The Healthy Home Cook’s Guide to "Botanical Broths": Mastering Vegetable-to-Herb Ratios for Nutrient-Dense, Low-Sodium Flavor Bases
In the quiet sanctity of a well-stocked kitchen, the hum of a simmering pot is the heartbeat of culinary creation. Many home cooks overlook the humble broth, relegating it to the status of a mere liquid filler or a store-bought afterthought packed with hidden sodium and preservatives. When you transition to making your own "Botanical Broths," you are not just making stock; you are crafting a foundational nutrient-dense canvas that elevates every dish it touches. By focusing on the symphony of aromatics and garden-fresh herbs, you reclaim control over your health without sacrificing an ounce of culinary depth. This guide is designed to strip away the mystery and replace it with precision, ensuring that your home kitchen smells like a five-star pantry every single day of the week.
The philosophy behind the Botanical Broth is simple: nature provides the flavor, and your technique unlocks it. Unlike traditional heavy stocks that rely on bones and hours of reduction, these lighter, vegetable-forward infusions rely on the delicate balancing of volatile oils found in fresh herbs and the structural sugars within root vegetables. Mastering the vegetable-to-herb ratio is the singular skill that separates an amateur’s watery pot of tea from a professional chef’s transformative liquid gold. Once you understand the chemical interplay between stalks, leaves, and roots, you will never reach for a salty, processed bouillon cube again. It is time to treat your broth with the same respect you reserve for your prime proteins and freshest produce.
Embracing this low-sodium, high-nutrient approach requires a shift in mindset, moving away from relying on salt to "fix" a dull flavor profile. Instead, we look toward acid, bitterness, and the aromatic profile of herbs to build layers of complexity that dance on the palate. Whether you are aiming for a classic French mirepoix base infused with thyme and bay, or a more adventurous ginger-cilantro-lemongrass profile for Asian-inspired soups, the principles remain identical. We will explore the specific temperatures that preserve nutrient integrity, the timing required to extract essential oils without bitterness, and the storage techniques that keep your supply fresh. Prepare to transform your healthy home cooking experience from the ground up, starting with a pot of water and the right intentions.
The Foundation of Flavor: Mastering Mirepoix and Aromatics
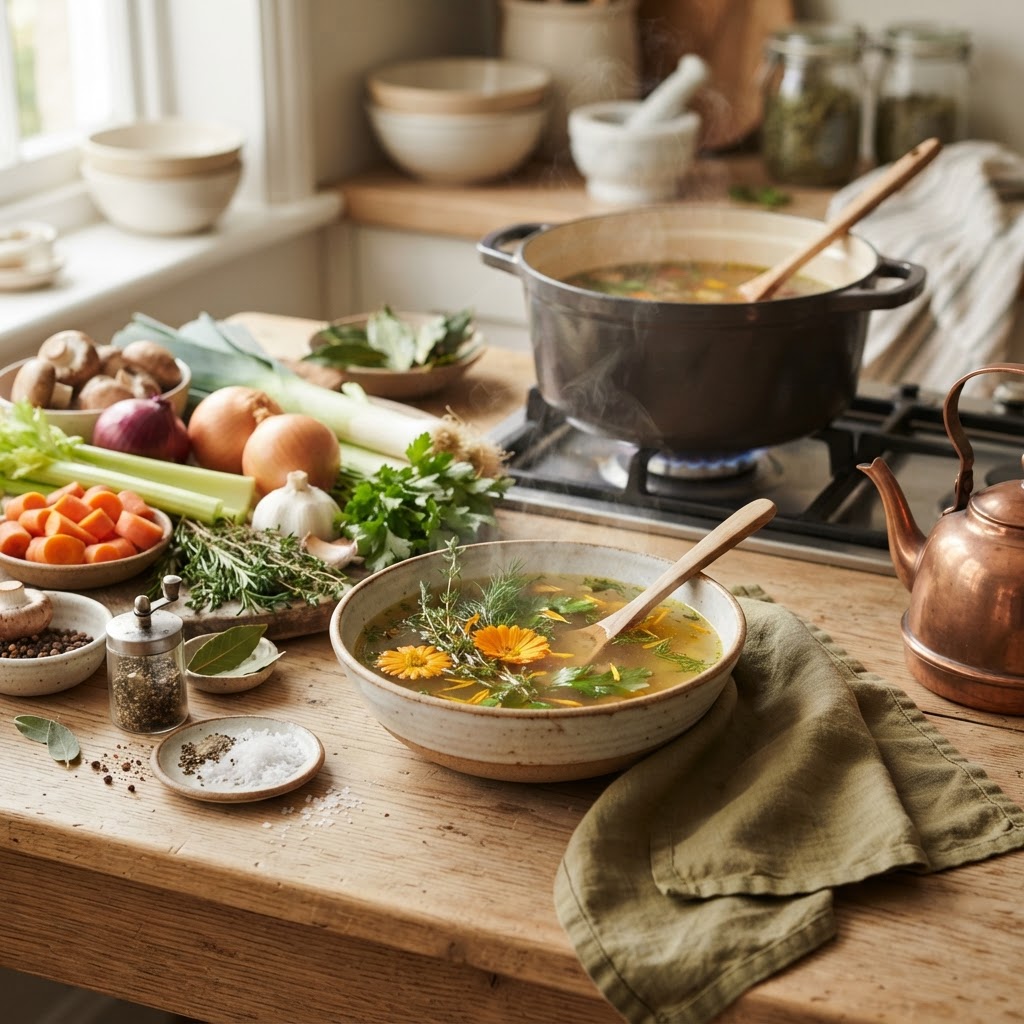
At the heart of every great broth lies the foundational aromatic base, traditionally known as mirepoix. In a botanical broth, this trio of carrots, celery, and onions provides the structural sweetness and depth of flavor necessary to ground more volatile, delicate herbs. To maximize nutrient density, you must avoid over-boiling your vegetables, as high temperatures can degrade water-soluble vitamins like Vitamin C and certain B vitamins. By maintaining a gentle, consistent sub-boiling simmer—roughly 185°F to 195°F—you ensure that the extraction of flavors happens slowly, preserving the integrity of the vegetables.
The Golden Ratio for Vegetables
Professional chefs often swear by the 2:1:1 ratio for a balanced vegetable base: two parts onion to one part celery and one part carrot. However, for a botanical broth, you have the flexibility to lean into different flavor profiles based on the herbs you intend to add later in the process. If you are aiming for a bright, herbal finish, increase your onion content slightly to provide a more neutral, sweet backbone. If your goal is a deep, earthy infusion, consider adding leeks or charred shallots to the mix.
"A great broth is the silent architect of a meal; it supports, elevates, and defines the final structure without ever demanding the spotlight for itself. If the foundation is built on fresh, intentional aromatics, the rest of the dish follows with effortless grace."
When preparing your vegetables, uniformity is key to consistent extraction. You should aim for a medium dice—roughly one inch in size—to provide enough surface area for flavor release without turning the vegetables into complete mush within the first hour of cooking. Remember that the skin and trimmings of organic vegetables are often the most nutrient-dense parts. Wash your leek tops, carrot peels, and onion skins thoroughly and include them in your pot, as they offer deep earthy tones that are often missing from peeled, store-bought produce.
The Art of the Infusion: Selecting and Balancing Herbs
The "Botanical" in our broth refers to the strategic inclusion of fresh herbs that provide not just flavor, but a plethora of phytonutrients. Unlike hardy vegetables, herbs are volatile; their essential oils can evaporate quickly if added too early or crushed too aggressively. For a long-simmering broth, woody herbs like thyme, rosemary, and sage should be bundled into a bouquet garni. This allows for easy removal and prevents the woody stems from imparting a bitter, resinous taste that can overpower the delicate notes of the vegetables.
Timing Your Herb Additions
Understanding the hierarchy of herbs is essential for a balanced profile. Woody herbs are robust enough to withstand heat and should be added at the beginning of the simmering process to allow their deeper, resinous notes to meld with the base aromatics. Conversely, soft, leafy herbs such as parsley, cilantro, dill, and basil are extremely sensitive to heat. To retain their vibrant, fresh, and bright flavors, they should be added only in the last 15 to 20 minutes of the simmering process.
By layering your herbs in this fashion, you prevent the common pitfall of a "muddy" tasting broth where the individual notes are indistinguishable. You are looking for clarity in taste; when you sip your broth, you should be able to identify the subtle sweetness of the carrot, the sharpness of the leek, and the clean, herbaceous kiss of the parsley. This level of clarity is only achievable through disciplined timing and careful temperature control.
Temperature Control and The Science of the Simmer
In the culinary world, "boiling" is often the enemy of a clear, flavor-forward broth. When water boils aggressively at 212°F, the agitation causes the particulate matter within the vegetables to emulsify into the liquid, resulting in a cloudy, potentially bitter broth. For a refined, nutrient-dense botanical base, the "lazy bubble"—that soft, occasional break on the surface—is your target. This requires a thermometer or close observation of the pot's surface. If you see rapid bubbles, turn your heat source to its lowest setting or use a heat diffuser to gently distribute the energy.
Why Gentle Heat Matters
Beyond the aesthetics of clarity, gentle heat is crucial for nutrient retention. Many of the compounds we want to extract from our botanical ingredients are heat-sensitive. Prolonged exposure to high heat can denature delicate proteins and oxidize sensitive antioxidants. By keeping your temperature below the boiling point, you are effectively "brewing" your vegetables rather than "boiling" them, much like you would treat a high-quality tea.
"The difference between a home cook and a chef is often found in the patience to let a broth develop at a whisper rather than a roar. Treat your ingredients with the softness they deserve, and the broth will repay you with unparalleled complexity."
To ensure you stay in the "sweet spot" for extraction, consider using a heavy-bottomed Dutch oven. The thick walls of the pot help maintain a stable, even temperature throughout the cooking process, preventing hot spots that might cause some parts of the vegetable mixture to overcook or burn. Always ensure your lid is slightly ajar; this allows a small amount of evaporation, which slightly concentrates the flavor without losing the volatile aromatic compounds that you have carefully layered into the broth.
The Low-Sodium Advantage: Building Umami Naturally
One of the greatest challenges for the health-conscious cook is replacing the savory "pop" that salt traditionally provides. In our botanical broths, we rely on natural sources of umami to fill that void. By incorporating ingredients like sun-dried tomatoes, dried mushrooms (such as shiitake or porcini), and a small strip of kombu (dried kelp), you can achieve a depth of flavor that is arguably more satisfying than plain salt. These ingredients are rich in glutamates, which naturally enhance the savory profile of your vegetables.
Strategic Umami Boosting
Dried Shiitake Mushrooms:* These add a meaty, earthy backbone to any vegetable broth. Just two or three dried caps can transform a light vegetable stock into a rich, complex liquid.
Sun-Dried Tomatoes:* These provide a subtle acidity and a concentrated hit of sweetness that balances the bitterness of certain herbs like kale or dandelion greens.
Kombu:* Often used in Japanese dashi, a small piece of kombu provides a clean, oceanic saltiness without adding significant sodium. Remove it before the water reaches a boil to avoid any slimy texture.
Nutritional Yeast:* While not for the broth pot itself, adding a teaspoon to your final bowl adds a nutty, savory finish that rounds out the lack of table salt.
When you remove the dependency on high-sodium bouillon cubes or canned bases, you allow your palate to reset. Over time, you will find that you are more sensitive to the nuanced flavors of fresh vegetables, and your dependence on added salt will naturally decrease. This is a fundamental step in the healthy home cook’s journey toward long-term wellness. You are not just making soup; you are training your palate to appreciate the true essence of your ingredients.
Storage, Preservation, and The "Chef’s Daily" Routine
A botanical broth is only as useful as its accessibility. If you go through the effort of making a gallon of nutrient-dense liquid, you need a system to ensure it stays fresh and flavorful. Once your broth is finished and strained, it should be cooled rapidly to preserve its quality. A chilled water bath is the most professional way to do this—place your pot in a sink filled with ice water and stir gently until the temperature drops below 40°F. This prevents the growth of bacteria and keeps the flavors clean and bright.
Preservation Techniques for Busy Cooks
Professional chefs often keep a "master pot" going during their prep shifts, but for the home cook, a weekly "broth session" is usually more realistic. Dedicate one hour on a Sunday afternoon to prep your vegetables and herbs. By having a rotation of three or four different styles of botanical broths in your freezer, you can completely change the character of a simple weeknight meal. A simple sautéed chicken breast becomes a gourmet meal when poached in a ginger-lemongrass broth, or a simple bowl of steamed rice transforms when cooked with a vegetable-thyme infusion.
Incorporating Botanical Broths into Daily Culinary Practice
Once you have mastered the technique, the applications are limitless. These broths act as the primary cooking liquid for grains, a base for risottos, a poaching medium for proteins, and the foundation for healthy, light soups. By cooking grains like quinoa, farro, or brown rice in a botanical broth, you infuse the grain with flavor at the molecular level, far exceeding the impact of cooking in plain water. It is a simple way to increase the nutrient profile of your everyday staples.
Creative Applications
The Poaching Method:* Instead of steaming or pan-searing, gently poach white fish or lean chicken in a simmering broth infused with lemon zest, dill, and bay leaves. The broth keeps the meat incredibly moist and imparts a subtle, clean flavor.
Deglazing and Pan Sauces:* If you are searing vegetables or proteins, use a splash of your botanical broth to deglaze the pan. The residual sugars and aromatics in the broth will pick up the browned bits (the fond) from the pan, creating a complex, low-sodium sauce in seconds.
The "Zero-Waste" Breakfast:* Use a cup of warm, savory broth as a base for a soft-boiled egg and wilted greens, creating a nourishing, light breakfast that is far superior to sugary cereals or processed breads.
By viewing your botanical broth as a versatile culinary solvent, you will find yourself reaching for it constantly. It is the secret ingredient that takes a recipe from "home-cooked" to "chef-quality." Always remember that the quality of your finished dish is directly proportional to the quality of the base you start with. If you put in the time to create a fragrant, clear, and nutrient-dense botanical broth, the rest of your cooking will require much less effort to achieve greatness.
Final Thoughts
The journey to becoming a master of your own kitchen begins with these fundamental building blocks. Botanical broths represent the intersection of health, flavor, and culinary mindfulness. By shifting away from processed, high-sodium bases, you are doing more than just improving your dinner; you are investing in your long-term health and refining your palate to appreciate the natural gifts of the earth. The process requires patience, a steady hand at the thermometer, and an appreciation for the subtle layers that only fresh herbs and slow heat can provide.
As you begin to experiment with your own ratios—perhaps adding a hint of star anise to your root vegetable base or swapping thyme for savory in your next batch—you will start to develop a "signature" broth that is uniquely yours. Do not be afraid to fail, to taste, and to adjust. Cooking is a living process, and your broth pot is a laboratory of flavors. Trust your instincts, respect the temperature, and remember that every ounce of effort you put into your foundation will be returned tenfold in the quality of your cooking.
Let this be your new culinary mantra: start with the base, respect the herb, and keep the simmer low. Your kitchen is now a space of creation, where simple, botanical ingredients are transformed into the very soul of your healthy home cooking. Embrace the process, share the results with those you love, and enjoy the satisfaction that comes from truly mastering the art of the broth. Your journey to a more flavorful and nutrient-dense life is simmering right there on the stove. Happy cooking, and remember, when the food tastes this good, you’ll never have to blame the chef.

Get the Next Recipe
Weekly recipes, techniques, and gear picks — straight to your inbox.
