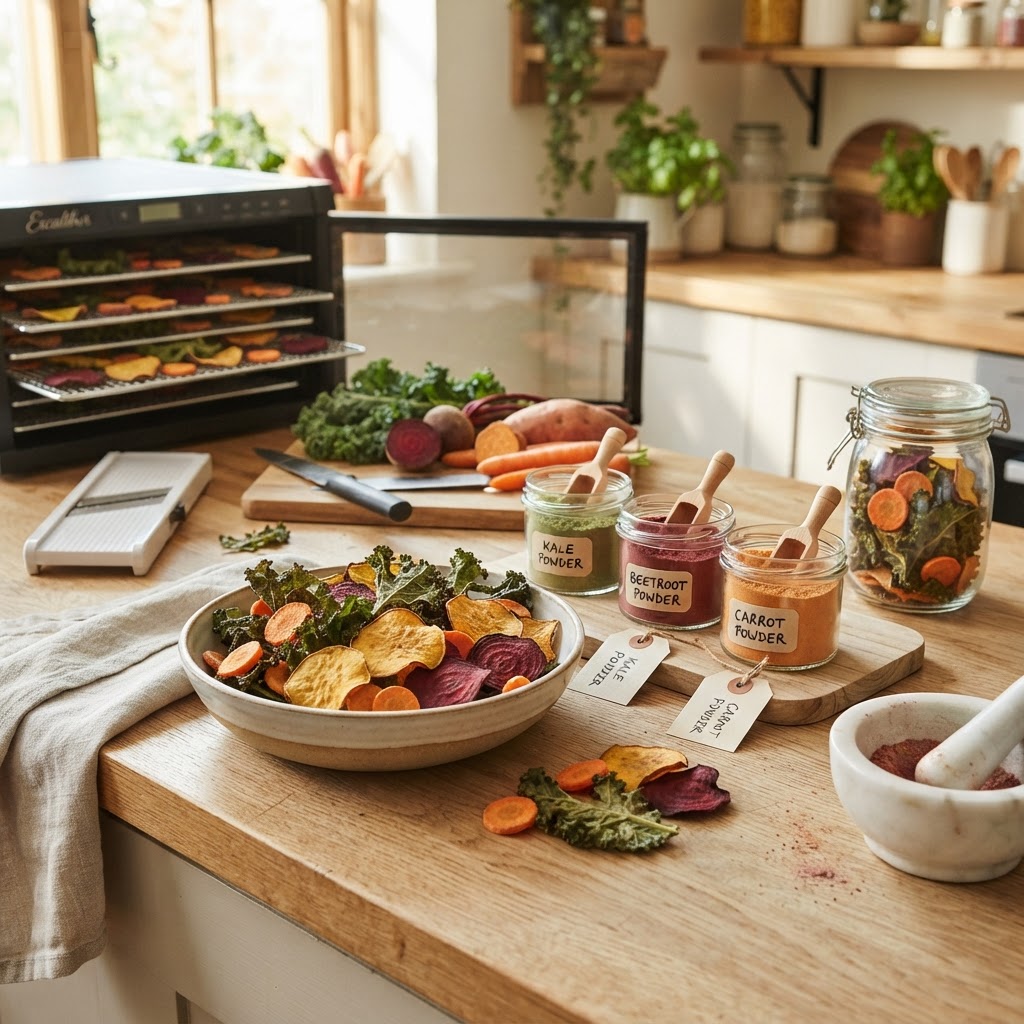
The Healthy Home Cook’s Guide to "Controlled Dehydration": Mastering Low-Temperature Drying for Nutrient-Dense Vegetable Chips and Powders
We have all been there, standing in the produce aisle, staring at an overpriced bag of "gourmet" vegetable chips that contains more salt, processed oils, and chemical preservatives than actual vegetables. It is the ultimate culinary disappointment, promising health while delivering a salty, greasy snack that leaves you feeling sluggish rather than satisfied. As home cooks, we often feel like our hands are tied when it comes to recreating those crisp, nutrient-dense snacks we crave, assuming that such results are only possible with industrial-grade equipment. The truth is, your home kitchen is a laboratory of immense potential, and with just a bit of patience and the right approach, you can transform humble garden produce into long-lasting, flavor-packed pantry staples.
Controlled dehydration is not merely a method for preserving excess summer harvests; it is a sophisticated culinary technique that elevates the inherent sugars and textures of produce to new heights. By utilizing low-temperature drying, we are essentially concentrating the flavor profiles of fruits and vegetables without compromising their structural integrity or thermal-sensitive vitamins. This process allows us to craft everything from delicate, paper-thin beet chips to intensely savory kale powders that act as an instant flavor booster for soups and sauces. When you move away from high-heat frying or commercial roasting, you gain complete control over the chemical composition of your snacks, ensuring that every bite is as wholesome as it is addictive.
Welcome to the world of slow-craft cooking, where the pace of the process is exactly what ensures the quality of the result. At Blame The Chef, we believe that the best kitchen tools are often the simplest ones used with the most intent. Whether you are using a dedicated electric dehydrator or the low setting on your convection oven, this guide will provide you with the masterclass knowledge needed to execute professional-grade drying at home. We are going to explore the nuances of cellular structure, the importance of pre-treatment, and the art of seasoning to ensure that you never have to pay for a store-bought bag of chips ever again.
The Science of Cellular Preservation
At its core, controlled dehydration is a delicate dance between moisture removal and nutrient preservation. When we dry vegetables, we are systematically drawing out the free water contained within the cell walls, which effectively inhibits the growth of bacteria and enzymes that lead to decay. However, the secret to maintaining the vibrant colors and potent flavors of your harvest lies in the low-temperature threshold. If the heat is too high, you denature the enzymes and break down the complex aromatic compounds that provide the essence of the vegetable, leading to a dull, brown, and flavorless final product.
By keeping temperatures between 115°F and 135°F, we preserve the phytonutrients and natural sugars, which undergo a concentrated transformation. As the water evaporates, the sugars become more apparent on the palate, creating a naturally sweet or savory experience that requires little to no added seasoning. This is why a simple carrot slice, when properly dehydrated, can taste like a piece of candy, and a sun-dried tomato becomes a concentrated umami bomb that is far superior to anything you could find on a grocery store shelf.
It is also crucial to understand the role of airflow. You can have the perfect temperature, but without consistent air circulation, the moisture released from the vegetables will get trapped, creating a humid environment that invites mold rather than crispness. Whether your machine uses a rear-mounted fan or a top-down airflow system, the goal is to create a steady, gentle breeze that wicks away moisture as soon as it reaches the surface of the vegetable. This is the difference between a leathery, rubbery result and a light, snap-able chip that melts on your tongue.
"True culinary skill is not found in the speed of your knife or the intensity of your flame, but in the patience to let time perform the work that heat simply cannot accomplish."
Understanding Your Equipment
If you are serious about this craft, investing in a machine with an adjustable thermostat is a non-negotiable step. While some home ovens can achieve low temperatures, they often struggle to maintain a consistent 125°F without cycling wildly, which can lead to uneven drying or unintentional cooking. Dedicated dehydrators allow for steady-state drying, ensuring that every rack in your unit produces consistent results. Look for models with stainless steel trays, as they are easier to sanitize and react less with acidic vegetables compared to plastic alternatives.
Preparation: The Art of the Uniform Slice
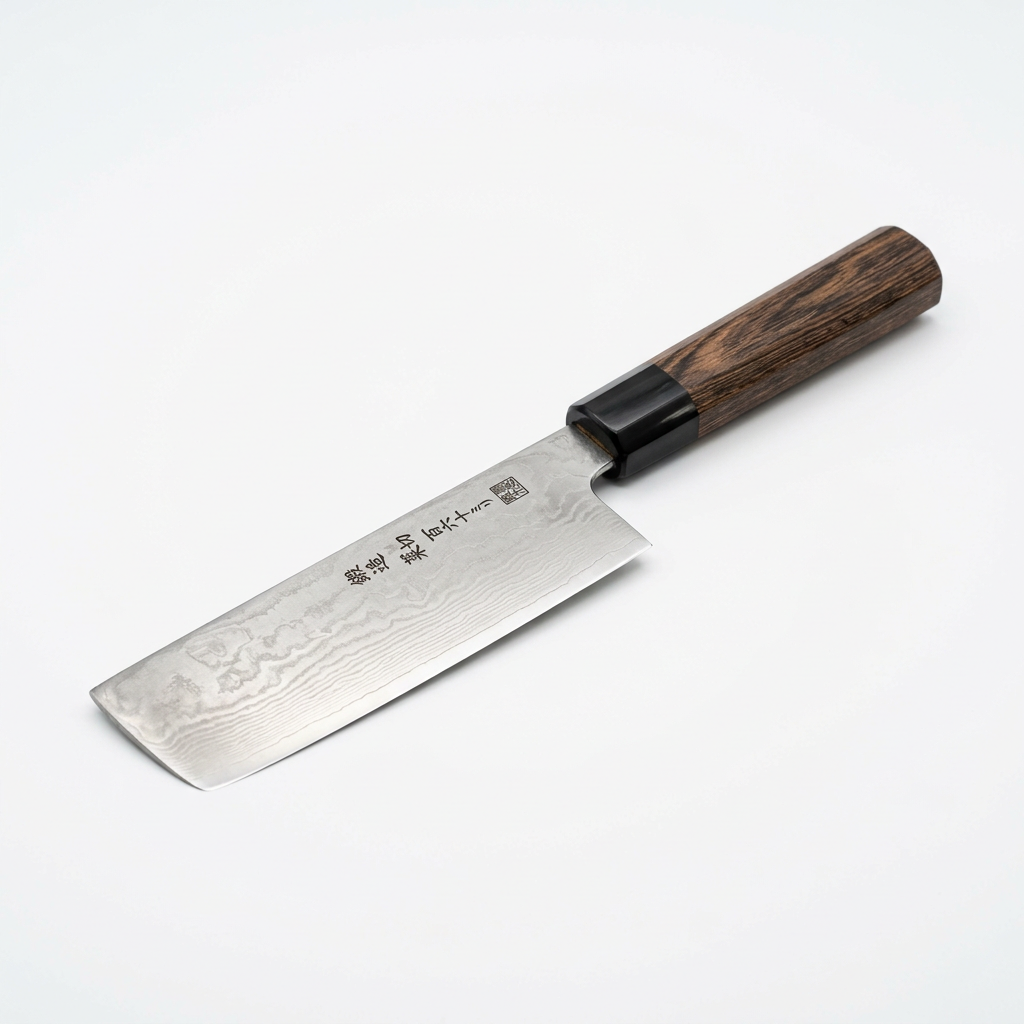
The secret to a uniform final product—where every piece is perfectly crisp rather than some being burnt and others being soft—is consistency in the prep work. When you are dehydrating, the surface area to volume ratio is the most important factor in your success. If you have a slice that is an eighth of an inch thick next to a slice that is a quarter of an inch thick, they will never dry at the same rate. This is why we highly recommend investing in a high-quality mandoline to ensure that your vegetable slices are laser-precise in their thickness.
Before you begin slicing, it is vital to prepare the raw ingredients for the heat. Some vegetables, particularly those with a higher starch content like potatoes or parsnips, benefit from a brief blanching process. Blanching helps to set the color and deactivate the enzymes that cause browning during the drying process. Simply drop your sliced vegetables into boiling water for no more than 60 seconds, then immediately transfer them into an ice bath to shock them and stop the cooking process entirely. Pat them completely dry with a lint-free kitchen towel before laying them onto your dehydrator trays.
Seasoning should also be approached with caution. Because the dehydration process concentrates flavors by a factor of three or four, a little salt goes a long way. If you are adding spices like garlic powder, onion powder, or smoked paprika, it is often best to apply them via a light misting of olive oil or a dusting of nutritional yeast, which helps the seasonings adhere to the surface of the vegetables. Remember that flavors will amplify, so start with significantly less seasoning than you think you need, and adjust your ratios after the first few batches once you understand the potency of your finished product.
The Best Vegetables for Beginners
Kale and Leafy Greens:* These require the least amount of prep and dry in just a few hours.
Zucchini and Summer Squash:* Excellent for high-volume snacking; slice thin for a potato chip-like experience.
Beets and Root Vegetables:* These have high sugar content and caramelize beautifully during the drying process.
Bell Peppers:* Wonderful for creating intense, smoky vegetable powders.
Mastering the Dehydration Process
Once your trays are loaded, the actual process begins. The first two hours of drying are the most critical, often referred to as the high-moisture phase. During this time, the vegetables are at their most vulnerable to spoilage if the temperature drops or the airflow is obstructed. Ensure your unit is in a room with low humidity, as high ambient moisture will drastically increase your drying time and can negatively impact the final texture of your chips. If you are drying in a kitchen that is naturally humid, such as one with a lot of boiling water, consider moving your dehydrator to a more neutral environment.
Rotation is another secret of the trade. Even in the best commercial-grade machines, there are "hot spots" where the air is slightly warmer or moving faster. Every few hours, take the time to rotate your trays—move the bottom trays to the top and the back of the trays to the front. This simple, manual intervention prevents uneven drying and ensures that every single chip reaches that perfect, snap-worthy state at the same time. This is not busy work; it is an active, meditative part of the culinary process that allows you to observe the transformation taking place.
How do you know when they are done? The "snap test" is the gold standard. Take a chip out of the machine and let it cool completely for three to five minutes. If, upon cooling, it bends rather than snapping cleanly in two, it still contains too much moisture. A chip that feels crispy while hot will often turn limp once it cools down if it hasn't reached the proper level of dehydration. Always allow your product to cool fully before checking, as this allows the residual heat to dissipate and the true texture to manifest.
"The difference between a amateur snack and a professional culinary product is not the ingredients, but the ability to recognize exactly when the ingredient has hit its peak of concentrated flavor."
Fine-Tuning Temperatures and Timings
Leafy Greens:* 115°F for 3 to 5 hours.
Soft Vegetables (Zucchini, Peppers):* 125°F for 6 to 10 hours.
Starchy Root Vegetables:* 135°F for 8 to 12 hours.
Vegetable Powders:* 135°F for 12 to 14 hours (or until bone-dry).
Turning Scraps into Gold: The World of Powders
One of the most exciting aspects of controlled dehydration is the ability to create your own vegetable powders. Instead of discarding the ends of carrots, the stems of kale, or the bruised parts of tomatoes that aren't quite pretty enough for chips, you can dehydrate them to the point of "glass-like" brittleness and grind them into potent culinary dust. This is the ultimate form of zero-waste cooking, allowing you to create your own custom seasonings that are free from the fillers and anti-caking agents found in store-bought spice blends.
To create a high-quality powder, the vegetable must be dried significantly longer than a chip. You are looking for a complete absence of moisture—if there is even a trace of water, your powder will clump and eventually mold in the jar. Once the pieces are completely brittle, transfer them to a high-speed blender or a dedicated spice grinder. Pulse until you reach a fine, uniform consistency. Sifting the powder through a fine-mesh strainer will help you remove any fibrous bits that didn't grind down perfectly, ensuring a professional, smooth texture for your seasonings.
These powders can be used in a myriad of ways. A tomato-basil powder can be mixed into plain yogurt to make an instant savory dip, or stirred into a boring weeknight pasta sauce to inject a deep, sun-dried flavor profile. You can mix bell pepper powder with a bit of sea salt and smoked paprika for a homemade BBQ rub that will outperform any commercial alternative. By controlling the drying process, you are essentially creating a library of concentrated ingredients that you can pull from all year round, long after the growing season has ended.
Essential Powder Blends
Storage and Longevity: Keeping the Snap
Even the perfectly dehydrated chip can turn soft if it is exposed to the ambient humidity of your kitchen. The post-dehydration environment is just as important as the drying process itself. Once your chips have cooled completely, you must package them immediately. Because these items are so dry, they are hygroscopic, meaning they will actively pull moisture from the air if left out on the counter. The goal is to create an airtight seal that locks in that crisp, dry environment you worked so hard to create.
Glass mason jars with silicone gaskets or high-quality vacuum-seal bags are your best friends. For maximum shelf life, especially for powders, consider adding a food-grade silica gel packet to the container. These packets are inexpensive and will absorb any residual moisture that manages to sneak into the jar, keeping your chips crisp for months. It is also a good practice to label your jars with the date of processing, as even in a pantry, the quality of dehydrated goods will slowly degrade after six to twelve months.
Store your jars in a cool, dark place away from direct sunlight. Ultraviolet light can break down the nutrients and cause the colors of your vegetable chips to fade, resulting in a less vibrant look and taste. A dark pantry or a dedicated spice drawer is ideal. Remember, because you are not using synthetic preservatives, you are relying on the low-water activity of the product to ensure safety. If you see any signs of condensation inside the jar after a few days, it means your product was not fully dried, and you should put it back in the dehydrator for an additional hour or two to prevent spoilage.
Pro-Tips for Long-Term Storage
Vacuum Sealing:* Using a vacuum sealer is the single best way to ensure the longevity of your powders.
Portion Control:* Store in smaller jars so you aren't opening a large container repeatedly and exposing the contents to air.
Check Frequently:* Give the jars a quick inspection every few weeks to ensure the texture remains consistent.
Troubleshooting Common Dehydration Blunders
Every chef, even at the highest level, encounters failures when trying new techniques. If your vegetable chips are turning out leathery instead of crisp, it is almost always a result of too much moisture remaining in the cell walls. Do not be discouraged; this is a sign that you need to either increase your drying time or adjust your slicing technique. Sometimes, simply increasing the temperature by five degrees for the final hour of the process is enough to push that last bit of water out and lock in the crispness you desire.
Another common issue is stickiness or clumping, particularly with vegetables that have higher natural sugar content, such as beets or carrots. This happens when the sugar reaches its melting point and becomes tacky. To avoid this, keep your temperature on the lower end (around 115°F to 120°F) and check them more frequently during the final stages of the process. If you notice them getting sticky, pull them out sooner—they may not be "snap" crispy, but they will be chewy and delicious in a different way, almost like a fruit leather.
Finally, if your finished product lacks flavor, consider your seasoning application again. Dehydration can mellow out certain raw flavors, so don't be afraid to enhance them before you begin. A quick toss in a bowl with a tiny amount of high-quality sea salt or even a splash of apple cider vinegar can brighten the natural notes of the vegetable and make the final product pop. Cooking is an iterative process; write down your temperatures, your slice thickness, and your seasoning ratios in a small notebook so that you can learn exactly what works for your specific palate and equipment.
"A kitchen is not a place where you simply follow instructions; it is a place where you observe the behavior of ingredients under pressure and adjust your technique to bring out their highest possible expression."
Troubleshooting Checklist
Soft/Leathery:* Increase drying time or decrease slice thickness.
Burnt/Bitter:* Reduce temperature by 5-10 degrees.
Uneven Texture:* Rotate trays more frequently and ensure uniform slicing.
Clumping Powders:* Ensure the product is "glassy" and bone-dry before grinding.
Final Thoughts
Mastering the art of controlled dehydration is one of the most rewarding skills a home cook can acquire. It shifts your perspective on food, moving you away from the reliance on pre-packaged, processed snacks and toward a system where you are the curator of your own pantry. By slowing down and respecting the delicate balance of temperature and airflow, you are not only creating snacks that are healthier and more flavorful, but you are also engaging in a tradition of preservation that connects us to the seasons and the land.
The beauty of this method lies in its endless versatility. Once you have the fundamentals of low-temperature drying down, the sky is truly the limit. You can experiment with different vegetable combinations, create your own signature seasoning blends, and even venture into dehydrating herbs, fruits, and meats. Each batch you finish is a testament to your patience and your dedication to the craft. There is an immense sense of pride that comes from opening a jar of your own homemade kale powder or offering a bowl of perfect, house-made beet chips to guests, knowing that you built that quality from scratch.
Remember, the goal is not perfection on the first try, but the continuous refinement of your process. Take the time to understand your equipment, respect the biological nature of the ingredients you are working with, and always, always keep a notebook of your experiments. As you grow more confident, you will find that "Blame The Chef" isn't just a title, but a playful acknowledgment that when you are the one in control of the process, you are the only one responsible for the incredible results on your table. Now, go turn that produce into something extraordinary—your pantry is waiting to be filled.

Get the Next Recipe
Weekly recipes, techniques, and gear picks — straight to your inbox.
