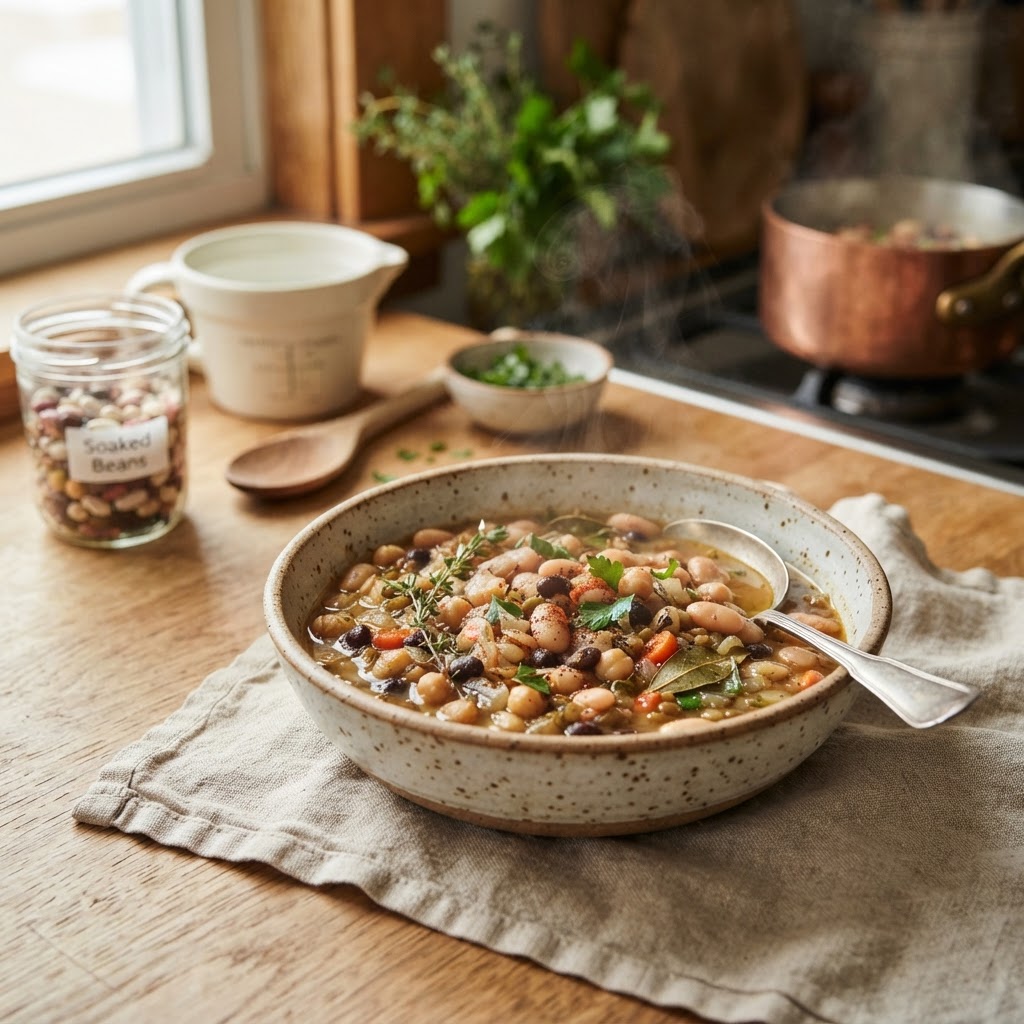
The Healthy Home Cook’s Guide to "Hydrothermal Soaking": Mastering Bean-to-Water Ratios for Optimal Nutrient Bioavailability and Digestion
The humble bean, a staple across continents and cultures, often gets a bad rap. We associate it with long soaking times, the dreaded digestive discomfort, and the perception of being bland or uninspiring. Yet, beneath this often-unearned reputation lies a nutritional powerhouse, brimming with protein, fiber, and essential micronutrients. The secret to unlocking its full potential, transforming it from a culinary challenge into a celebrated ingredient, lies not in complicated recipes or exotic spices, but in a foundational understanding of a seemingly simple process: hydrothermal soaking. This isn't just about plumping up dried beans; it's a deliberate, science-backed approach that dramatically enhances their digestibility, optimizes nutrient absorption, and elevates their texture and flavor.
For too long, home cooks have approached bean preparation with a "set it and forget it" mentality, often relying on inherited wisdom or hurried online advice. This can lead to unevenly cooked beans, a gritty texture, or, worse still, the very digestive issues that deter so many from embracing legumes. The concept of hydrothermal soaking, while perhaps sounding technical, is remarkably accessible. It’s about understanding the interplay of water, heat, and time, and how these elements work in concert to break down complex carbohydrates, reduce anti-nutrients, and coax out the inherent creaminess and subtle sweetness that well-prepared beans possess. By mastering these basic principles, you're not just cooking beans; you're performing a culinary alchemy that yields superior results every single time.
This guide is designed to demystify the process, equipping you with the knowledge and confidence to tackle any dried bean with ease. We'll delve into the "why" behind each step, exploring the science of digestion and nutrient bioavailability in a way that's practical for your kitchen. Forget the guesswork and the disappointing outcomes. By the end of this post, you'll have a comprehensive understanding of bean-to-water ratios, optimal soaking temperatures, and the nuanced differences between various soaking methods. Prepare to become a bean aficionado, ready to impress yourself and your loved ones with perfectly cooked, easily digestible, and utterly delicious legumes that will redefine your perception of this ancient and remarkable food.
The Science Behind the Soak: Why Hydrothermal Matters
The journey from a hard, dry bean to a tender, digestible delight is a fascinating one, driven by scientific principles that are readily harnessable in any home kitchen. At its core, hydrothermal soaking is about hydration and transformation. When dried beans are submerged in water, they begin to rehydrate, absorbing liquid and swelling considerably. This rehydration process is not merely about physical expansion; it initiates crucial biochemical changes within the bean. Enzymes within the bean become activated, and complex carbohydrates, particularly oligosaccharides like raffinose and stachyose, begin to break down. These oligosaccharides are notoriously difficult for the human digestive system to process, leading to the production of gas and subsequent discomfort. By initiating this breakdown during the soaking phase, we significantly reduce the digestive burden of the final cooked product.
Furthermore, hydrothermal soaking plays a vital role in reducing the concentration of anti-nutrients. Beans, as part of their natural defense mechanisms, contain compounds like phytates and lectins. Phytates can bind to essential minerals like iron, zinc, and calcium, hindering their absorption in the gut. Lectins, while present in smaller amounts and often denatured by cooking, can also contribute to digestive upset in sensitive individuals. The extended contact with water, especially when combined with a change in temperature, helps to leach out and neutralize a significant portion of these compounds. This means that by correctly soaking your beans, you're not only making them easier to digest but also increasing the bioavailability of the valuable nutrients they contain.
The choice of water and its temperature during the soaking process are also critical. Using cool to lukewarm water is generally recommended for the initial soaking. This temperature range encourages gradual rehydration and enzyme activation without promoting the rapid growth of undesirable bacteria that can occur in warmer environments. Conversely, for certain methods or specific bean types, a warm or even hot water soak can be employed for shorter durations. This method, often referred to as a "quick soak," can accelerate the rehydration process and further aid in the breakdown of oligosaccharides and reduction of anti-nutrients, making it a valuable tool for those pressed for time. Understanding these nuances allows you to tailor your soaking method to your needs and the specific characteristics of the beans you are using.
"Think of hydrothermal soaking as the pre-game warm-up for your beans. It's essential for performance, preventing injuries (digestive upset), and setting the stage for a winning meal."
The Role of Water in Bean Rehydration
Water is the fundamental solvent and catalyst for transforming hard, desiccated beans into something palatable and digestible. During the drying process, beans lose a significant portion of their moisture content, causing their cellular structure to become rigid and their starches to consolidate. When immersed in water, the cell walls of the bean begin to absorb this liquid through osmosis. This influx of water softens the bean, plumps it up, and initiates the enzymatic processes that are crucial for digestibility. The amount of water used is equally important; insufficient water will lead to incomplete rehydration, resulting in uneven cooking and a tough texture. Conversely, an excessive amount of water is wasteful but generally not detrimental, though it might slightly dilute the bean's inherent flavor over very long soaking periods.
The quality of the water also matters. While tap water is usually acceptable, in areas with very hard water (high mineral content), it can sometimes contribute to tough bean skins that resist softening. If you find your beans consistently taking an inordinate amount of time to cook, or remaining stubbornly firm, consider using filtered or bottled water for soaking and cooking. This might seem like a minor detail, but for those striving for culinary perfection, every element counts. The water acts as a medium for not just hydration, but also for the leaching of soluble compounds and the activation of internal processes.
Breaking Down the Bad Guys: Oligosaccharides and Anti-Nutrients
The primary culprits behind the infamous "musical fruit" reputation of beans are a group of complex sugars called oligosaccharides. These include raffinose, stachyose, and verbascose. Our bodies lack the necessary enzyme, alpha-galactosidase, to properly break down the alpha-galactoside bonds that link these sugars. When they reach the large intestine undigested, gut bacteria ferment them, producing hydrogen, methane, and carbon dioxide gas – hence the digestive distress. Hydrothermal soaking, especially when incorporating a temperature change, helps to initiate the breakdown of these oligosaccharides by activating endogenous bean enzymes. The longer the soak and the warmer the water (within safe limits), the more effective this process becomes.
Beyond the oligosaccharides, beans also contain anti-nutrients like phytates (phytic acid) and lectins. Phytates, as mentioned, can chelate (bind) to minerals, reducing their bioavailability. Lectins are proteins that can, in certain forms and concentrations, interfere with nutrient absorption and potentially cause gut irritation. The soaking process, particularly with repeated water changes or extended durations, helps to leach these compounds out of the bean. Furthermore, the cooking process itself, especially at higher temperatures, effectively denatures most harmful lectins. So, by embracing proper soaking techniques, you are actively enhancing the nutritional value of beans by increasing mineral absorption and reducing the impact of other potentially problematic compounds.
Mastering the Ratios: How Much Water Do Your Beans Need?
The question of "how much water" is paramount to successful bean preparation. A common and effective rule of thumb for cold soaking is to use at least three times the volume of water to dry beans. This ratio ensures that the beans have ample room to expand and that there is enough water to fully hydrate them without becoming depleted. For instance, if you're soaking one cup of dried navy beans, you'll want to use at least three cups of water, and often, a generous four cups is even better. This provides a buffer, accounting for any evaporation during longer soaking periods and ensuring consistent hydration.
When dealing with particularly large beans like chickpeas or lima beans, or when soaking for an extended period, it's wise to err on the side of more water. These beans absorb a significant amount of liquid, and you don't want them to become exposed to the air, which can lead to uneven rehydration and potentially spoilage. Think of it as giving your beans a luxurious bath; they should be fully submerged and have plenty of space to move and plump up without feeling crowded. The water should remain clear throughout the soaking process; if it becomes cloudy or murky, it’s an indication that it’s time for a water change.
"Don't be shy with the water! Your beans need ample space to rehydrate and soften; think of it as a generous spa treatment for these nutritional powerhouses."
The General Rule: The 1:3 Bean-to-Water Ratio
This is the cornerstone of most soaking methods. For every one part of dried beans, you should have at least three parts of water. This provides sufficient liquid for the beans to fully absorb, swell to their maximum size, and for the beneficial leaching of oligosaccharides and anti-nutrients to occur effectively. For example, 1 cup of dried beans will require approximately 3-4 cups of water. It's always better to have a little too much water than too little. If the beans absorb all the water before they are fully plumped, they may not rehydrate evenly, leading to a tough center.
If you are using a smaller soaking vessel or a larger quantity of beans, it’s crucial to ensure the beans remain fully submerged. You might need to top up the water level periodically, especially if you are soaking for longer than 12 hours. Always use cool or lukewarm water for this general ratio, as it promotes a slower, more controlled rehydration and reduces the risk of bacterial growth. This ratio is a solid starting point for nearly all types of dried beans, from tiny lentils to robust kidney beans.
Accounting for Bean Size and Absorption
Different bean varieties have different absorption rates. Smaller beans like lentils and black beans will absorb water more quickly and to a lesser extent than larger beans like chickpeas, cannellini, or kidney beans. Therefore, the 1:3 ratio is a good baseline, but for larger beans, you might find yourself needing closer to a 1:4 or even 1:5 ratio, particularly if you're soaking them overnight. Chickpeas, for instance, can nearly double or triple in size, so providing ample water is essential to prevent them from becoming exposed to air and developing a leathery exterior.
Consider also the age of the beans. Older dried beans can be significantly harder and take longer to rehydrate. They may require longer soaking times or even multiple water changes to soften adequately. In some cases, very old beans might not ever reach the desired tenderness, even with extended soaking and cooking. If you purchase beans from bulk bins or have had them in your pantry for a while, it’s a good idea to be more generous with your water and be prepared for a potentially longer soaking and cooking time.
The Art of the Soak: Exploring Different Hydrothermal Methods
There are several effective methods for hydrothermal soaking, each with its own advantages and ideal applications. The choice of method often depends on your available time, the type of bean, and your personal preference for texture and digestibility. Understanding these distinct approaches will empower you to select the most suitable technique for any given situation, ensuring optimal results every time you reach for a bag of dried beans. From overnight soaks to quick immersions, each method plays a role in unlocking the bean's full potential.
1. The Overnight Cold Soak: The Classic Approach
This is perhaps the most traditional and widely recommended method for soaking dried beans. It involves simply covering the dried beans with cool water and letting them sit for an extended period, typically 8 to 12 hours, or overnight. This extended duration allows for thorough rehydration, significant reduction in oligosaccharides, and leaching of anti-nutrients. The slow, gentle hydration promotes even softening throughout the bean, leading to a wonderfully creamy and tender final product. It's a low-effort, high-reward method that is perfect for those who plan their meals in advance.
Steps for the Overnight Cold Soak:
This method is ideal for most types of beans, including kidney beans, cannellini beans, pinto beans, black beans, and navy beans. It yields exceptionally tender beans with superior digestibility. The long, slow hydration allows enzymes within the bean to work more effectively, breaking down complex carbohydrates that can cause digestive issues.
2. The Quick Hot Water Soak: For Time-Strapped Cooks
When time is of the essence, the quick hot water soak offers a viable alternative to the overnight method. This technique involves bringing beans to a boil, then letting them simmer in hot water for a shorter duration before proceeding with cooking. It accelerates the rehydration process and aids in the breakdown of oligosaccharides. While it might not achieve the same level of deep tenderization as an overnight soak for all beans, it significantly improves digestibility and cooking time compared to cooking dried beans directly from their hard state.
Steps for the Quick Hot Water Soak:
This method is particularly effective for smaller beans like lentils and split peas, which don't require extensive soaking. It also works well for larger beans like kidney beans or chickpeas, significantly reducing their cooking time. However, some chefs note that this method can sometimes lead to a slightly less creamy texture compared to the overnight soak, and in rare cases, it can cause the skins of some beans to split more readily during cooking.
3. The "No Soak" Method: When All Else Fails (with caveats)
While hydrothermal soaking is strongly encouraged for optimal results, there are instances where you might find yourself needing to cook beans without any prior soaking. It's important to understand that this method is the least ideal for digestibility and texture. Beans cooked without soaking will take considerably longer to become tender, will likely result in a less creamy texture, and may be more prone to causing digestive discomfort due to the higher concentration of intact oligosaccharides. However, it is still possible to cook beans this way, especially with pressure cooking.
Steps for the "No Soak" Method:
This method is best suited for beans that are destined for dishes where a slightly firmer texture is acceptable, or when using a pressure cooker, which drastically reduces the cooking time and helps to break down the beans more effectively, mitigating some of the digestibility issues. If using a pressure cooker, follow the manufacturer's instructions for bean cooking times, but expect them to be significantly longer than for pre-soaked beans.
Optimal Temperatures and Timings for Bean Rehydration
Temperature and time are inextricably linked in the hydrothermal soaking process, influencing the efficiency of hydration, the breakdown of oligosaccharides, and the reduction of anti-nutrients. Understanding these variables allows you to fine-tune your approach for superior results. While there's no single "correct" temperature or time for all beans, a set of general guidelines can help you navigate this crucial stage of bean preparation with confidence.
The Sweet Spot for Cold Soaking: Cool to Lukewarm
For the overnight cold soak, the ideal water temperature is anything from cool tap water (around 60-70°F or 15-21°C) to lukewarm (around 80-90°F or 27-32°C). This range is crucial because it allows for gradual and thorough rehydration without encouraging the rapid proliferation of bacteria. Colder water slows down enzymatic activity, while water that is too warm can accelerate it too quickly, potentially leading to the growth of unwanted microorganisms. The goal is to gently coax the beans back to life, allowing their internal structures to soften and their beneficial compounds to begin their transformation.
If you're soaking beans in a warm kitchen or during summer months, you might consider using slightly cooler water or even placing the soaking bowl in the refrigerator. This helps maintain a stable, cool temperature throughout the 8-12 hour soaking period, ensuring the beans remain safe and rehydrate evenly. The extended time at this optimal temperature is what allows for the significant reduction in gas-producing compounds and the improved digestibility that makes well-soaked beans so desirable.
Harnessing Heat: The Quick Soak's Temperature Dynamics
The quick hot water soak operates on a different principle, leveraging higher temperatures for a shorter duration. After the initial rinse, the beans are brought to a rolling boil – meaning the water is actively bubbling at 212°F (100°C). This vigorous boiling for a few minutes serves to quickly plump the beans and initiate the denaturation of certain proteins and the breakdown of some complex sugars. Following this brief boil, the pot is removed from the heat and the beans are allowed to steep for about an hour. While the water temperature gradually cools from boiling, it remains warm enough (likely between 140-180°F or 60-82°C for a significant portion of this hour) to continue the beneficial biochemical processes without the risk of bacterial growth associated with prolonged exposure to lukewarm temperatures.
This method is a pragmatic compromise, offering improved digestibility and reduced cooking times compared to an unsoaked bean, all within a more manageable timeframe. The intense heat at the beginning of the process helps to break down cell walls rapidly, while the subsequent steeping period allows for deeper penetration of moisture and continued enzymatic activity. It's a powerful technique for those who appreciate the convenience without wanting to completely sacrifice the benefits of a more traditional soak.
Timing is Everything: Duration for Different Soaking Methods
The duration of your soak is as critical as the water temperature. For the overnight cold soak, aim for 8 to 12 hours. Going much beyond 12-18 hours can sometimes lead to a mushy texture or the beans becoming too waterlogged, especially in warmer environments. However, for very old or exceptionally hard beans, you might need to extend this time slightly, or opt for a water change midway through. The key is to find the sweet spot where the beans are fully plumped, softened, and have undergone sufficient chemical changes for improved digestibility.
The quick hot water soak significantly shortens the waiting period. The initial boil lasts only 2-5 minutes, followed by a 1-hour steep. This total time commitment of just over an hour, compared to overnight, makes it an attractive option for weeknight cooking. While the digestive benefits might not be as profound as an overnight soak, they are still substantial, making this method a worthy alternative. Remember, the goal is to achieve a noticeable plumpness and softening, which indicates that the rehydration and biochemical processes have begun in earnest.
Rinsing and Water Changes: The Unsung Heroes of Bean Prep
While the initial soaking is fundamental, the subsequent steps of rinsing and, crucially, changing the soaking water, play a vital role in maximizing the benefits of hydrothermal soaking. These seemingly simple actions are powerful tools for further enhancing digestibility and improving the final flavor and texture of your cooked beans. They are the unsung heroes that elevate your bean preparation from good to exceptional.
The Power of the Rinse: Flushing Away the Unwanted
After any soaking period, whether cold or hot, it is imperative to drain the soaking water thoroughly and rinse the beans under fresh, cool running water. This step serves multiple purposes. Firstly, it removes any surface debris that may have been released from the beans during the soak. More importantly, it flushes away a significant portion of the leached oligosaccharides and other water-soluble compounds that have been drawn out of the beans into the soaking liquid.
Think of it like rinsing pasta: you're washing away the excess starch. In the case of beans, you're washing away the compounds that contribute to gas and digestive discomfort. A good rinse under cool running water, perhaps for 30 seconds to a minute, with a bit of gentle agitation, is sufficient to achieve this. This simple step is a cornerstone of making beans more palatable and easier on the digestive system.
The Strategic Water Change: Enhancing Digestibility
For extended cold soaks, particularly those lasting longer than 8 hours, or when dealing with beans known for causing digestive issues (like kidney beans or chickpeas), performing at least one water change during the soaking period is highly recommended. This involves discarding the initial soaking water (which will likely be cloudy and possibly slightly colored) and replacing it with fresh, cool water. This process can be done midway through the soaking time, for example, after 4-6 hours.
"Don't underestimate the humble rinse and water change! These simple steps are your secret weapons for unlocking the truly digestible and delicious potential of beans."
Why is this so effective? Each water change provides a fresh medium for the oligosaccharides and anti-nutrients to leach out of the beans. By discarding the water that has already absorbed these compounds, you create a more efficient concentration gradient, encouraging more of them to be drawn out into the new, clean water. This repeated leaching process significantly reduces the overall load of gas-producing compounds, making the beans considerably easier to digest. While it adds a small step to the process, the payoff in terms of digestive comfort is immense.
When to Change the Water: Signs and Timing
You’ll often see the soaking water become cloudy or even take on a slight color from the beans. This is a clear indicator that compounds are being released. If you’re doing an overnight soak and the water looks particularly murky after several hours, it’s a good time to perform a water change. For very long soaks (e.g., 18-24 hours for tough old beans), you might even consider two water changes.
The timing of the water change is flexible. A good rule of thumb is to do it about halfway through your planned soaking time. For an 8-12 hour soak, this means changing the water after about 4-6 hours. If you are using the quick hot water soak, a thorough rinse after the steeping period is usually sufficient, as the heat and shorter duration have already initiated significant breakdown. The key takeaway is that proactively removing the absorbed compounds from the soaking water is a critical step for maximizing digestibility.
Chef's Secrets: Elevating Your Bean Prep with Professional Tips
Beyond the fundamental techniques of hydrothermal soaking, there are a few insider tips and tricks that culinary professionals use to ensure consistently superior results. These are not complicated maneuvers, but rather nuanced adjustments that leverage a deeper understanding of the ingredients and the cooking process. Incorporating these into your routine will undoubtedly elevate your bean dishes from everyday fare to something truly special.
The Salt Debate: When to Add It and Why
The question of when to add salt to beans is a long-standing one, and the general consensus among many chefs is to avoid adding salt during the soaking phase. The reasoning is that salt can potentially toughen the bean skins and hinder their ability to absorb water and soften properly during cooking. This can lead to longer cooking times and a less tender final product. Instead, it's best to season your beans generously with salt towards the end of the cooking process, or once they have reached your desired level of tenderness.
However, some culinary traditions and specific recipes may call for adding a small amount of salt to the soaking water. If you have a particularly old batch of beans or are concerned about them not softening, a small pinch of salt might be considered. But as a general rule for optimal texture and tenderness, wait until the beans are nearly cooked before salting. This allows the salt to penetrate the softened beans and enhance their flavor without compromising their texture. A good starting point is to add salt during the last 15-30 minutes of cooking.
Aromatics for Flavor Infusion: Beyond Just Water
While water is the primary medium for hydrothermal soaking, incorporating aromatics can begin to infuse flavor into the beans from the very start. This is especially beneficial if you plan to cook the beans in plain water or a simple broth. Adding ingredients like a halved onion, a few cloves of garlic, a bay leaf, a sprig of rosemary or thyme, or even a piece of kombu to the soaking water can impart subtle, yet delicious, undertones.
If you are doing an overnight cold soak, these aromatics will have ample time to release their essence. For the quick hot water soak, they will contribute flavor during the steeping period and carry through into the cooking process. When using this technique, remember to remove and discard these aromatics before cooking the beans, as their flavor can become too concentrated or impart an undesirable texture if left in for the entire cooking duration. This simple addition transforms a basic soaking step into the first layer of a deeply flavorful dish.
Adjusting for Bean Age and Type
It's crucial to remember that not all beans are created equal, and their age significantly impacts their rehydration and cooking properties. Older beans tend to be harder, absorb water more slowly, and may require longer soaking times (sometimes up to 24 hours with water changes) and extended cooking. If you suspect your beans are old, it’s wise to be more generous with the water during soaking and to start checking for tenderness earlier in the cooking process than you might for fresh beans.
Similarly, certain bean types have inherent characteristics that might require slight adjustments. For example, flourier beans like navy beans or pinto beans tend to break down more easily and become creamy, making them ideal for purees and dips. Waxy beans like cranberry beans or kidney beans hold their shape better and are excellent in salads or stews. Understanding these differences can guide your soaking and cooking methods to achieve the desired texture. Always sort and rinse, but be prepared to adjust soaking times and water ratios based on the specific beans you are working with.
Troubleshooting Common Bean Soaking Problems
Even with the best intentions and techniques, the occasional bean-related mishap can occur. Understanding common problems and their solutions can save you frustration and ensure your culinary endeavors are successful. From stubbornly hard beans to unexpected spoilage, a little troubleshooting goes a long way in mastering the art of hydrothermal soaking.
The Case of the Unyielding Bean: Why Aren't They Softening?
This is perhaps the most common and frustrating issue. Several factors can contribute to beans that refuse to soften, even after extended soaking and cooking. Age is a primary culprit; older beans lose moisture and become tougher over time, requiring significantly longer cooking. Hard water can also make beans more resistant to softening. Sometimes, it's simply a matter of insufficient soaking time or water.
Solutions:
Extend Soaking Time:* If beans are still hard after the usual soaking period, you can try extending the soak for another 8-12 hours, with a water change or two.
Use a Pressure Cooker:* A pressure cooker is a bean's best friend when it comes to stubbornness. The increased pressure and temperature dramatically reduce cooking time and help to break down even the toughest beans.
Add Baking Soda (with caution):* A small amount of baking soda (about 1/2 teaspoon per cup of dried beans) added to the cooking water can help soften beans by raising the pH, which aids in breaking down pectin in the cell walls. However, use this sparingly, as too much can impart a soapy flavor or make the beans too mushy.
Consider Re-Soaking:* If you forgot to soak them altogether, a quick hot soak can still help, though the results won't be as ideal as a longer soak.
The Spoilage Scare: When Soaking Goes Wrong
While less common, beans can spoil during the soaking process, especially if left at room temperature for too long in warm weather or if the water is not changed. Signs of spoilage include an unpleasant odor, slimy texture, or visible mold.
Solutions:
Discard Immediately: If you notice any signs of spoilage, it is crucial to discard the entire batch of beans*. Consuming spoiled food can lead to serious illness.
Refrigerate Soaking Beans: To prevent spoilage, especially during warmer months or for longer soaking times (over 8-12 hours), it is highly recommended to refrigerate the soaking beans*. This slows down bacterial growth and ensures their safety.
Use Fresh Water:* Always use clean, fresh water for soaking and for any water changes.
The Exploding Bean: Skins Splitting During Cooking
Sometimes, even after proper soaking, bean skins can split excessively during cooking, leading to a less aesthetically pleasing dish and a mushier texture than desired. This can happen due to uneven rehydration, cooking the beans too vigorously, or sometimes just the natural tendency of certain bean varieties.
Solutions:
Gentle Cooking:* Avoid boiling the beans at a rolling boil for extended periods. Instead, maintain a gentle simmer once the beans have reached a boil after soaking.
Avoid Over-Soaking:* While thorough soaking is good, excessively long soaking can sometimes lead to waterlogged skins that are prone to splitting.
Cooler Soaking Water:* Ensure your cold soak is done in cool, not warm, water to promote even hydration.
Add a Pinch of Baking Soda:* As mentioned before, a small amount of baking soda can sometimes help to soften the skins, making them less prone to splitting, though this should be used cautiously to avoid flavor issues.
Final Thoughts
Embracing the principles of hydrothermal soaking is not just about preparing dried beans; it's about unlocking their full culinary and nutritional potential. By understanding the interplay of water, temperature, and time, and by applying simple yet effective techniques like proper rinsing and strategic water changes, you can transform these humble legumes into stars of your kitchen. The journey from a hard, unyielding bean to a creamy, tender, and easily digestible delight is a testament to the power of thoughtful preparation.
The science behind soaking – the breakdown of oligosaccharides, the reduction of anti-nutrients, and the efficient rehydration – is your ally in creating healthier, more enjoyable meals. Whether you opt for the classic overnight soak, the time-saving quick hot water method, or even cautiously navigate the "no soak" approach with a pressure cooker, the foundational principles remain the same: treat your beans with care and attention. The result will be a richer flavor, a superior texture, and, most importantly, a more comfortable digestive experience.
So, the next time you reach for a bag of dried beans, don't shy away from the process. See it as an opportunity to engage with your food on a deeper level, to harness the power of simple science, and to create dishes that are not only delicious but also incredibly nourishing. Master the bean-to-water ratios, pay attention to temperature and timing, and don't forget those crucial rinses and water changes. You'll be rewarded with perfectly cooked beans that will forever change your perception of what this incredible ingredient can be. Happy cooking, and may your beans always be tender and your digestion happy!
Get the Next Recipe
Weekly recipes, techniques, and gear picks — straight to your inbox.
