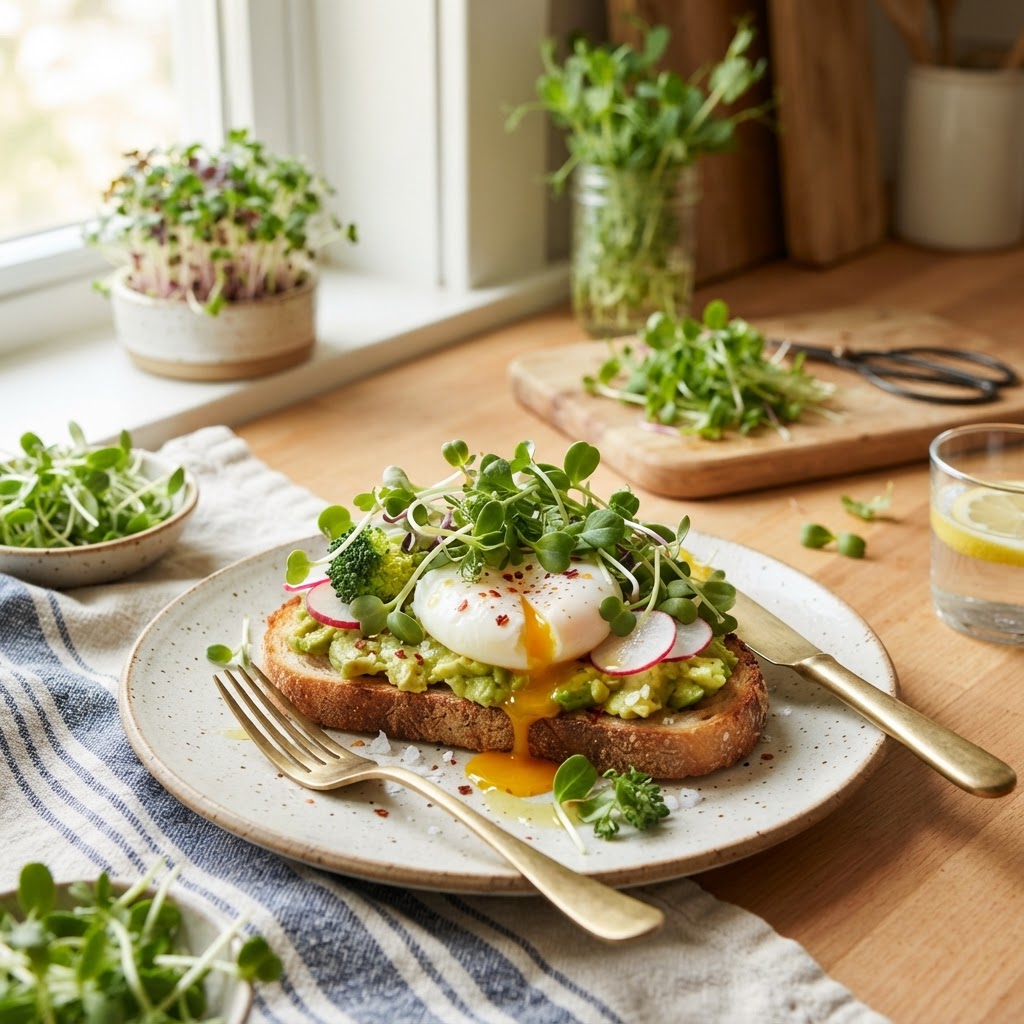
The Healthy Home Cook’s Guide to Microgreens: How to Grow, Select, and Incorporate Nutrient-Dense Greens Into Every Meal
There is a quiet revolution happening in kitchens across the globe, one that doesn’t require expensive gadgets, industrial appliances, or years of culinary training. It is the rise of the microgreen, those tiny, vibrant seedlings that pack a nutritional punch far beyond their diminutive size. Often dismissed by amateur cooks as mere "fancy plate garnishes" for high-end restaurants, these greens are actually the secret weapon of the modern home chef looking to maximize flavor and vitality. By integrating these concentrated bursts of plant life into your daily diet, you are essentially harnessing the raw, early-stage energy of nature itself. It is a practice that bridges the gap between gardening and gourmet cooking, proving that you do not need a sprawling backyard to be an urban farmer.
Stepping into the world of microgreens might seem intimidating at first, given the precision often associated with professional horticulture, but the barrier to entry is delightfully low. Whether you are working with a sunny windowsill in a cramped city apartment or a dedicated corner of your suburban kitchen, the principles remain the same: light, water, and patience. Many people assume that growing their own food is a time-consuming hobby reserved for the retired or the agrarian-obsessed, yet microgreens reach maturity in as little as seven to fourteen days. This rapid turnaround time makes them the perfect entry point for those wanting to take control of their food supply. Once you experience the intense, concentrated flavor of a freshly harvested radish microgreen, you will find it nearly impossible to go back to the wilted, flavorless bags found in grocery store aisles.
As we journey through this guide, we will move beyond the superficial understanding of these greens and dive deep into the science and art of cultivating them. We will explore the varieties that offer the best nutritional profiles, the specific soil requirements that prevent common amateur pitfalls like "damping off," and the culinary applications that will elevate your cooking from standard home fare to restaurant-quality cuisine. You will learn how to balance the delicate texture of pea shoots with the peppery bite of arugula, how to properly store them to maximize shelf life, and why every healthy home cook should consider these greens a pantry staple. Prepare to transform your kitchen into a miniature farm and your meals into nutrient-dense masterpieces.
The Science and Selection of Microgreens
At the core of the microgreen trend is a fundamental misunderstanding of what these plants actually are. To be clear, microgreens are not the same as sprouts. While sprouts are germinated in water and consumed whole—including the root—microgreens are grown in a growing medium, like soil or coconut coir, and are harvested above the soil line once their first set of "true leaves" appears. This distinction is crucial because it allows the plant to develop a more complex flavor profile and significantly higher nutrient density. By allowing the seedling to photosynthesize for a week or two, you are capturing a snapshot of the plant’s life when its vitamins, antioxidants, and enzymes are at their absolute peak concentration.
When selecting which varieties to grow or purchase, you should categorize them by flavor intensity and texture. Mild greens, such as sunflowers, peas, and broccoli, provide a satisfying crunch and a neutral, nutty flavor that serves as an excellent base for large salads. If you are looking for a punch of heat or character, turn to the brassica family, which includes radish, mustard, and arugula. These varieties contain high levels of glucosinolates, the compounds responsible for that signature peppery zing that can cut through the richness of fatty meats or creamy dressings. Always opt for organic, untreated seeds to ensure that no chemical pesticides or fungicides are present in your final product.
"Microgreens are not merely a visual flourish; they are the concentrated essence of the plant, capturing the vital nutrients that most gardeners never see because they harvest too late or too early."
When evaluating quality at a market, look for leaves that are vibrant, perky, and free of any signs of mold or yellowing. If you are growing your own, the visual check is even easier. The stems should be sturdy and upright, never limp or slimy. Remember that different species grow at different rates, so if you are planning on mixing varieties in a single tray, ensure they have similar germination timelines to avoid a chaotic harvest. Understanding these variables is the first step toward becoming a true microgreen master.
Setting Up Your Indoor Micro-Farm
You do not need a greenhouse to be successful; in fact, a simple plastic tray and a bright, indirect light source are more than enough. The most critical component is your growing medium. While many commercial growers use specialized hydroponic pads, beginners often find the most success with a high-quality, organic seed-starting mix. This medium is light, airy, and designed to hold just enough moisture without becoming waterlogged, which is the primary enemy of young seedlings. Ensure your trays have adequate drainage holes; without them, standing water will lead to root rot and fungal growth, effectively ending your experiment before it begins.
For lighting, while a sunny south-facing window is a good start, it is often insufficient during the winter months or in northern latitudes. Professional chefs who grow their own greens almost universally use LED grow lights. These are energy-efficient, produce very little heat, and can be placed just a few inches above the canopy of your greens to ensure sturdy, upright growth. If your plants look tall, pale, and "leggy," they are stretching for light, which is a sign you need to either move the light closer or increase the duration of exposure. Aim for roughly 12 to 14 hours of light per day for optimal development.
Essential Gear for the Home Chef
Growing Trays:* Standard 10x20 inch perforated trays with matching solid bottom trays for bottom watering.
Growing Medium:* Organic seed-starting soil or coconut coir (coir is excellent for water retention).
Spray Bottle:* A fine-mist mister for the initial germination phase.
Circulation:* A small desk fan to keep air moving; this prevents the dreaded "damping off" disease.
Once you have gathered your equipment, the preparation is simple. Fill your tray with about an inch of your dampened growing medium. Spread your seeds densely—the goal is a solid carpet of seeds, not sparse distribution—but be careful not to overlap them significantly, as this invites mold. Mist the seeds thoroughly with filtered water and cover the tray with an inverted tray or a piece of cardboard to create a dark, humid environment. This "blackout period" lasts for 3 to 4 days, encouraging the seeds to send their roots deep into the soil before they begin their reach toward the light.
Mastering the Growth Cycle: From Seed to Harvest
Once your seeds have sprouted during the blackout period, it is time to reveal them to the light. This transition is the most critical stage of the process. As the seedlings pop their heads up, they will appear yellow or white; this is perfectly normal. Within 24 hours of exposure to light, they will turn a deep, vibrant green as they begin to photosynthesize. During this time, keep the tray in a well-ventilated area. Stagnant air is the fastest way to invite mold, which thrives in the humid environment that microgreens prefer. A small fan set on a low speed can significantly improve your yield by strengthening the plant stems.
Watering should be done exclusively through bottom watering. By pouring water into the bottom tray rather than misting the tops of the plants, you keep the foliage dry, which significantly reduces the risk of mold and bacterial issues. Keep a close eye on the moisture level; the soil should feel like a damp sponge—cool and moist to the touch—but never saturated. If you notice a faint, musty smell, you are likely overwatering or failing to provide enough airflow. Professional growers often use a hydrogen peroxide solution (3% concentration mixed with water at a 1:10 ratio) to mist the soil if they notice the slightest hint of mold, which acts as a gentle, effective disinfectant.
"Consistency in the early stages of growth is the difference between a sad, sparse tray of stalks and a lush, nutrient-dense carpet of greens that look like they were plucked straight from a professional kitchen."
Harvesting is an art form. You are waiting for the cotyledons—the initial seed leaves—to fully open. Depending on the variety, you might also see the first set of true leaves starting to emerge. For most varieties, this is the sweet spot. Using a very sharp, clean pair of scissors or an herb knife, harvest the greens by cutting them just above the soil line. Do not wash them until you are ready to use them; moisture is the enemy of shelf life once the greens are cut. If you need to store them, place them in a breathable container lined with a paper towel to wick away excess humidity, and keep them in the refrigerator for up to five to seven days.
Culinary Applications: Beyond the Garnish
Now that you have successfully grown your harvest, how do you incorporate these into your daily routine? The biggest mistake home cooks make is using microgreens only as a last-minute topping. While they do look beautiful on top of a seared steak or a bowl of ramen, their flavor is often lost in the shuffle. Instead, think of microgreens as a primary salad green or a nutritional boost to your morning routine. A hearty handful of pea shoots, mixed with a little lemon zest and high-quality olive oil, makes for a complex, vibrant base for a grain bowl or a warm salad.
For hot dishes, timing is everything. Because microgreens are so delicate, they will wilt instantly if subjected to high heat. The professional technique is to add them at the very end of the cooking process—the "fold-in" method. For example, if you are making a creamy pasta, stir the greens into the pasta just as you pull it off the heat. The residual warmth will soften them slightly without destroying their structure or their nutritional integrity. This adds a layer of freshness that is often missing from heavy, cooked dishes.
Three Ways to Elevate Your Plate
Experimentation is encouraged. Because the flavors are so concentrated, you can use them to balance heavy, fatty dishes. A rich, slow-cooked short rib is significantly improved by a garnish of bright, acidic cilantro microgreens, which act similarly to a squeeze of lime juice. By thinking about flavor profiles—acid, fat, salt, and heat—you can strategically use microgreens to provide a necessary counterbalance to your main components.
Nutritional Density: Why We Care
Why all this effort for such a small plant? The answer lies in the phytochemical profile. Studies have shown that microgreens can contain up to 40 times higher concentrations of vitamins and antioxidants than their mature counterparts. Specifically, red cabbage microgreens have been found to have higher levels of Vitamin C, Vitamin K, and Vitamin E than full-grown cabbage. By consuming these young plants, you are getting a concentrated dose of nutrition that is easily digestible and metabolically available to your body.
When you consume raw microgreens, you are also consuming enzymes that are often destroyed during the cooking process of mature vegetables. These enzymes aid in digestion and nutrient absorption, making them a fantastic addition to any meal, especially if you struggle with bloating or sluggish digestion. The fiber content in these greens, while lower in volume than mature vegetables, is incredibly tender, meaning it doesn't cause the same digestive strain that fibrous, mature kale or collard greens might.
"A single handful of microgreens can provide the nutritional equivalent of a large serving of mature vegetables, making them the ultimate efficiency hack for the busy, health-conscious home cook."
Furthermore, the diversity of the microgreen category allows you to target specific health goals. If you are looking to boost your immune system, focus on the brassica family (broccoli, kale, cauliflower), which are high in sulforaphane, a compound studied extensively for its potential cancer-fighting properties. If you are looking for anti-inflammatory benefits, look toward radish and mustard. By rotating your crops and your consumption, you are essentially providing your body with a broad-spectrum nutritional insurance policy.
Troubleshooting Common Culinary Pitfalls
Even with the best intentions, things can go wrong. If your greens taste bitter, it might be due to harvesting too late or allowing them to become dehydrated during the growing phase. Stress in plants leads to the production of defensive compounds, which in many cases, taste bitter. Ensure consistent water and light to keep the plant in a "growth" phase rather than a "survival" phase. If your greens are growing mold, don't throw away the whole tray immediately. Often, what beginners mistake for mold is actually root hairs. These are tiny, fuzzy white fibers that grow from the base of the stem to help the plant absorb water. You can distinguish them from mold because they are usually uniform, lack a musty smell, and disappear when misted with water.
If you find that your greens are consistently failing to thrive, look at your temperature. Microgreens generally prefer a consistent temperature between 65°F and 75°F. If your kitchen gets too cold at night, growth will stall. If it gets too hot, you will dry out the medium too quickly and increase the risk of pathogens. A simple fix is to move your growing rack away from drafts or direct heating vents. Chef's tip: If you are having trouble with a specific variety, try "up-potting" your technique by using a slightly deeper tray, which provides more room for root development and a larger reservoir of moisture, making the system more forgiving for the busy cook.
Lastly, don't be afraid to fail. Growing microgreens is a craft that requires an iterative approach. If one batch doesn't turn out perfect, analyze the conditions: Was the light too far away? Did you overwater? Was the air stagnant? Change one variable for the next batch and observe the difference. The beauty of this process is that you get a "redo" every two weeks. By the time you reach your fifth or sixth harvest, you will have moved from a novice following a guide to an intuitive farmer who knows exactly what their crops need.
Final Thoughts
The integration of microgreens into your culinary repertoire is more than a trend; it is a fundamental shift toward eating more nutrient-dense, locally sourced, and vibrant food. By taking the small step of cultivating these greens in your own home, you are taking a stand against the convenience-focused, low-nutrition cycle of modern grocery shopping. You are reclaiming the act of preparation, ensuring that the food you put on your table is as fresh as it is flavorful. It is a rewarding experience that pays dividends in both the quality of your meals and the health of your body.
Start small. Buy a few trays, pick two or three of your favorite varieties, and commit to the two-week growing cycle. Watch how the seeds transform from dry, dormant kernels into a thriving, green canopy. Learn to respect the timing of the harvest and the delicacy of the greens in your pan. As you become more confident, expand your garden to include more exotic varieties like amaranth or spicy clover, and challenge yourself to find new, creative ways to weave them into your favorite recipes.
Remember, the goal here is not to be a professional horticulturist—it is to be a better, healthier home cook. Whether you use them as a simple garnish for your scrambled eggs or as the star of a complex, layered salad, microgreens have a place in every kitchen. They are the small, mighty heroes of the culinary world, waiting to transform your next meal into a celebration of freshness and vitality. Blame the chef if you want, but after you taste the difference that home-grown microgreens make, you will be the one taking all the credit for the incredible flavors coming out of your kitchen. Enjoy the process, enjoy the harvest, and above all, keep cooking with curiosity and care.
Growing your own food is an act of defiance against the pre-packaged, processed world. Every time you cut a handful of sunflower shoots or spicy radishes, you are making a choice to prioritize quality over convenience. This isn't just about nutrition; it's about flavor. The sheer intensity of a micro-radish, with its sharp, clean bite, is an experience that cannot be replicated by anything you find sitting on a refrigerated shelf for two weeks. It's time to stop thinking of these greens as a luxury and start thinking of them as a necessity. Your body will thank you, your palate will thank you, and your dinner guests will wonder how you managed to find produce that tastes so exceptionally alive. Keep your lights bright, your trays moist, and your scissors sharp—the best part of your next meal is already growing on your kitchen counter.

Get the Next Recipe
Weekly recipes, techniques, and gear picks — straight to your inbox.
