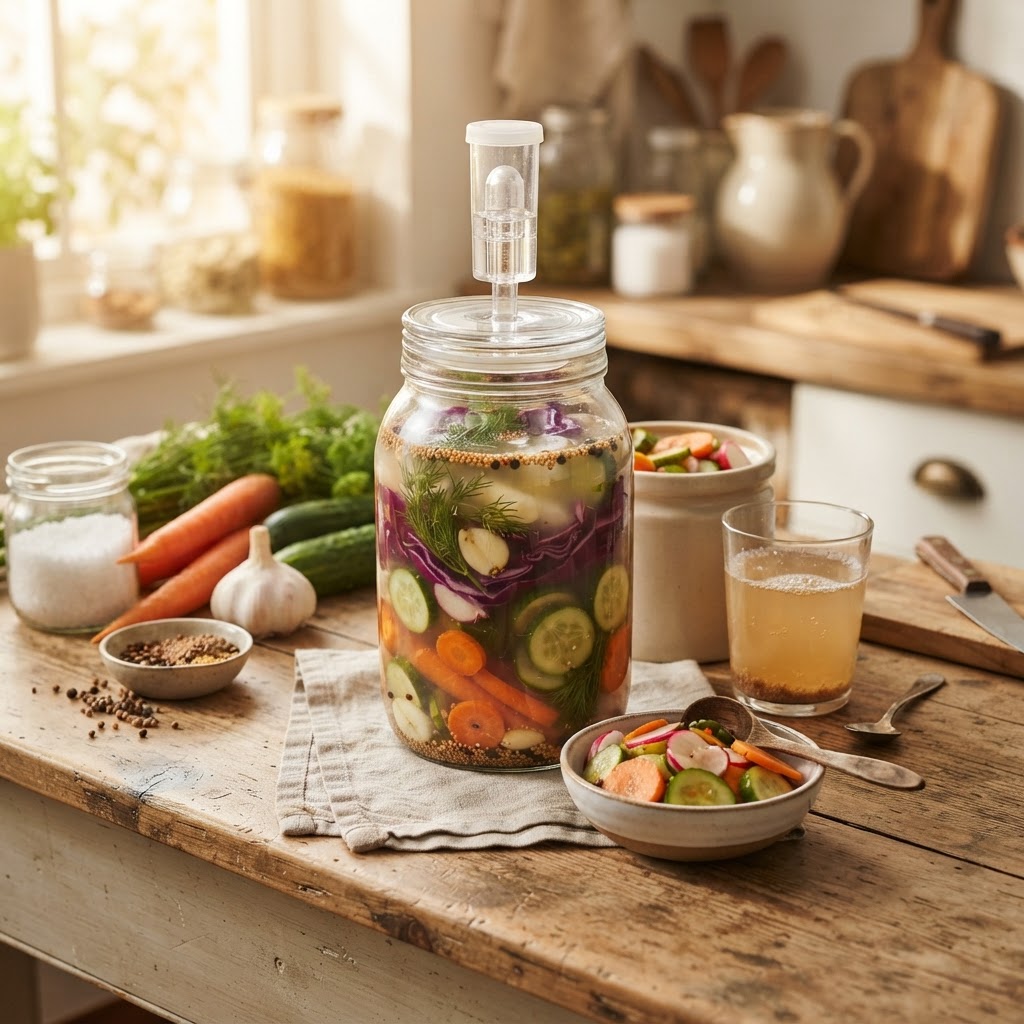
The Healthy Home Cook’s Guide to "Nutrient-Dense Pickling": Using Probiotic-Rich Brines to Enhance Digestion and Flavor
Pickling is one of those culinary techniques that sits at the beautiful intersection of ancient survival strategy and modern gastronomic indulgence. When we talk about "nutrient-dense pickling," we are moving away from the vinegary, high-heat canning processes that prioritize shelf stability above all else and moving toward the art of lacto-fermentation. This is the method where time, salt, and beneficial bacteria do the heavy lifting, transforming humble garden vegetables into tangy, crunchy, and probiotic-packed powerhouses. By harnessing the natural microbes present on the skins of fresh produce, you are essentially cultivating a tiny, healthy ecosystem inside a mason jar that serves as a functional food for your gut microbiome.
For the home cook who wants to elevate their kitchen game, understanding the biology behind fermentation is just as important as knowing how to balance your flavors. Many beginners fear the process because it requires patience and a surrender of control to nature, yet it is arguably the most forgiving technique in the culinary repertoire. Once you grasp the simple ratio of salt-to-water weight, you open up an infinite pantry of possibilities that can transform a standard salad into a complex, umami-rich experience. This guide will walk you through the essential science of brines, the selection of raw ingredients, and the professional techniques that ensure your ferments remain safe, delicious, and teeming with life.
At "Blame The Chef," we believe that the best meals are those that nourish the body while challenging the palate, and pickling is the ultimate expression of that philosophy. Whether you are dealing with a bumper crop of summer cucumbers, a surplus of late-autumn carrots, or simply looking to add a layer of complexity to your everyday meals, these techniques are designed for the home kitchen. We will explore how to avoid common pitfalls like soft vegetables and mold, while mastering the nuances of flavoring agents like fresh herbs, aromatics, and spices. Prepare to turn your countertop into a laboratory of flavor where the reward for your minimal effort is a jar of something truly transformative.
The Foundation of Probiotic-Rich Brining
At its core, lacto-fermentation is a process of anaerobic respiration where bacteria—specifically Lactobacillus species—consume the sugars in vegetables and convert them into lactic acid. This acid acts as a natural preservative, lowering the pH of the jar to a level where harmful bacteria cannot survive, effectively "cooking" the vegetables without the need for heat. The beauty of this process is that it preserves the enzymes and vitamins that are often lost during the canning process, creating a nutrient-dense food source that supports digestive health and strengthens the immune system through the introduction of diverse probiotics.
Understanding the Salt-to-Water Ratio
To succeed in pickling, you must be precise with your brine concentration. The industry standard for most vegetable ferments is a 2% to 5% salt solution. A 2% brine is generally sufficient for most vegetables, whereas firmer or more fibrous vegetables, like cabbage or root vegetables, might benefit from a 3% or 4% brine to maintain crispness and prevent spoilage. You calculate this by the total weight of the water and the produce or simply the weight of the water if you are using an immersion technique. Always use high-quality sea salt or kosher salt that is free of iodine and anti-caking agents, as these additives can interfere with the bacterial growth and lead to unappealing, cloudy ferments.
The Role of Temperature and Environment
The speed of your fermentation is dictated almost entirely by the ambient temperature of your kitchen. The ideal range for a steady, consistent ferment is between 65°F and 75°F (18°C to 24°C). If your kitchen is warmer, your ferments will move very quickly, which can sometimes result in a loss of texture or an over-acidic taste. Conversely, if your home is quite cool, the process will slow down significantly, which can actually be a good thing if you want to develop deeper, more complex flavors over a longer period.
"The magic of lacto-fermentation lies in the realization that you are not just making a condiment; you are cultivating a living, breathing ecosystem that improves in quality as the bacteria evolve."
Selecting Ingredients for Maximum Crunch
One of the most common complaints among home cooks is the dreaded "mushy pickle." Achieving a satisfying snap is a matter of both technique and ingredient selection. Always choose produce that is as fresh as possible, ideally sourced from a farmers' market or harvested directly from your garden. Bruised or soft vegetables will degrade quickly in the brine, whereas fresh, firm produce contains the structural integrity required to withstand the enzymatic breakdown that occurs during fermentation.
The Secret of Tannins
To ensure your ferments stay crunchy, you need to incorporate a source of tannins. These compounds help stabilize the pectin in vegetable cell walls, preventing them from softening. You can find high concentrations of tannins in leaves such as:
Oak leaves*
Grape leaves*
Black tea leaves*
Horseradish leaves*
Simply tucking a small leaf into the bottom of your jar can significantly improve the texture of your pickles over a four-week period. It is an old-world culinary trick that professional chefs have relied on for generations to maintain the "snap" in their preserves.
Preparing Your Aromatics
The aromatics you add to your brine provide the top notes of flavor, while the fermentation provides the base. Garlic, fresh dill, mustard seeds, peppercorns, and coriander seeds are classic staples, but do not be afraid to experiment with more adventurous additions. Think of sliced ginger, dried chili flakes, or even thin strips of citrus peel. When using garlic, remember that it can sometimes turn blue or green due to a reaction between the sulfur in the garlic and the copper or iron in the water or salt—this is entirely harmless and does not affect the taste.
The Step-by-Step Fermentation Process
Consistency is key when developing your own fermentation routine. A standardized workflow helps you track your progress and ensures that your jars are clean and safe. While it may seem like a complex chemical operation, it really boils down to sanitation and patience.
Managing Headspace and Gas
During the first few days of fermentation, the activity is at its peak. You will see bubbles forming, which is a sign that your ferment is healthy and alive. If you are using traditional mason jars with standard lids, you will need to "burp" the jars once a day by loosening the lid slightly to release the accumulated carbon dioxide. Alternatively, invest in airlock lids or specialized fermentation valves, which allow the gas to escape automatically while preventing outside oxygen from entering.
Troubleshooting Common Fermentation Woes
Even with the best intentions, things can sometimes go sideways in the jar. Understanding the visual cues of your ferments is a vital skill. One of the most common sights for beginners is a white, powdery sediment at the bottom of the jar. This is perfectly normal; it is simply a collection of spent bacteria and salt, and it can be shaken back into suspension before serving.
Dealing with Kahm Yeast
You might occasionally see a thin, white, filmy layer on the surface of your brine. This is known as Kahm yeast. While it isn't dangerous, it can impart an off-flavor to your ferments and indicate that the environment is slightly too aerobic. You can carefully skim it off with a clean spoon. If it keeps returning, try adjusting your brine concentration or ensuring your vegetables are more securely submerged.
When to Discard
If you see fuzzy, colored mold (black, pink, or green) on the surface, or if the contents of the jar smell putrid or rotten rather than pleasantly sour and tangy, it is time to discard the batch. Fermented vegetables should always have a bright, acidic, and pleasant aroma. If you are ever in doubt, the golden rule of home preservation applies: when in doubt, throw it out.
"A well-executed ferment should smell clean and sharp, like the bracing air of a cool morning. If it smells like a swamp, your balance is off."
Incorporating Probiotics into Your Daily Diet
Now that you have jars of beautiful, shelf-stable, probiotic-rich vegetables, how do you actually incorporate them into your life? The most important rule is to avoid heating them. If you add your fermented carrots to a boiling soup, you are killing off the very probiotics you worked so hard to cultivate. Treat these as a "living garnish" or a side dish that is added after the cooking process is complete.
Culinary Applications
The Charcuterie Board*: A selection of fermented radishes, green beans, and carrots cuts through the richness of cured meats and cheeses, providing a palate-cleansing acidity.
The "Loaded" Grain Bowl*: Add a generous scoop of fermented sauerkraut or beet kvass-pickled onions to a bowl of quinoa, chickpeas, and fresh greens.
Probiotic Salads*: Use the brine itself as the base for a vinaigrette. Combine the brine with high-quality olive oil and a touch of mustard for a salad dressing that is significantly healthier than store-bought options.
Sandwich Toppers*: Replace standard mayonnaise-heavy coleslaw with crisp, fermented pickles to add both crunch and depth to your favorite lunch sandwiches.
Maintaining Your Gut Microbiome
Regular consumption of small amounts of fermented foods is more beneficial than eating a massive amount once a week. Incorporating a forkful of your pickles into your daily meal routine helps maintain a diverse and resilient gut flora. Think of it as a daily insurance policy for your digestion. As you begin to integrate these foods, you may notice improvements in your energy levels, digestion, and even your skin health, as the gut-brain axis is significantly influenced by the health of your internal microbial community.
Advanced Techniques for Flavor Development
Once you have mastered the basics of cucumbers and carrots, it is time to experiment with more complex flavor profiles. This is where you can start to blend cultural influences and create signature preserves that are unique to your home kitchen. Consider the profile of a Japanese tsukemono or the spicy profile of a Korean kimchi; both rely on the same fundamental principles of lacto-fermentation but use vastly different ingredients and techniques to achieve their distinct characteristics.
Layering Spices and Herbs
Consider the "flavor profile" of your jar before you begin. If you are working with beets, they pair beautifully with caraway seeds, fennel, and orange zest. If you are fermenting green beans, consider adding a dash of smoked paprika or fresh garlic scapes for an earthy, savory kick. You can even experiment with adding fresh ginger and turmeric to your brines for an anti-inflammatory boost that also tastes fantastic.
Using Liquid Starters
While wild fermentation relies on the naturally occurring bacteria on the vegetable skins, you can speed up the process by using a "starter" liquid. A splash of brine from a previous, successful ferment (the "backslop" method) introduces an established colony of healthy bacteria, which can help jump-start the process and make the initial stages more reliable. Just be sure that your starter brine is free of any spoilage or off-tastes.
The Art of Aging
Just like fine wine or aged cheese, many ferments improve with time. While a cucumber pickle might be ready in three to seven days, other ferments like kimchi or heavy root vegetable pickles can benefit from being moved to a cool, dark place (like a root cellar or the back of your refrigerator) for several months. This slow, cold aging process allows the flavors to mellow and integrate, creating a level of complexity that is impossible to achieve in a rapid, warm-room ferment.
Scaling Up for the Seasonal Pantry
If you find that your fermentation projects are becoming a weekly ritual, it is time to think about scaling your operation. Having a dedicated space in your kitchen for your jars—what we like to call the "Fermentation Corner"—keeps your workspace organized and ensures that your jars are kept out of direct sunlight. Sunlight can degrade the quality of your ingredients and cause temperature fluctuations that interfere with the bacterial development.
Managing Your Rotation
To keep a constant supply of probiotics, use a rotation system. Label every jar with the date it was started and the specific vegetable variety. As you begin to empty one jar, start a new one to replace it. This creates a staggered cycle where you always have something in the "first stage" of fermentation and something in the "peak maturity" stage.
Storage Solutions
Once your ferments reach the desired flavor profile, move them to the refrigerator. The cold temperature will not kill the beneficial bacteria, but it will put them into a state of semi-dormancy, effectively "pausing" the fermentation. This preserves the texture and the flavor for months, allowing you to enjoy the harvest of a bumper crop long after the season has passed.
"The jar on your counter is a testament to the fact that you can curate your own health, one delicious, crunchy bite at a time. It is a slow, methodical process that pays dividends in flavor and vitality."
Final Thoughts
The journey into "nutrient-dense pickling" is not just about the end product; it is about reclaiming the lost art of preservation and reconnecting with the cycles of nature. When you take a raw, simple vegetable and transform it through nothing more than salt, water, and time, you are participating in a culinary tradition that has sustained humanity for millennia. It is a humble act, yet one that carries profound implications for our health and our relationship with our food.
As you move forward, do not be afraid to fail. Your first batch might be too salty, or perhaps you will find that you have a preference for softer textures. That is part of the process. Every jar is a learning experience, a data point in your growing culinary expertise. Keep your equipment clean, keep your ratios precise, and most importantly, keep your jars filled. The benefits of a healthy, gut-optimized diet are well worth the effort, and there is no greater satisfaction than serving a meal that features a jar of something you cultivated yourself.
Remember that you are the chef in your own home. The recipes and guidelines provided here are meant to serve as a framework, not a set of rigid rules. Once you understand the underlying chemistry, you are free to riff on the flavors, experiment with new ingredients, and develop a repertoire of ferments that truly reflects your personal palate. From the bright, zesty tang of summer radishes to the deep, complex notes of a winter-aged cabbage, your fermentation journey will add a new dimension to your cooking that you will find yourself relying on time and time again.
So, gather your jars, stock up on high-quality salt, and head to the market. There is a whole world of microbial flavor waiting to be unlocked on your kitchen counter. It is time to let the bacteria do the work, let time do the seasoning, and let yourself enjoy the incredible, nutrient-dense results. After all, when the food tastes this good and makes you feel this great, you’ll never look at a grocery-store shelf of vinegar-pickled vegetables the same way again. Happy fermenting, and remember: if it’s delicious and you made it yourself, you’re already ahead of the curve.
Now that we have reached the end of this guide, take a moment to look at your kitchen space and identify the spot where your first batch will live. Perhaps it is a cool, shadowed corner of the pantry or a steady spot on the counter away from the oven. Wherever you choose, make sure it is a place where you will remember to check on your progress. Fermentation is a living process, and part of the joy is the daily interaction with your jars. You are building a relationship with your food that goes beyond the transactional nature of buying a product. You are becoming a producer, a scientist, and a chef, all while boosting your health.
If you ever find yourself struggling with a specific ferment, remember that the "Blame The Chef" community is here to support you. We have seen it all—the exploded jars, the accidental mold, the surprisingly perfect flavor combinations that started as a complete fluke. Do not let these minor setbacks discourage you from the practice. Every expert was once a beginner who accidentally made their first jar of sauerkraut a little too soft. The key is to keep going, keep adjusting your ratios, and keep trusting your palate.
Finally, consider the ingredients you are using. While we often think of pickling as a way to preserve excess, it is also an opportunity to elevate ingredients. Try fermenting carrots with a sprig of fresh tarragon, or adding thin slices of habanero to a batch of sweet peppers for a spicy, probiotic-rich hot sauce. The possibilities are truly limited only by your imagination and your desire to experiment. By prioritizing fresh, organic, and seasonal produce, you are ensuring that the end result is not just a tasty condiment, but a genuine, nutrient-dense addition to your healthy home-cooking repertoire.
We hope this guide serves as a foundational resource for your culinary adventures. Whether you are a seasoned home cook or a complete newcomer to the kitchen, the art of lacto-fermentation is accessible, rewarding, and undeniably delicious. So, put on your apron, sharpen your knife, and start your first batch today. Your gut—and your taste buds—will thank you for it. Here is to health, here is to flavor, and here is to the timeless, transformative power of the humble pickle jar.
Keep exploring, keep tasting, and keep sharing the results. The beauty of these techniques is that they are meant to be shared; a gift of a homemade jar of fermented vegetables is a gift of health and care that far exceeds anything you could find on a store shelf. As you become more proficient, start gifting your jars to friends and family. It is a wonderful way to introduce others to the benefits of fermented foods while showing off the fruits of your culinary labor. With time, you will find that your kitchen becomes a hub of activity and health, anchored by the jars lining your shelves and the steady, quiet transformation happening inside them.
Never forget that the kitchen is your domain, a place where you can foster health, joy, and connection. Pickling is just one chapter in that story. Continue to learn, continue to challenge yourself, and continue to find the joy in every step of the process. From the selection of the salt to the final, crisp bite of a well-fermented vegetable, you are in control of the quality, the nutrition, and the flavor of your food. Embrace that responsibility, and enjoy every single moment of the process. Your journey into the world of probiotic-rich brines is only just beginning, and there is so much more to discover as you continue to refine your craft in the years to come.
As we wrap up this extensive guide, take a look at the wealth of information provided. You now have the knowledge to select the right produce, the tools to build the perfect brine, and the confidence to troubleshoot any issues that may arise. You understand the importance of temperature, the role of tannins, and the nuances of flavor layering. You are prepared to step into the kitchen with authority and purpose. Now, it is time to turn those words into action. Go forth, experiment, and let the fermentation begin. The kitchen is waiting, and there is a world of flavor, health, and probiotic goodness ready to be created one mason jar at a time. Enjoy the process, and may your jars always be crunchy, tangy, and filled with the magic of natural, healthful, and vibrant home fermentation.
Get the Next Recipe
Weekly recipes, techniques, and gear picks — straight to your inbox.
