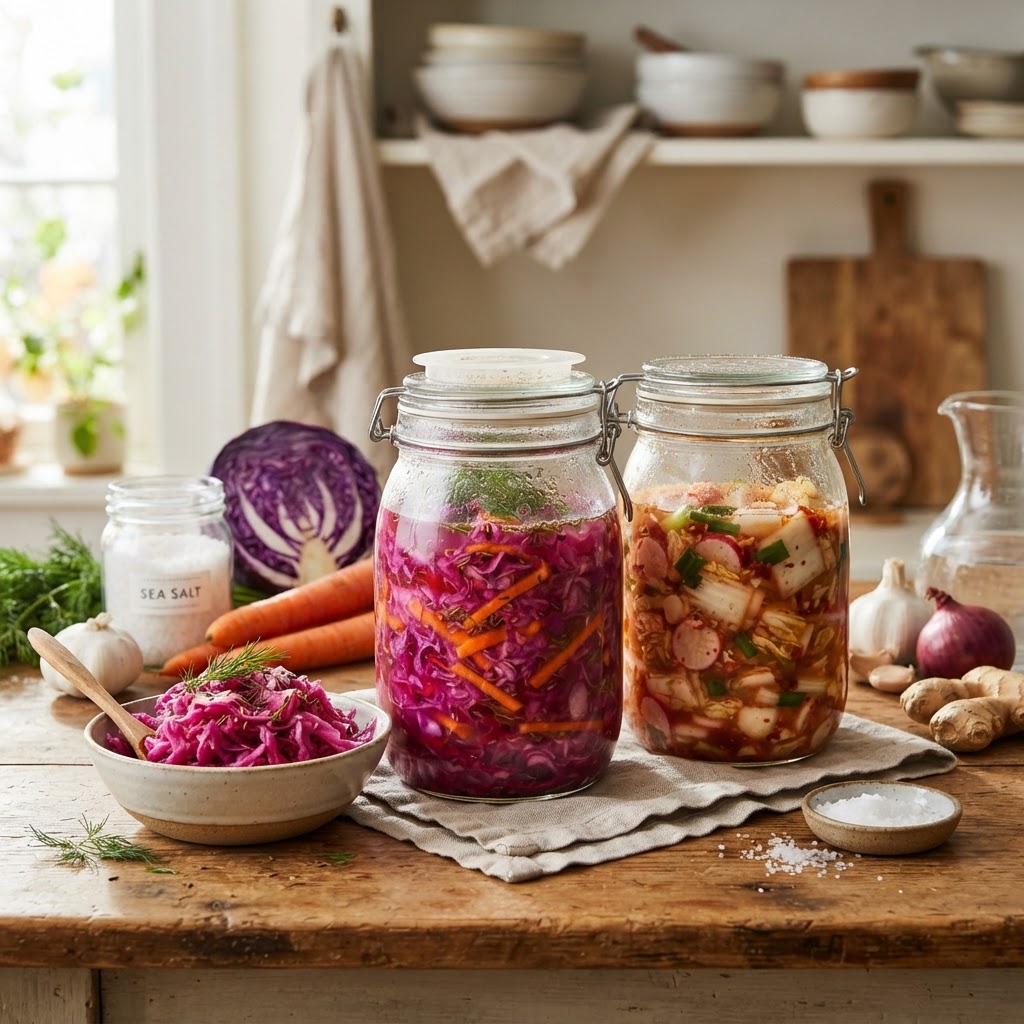
The Healthy Home Cook’s Guide to "Phytonutrient-Dense Ferments": Mastering Vegetable-to-Salt Ratios for Probiotic-Rich, Anti-Inflammatory Condiments
The modern kitchen has evolved into more than just a place to prepare meals; it is a laboratory for longevity and a sanctuary for gut health. We often focus on the heat of the stove or the sharpness of our knives, but some of the most profound transformations in food happen in the quiet, cool darkness of a pantry. Fermentation is an ancient culinary art that bridges the gap between basic preservation and advanced nutritional science. By harnessing the power of beneficial bacteria, we unlock a world of flavor and health benefits that simply cannot be replicated by store-bought, vinegar-based condiments. When you commit to making your own phytonutrient-dense ferments, you are taking control of your microbiome and inviting a deeper complexity into your daily meals.
Many home cooks feel intimidated by the science of fermentation, fearing the growth of harmful molds or the failure of a batch. The reality is that nature wants these vegetables to ferment; we are simply providing the perfect environment for the right microbes to thrive. By mastering the fundamental vegetable-to-salt ratio, you eliminate the guesswork that often discourages beginners. Once you understand the interplay between salinity, temperature, and time, you move from being a follower of recipes to a master of your own probiotic-rich creations. This process is not just about health; it is about reclaiming the ancestral wisdom of our ancestors, who understood that a healthy gut is the foundation of a healthy life.
As we dive into this guide, I encourage you to view every jar as a living experiment. You are cultivating a community of microbes that will, in turn, cultivate your own systemic health. These ferments are not merely sides or toppings; they are concentrated sources of anti-inflammatory powerhouses that can transform a dull plate of proteins into a vibrant, digestive-supporting feast. Whether you are fermenting classic cabbage kraut, crunchy carrots with ginger, or spicy radishes, the principles remain consistent and reliable. Let’s strip away the intimidation factor and equip you with the technical mastery required to stock your fridge with homemade, healing condiments that truly nourish your body from the inside out.
The Chemistry of Salt: Understanding Ratios and Safety
The most common mistake amateur fermenters make is relying on intuition rather than precision. While our ancestors may have salted by "feel," the modern home cook benefits immensely from using a digital kitchen scale. Salt is the primary selective agent in lacto-fermentation; it suppresses the growth of putrefactive bacteria while allowing the hardy, beneficial Lactobacillus species to flourish. Without the correct salinity, your vegetables will soften, rot, or harbor unwanted pathogens, rather than developing that signature tangy crunch.
The Golden Ratio for Success
The industry standard for successful vegetable fermentation is a 2% to 2.5% salt-by-weight ratio. This means if you have 1,000 grams of prepared vegetables, you should use between 20 and 25 grams of high-quality, non-iodized sea salt. Iodized salt can inhibit the fermentation process, so always reach for Celtic sea salt or pure kosher salt. If you are fermenting in a warm environment, lean toward the higher 2.5% end of the spectrum to ensure safety, whereas in cooler months, 2% is perfectly adequate for a steady, controlled ferment.
Why Precision Matters
Beyond safety, salt draws moisture out of the vegetable cells through the process of osmosis, creating the brine that will eventually submerge the vegetables. This submergence is critical because lacto-fermentation is an anaerobic process. Oxygen is the enemy of your ferment; it invites yeast and mold to the party, which can ruin the delicate balance of your jar. By accurately weighing your salt and vegetables, you guarantee that enough brine is produced to keep everything fully submerged, ensuring a clean, crisp, and safe result every single time you start a new batch.
"The magic of fermentation lies in the dance between salt and time; respect the chemistry, and the bacteria will reward you with unparalleled depth of flavor and gut-boosting nutrition."
Preparing Your Vegetables for Maximum Nutrient Density
The quality of your raw materials dictates the quality of your finished ferment. Always prioritize organic, locally grown produce whenever possible. Conventionally grown vegetables often contain pesticide residues that can negatively impact the fermentation process, and they frequently lack the vibrant, mineral-rich soil profiles that produce the best results. When you select your ingredients, look for firmness and freshness. Limp or aged produce will result in a soft ferment with a less-than-desirable texture, and since fermentation concentrates flavors, any bitterness in your produce will be amplified in the final product.
Washing and Cleaning
While it is important to clean your vegetables, you must be careful not to over-scrub them. The surface of the vegetable is home to the very wild microbes you need to jump-start your fermentation. A gentle rinse in cool, filtered water is enough to remove dirt and debris. Do not soak the vegetables, as this can leach out important nutrients and minerals before they even hit the jar. If you are using cabbage, you can discard the outermost, tough, or dirty leaves, but keep the rest of the vegetable intact to preserve the integrity of the cellular structure.
Slicing and Textural Consistency
The way you cut your vegetables impacts both the fermentation time and the final mouthfeel. For a traditional sauerkraut, thin ribbons are ideal because they release water quickly and pack densely into the jar. For root vegetables like carrots or radishes, coins or sticks work well, but keep in mind that larger chunks will take longer to ferment than finely grated pieces. Aim for uniformity in your cuts. When every piece of vegetable is approximately the same thickness, they will soften at the same rate, resulting in a consistent texture throughout the entire jar.
The Art of Packing and Managing Anaerobic Conditions
Once your salt is massaged into your vegetables and the brine has begun to flow, the next phase is the packing process. This is a physical labor of love. You need to pack the vegetables into your fermentation vessel as tightly as possible to force out air pockets. Using a clean fermentation weight or even a smaller glass jar filled with water can help hold the vegetables down below the surface of the liquid. If the vegetables are exposed to air, they will oxidize and likely develop unwanted molds, which is the most frequent cause of failure for home cooks.
Choosing the Right Vessels
For beginners, I always recommend wide-mouth glass mason jars fitted with an airlock lid. While you can use a basic jar and burp it daily, airlock systems allow carbon dioxide to escape while preventing oxygen from entering, which drastically reduces the risk of spoilage. Avoid metal containers, as the acidic environment created by lactic acid will corrode the metal and impart a metallic taste to your food. Glass or food-grade ceramic crocks are the gold standard for long-term, high-volume fermentation projects.
The Role of Temperature
Your fermentation station should be kept in a cool, dark place with a stable temperature. The ideal range for most vegetable ferments is between 65°F and 72°F (18°C–22°C). If your house is too cold, the fermentation will slow down significantly, potentially leading to a lackluster flavor profile. If it is too warm, the bacteria might work too quickly, resulting in soft or "mushy" vegetables. Consistency is key. If you are struggling to find a stable spot, a kitchen cabinet away from the oven or direct sunlight is usually the safest and most reliable location.
* Keep the jar out of direct sunlight to prevent UV damage to the bacteria.
* Ensure the liquid level is at least one inch above the vegetable matter.
* Check for signs of active bubbles as early as 24 to 48 hours.
* Label your jars with the date and the specific ratio used for future reference.
Incorporating Phytonutrients: Beyond Basic Kraut
Fermentation is not just about cabbage and salt. It is an opportunity to pack your diet with a diverse array of plant-based nutrients that are unlocked during the breakdown of vegetable cell walls. By adding aromatics and secondary ingredients, you can significantly boost the anti-inflammatory profile of your ferments. Think of your jars as a canvas for botanical experimentation. Adding ingredients like fresh turmeric, ginger, garlic, or even seaweed can provide a synergistic effect, where the fermenting process makes these phytonutrients more bioavailable and easier for your body to absorb.
Synergistic Additions
The "Wild" Factor
Don't be afraid to add fresh herbs like dill, basil, or cilantro to your ferments. However, keep in mind that delicate herbs can sometimes break down too much if fermented for long periods. If you want to keep your herbs vibrant, you can add them to the jar in the final few days of the fermentation process. Alternatively, you can use dried herbs throughout the process without worrying about them turning into mush. The beauty of these phytonutrient-dense additions is that they create unique flavor profiles that make your ferments a true culinary centerpiece rather than an afterthought.
"True health is not just about the absence of disease; it is the presence of vitality, which you build one bite at a time through the transformative power of living, fermented foods."
Troubleshooting and Signs of Success
Every ferment has its own personality, and learning to read your jars is a skill that develops with practice. You should expect to see bubbles—this is the visual proof that the Lactobacillus is hard at work, consuming the natural sugars and producing carbon dioxide and lactic acid. The smell should be clean, tangy, and slightly sour. If you ever open a jar and smell something foul, rotten, or genuinely unpleasant, discard the batch immediately. Trust your senses; if it smells wrong, it usually is.
Distinguishing Mold from Yeast
It is common to see a thin, white, powdery layer on the surface of your ferment, often called kahm yeast. While not technically harmful, it is a sign that the environment is slightly too aerobic and the flavor can be affected. Simply skim it off the top and ensure your vegetables are pushed further down into the brine. True mold, which appears fuzzy and colorful (often green, pink, or black), indicates that the batch has been contaminated and should be safely disposed of in your compost bin.
Knowing When It Is Ready
How long should you let it ferment? The answer depends on your personal taste preferences and your room temperature. A quick ferment of 5 to 7 days will provide a milder tang, perfect for those new to the taste of fermented foods. For a deeper, more acidic punch, let your vegetables sit for 2 to 4 weeks. Once you are satisfied with the flavor, move your jars to the refrigerator. The cold temperature will effectively "pause" the fermentation process, allowing you to enjoy your perfectly balanced condiments for months to come.
Scaling Up: Professional Tips for the Home Kitchen
Once you have mastered the basics, you may find yourself wanting to ferment more frequently. Scaling up doesn't mean changing the math; it just means having better organization. I recommend keeping a fermentation logbook where you record the date, the ingredients, the salt percentage used, and the ambient temperature of your kitchen. Over time, this data will allow you to fine-tune your results, helping you understand how variations in your kitchen environment influence the speed and flavor of your ferments.
Workflow Efficiency
Investing in Quality Tools
While you can get by with basic household items, a few specialized tools can make your life much easier as you scale up. A mandoline slicer will ensure that your vegetables are sliced with professional-grade precision, which is crucial for even fermentation. High-quality glass weights are a much cleaner, more sustainable alternative to using makeshift weights like small jars or rocks. Investing in these minor tools will pay off in the long run by ensuring the consistency and safety of every batch you produce.
Expanding Your Culinary Repertoire
The world of fermentation goes far beyond simple sauerkraut. Once you are comfortable with the basics, you can experiment with lacto-fermented salsas, pickled jalapeños, or even fermented fruit like apples or plums. The same 2% to 2.5% salt rule applies to almost all vegetable-based ferments. You are only limited by your imagination and the seasonality of the produce available to you. By rotating your ferments throughout the year, you ensure that you are receiving a diverse range of nutrients that support your microbiome in different ways.
Seasonal Fermentation Cycles
Spring is the perfect time for radishes and tender spring greens, while summer offers an abundance of cucumbers, zucchini, and peppers. Autumn and winter are the seasons for hearty root vegetables like carrots, beets, and cabbage, which hold up exceptionally well to longer fermentation times. By eating seasonally, you align your diet with the natural rhythms of the earth, ensuring that your gut bacteria are exposed to a rotating array of plant fibers, which is essential for maintaining high levels of bacterial diversity in your gut.
The Holistic Benefit
When you integrate these ferments into your daily meals, you are doing more than just adding flavor. You are providing your body with a steady supply of live enzymes and probiotics that assist with digestion and nutrient absorption. Many people report improved energy levels, clearer skin, and enhanced immune function after making fermented vegetables a consistent part of their diet. It is an easy, cost-effective way to take responsibility for your health, and the culinary rewards are truly unmatched.
Final Thoughts
Embarking on your fermentation journey is one of the most rewarding culinary commitments you can make. It forces you to slow down, pay attention to the details, and trust in the natural processes that have sustained humanity for millennia. By mastering the vegetable-to-salt ratio and maintaining a clean, anaerobic environment, you have all the tools necessary to produce world-class, phytonutrient-dense condiments right in your own kitchen. You will find that as your skill grows, so does your appreciation for the complex, tangy, and refreshing flavors that only a slow-fermented vegetable can offer.
Remember that perfection is not the goal; progress is. Even if your first batch isn't exactly to your liking, you have learned the mechanics and the chemistry, which will make your next attempt even better. Don't be afraid to experiment with spices, textures, and different vegetable combinations. The goal is to make healthy eating a sustainable, enjoyable, and integral part of your life. Every jar of kraut or pickles you create is a victory for your health and a testament to your capability as a home cook.
Stay curious, stay consistent, and keep your ferments tucked away in the shadows where the real magic happens. Before you know it, your fridge will be stocked with a variety of gut-healing, anti-inflammatory treasures that will elevate every meal you serve. There is no greater satisfaction than looking at a row of colorful, bubbling jars and knowing that you created them from scratch, using nothing more than a little bit of salt, some fresh vegetables, and the passage of time. Welcome to the wonderful, living world of fermentation. Happy culturing, and remember: if it’s a little bit funky, it’s exactly where it needs to be.



Get the Next Recipe
Weekly recipes, techniques, and gear picks — straight to your inbox.
