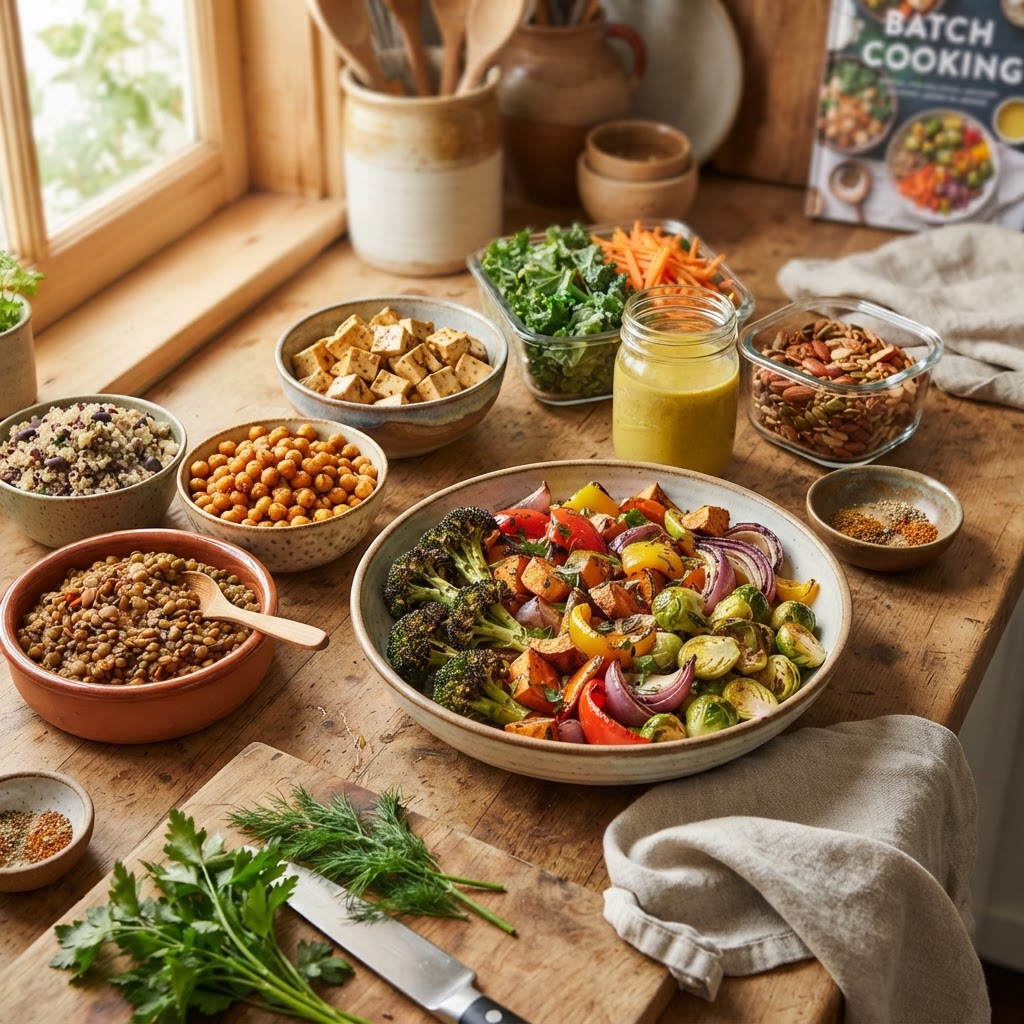
The Healthy Home Cook’s Guide to "Plant-Forward" Batch Cooking: How to Transform Seasonal Vegetables into High-Protein, Ready-to-Eat Components
The modern kitchen is often painted as a battlefield of competing priorities, where the dream of a nourishing, home-cooked meal collides head-on with the reality of a packed calendar. We have all stood in front of an open refrigerator at 7:00 PM, exhausted and uninspired, only to reach for a delivery app or a processed snack because the idea of chopping, sautéing, and seasoning feels like an impossible climb. "Plant-forward" cooking is often dismissed as a chore, a path to bland salads that leave you hungry an hour later. However, the secret lies not in the labor of daily cooking, but in the intelligence of batch-prep components. By shifting our mindset from "making a meal" to "building a pantry of high-protein, plant-based assets," we can reclaim our kitchens without sacrificing our sanity or our health.
To master the art of the plant-forward kitchen, one must learn to view produce through the lens of a professional line cook. In a high-end restaurant, we never start a dinner service by peeling a single potato; instead, we rely on mise en place, the sacred culinary practice of having every component prepped, portioned, and ready to go. When you bring this logic into your home, you stop being a slave to the recipe and start becoming a curator of your own fridge. This approach isn't about eating the same leftovers for five days straight; it is about having flavorful, texturally complex foundations that can be transformed into wildly different meals in under ten minutes. The transition from raw vegetable to high-protein, ready-to-eat staple is the bridge between chaotic snacking and intentional, vibrant living.
In this guide, we are going to move beyond basic roasting techniques and explore how to infuse plant-based proteins—beans, legumes, ancient grains, and tofu—with deep, savory flavors that hold up to the refrigerator test. We will discuss the crucial ratios of aromatics and fats, the importance of acid and salt balance in long-term preservation, and how to store these components so they retain their integrity for days. Whether you are a dedicated vegan or simply someone looking to incorporate more color and fiber into a protein-heavy diet, these techniques will change the way you interact with your groceries. Prepare to stop blaming the chef and start becoming the master of your own culinary rhythm.
The Foundation of Flavor: Mastering the Aromatics
Every great plant-forward component begins with a solid aromatic base. In professional kitchens, we call this the sautéed foundation, a mixture of finely diced onions, carrots, celery, and garlic that provides the "umami backbone" for whatever follows. When you are batch-prepping, you shouldn't just chop these; you should cook them down slowly until they are caramelized and sweet. This process, known as sweating or softening, removes the harsh raw bite of the vegetables and concentrates their natural sugars. By doing this in a large batch at the start of the week, you create a flavor-bomb base that can be stirred into cooked lentils, mixed with grains, or used as a sauce thickener later on.
To execute this, heat your heavy-bottomed pot or Dutch oven over medium heat. Add a generous amount of high-quality extra virgin olive oil or avocado oil, ensuring the bottom of the pan is well-coated. Once the oil shimmers, add your aromatics. The key here is patience. Don't rush to high heat, as you want the vegetables to become translucent and soft, not charred. If the mixture starts to brown too quickly, turn the heat down and add a tiny splash of water or vegetable stock to deglaze the pan and reintroduce moisture. This process should take at least 15 to 20 minutes to reach maximum flavor depth.
The Power of "Umami Boosters"
When working with plant-forward batch cooking, you need to compensate for the lack of animal fat. The secret to making plant-based components feel "meaty" and satisfying is to incorporate umami-rich ingredients during the cooking process. Adding a tablespoon of tomato paste, a splash of soy sauce or tamari, or a sprinkle of nutritional yeast during the final minutes of sautéing will transform your humble aromatics. These ingredients act as flavor intensifiers, giving your finished product a savory depth that lingers on the palate and signals to the brain that the meal is complete and satiating.
"True culinary mastery is not about the complexity of the dish, but the consistency of the components. When you prep your aromatics with care, every meal that follows inherits that foundation of depth, making even the simplest grain bowl feel like a restaurant-quality experience."
Legumes and Pulses: The High-Protein Workhorses
Beans and lentils are the undisputed kings of the plant-forward kitchen, but they are often treated as an afterthought. To elevate these humble ingredients into a high-protein staple, you must cook them with intent. Forget the canned versions—unless you are in a true pinch—and learn to cook dried legumes in a flavored poaching liquid. Whether it's chickpeas, black beans, or French green lentils, the cooking liquid is your opportunity to infuse flavor into the very heart of the protein. Use a combination of vegetable stock, aromatics like bay leaves and thyme, and even a smashed head of garlic to create a broth that elevates the beans beyond mere texture.
When cooking, ensure your legumes are seasoned at the right time. A common myth suggests that adding salt early makes beans tough; in reality, salting the soaking or cooking water is essential for creamy interiors and intact skins. Aim for a salt-to-water ratio that tastes like a well-seasoned soup. Once the beans are tender but still holding their shape, drain them (reserving a bit of that flavorful liquid) and store them in airtight containers. These beans can be tossed into salads, crushed into a protein-rich dip, or fried quickly in a skillet for a crispy, satisfying texture.
Strategic Texture: Crispy vs. Creamy
Variety is the antidote to "batch-prep boredom." If you cook five cups of chickpeas, don't store them all in the same state. Keep half of them in their cooking liquid for a creamy, stew-like consistency that works well in soups or blended into hummus. Take the other half, pat them dry with a clean kitchen towel, toss them in olive oil and smoked paprika, and roast them in a 400°F oven for 20 minutes. The resulting crispy chickpeas provide that vital "crunch factor" that many plant-based dishes lack. Having two distinct textures from the same ingredient doubles your culinary options.
Ancient Grains as Nutrient-Dense Bases
Grains are the perfect canvas for your plant-forward creations. While white rice has its place, focusing on nutrient-dense ancient grains like farro, quinoa, freekeh, and black barley provides more protein, fiber, and complex carbohydrates to keep you energized. The trick to perfect batch-cooked grains is to treat them like pasta. Cook them in a large volume of salted, boiling water rather than steaming them in a tight ratio. This allows the grains to circulate, ensuring an even, perfectly al dente texture every time. Drain them in a fine-mesh colander once they reach that sweet spot of tenderness, then immediately spread them onto a baking sheet to cool.
This cooling step is vital for two reasons. First, it prevents the grains from continuing to cook in their own steam, which would result in mushy, clumped-together leftovers. Second, it allows you to season your grains while they are still warm. A toss of high-quality olive oil, a squeeze of lemon juice, and a pinch of flaky sea salt while the grains are cooling ensures that every single bite is seasoned from the inside out. Once they have cooled to room temperature, they are ready to be stored in the refrigerator, where they will maintain their bite for up to five days.
Flavor Infusion During Cooking
To make your grains more than just a filler, consider incorporating aromatics into the cooking water. Throwing in a cinnamon stick when cooking quinoa gives it a subtle warmth that works beautifully in savory breakfast bowls. Adding a knob of ginger and a star anise to the water for rice or farro creates an Asian-inspired base that pairs perfectly with steamed vegetables and a drizzle of sesame oil. These small, flavor-focused additions during the boiling process mean you don't have to work as hard to make the meal taste good when you’re hungry later in the week.
Roasting Vegetables: The Art of Caramelization
Roasting is the gold standard for transforming raw vegetables into sweet, tender, and deeply flavorful components. However, most home cooks make the mistake of overcrowding their baking sheets, which results in "steamed" vegetables that lack that desired Maillard reaction. The secret to a perfect roast is simple: surface area. Use large, heavy-rimmed baking sheets and ensure that no two pieces of vegetable are touching. This allows the hot, dry air of the oven to circulate around each piece, crisping the edges while maintaining a buttery, tender center.
Temperature control is equally critical. For dense, root vegetables like carrots, beets, and sweet potatoes, aim for a consistent 425°F (220°C). This high heat is necessary to trigger the caramelization of natural sugars. For more delicate vegetables like cauliflower, broccoli, or zucchini, a slightly lower temperature of 400°F (200°C) is preferred to ensure they don't burn before the centers are fully cooked. Always toss your vegetables in oil, salt, and your chosen spices before placing them on the pan. Never salt the vegetables too far in advance, as the salt will draw out moisture and prevent them from browning properly.
"A well-roasted vegetable is not a side dish; it is a building block. When you master the science of caramelization, you create a depth of sweetness and complexity that makes meat unnecessary, proving that flavor is a function of technique, not just ingredients."
Seasoning Strategies for Roasted Components
Don't be afraid to experiment with spice blends when roasting in batches. A Middle Eastern spice profile using cumin, coriander, and smoked paprika works perfectly for roasted cauliflower or carrots. An Italian-inspired blend of dried oregano, garlic powder, and fennel seeds makes zucchini or eggplant a natural companion for pasta or grain bowls. By keeping your roasted vegetables simple but boldly spiced, you create a library of components that can be mixed and matched with your beans and grains to create a different culinary profile every single night of the week.
The "Green" Component: Blanching and Emulsions
While roasted vegetables are fantastic, your weekly meal prep is incomplete without a fresh, vibrant green element. Blanching—the process of briefly boiling vegetables like kale, broccoli rabe, or asparagus, followed by a shock in an ice bath—is the best way to retain their bright color and snap. This technique locks in the chlorophyll, preventing the vegetables from turning that drab, olive-drab color often associated with reheated greens. Once blanched, these greens can be stored for days and easily tossed into a hot pan with garlic and chili flakes just before serving.
To take your greens to the next level, you must master the art of the emulsified sauce. A jar of homemade vinaigrette or a creamy tahini-lemon dressing can turn a collection of bland components into a vibrant, restaurant-style meal. When making a dressing, always follow the standard ratio of three parts oil to one part acid. Whisk in a teaspoon of Dijon mustard or a small amount of honey; these act as stabilizers that keep the oil and acid from separating in the fridge. Keeping one "acid-forward" dressing and one "creamy" dressing in your fridge at all times gives you the flexibility to pivot between a light, zesty salad and a rich, hearty grain bowl.
Tips for Storing Your Greens
Bringing It All Together: The Assembly Model
Once you have your aromatics, legumes, grains, roasted vegetables, and fresh greens prepped, you have successfully built a culinary framework. The beauty of this system is that it removes the need for complex, step-by-step recipes on a Wednesday night. Instead, you utilize the assembly model. Start with your base (the grains), add your protein (the legumes), pile on your textures (the roasted vegetables), and finish with your brightness (the blanched greens and a dressing). This process takes no more than five minutes, and because you prepped with flavor in mind, the result is always complex, balanced, and deeply satisfying.
If you find yourself missing the "heft" of a traditional meal, don't worry about adding meat. Focus on adding high-impact fats. A handful of toasted nuts, a generous sprinkle of feta or goat cheese, or half an avocado can elevate a plant-forward bowl from a "snack" to a meal. These additions provide the caloric density and mouthfeel that make the transition to a plant-forward diet sustainable in the long term. You aren't just eating vegetables; you are eating a thoughtfully curated experience that you designed for your own palate.
Troubleshooting the "Bland" Meal
If you find your bowl lacking, go back to the professional chef's checklist: Salt, Acid, Heat, and Texture.
Is it missing salt*? Don't just add more plain salt; try a dash of soy sauce or a sprinkle of sea salt.
Is it missing acid*? A squeeze of lime or a quick pickle of red onion can make the whole dish pop.
Is it missing heat*? A drizzle of chili crisp or a fresh jalapeño can provide the necessary kick.
Is it missing texture*? A handful of toasted pumpkin seeds or fried onions can bridge the gap between "mushy" and "memorable."
Final Thoughts
The goal of this guide was never to turn you into a short-order cook for your own family, but to show you how to work smarter, not harder, in the kitchen. By focusing on batch-prep components, you aren't just "cooking ahead"; you are creating a system that honors your time, your health, and your budget. The transition to a plant-forward lifestyle is often difficult because we treat plants as sides rather than foundations. When you shift your perspective to include grains, legumes, and aromatics as the stars of the show, you realize that flavor and nutrition are not mutually exclusive.
As you begin to build your weekly rotation, remember that your kitchen is a learning laboratory. If your first batch of roasted carrots comes out a bit soft, or your beans are a little bland, do not be discouraged. These are not failures; they are data points. Take note of the temperature, adjust the seasoning next time, and keep moving forward. The "Blame The Chef" philosophy is all about empowerment, and there is no greater empowerment than looking into a fridge filled with vibrant, healthy, and ready-to-eat components. You are the architect of your own nourishment, and with these tools, you are well on your way to becoming the master of your kitchen. Enjoy the process, experiment with the flavors, and remember that every meal is an opportunity to cultivate a healthier version of yourself.
This is a lifestyle change that rewards consistency over intensity. You do not need to spend ten hours in the kitchen every Sunday to see the benefits. Start with one grain, one legume, and one vegetable roast. Once you master the rhythm of these three, you can expand your repertoire. The goal is to make the "healthy" choice the "easy" choice. When the components are already waiting for you, you won't need to reach for that delivery app. You will have a better, fresher, and more flavorful option waiting right behind the refrigerator door. Embrace the preparation, trust your palate, and most importantly, enjoy the delicious results of your hard work. Happy cooking!
Get the Next Recipe
Weekly recipes, techniques, and gear picks — straight to your inbox.
