The Home Cook’s Guide to Blade Geometry: Mastering Edge Angles and Grind Types for Precision Vegetable and Protein Prep
Walk into any professional kitchen, and you will quickly notice that the hum of activity is punctuated by the rhythmic, sharp sound of steel meeting cutting boards. Many home cooks assume that the secret to becoming a master in the kitchen lies in the complexity of a recipe or the provenance of rare ingredients. While those elements certainly play a role in the final dish, the actual physical barrier between a mediocre meal and a restaurant-quality experience is often just a matter of millimeters—or, more accurately, degrees. Understanding the geometry of your knife is not merely a theoretical exercise for tool nerds; it is the fundamental bridge between struggling to process a stubborn butternut squash and gliding through it with effortless grace. When you stop blaming your knife for poor performance and start understanding how its edge is shaped, you begin to control the consistency of your cooking, the release of flavors, and the safety of your workspace.
The term blade geometry might sound like something pulled from an engineering textbook, but in the culinary world, it is the bedrock of efficiency. Every knife is essentially a wedge, and how that wedge is tapered determines how it displaces the material it encounters. If you have ever felt your blade get "stuck" halfway through a carrot, you have experienced a failure in geometry, where the thickness of the spine creates too much friction against the cell walls of the vegetable. By learning the language of grinds, bevels, and edge angles, you gain the ability to select the right tool for the right task every single time. This is the difference between crushing the delicate structure of a basil leaf and slicing it with surgical precision, or shredding a prime cut of protein versus rendering it into clean, uniform portions that cook evenly and present beautifully.
In this guide, we are going to peel back the mystery of the steel and look at the physics of the cutting edge. We will move beyond the basic concept of "sharpness" and explore the specific angles that allow a blade to either survive the rigors of butchery or perform the delicate, whisper-thin cuts required for fine dining. Whether you are working with a hardened Japanese carbon steel gyuto or a robust, European-style chef’s knife, the principles of edge maintenance and geometry remain universal. We will explore how your cutting board affects your edge, why the secondary bevel is your best friend in the kitchen, and how you can tailor your knives to handle everything from root vegetables to delicate proteins. Prepare to shift your perspective on your cutlery, because once you master the geometry, you will never look at your knife block the same way again.
The Anatomy of the Edge: Understanding Bevels and Angles
To truly master your knives, you must first understand that a blade is not a single flat line; it is a complex slope. When we talk about an edge angle, we are referring to the angle at which the two sides of the blade meet to form the cutting edge. For most home cooks, the general rule of thumb is that a lower angle (a thinner edge) provides superior slicing performance, while a higher angle (a thicker, more obtuse edge) provides greater durability. Finding the "sweet spot" for your specific knives is the first step toward true kitchen proficiency.
Most western-style knives, such as those made by Wüsthof or Zwilling, typically come from the factory with an edge angle between 20 and 25 degrees per side. This is designed for durability and the ability to withstand the "rocking" motion often used by home cooks on heavier cutting boards. Conversely, Japanese knives, like those from Shun or Miyabi, are often ground to a much tighter angle, typically between 12 and 15 degrees. This results in an incredibly thin edge that is designed for precision, slicing, and clean cuts, but it is also far more susceptible to chipping if it strikes bone or frozen food.
The edge angle of your knife is the defining factor in its personality. A 15-degree edge is a scalpel, designed for finesse; a 25-degree edge is a battle-axe, designed to endure the chaotic environment of a busy prep station. Understanding this balance is the key to matching your tool to the task at hand.
Defining the Primary and Secondary Bevels
Beyond the main angle, you must consider the distinction between the primary bevel and the micro-bevel. The primary bevel is the main taper that runs from the spine of the knife down toward the edge. This determines the overall "wedge" effect. If your knife has a full flat grind, it will slice through dense vegetables with less resistance because the taper is gradual and thin. The secondary bevel, or the micro-bevel, is the very tip of the edge where you actually perform your sharpening.
How Angles Affect Cutting Physics
When you increase the angle of your knife, you are effectively increasing the amount of force required to push the knife through food. This is due to the mechanics of the wedge. A wider wedge displaces material more aggressively. This is beneficial for heavy-duty tasks like chopping through lobster shells or splitting a pumpkin, but it is detrimental when you are trying to julienne shallots for a delicate vinaigrette.
Why Consistency is King
Regardless of the angle you choose, the most important factor is consistency. If you sharpen one section of your blade at 15 degrees and another at 22 degrees, the knife will feel erratic. You will find that some parts of the edge feel razor-sharp while others seem to drag. When honing or sharpening, always strive to maintain a constant angle across the entire length of the blade to ensure that your cutting stroke is predictable from heel to tip.
Grind Types: Why the Shape of the Steel Matters
The grind of a knife refers to the shape of the blade cross-section. While the edge angle is the final sharpened point, the grind is the path the knife takes as it moves through the food. The grind dictates how much "stiction"—or static friction—the knife experiences while in use. If you have ever felt a suction effect when slicing into a large potato, you have dealt with a blade that has poor geometry for that specific task.
The most common grind for a standard chef's knife is the flat grind, where the blade tapers in a straight line from the spine to the edge. This offers a great balance between structural integrity and cutting performance. However, there are more specialized grinds designed for specific culinary needs. A hollow grind, for example, features a concave taper that creates a very thin edge while maintaining a thicker spine. These blades are incredibly sharp and excel at slicing soft foods, but they lack the structural support for heavy chopping.
The Convex Grind: Durability Meets Performance
The convex grind, often seen on traditional Japanese blades like the deba or kiritsuke, involves a rounded, outward curve from spine to edge. This is arguably the most efficient geometry for food separation. As the blade enters the food, the convex shape helps push the pieces apart, reducing friction and preventing the "wedging" effect. This is the gold standard for high-performance prep knives used for heavy protein work or dense root vegetable processing.
The Chisel Grind: Specialized Precision
A chisel grind means the knife is sharpened on one side only, with the other side left perfectly flat. This is common in traditional Japanese yanagiba (sushi knives). The benefit here is extreme sharpness and the ability to track perfectly straight through a protein. Because there is only one bevel, there is no "steering" of the knife, which allows for clean, translucent slices of sashimi that are impossible to achieve with a double-beveled European knife.
Never underestimate the power of the grind. If you are struggling with your knife performance, the issue may not be that it is dull, but that the grind profile is not suited to the density of the food you are preparing. Match your grind to your ingredient for the most seamless prep work.
Selecting Your Grind for Home Tasks
For the average home cook, a hybrid approach is usually best. A knife with a slightly convex edge geometry provides the best of both worlds: the strength to handle the occasional squash or chicken wing, and the finesse to slice a tomato without bruising the flesh. Avoid overly hollow-ground knives for daily driver tasks, as they can be brittle and prone to micro-chipping on the edge.
Edge Maintenance: Honing vs. Sharpening
One of the biggest misconceptions in the culinary world is that honing and sharpening are the same thing. They are not. If you want to maintain a high level of performance, you must master both processes. Think of it this way: sharpening is the process of removing metal to create a new edge, while honing is the process of realigning the existing edge.
A knife edge is microscopically thin, and with every cut, that edge gets pushed slightly out of alignment. Even if the steel is still sharp, if the edge is rolled or bent, the knife will feel dull. A honing steel (or a ceramic rod) is designed to push that microscopic edge back into alignment. You should hone your knife before every major cooking session. It takes only thirty seconds, but it significantly extends the time you can go between professional sharpenings.
The Science of the Burr
When you sharpen your knife on a stone, you are intentionally creating a burr. A burr is a tiny flap of metal that forms on the opposite side of the edge you are currently grinding. If you don't remove the burr, your knife will feel like it is tearing rather than slicing. Once you have created a consistent burr along the entire length of the blade, you must "de-burr" by alternating sides on your finest stone or using a leather strop.
Frequency of Maintenance
How often you sharpen depends on the type of steel and the frequency of use. For a standard stainless steel home knife, a professional-style sharpening on water stones once every three to six months is usually sufficient, provided you are honing regularly. If you use a high-carbon steel knife, you may find you want to touch up the edge more frequently to keep it at its peak performance.
The Role of Strops
A leather strop is an underrated tool in the home kitchen. After you have sharpened your knife, a few passes on a loaded leather strop will polish the edge to a mirror finish and remove even the most stubborn micro-burrs. This results in an edge that glides through protein as if it were butter. Always stroke away from the edge to avoid cutting the leather, and keep your angle consistent with your sharpening angle.
The Impact of Cutting Boards and Technique
You could have the most perfectly ground blade in the world, but if you are using a glass or marble cutting board, you will destroy that edge in a single afternoon. Cutting board material is the unsung hero of blade longevity. Hard surfaces force the metal to deform, which is the fastest way to turn a high-performance edge into a useless scrap of metal.
For the preservation of your edge, nothing beats end-grain wood or soft plastic (like high-density polyethylene). Wood boards are gentle on steel; when the knife hits the surface, the wood fibers yield, allowing the edge to sink in just a hair, which protects the bevel from lateral force. Glass, granite, and ceramic boards provide zero "give," meaning the full impact force is absorbed by the very tip of your knife edge.
The "No-Drag" Technique
When slicing, your goal should be to move the knife in a slight slicing motion rather than a straight downward push. By using a draw cut or a push-cut, you extend the contact point between the blade and the food over a larger area. This reduces the pressure on any single point of the blade and makes for a cleaner cut that keeps the moisture inside the protein or vegetable.
Safety and Geometry
Safety in the kitchen is directly related to your edge geometry. A sharp knife is safer than a dull one because it requires less force to initiate the cut. When a knife is dull, you end up applying pressure to overcome the resistance, which increases the likelihood of a slip. A well-maintained, properly ground edge "bites" into the food immediately, giving you complete control over the path of the blade.
A sharp knife is a predictable knife. When you aren't fighting your tools, you are free to focus on your technique and the flavors you are creating. Invest in your edges, and your hands will thank you with fewer slips and better, more consistent prep work.
Managing the Heel
For home cooks, the heel of the chef's knife is the most important part for heavy work. When chopping through tough vegetables, move the food toward the heel of the blade, where the metal is thickest and the leverage is greatest. Avoid using the tip for high-force tasks, as the tip is thin and more prone to bending or snapping.
Mastering Prep for Different Ingredients
Different ingredients demand different approaches. A leek requires a delicate touch and a sharp tip for fine dicing, while a thick piece of pork shoulder requires a robust heel and a stable, high-angle edge. Understanding how these ingredients interact with your blade geometry allows you to adapt your movements accordingly.
When working with proteins, you want an edge that is stable. If you are butchering chicken or trimming a roast, a slight micro-bevel (sharpening at 20 degrees rather than 15) will prevent the edge from folding under the resistance of connective tissue. Always wipe your blade clean between tasks to prevent cross-contamination and to remove build-up that can create drag during the next slice.
The Art of the Vegetable Dice
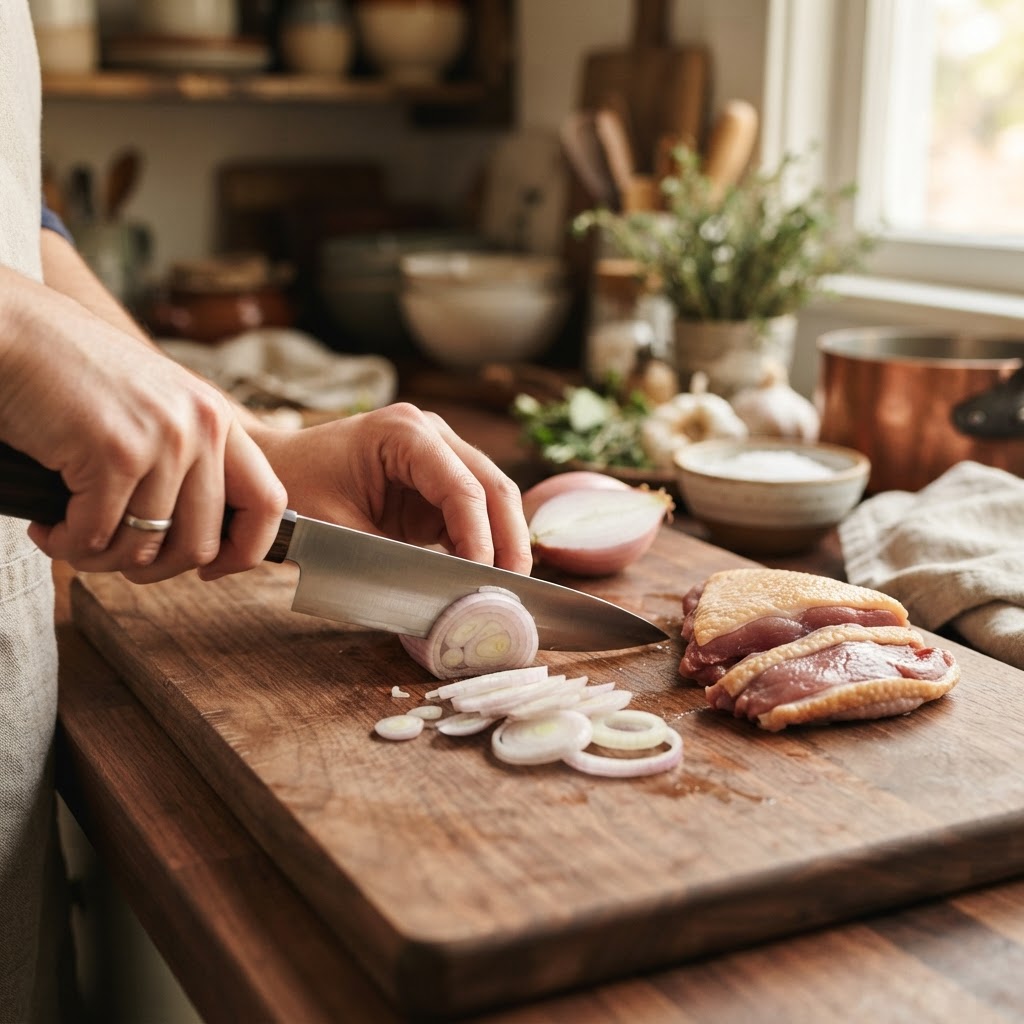
For vegetables like onions and peppers, consistency is the goal. Use the claw hand technique to guide your blade, allowing the side of the knife to rest against your knuckles. By keeping your knife blade thin through the grind, you ensure that the vegetable pieces fall away cleanly rather than sticking to the side of the blade. This is essential for achieving a professional-looking brunoise.
Handling Herbs and Delicate Greens
Delicate herbs require a slicing motion, not a chopping motion. If you chop herbs with a dull knife or a heavy, thick blade, you will crush the cell walls, causing the herbs to turn black and lose their aroma within minutes. A razor-sharp, thin-ground knife will slice through herbs, leaving them vibrant, aromatic, and intact for hours.
Professional Tips for the Home Chef
If you want to move from home cook to home chef, you need to treat your tools like a professional. This means more than just sharpening; it means maintenance, storage, and respect. Never put your high-quality knives in the dishwasher; the heat and detergent are lethal to the tempering of the steel and the edge geometry you have worked so hard to maintain.
Store your knives on a magnetic strip or in an in-drawer block. Never toss them into a drawer with other utensils; even the best steel will lose its edge if it is rattling around against metal spoons and forks. Keep your knives dry. Moisture is the enemy of high-carbon steel and can lead to rust spots that disrupt the smooth geometry of the blade surface.
Investing in the Right Stones
You don't need a massive collection of stones to get a professional result. A single combination stone with a 1,000-grit side and a 3,000-grit side is all you need for 95% of your maintenance. The 1,000-grit side is for establishing the edge and removing minor damage, while the 3,000-grit side is for polishing and refining.
The Importance of Feedback
Pay attention to the sound and feel of the knife as you cut. If you hear a "crunch" when you hit the board, you are pushing too hard or your board is too hard. If you feel the knife sticking, you need to adjust your angle. Learning to "listen" to your knife is a sensory skill that distinguishes the amateur from the master.
Final Thoughts
The journey to becoming a master of your culinary environment is not about buying the most expensive knife in the store; it is about understanding the simple, elegant geometry that allows a piece of metal to perform like an extension of your own hand. When you stop blaming the chef—or the equipment—and start investing in the science of the blade, you empower yourself to be more efficient, more creative, and more precise.
We have covered the importance of edge angles, the role of different grind profiles, the necessity of proper maintenance, and the impact of your work surface. By integrating these practices into your routine, you are doing more than just sharpening steel; you are refining your craft. The difference between a home-cooked meal and a truly elevated culinary experience is often found in the uniformity of your dicing, the precision of your slices, and the respect you afford your tools.
Take your time with your knives. Don't be afraid to experiment with different stones, learn how the burr forms, and witness the change in your cooking as your edges improve. As you become more comfortable with your blade geometry, you will find that your prep time decreases, your ingredients look better, and—perhaps most importantly—your time in the kitchen becomes significantly more enjoyable. Keep your edges sharp, your techniques refined, and your love for the process at the center of everything you do.
The kitchen is a place of constant learning, and every time you pick up a knife, you have an opportunity to practice these skills. Do not rush the process. If you find yourself frustrated, put the knife down, revisit the basics of your edge angle, and remember that every master chef once started exactly where you are now. By focusing on the fundamentals, you are building a foundation that will serve you for the rest of your life.
Thank you for joining me on this deep dive into the world of blade geometry. I hope this guide helps you unlock new levels of precision and confidence in your daily cooking. Whether you are prepping a simple salad for a quick lunch or executing a complex, multi-course dinner for friends, remember that the secret to the perfect result is right there in your hands. Keep practicing, keep honing, and most importantly, keep cooking with passion and purpose. Your kitchen is your studio, and your knife is your most vital instrument. Treat it well, and it will ensure that every single dish you create is a masterpiece of precision and flavor.
Remember, the goal isn't perfection from the first day; it is the iterative improvement that comes with understanding your tools. Every time you sharpen, you learn more about the steel. Every time you slice, you learn more about the density of your ingredients. Over time, these small observations coalesce into a deep, intuitive knowledge that makes you a faster, more accurate, and more effective cook. Stay curious, stay sharp, and continue to blame the chef—yourself—only when you aren't pushing to learn something new.
In the final assessment, the knife is just a tool, but it is a tool that defines your relationship with your ingredients. If you can bridge the gap between the geometry of the blade and the requirements of the food, there is nothing in the culinary world that you cannot achieve. Continue to explore, continue to refine your edges, and most of all, enjoy the process of turning raw ingredients into something spectacular. Your journey toward culinary mastery is only just beginning, and there is so much more to discover at the edge of the blade.
So, go ahead and clear off that cutting board, grab your favorite stone, and start sharpening your skills. From the delicate, translucent slice of a scallion to the hearty, firm cut through a root vegetable, your ability to manipulate texture and flavor starts with how you handle your edge. It’s time to move forward, embrace the physics of the kitchen, and see how much better your cooking can become when you truly understand the geometry beneath the surface. Happy cooking, and may your edges always be keen.
Get the Next Recipe
Weekly recipes, techniques, and gear picks — straight to your inbox.
