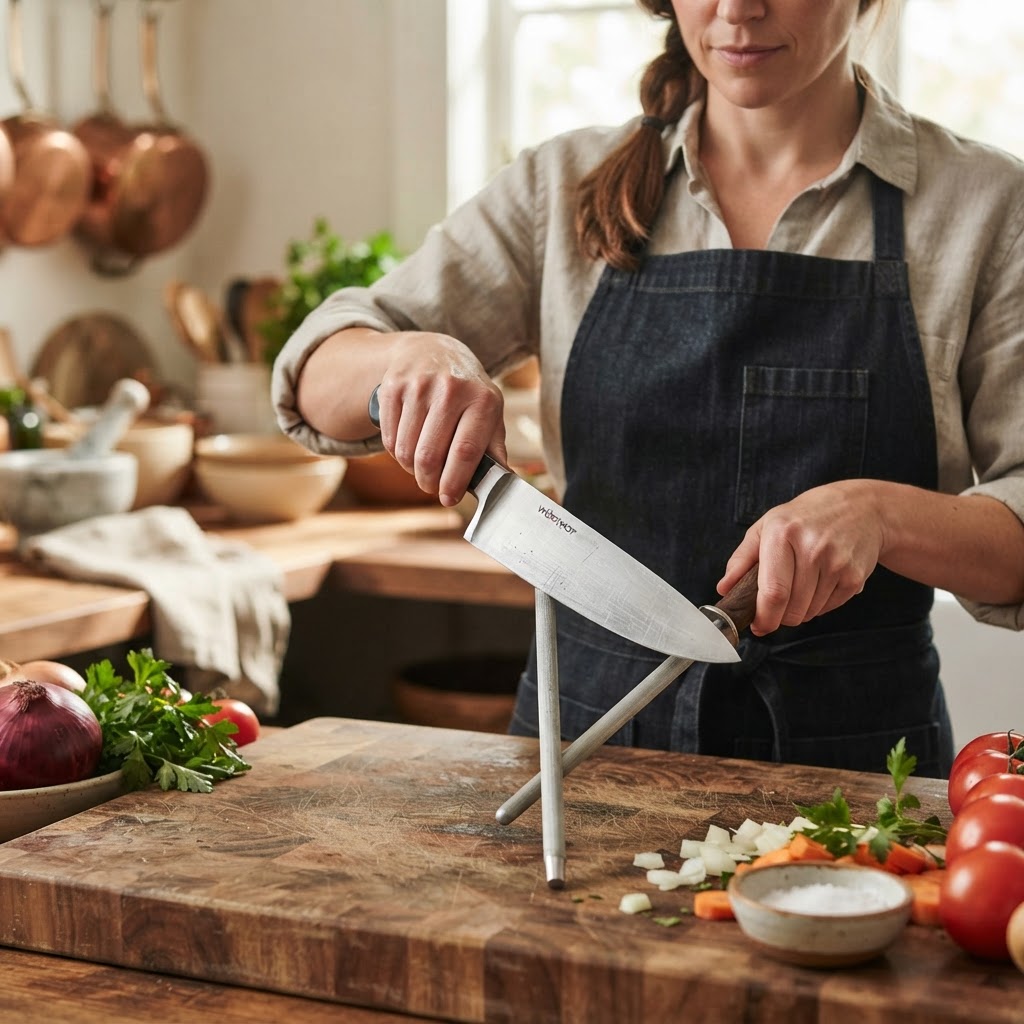
The Home Cook’s Guide to Blade Honing: Mastering Angle Consistency and Steel Realignment for Razor-Sharp Knife Maintenance
There is a singular, transformative moment in every home cook’s journey when they first wield a truly sharp knife. It is not merely about the efficiency of slicing through a stubborn onion or the grace with which you can julienne a carrot; it is about the profound connection you forge with your ingredients. When your blade is dull, you are fighting against the food, tearing through cell walls rather than parting them, which inevitably leads to bruised herbs and uneven cooking. Mastering the art of blade honing is the bridge between being a person who cooks and being a true culinary craftsman who respects the tools of the trade.
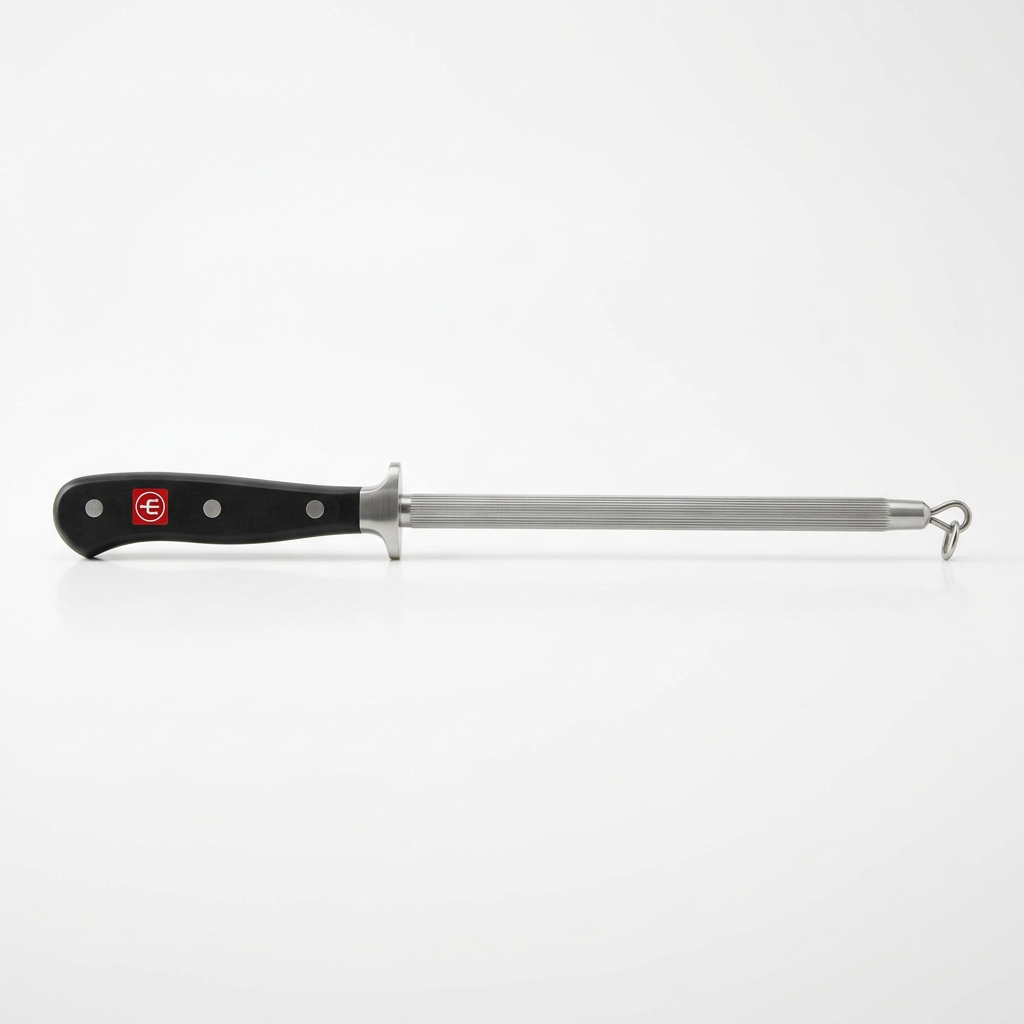
Many home cooks are intimidated by the steel rod that often sits tucked away in their knife block, collecting dust while their blades slowly lose their edge. This tool, known as the honing steel or honing rod, is frequently misunderstood as a sharpener, but its function is far more nuanced and vital for daily maintenance. While sharpening removes actual metal to create a new apex, honing is about steel realignment. Think of your knife edge as a microscopic set of teeth; over time, these teeth bend out of alignment, causing the knife to feel dull even when the edge itself is technically still sharp. By realigning these microscopic burrs, you restore the knife’s ability to slice effortlessly, extending the time between professional sharpening sessions significantly.
In this guide, we are going to demystify the process of blade care and turn that neglected steel into your most essential kitchen companion. We will cover the mechanics of angle consistency, the importance of choosing the right honing material, and the precise physical movements required to keep your knives performing at a professional level. It is time to stop blaming the dull knife for your frustrations in the kitchen and start taking ownership of your tools. With a little practice and the right technique, you will discover that a razor-sharp edge is not just a luxury reserved for top-tier restaurants, but a standard you can easily maintain in your own home kitchen.
Understanding the Anatomy of a Sharp Edge
To truly master the art of honing, you must first understand what happens to your blade during the rigors of meal preparation. A knife edge is essentially a very thin piece of metal that is ground down to a fine point. When you strike a cutting board—especially hard plastic or glass—the force of that impact causes the microscopic edge to fold or roll over to one side. This is not visible to the naked eye, but under a microscope, it looks like a series of jagged, bent teeth. This physical deformation is why your knife suddenly feels like it is "skidding" off the skin of a tomato rather than biting into it.
Honing is the mechanical process of pushing those tiny, folded teeth back into a straight, central line. It does not shave off material like a whetstone; instead, it utilizes a rod—typically made of steel, ceramic, or diamond-coated material—to manipulate the edge back to its original geometry. By maintaining this alignment, you prevent the edge from becoming rounded or dull prematurely, which in turn reduces the amount of metal that needs to be removed when you eventually do take the knife to a stone. It is a form of preventative medicine for your cutlery, ensuring that your investment lasts for years or even decades.
Consistency is the golden rule of knife maintenance. If you hone your knife at an inconsistent angle, you are effectively pushing the edge in multiple directions, which only accelerates the degradation of the steel. You are aiming for a stable, repeatable movement that respects the factory-ground bevel of your blade. Most high-quality Western knives are ground at an angle between 20 and 22 degrees per side, while thinner, Japanese-style blades are often ground much steeper, usually between 12 and 15 degrees. Knowing your knife’s intended angle is the first step toward achieving that elusive, effortless glide through your produce.
The Role of Material in Honing Rods
When selecting a tool for alignment, you will encounter three primary types, each serving a slightly different purpose in the maintenance lifecycle:
Steel Hones:* These are traditional rods designed specifically for realigning edges. They are best for softer, high-carbon steel knives.
Ceramic Hones:* These are slightly more aggressive and actually remove a tiny amount of metal while realigning. They are ideal for harder, Japanese-style steel.
Diamond-Coated Hones:* These are very abrasive and should be used sparingly. They are better suited for "touch-up" sharpening rather than daily alignment.
The secret to a sharp knife isn't the frequency of your sharpening sessions, but the discipline of your honing routine. If you wait until the knife is dull to act, you’ve waited too long.
The Mechanics of Angle Consistency
Achieving the perfect angle is a matter of muscle memory rather than sheer luck. When you hold your honing rod, you must imagine that the angle is locked in a vice. The most common mistake beginners make is varying the angle as they pull the blade across the steel. If you start at 20 degrees but finish the stroke at 30 degrees, you are essentially blunting the knife by distorting the edge. To visualize this, many chefs recommend placing the heel of the blade against the rod and then placing a folded matchbook or a small wedge at the desired angle to "feel" what 20 degrees looks like before you begin the physical motion.
Maintaining the angle requires a stationary rod and a fluid motion from the wrist and shoulder. Do not try to move the knife by just flicking your wrist, as this will inevitably result in an inconsistent angle. Instead, move your entire arm from the shoulder while keeping the elbow tucked close to your body. The goal is to maintain the same degree of contact from the heel of the blade all the way to the tip. As you move the blade down the steel, the curve of the blade’s belly will naturally interact with the rod; you must adjust your arm movement to keep that contact point consistent.
Visualizing the Arc
For knives with significant belly curves, like a chef’s knife or a santoku, the contact point on the rod should move as you pull the blade. Start with the heel of the knife near the top of the rod and finish with the tip of the knife at the base of the rod. This "sweeping" motion ensures that every millimeter of the blade is addressed. If you keep the same spot on the blade on the same spot on the rod, you will create uneven wear patterns that will be difficult to fix later.
The Frequency of Maintenance
A common misconception is that you need to hone your knife every single time you cook for five minutes. While regular maintenance is good, over-honing can actually cause the edge to become brittle or rounded if done with poor technique. A good rule of thumb for the home cook is to hone your knife before each major cooking session or every three to four hours of active cutting time. If you are prepping a large Thanksgiving dinner, give your blade a quick tune-up halfway through the day. If you are just chopping a few cloves of garlic, you can likely skip the honing step entirely.
You can also rely on the "paper test" to gauge when honing is necessary. Hold a clean, standard sheet of printer paper by the top edge and try to slice through it with a slow, downward motion. A truly sharp, well-honed knife will slice through the paper with almost zero resistance, creating a clean, straight cut. If the blade tears the paper or catches at certain points, it is time to realign. This test provides immediate feedback on your honing technique and tells you exactly which sections of the blade might need more attention.
Professional kitchens operate on a "honing by feel" philosophy. When you are experienced, you can feel the drag or "bite" of the edge against the steel. A blade that is properly realigned will have a smooth, sliding sensation across the rod, whereas a blade with a rolled edge will feel like it is catching or grating on the steel. Pay attention to this feedback loop; the more you listen to what the knife is telling you, the less often you will need to rely on a professional stone-sharpening service.
Professional Chef Tips for Longevity
Never use glass or stone cutting boards:* These materials are harder than the steel of your knife and will dull your edge instantly. Stick to wood or high-density plastic.
The "Push" vs. "Pull": Always hone by pulling the blade away* from the edge, similar to how you would slice a thin piece off the rod. Pushing the edge into the rod can cause the blade to dig in and chip.
Keep your steel clean:* Tiny metal shavings can build up on the surface of your honing rod over time. Wipe it down with a damp cloth or a bit of rubbing alcohol after every use to ensure it doesn't transfer debris back onto your knife.
Your honing rod is not a magic wand that fixes damage; it is a maintenance tool that preserves perfection. Treat it with the same respect you give your blade, and you will rarely ever feel the frustration of a dull knife again.
Managing the Pressure of the Stroke
One of the most critical aspects of honing that is often ignored is the amount of downward pressure applied during the stroke. Many home cooks approach the steel with too much force, thinking that pressing harder will yield a sharper result. In reality, excessive pressure can actually cause the steel to bend further or, in the case of ceramic rods, strip away too much metal. You want to apply just enough pressure to maintain contact, roughly the same amount of weight you would use to butter a piece of soft bread.
Consistency in pressure is what prevents the "sawing" motion that ruins an edge. If you are pressing down hard and then suddenly lifting, you are creating micro-vibrations that destabilize the edge alignment. Aim for a light, rhythmic stroke. The sound of a well-honed knife is a light, melodic ringing or a soft, metallic "shhh" sound. If you hear a loud, grating scraping sound, you are likely applying too much pressure or holding the knife at too steep an angle.
The Rhythm of the Stroke
The speed of your motion should be steady and deliberate. Do not rush; there is no prize for finishing your honing in two seconds. A calm, slow stroke allows you to monitor the angle and the pressure in real-time. Aim to perform about five to eight strokes on each side of the blade. This is usually sufficient to realign the edge without overworking the metal. After every few strokes, run your finger (very carefully!) along the spine—never the edge—to feel for any burrs that might have moved from one side to the other.
Common Pitfalls and How to Avoid Them
Even with the best intentions, the learning curve for honing can be steep. One of the most common issues is the "tip-skipping" problem, where the cook maintains the angle perfectly until they reach the tip of the knife, at which point the angle flattens out. This happens because the wrist tends to drop as the arm moves away from the body. To correct this, focus on keeping your wrist locked in a neutral position relative to your forearm. Imagine your forearm and the handle of the knife are one single, rigid piece of equipment.
Another common mistake is neglecting the heel of the blade. Because the heel is the part of the knife that sees the most contact with the board during vigorous chopping, it often rolls more severely than the rest of the blade. Many cooks skip this area because it feels awkward to reach, but this leads to a knife that is sharp at the tip but dull at the base. Make it a habit to start every honing stroke by placing the heel firmly against the rod at the very top.
Finally, do not be afraid to use a tabletop honing stand if you struggle with holding the rod steady. There is no shame in using a tool to keep your rod upright and secure. A wobbly rod is the enemy of a consistent angle. By anchoring the rod on your cutting board, you remove one variable from the equation, allowing you to focus entirely on the movement of the knife. This simple adjustment often leads to an immediate improvement in the performance of the home cook's blade.
Troubleshooting Your Edge
If the knife still feels dull: You have likely moved past the point where honing can help. The edge is likely rounded over or heavily damaged and requires a whetstone* to grind a new bevel.
If you see metallic dust:* If your honing rod is steel and you see dark grey streaks, you are pressing too hard. Stop immediately and clean your rod.
If the edge feels "gritty":* You may have a micro-burr that wasn't properly realigned. Try a few more light, alternating strokes to smooth it out.
The Transition to Whetstone Sharpening
It is important to emphasize that honing is not a replacement for sharpening. Think of your kitchen knife as a car. Honing is like checking your tire pressure—it keeps the car running smoothly on a day-to-day basis. Sharpening, on the other hand, is like getting an oil change or replacing the tires—it is a deeper, more structural intervention that happens once every few months, depending on how often you cook. You cannot simply hone a knife forever; eventually, the metal will lose its sharpness entirely, and no amount of alignment will bring it back.
When you notice that your honing routine is no longer yielding a paper-slicing edge, it is time to invest in a whetstone. Learning to use a whetstone is a rewarding skill that builds on the foundation of angle consistency you learned through honing. A 1000-grit stone is the standard starting point for most home cooks. By combining the daily discipline of honing with a quarterly commitment to sharpening, you ensure that your knives remain at the peak of their potential, serving you faithfully through every sauté, chop, and sear.
Ultimately, your knives are an extension of your intent in the kitchen. When you invest the time to maintain them, you are showing respect for the ingredients you prepare and the people you feed. A sharp knife is safer, more efficient, and undeniably more enjoyable to use. As you become more comfortable with your honing rod, you will find that the process becomes second nature—a meditative, rhythmic start to your culinary tasks.
Final Thoughts
Mastering the blade is a journey, not a destination. By embracing the nuances of steel realignment and angle consistency, you elevate your kitchen skills from the mundane to the exceptional. Remember that the honing rod is your most frequent ally in the quest for the perfect edge, but it requires patience and a gentle touch to yield its best results. Do not be discouraged if your initial attempts feel clumsy; with practice, the correct angle will become ingrained in your muscle memory, and the "honing ritual" will become the most satisfying part of your prep work.
Keep your rod clean, your angles locked, and your focus sharp. Treat your cutlery with care, and in return, your knives will reward you with unparalleled performance that makes every culinary endeavor a joy. Whether you are prepping a complex vegetable mirepoix for a classic French stew or simply slicing a ripe heirloom tomato for a summer salad, a well-honed knife turns every task into a display of precision. Thank you for choosing to hone your craft—your journey toward a sharper kitchen starts here. Now, go sharpen those blades, blame the chef if you must, but keep cooking with passion and precision.
The beauty of a well-maintained tool is that it never truly feels like work. Once you internalize these techniques, you will find that you no longer think about the mechanics of the edge; you simply trust your tools to do exactly what you ask of them. Keep this guide as a reference, revisit these principles whenever you feel your edge slipping, and keep challenging yourself to improve. Your kitchen is your domain, and your knives are the instruments that define your success. With the right technique, you are no longer just a home cook—you are a master of your culinary environment.
Get the Next Recipe
Weekly recipes, techniques, and gear picks — straight to your inbox.
