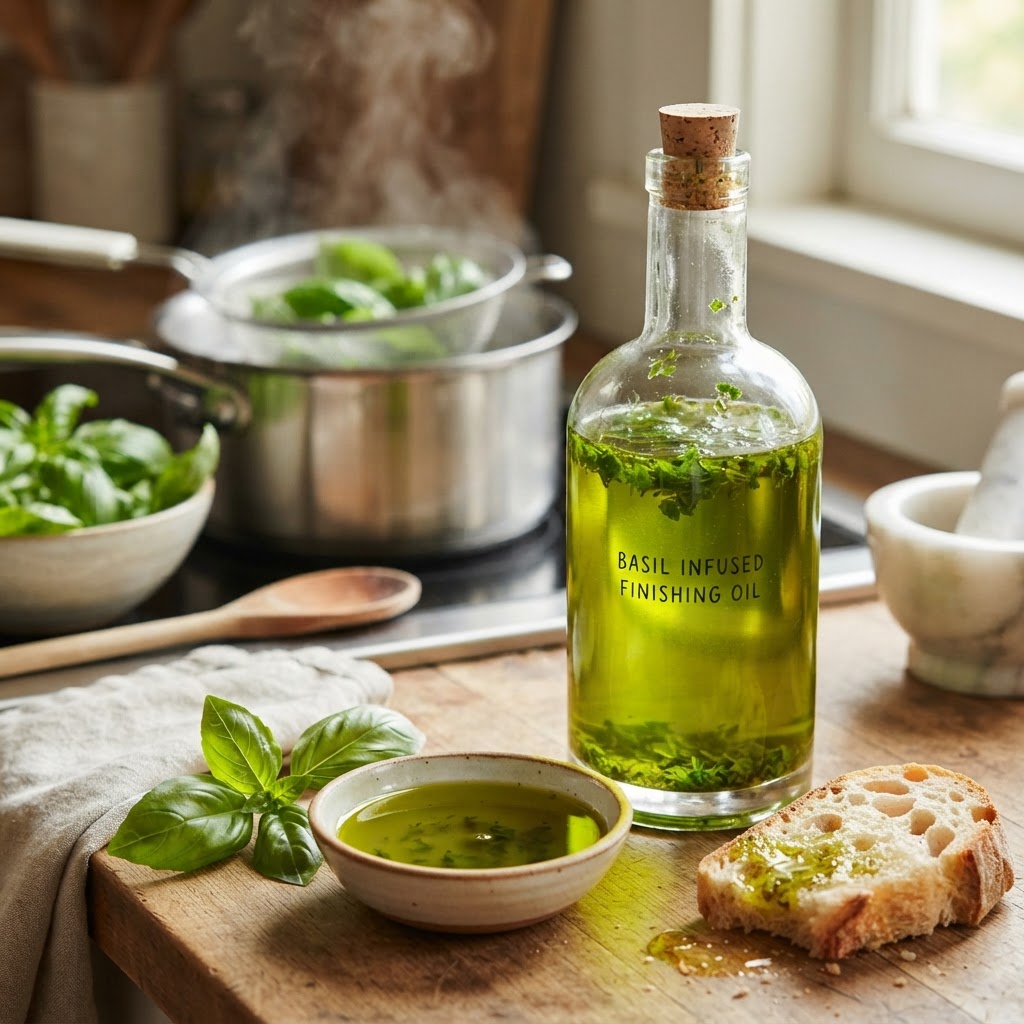
The Home Cook’s Guide to Blanched Aromatics: Mastering Oil-Infusion Techniques for Vibrant Finishing Oils
Every home cook eventually hits a ceiling where they feel their dishes are technically sound but lack that elusive, professional "pop" that defines restaurant-quality cooking. You have mastered the sear, you understand the importance of seasoning, and you can emulsify a vinaigrette without breaking a sweat, yet something remains missing from the final plate. That secret weapon, often tucked away in the squeeze bottles of high-end kitchens, is the vibrant, aromatic finishing oil. These oils are not merely fats; they are concentrated flavor extracts that bridge the gap between heavy, cooked-down sauces and the bright, raw brightness of fresh herbs. By learning to blanch aromatics before infusing them, you transform simple oil into a luminescent, herb-forward condiment that elevates everything from roasted carrots to seared scallops.
The process of creating these oils is a study in color theory and chemistry, specifically regarding the preservation of chlorophyll. When you throw fresh herbs directly into hot oil, you often end up with a murky, brownish liquid that tastes like scorched grass. Blanching is the culinary intervention that halts the enzymes responsible for browning, effectively locking in the vivid, electric greens that make these oils so visually stunning. It is a technique that feels slightly fussy at first glance, requiring a few extra steps and a bit of cleanup, but the reward is a shelf-stable bottle of liquid gold that will change how you approach plating. You are not just cooking; you are curating flavor profiles, learning to manipulate the very essence of your ingredients to suit your culinary vision.
At Blame The Chef, we believe that the difference between an amateur and a confident home cook lies in the mastery of these small, preparatory rituals. This guide is designed to strip away the mystery surrounding infused oils, moving past the common pitfalls that lead to bitter or dull results. We will cover the precise temperature gradients, the importance of shock-cooling, and the vital role that timing plays in ensuring your oils remain vibrant for weeks. As you prepare to dive into this technique, keep in mind that the quality of your base oil—the neutral canvas upon which you paint—is just as important as the herbs themselves. Prepare to clear space in your pantry, because once you master the art of the blanched aromatic infusion, you will never go back to serving a dish without that final, glossy drizzle.
The Science of Chlorophyll and Heat
To understand why blanching is non-negotiable for a vibrant oil, we have to look at the cellular structure of leafy greens. Plants contain chlorophyll, the pigment responsible for that deep, lively green color. When you heat an herb, the plant’s cell walls collapse, releasing organic acids that react with the chlorophyll. In the presence of these acids and heat, the magnesium atom at the center of the chlorophyll molecule is replaced by hydrogen, resulting in pheophytin, a dull, olive-brown compound. By blanching, we are essentially "setting" the color and neutralizing these enzymes before the high heat of the oil infusion process can degrade the pigment.
The Role of Rapid Cooling
After the herbs hit the boiling water, they must be immediately submerged in an ice bath. This shock-cooling process is critical; it stops the cooking process instantly. If you allow the herbs to carry-over cook in the residual heat, the internal temperature will remain high enough to trigger that color degradation we are trying to avoid. Your herbs should emerge from the ice bath looking even more vibrant than they did when they were raw. Once they are chilled, the moisture becomes the primary enemy, which brings us to the next vital step in the process.
Drying: The Invisible Barrier
Moisture is the antithesis of a shelf-stable oil. Any water molecules left behind on the surface of your herbs will not only cause the oil to sputter and pop during the infusion process, but they will also lead to rapid bacterial growth and spoilage. You want your herbs to be bone-dry. I recommend spreading the blanched, shocked herbs onto a lint-free kitchen towel or several layers of paper towels, then patting them until they are completely surface-dry. This labor-intensive step is the difference between a refined oil that lasts for a month and a murky infusion that turns rancid within days.
"True culinary mastery is not found in the complexity of the recipe, but in the unwavering commitment to the foundational techniques that preserve the integrity of the raw ingredient."
Selecting Your Canvas: The Base Oil
When choosing an oil for infusion, your goal is to select a neutral medium that will carry the flavor of the aromatics without competing with them. While extra virgin olive oil is delicious, its robust, fruity profile can sometimes overwhelm delicate herbs like tarragon or chervil. For most aromatics, a high-quality neutral oil such as grapeseed, avocado, or a refined light olive oil is the superior choice. These oils have a clean finish that allows the personality of your herbs to take center stage.
Why Avoid Stronger Oils?
If you are infusing with bold ingredients like chili or garlic, you might be tempted to use a toasted sesame or heavy virgin olive oil. However, I strongly advise against this for a beginner. Strong base oils tend to oxidize faster and can create flavor clashes that complicate the palate. By sticking to a neutral oil, you create a versatile "flavor vehicle" that you can use on anything from a delicate white fish to a hearty bean soup. Save the heavy, flavorful oils for dressings where you want that base note to shine, rather than as a foundation for a delicate herb infusion.
Temperature Control and Smoke Points
Even with a neutral oil, you must respect its smoke point. When infusing at high temperatures, you risk burning the herb particles, which introduces an acrid, bitter note. The sweet spot for blending and heating is generally around 140°F to 150°F (60°C to 65°C). At this temperature, the oil is warm enough to extract the essential oils from the herbs but not hot enough to degrade the delicate volatile compounds that give your herb oil its signature scent. Use a digital instant-read thermometer—it is the only way to ensure consistency.
The Blanching and Infusion Protocol
The process of creating the perfect infused oil follows a rigorous, repeatable sequence. While it might feel like a science experiment, once you have run through the steps a few times, it will become second nature. The primary goal here is maximizing surface area contact between the herb and the fat, which is why the blending stage is just as important as the blanching stage.
Why High-Speed Blending Matters
You might wonder why we blend the herbs into the oil rather than simply steeping them. While steeping (cold infusion) works for certain ingredients like dried chilies or spices, fresh herbs require the mechanical action of a high-speed blender to rupture the plant cell walls. This releases the essential oils directly into the fat, creating an instantaneous infusion that is far more potent than a traditional steep. The heat generated by the blender blades acts as a gentle catalyst, ensuring the oil is fully integrated with the herb essence.
Troubleshooting the Emulsion
If your oil looks like a split vinaigrette immediately after blending, it is likely because you either didn't dry the herbs well enough or your ratio of oil to herbs is off. A good rule of thumb is 1 part packed herbs to 2 parts oil by volume. If you find the mixture is too thin or separating too quickly, ensure you are using a high-speed blender rather than a standard food processor. The goal is a uniform, opaque green liquid that looks almost like a vibrant paint.
Straining and Storage for Longevity
The final hurdle in your quest for the perfect herb oil is the straining process. If you want a restaurant-quality, "clear" oil, you must be patient. Simply pouring the mixture through a metal sieve is not enough; the fine particulates that give the oil its color will eventually settle at the bottom, creating a murky sludge. To achieve a crystal-clear finish, you need to use a finer filtration method.
The Coffee Filter Method
For the most professional results, strain your blended oil through a fine-mesh cheesecloth or a paper coffee filter. This is a slow, drip-based process that requires patience. Set your filter inside a funnel over a clean glass jar and let the oil gravity-strain in the refrigerator overnight. This removes even the smallest flecks of plant matter, resulting in an oil that is not only vibrant in color but also exceptionally smooth in texture.
Shelf Life and Preservation
Even with careful technique, fresh herb oils are perishable products. Because you have introduced moisture-heavy ingredients into a fat-based environment, you must store these oils in the refrigerator. They will typically last for 1 to 2 weeks if kept in an airtight, dark glass bottle. I recommend storing them in a squeeze bottle for easy application, but ensure the nozzle is wiped clean after every use to prevent oxidation at the opening of the bottle.
"The beauty of a perfectly executed infused oil is that it requires only a few drops to transform a plate; it is the ultimate expression of 'less is more' in the modern kitchen."
Experimenting with Flavor Profiles
Once you have mastered the basic parsley or basil oil, the world of infusion opens up significantly. The principles remain identical, but the flavor possibilities are endless. You can move beyond simple herbs and explore aromatic roots, citrus peels, and even toasted seeds. Each new ingredient offers a different challenge regarding moisture content and surface area.
Classic Combinations to Start
Basil & Lemon Zest:* Perfect for finishing Caprese salads or grilled white fish.
Cilantro & Serrano:* Ideal for drizzling over street tacos or roasted root vegetables.
Parsley & Chive:* A workhorse oil that adds a fresh, clean finish to soups and potato dishes.
Scallion & Ginger:* A nod to classic Asian flavor profiles, perfect for steaming or stir-fry finishing.
Expanding the Palette
When working with ingredients like ginger or garlic, you may find that the flavors are much sharper. You can still use the blanching technique to soften the raw bite of these ingredients before infusion. For ginger, a quick 30-second blanch is sufficient to remove the harsh, soapy edge that raw ginger can sometimes have in a cold oil infusion. By experimenting with these ratios, you will eventually find your signature "house blend" that guests will start to ask you about the moment they sit down at your table.
The Aesthetics of Plating
A finishing oil is as much about the visual presentation as it is about the flavor. In professional kitchens, we use these oils to create contrast, depth, and a sense of luxury. When you drizzle a vibrant, neon-green basil oil over a stark white bowl of pea soup or a dark-seared steak, you are utilizing the principles of color contrast to make the dish pop. It turns a home-cooked meal into a composed plate.
Techniques for Application
The Dot Technique:* Use a squeeze bottle to place precise dots of oil around the plate. This is excellent for creating clean, modern patterns.
The Drizzle:* A classic, free-form drizzle over a roasted vegetable platter adds both sheen and a burst of concentrated flavor.
The Pool:* Pouring a small amount of oil into the center of a shallow bowl, then placing your main protein or vegetable in the middle, creates a beautiful "halo" effect.
Understanding Flavor Balance
Always remember that your infused oil acts as a seasoning. If you have already salted your dish, be mindful that the oil provides a "fatty" dimension but no saltiness on its own. It is the final layer of the flavor profile. If the dish feels like it needs a bit more acid, don't rely on the oil—rely on a squeeze of lemon or a splash of vinegar. The oil is there to provide the aromatic top note that hits the nose before the dish even touches the tongue.
Final Thoughts
Mastering the art of blanched aromatic oils is a journey into the finer details of culinary chemistry. It requires you to slow down, respect the properties of your ingredients, and embrace the technical steps that might seem unnecessary but are ultimately transformative. When you pour that first drop of brilliant green oil onto a dish you’ve prepared with care, you are not just adding a condiment; you are signaling to yourself and your guests that you have transitioned from simply following a recipe to understanding the nuances of flavor construction.
The beauty of this technique lies in its versatility. Whether you are using it to salvage a dish that feels a little "flat" or using it as a deliberate component of your plating strategy, you are in control of the sensory experience. Keep your equipment clean, keep your oil cold, and never stop experimenting with the herbs and aromatics that define your personal style. At Blame The Chef, our mission is to empower you to stop blaming your tools or your ingredients and start trusting your own hands. You now possess the knowledge to turn the mundane into the extraordinary, one emerald-green drop at a time. Go forth and infuse with confidence.
***
Pro-Tips for the Enthusiastic Home Cook
Label your creations:* Always mark the date of production on your bottles. Even the best oils degrade, and knowing exactly when you made it will save you from serving a potentially rancid product.
Don't discard the solids:* If you use a coarse strainer instead of a coffee filter, you will have a "herb paste" left behind. Do not throw this away! It is essentially a concentrated pesto base. Stir it into pasta, mix it with butter, or use it to flavor a pan sauce.
Source matters:* If you can, use herbs from your own garden or the local farmers' market. The higher the volatile oil content in the fresh herbs, the more vibrant and aromatic your finished product will be. Grocery store herbs that have traveled thousands of miles will often yield a much weaker infusion.
Safety first:* Always ensure your workspace is clean, especially when working with oils. Keep a fire extinguisher or a heavy lid nearby whenever you are heating oil, even at low temperatures. Safety is the hallmark of a professional-minded home cook.
The "Cold" Variation:* For delicate herbs like mint, you can try an "ice-cold" infusion where you don't heat the oil at all. Simply blend the blanched, chilled, and dried herbs with oil in a frozen blender jar. The lack of heat preserves the volatile, "bright" notes of the mint, which is perfect for fruit-based desserts or lamb preparations.
Clean as you go:* The blending process can be messy. Keep a damp towel nearby to immediately wipe up any oil splatters. Because the oils are highly pigmented, they can stain light-colored countertops or fabrics if left to sit, so prioritize cleanup while the blender is still running or being cleaned.
As you continue to explore the depths of this technique, remember that the "Blame The Chef" philosophy is built on the idea that every mistake is just a lesson in disguise. If your first batch isn't quite as vibrant as you had hoped, look at your drying time. If it tastes bitter, look at your blending temperature. Cooking is iterative, and your journey toward becoming a master of aromatics is a marathon, not a sprint. Keep your blades sharp, your ice bath cold, and your palate open to the subtle complexities that these oils bring to the table. You are well on your way to elevating your culinary game to heights you once thought were reserved for the pros. The kitchen is your laboratory, and the aromatics are your medium—go create something beautiful.

Get the Next Recipe
Weekly recipes, techniques, and gear picks — straight to your inbox.
