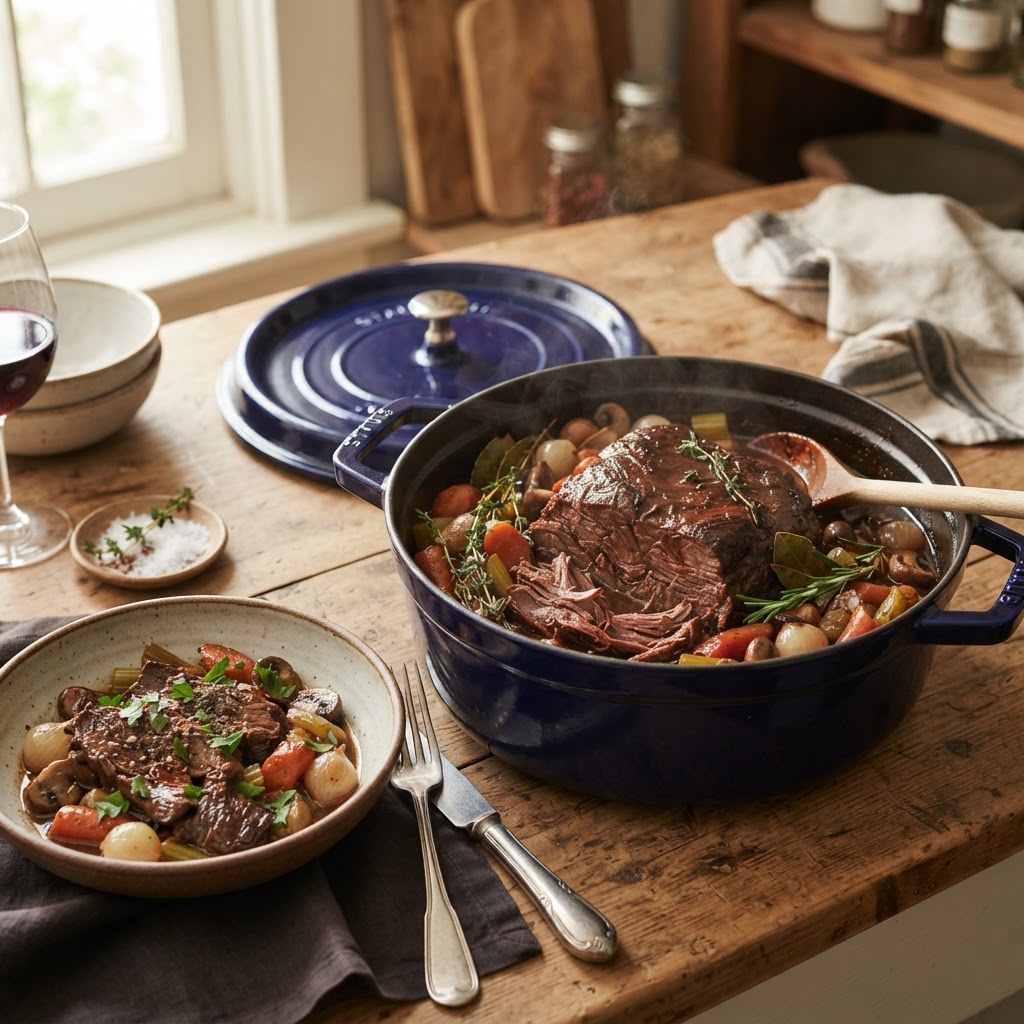
The Home Cook’s Guide to Braising: How to Transform Tough Cuts into Melt-in-Your-Mouth Meals
There is something profoundly magical about the transition that happens inside a heavy Dutch oven when it is tucked away in a low-temperature oven for several hours. As a chef, I have spent countless nights in professional kitchens orchestrating complex, multi-component dishes, yet I always find myself returning to the humble act of braising as the ultimate expression of comfort and technique. It is a process that demands very little of your active time, yet it rewards your patience with a depth of flavor that is simply impossible to achieve through flash-cooking methods like searing or sautéing. Many home cooks approach tough cuts of meat with a sense of trepidation, fearing they might end up with something dry or stringy, but braising is actually the most forgiving and foolproof method in your culinary arsenal.
The beauty of this technique lies in its reliance on the fundamental laws of thermodynamics and chemistry rather than fancy equipment or expensive ingredients. By utilizing a combination of dry heat—usually through an initial sear—followed by moist heat in a sealed environment, you are effectively breaking down the tough connective tissues like collagen and elastin that make secondary cuts of meat difficult to chew. As the temperature rises slowly, these stubborn fibers dissolve into luxurious gelatin, which not only softens the meat to a point where it falls apart at the touch of a fork but also enriches the braising liquid, giving it a silky, coat-the-back-of-a-spoon texture. Once you master the rhythm of a proper braise, your grocery bills will inevitably drop as you pivot toward more economical, flavorful cuts that the average shopper often overlooks.
Before you clear off your counter and preheat your oven, it is important to understand that braising is not just a cooking method; it is a philosophy of patience. You cannot rush the dissolution of connective tissue, and trying to crank up the heat will only result in tight, fibrous meat rather than the succulent results you are aiming for. In this guide, we are going to peel back the curtain on the science of the braise, exploring the essential equipment, the hierarchy of cuts, and the nuanced alchemy of aromatics and liquids. Whether you are aiming for a classic red wine-braised short rib or a rustic chicken fricassee, the principles remain the same, providing you with a reliable roadmap for building complex, restaurant-quality layers of flavor in your own home kitchen.
The Science of the Braise: Understanding Collagen
At the heart of every successful braise is the breakdown of collagen, a structural protein found in the connective tissues of muscles. In animals, the parts of the body that do the most work—the legs, shoulders, and shanks—contain the highest concentration of this protein. When you cook these cuts quickly, the collagen tightens, turning the meat tough and chewy, which is why a steak would be miserable if cooked this way. However, when you introduce a slow, moist environment, the collagen undergoes a transformation, denaturing and eventually turning into gelatin. This process is the secret behind the "melt-in-your-mouth" texture that defines legendary braises.
Temperature is Everything
The "sweet spot" for breaking down collagen is a constant, gentle simmer. If your liquid boils aggressively, you are essentially "shocking" the meat, causing the proteins to seize up and toughen. You want to maintain a liquid temperature between 185°F and 205°F (85°C to 96°C). In the oven, this is usually achieved by setting your dial between 300°F and 325°F (150°C to 165°C). This lower range is sufficient to keep the collagen dissolving without evaporating your liquid too quickly or drying out the exterior of the meat.
The Role of Moisture
Braising is defined by the presence of a cooking liquid. While many assume you need to submerge the meat entirely, a true braise requires only enough liquid to cover about one-third to one-half of the protein. The exposed top of the meat cooks via the steam trapped within the sealed pot, keeping it moist while the bottom absorbs the flavors of the braising medium. Using too much liquid can actually dilute the flavor of your sauce, leaving you with a watery final product that lacks the intensity required for a truly memorable meal.
"Braising is the ultimate lesson in culinary patience; you are not just cooking the meat, you are transforming its very architecture, turning the stiff remnants of movement into the velvety essence of luxury."
Selecting the Right Cuts for the Pot
Walking through the meat aisle can be overwhelming, but for a braise, you want to avoid the "prime" cuts. You are looking for the "working" muscles of the animal, as these are the cuts packed with the connective tissue that creates the best flavor and texture. Think of cuts that are often labeled as "stew meat" or cuts that require a long-term commitment. When you choose these, you are not just saving money; you are choosing the ingredients that will yield the highest reward after a few hours in the oven.
Top Tier Braising Cuts
Beef:* Short ribs, chuck roast, oxtail, brisket, and beef shanks.
Pork:* Shoulder (often called pork butt), pork belly, and shanks.
Lamb:* Lamb shanks, shoulder, and neck.
Poultry:* Chicken thighs and legs (bone-in, skin-on).
Why Bone-In Matters
Whenever possible, opt for bone-in cuts. The bones contribute significant minerals and additional collagen to the braising liquid, which results in a much richer, more viscous sauce. As the meat cooks, the bone marrow also leaches into the braise, adding a savory, umami-rich depth that is impossible to replicate with vegetable stock alone. If you find a recipe calling for boneless chuck, try to swap it for a bone-in alternative; the extra effort of navigating around the bone when eating is a small price to pay for the massive increase in flavor.
The Anatomy of the Perfect Sear
Before you introduce liquid to the pot, you must address the exterior of your protein. The Maillard reaction—a chemical reaction between amino acids and reducing sugars that gives browned food its distinctive flavor—is essential to a great braise. Without this step, your final dish will be pale, one-dimensional, and lacking the deep, roasted notes that define a professional-level braise. Never skip the sear; it is the foundation upon which your entire flavor profile is built.
Executing the Perfect Sear
Deglazing: The Flavor Secret
After you remove the seared meat, you will see a layer of dark, caramelized bits stuck to the bottom of the pan. This is called fond, and it is arguably the most flavorful part of the entire dish. Deglazing involves adding a liquid—usually wine, stock, or vinegar—to the hot pan and scraping up these bits with a wooden spoon. This releases all that trapped flavor directly into your braising liquid, acting as the base for your final sauce.
"If you look at the bottom of your pot after searing and see a dark, crusty landscape of flavor, you are doing it right; never scrape that away—that is where the soul of your sauce lives."
The Aromatics and the Braising Liquid
The liquid you choose acts as the vehicle for your flavor. While a basic braise can work with just water and salt, we are aiming for greatness. The classic French approach usually involves a mix of wine and stock, often supplemented by a "mirapoix" of aromatics. This trio—onions, carrots, and celery—forms the bedrock of flavor for many braises. However, don't be afraid to branch out depending on the protein you are using.
Choosing Your Medium
Red Wine:* Ideal for beef, lamb, and venison. Look for dry reds like Cabernet Sauvignon or Syrah. The tannins in the wine help cut through the richness of the meat.
White Wine:* Perfect for chicken, pork, or rabbit. A dry, crisp white like Sauvignon Blanc or a dry Vermouth adds acidity that brightens the dish.
Broth/Stock:* Always use high-quality, low-sodium chicken or beef stock so you can control the salt levels throughout the cooking process.
Tomatoes:* Crushed tomatoes or tomato paste add acidity and natural glutamates, boosting the overall umami.
The Aromatic Base
Don't just toss in chunks of onions and call it a day. Take the time to sweat your aromatics in the fat left over from searing the meat. By cooking your onions, carrots, and celery over medium heat until they are soft and translucent, you are building a layer of sweetness that balances the acidity of the wine. Adding a few cloves of smashed garlic, a handful of fresh thyme sprigs, and a bay leaf in the final minute of sautéing releases their essential oils, creating an aromatic foundation that will permeate the meat as it simmers.
Mastering the Cooking Process
Once the meat is seared, the fond is deglazed, and the aromatics are sweating, you are ready to assemble. Place your meat back into the pot, pour your liquid in until it reaches the correct depth (about halfway up the meat), and bring it to a very gentle simmer on the stovetop. Only after you have achieved this steady, low simmer should you cover the pot tightly and move it to the oven.
The Lid Matters
Your Dutch oven lid is a critical piece of technology. It traps the steam, ensuring that the meat stays moist rather than drying out in the oven's ambient heat. If you feel your lid doesn't seal tightly enough, you can place a piece of parchment paper over the top of the pot before putting the lid on to create a more effective seal. This simple hack prevents your braising liquid from evaporating too quickly, which is a common problem in older or warped cookware.
Timing and Tenderness
How do you know when it is done? The answer is simple: trust the fork. When you think the time is up, pull the pot out and test a piece of meat with a fork. If it resists, it needs more time. If the fork slides through the meat with the ease of a knife cutting through butter, it is ready. It is better to leave it for an extra twenty minutes than to pull it out too early; because of the slow-cooking process, a little extra time rarely ruins a braise, provided there is enough liquid to prevent scorching.
Finishing the Sauce and Serving
Once the meat is fork-tender, the work isn't quite done. You have a pot filled with incredible, flavor-packed liquid, but it might be a bit thin. A professional-grade braise always ends with a reduced, velvety sauce. Carefully remove the meat from the pot and set it aside on a warm platter, tenting it with foil. Strain the solids out of the liquid, or, if you prefer a rustic style, leave them in.
The Reduction Technique
Place the pot back on the stovetop over medium-high heat and let the liquid bubble away until it reduces by about one-third or one-half. You are looking for a consistency that coats the back of a spoon. If you want even more luxury, whisk in a tablespoon of cold butter just before serving—a technique known as monter au beurre. This adds a glossy finish and a depth of flavor that will leave your guests wondering how you achieved such a restaurant-quality result at home.
Presentation Tips
Serve your braised meat over a bed of something that can soak up the sauce. Creamy polenta, mashed potatoes, or even simple buttered egg noodles are the perfect vessels. Spoon a generous amount of your reduced braising liquid over the meat, ensuring that every bite is saturated with the sauce you have spent hours developing. A final sprinkle of freshly chopped parsley or chives adds a bright, fresh contrast to the deep, heavy flavors of the braise.
"A great sauce is the reward for your patience; by reducing your braising liquid, you are concentrating all those hours of work into a singular, intense moment of flavor."
Troubleshooting Common Braising Issues
Even the best chefs run into hiccups. Perhaps your sauce is too salty, or the meat didn't get as tender as you hoped. Don't panic. Almost every problem in braising has a solution that can be applied in the final stages of the cooking process. Learning to adjust and "fix" your dish is what separates a cook who follows a recipe from a cook who understands food.
If the Sauce is Too Salty
If you find yourself with an over-salted sauce, do not add more stock, as that will just increase the volume without fixing the concentration. Instead, add a small splash of acidity—like a tablespoon of red wine vinegar or a squeeze of lemon juice. The acidity tricks the palate into perceiving less salt. If that fails, a small dollop of sour cream or heavy cream can mellow the saltiness significantly.
If the Meat is Still Tough
This is almost always a sign that it simply wasn't cooked long enough. Put it back in the oven. Do not try to rush it by cranking up the heat. If you have run out of liquid, add a small amount of warm stock or water before covering it again. Remember: low and slow is the law. There is no such thing as "too tender" when it comes to a braise, so give it the time it needs to reach the point of perfection.
Preventing Scorching
If your liquid level gets too low, the bottom of the pot can scorch, leaving a bitter taste. Check the pot once about halfway through the cooking time. If the liquid has dropped significantly, add a half-cup of warm stock or wine. Always keep your liquid level maintained at the one-third mark to ensure the bottom of the pot remains protected from direct heat.
Final Thoughts
Braising is a journey, not a destination. It is a method that teaches you to stop fighting against the nature of your ingredients and start working with them to coax out their absolute best. By shifting your focus from "fast cooking" to "controlled transformation," you open up a world of culinary possibilities that are both economical and incredibly satisfying. You don't need expensive equipment or a degree from a culinary institute to put a dish on the table that tastes like it came from a three-star bistro.
What you need is a sturdy pot, a good understanding of temperature control, and the willingness to let time do the heavy lifting for you. As you practice these techniques, you will find that your intuition for seasoning and your ability to judge the readiness of a cut of meat will sharpen. You will move from being a home cook who relies on recipes to a home cook who understands the mechanics of flavor. Start with a classic chuck roast or a few chicken thighs, and soon enough, you will be experimenting with different wine pairings, unique spice rubs, and complex aromatic bases that are uniquely your own.
The kitchen is a place of comfort, and there is no greater comfort than a meal that has been nurtured for hours. When you serve that fork-tender meat, glistening with a reduction you perfected, you aren't just serving dinner—you are serving a story of patience, attention, and care. So, go ahead and clear that space on your stove, find your heaviest pot, and embrace the slow, deliberate art of the braise. Your future meals, and your guests, will certainly thank you for it. Remember, in the world of "Blame The Chef," the goal is always to empower you to feel like the master of your own kitchen, one pot at a time. Happy cooking, and may your sauce always be thick, your meat always tender, and your kitchen always filled with the comforting aroma of a long-simmering meal.


Get the Next Recipe
Weekly recipes, techniques, and gear picks — straight to your inbox.
