The Home Cook's Guide to Caramelization: Mastering Sugar's Transformation at 338°F for Complex, Bitter-Sweet Depth
There is a singular moment in the kitchen that separates the casual observer from the true culinary student: the second you realize that heat is not merely a tool for sterilization, but an active, transformative ingredient. Many home cooks view sugar as a binary element, present only to provide sweetness or to serve as a structural backbone for baked goods. However, when we subject simple sucrose to precise, elevated temperatures, we initiate a chemical metamorphosis known as caramelization. This is the elusive bridge between the saccharine and the sophisticated, a complex dance of molecular breakdown that yields notes of toasted nut, burnt honey, and deep, dark fruit. It is the secret language of the pastry chef, written in amber hues and controlled by the steady hand of someone who understands that patience is just as vital as the flame itself.
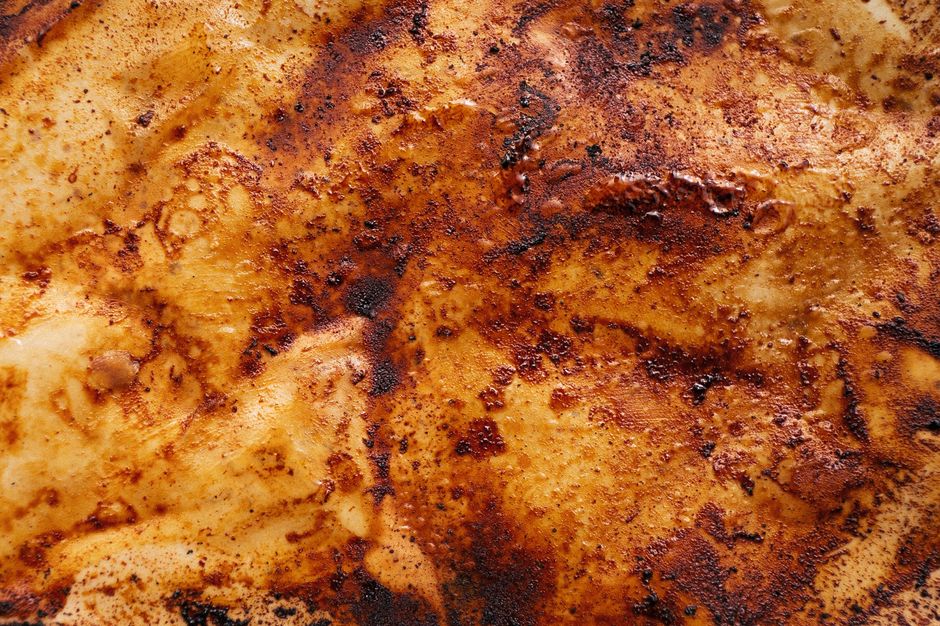
To master this process, one must first abandon the fear of the dark. When you observe your pan and see the edges deepening from a pale, straw-like gold to a rich, burnished mahogany, the instinctual reaction is often to pull the pan from the heat, fearing you have pushed the sugar too far. Yet, it is within that final, dangerous stage—the brink of bitterness—that the most profound flavor profiles reside. By understanding that caramelization begins in earnest at roughly 338°F (170°C), you empower yourself to treat heat as a dial rather than a switch. We are not just cooking here; we are orchestrating a controlled pyrolytic breakdown, turning simple carbohydrates into a labyrinth of flavor compounds that can define the character of an entire dish, from a savory onion confit to a silky salted caramel sauce.
Welcome to the laboratory of the kitchen, where Blame The Chef takes you beyond the recipe card and into the mechanics of flavor. In this guide, we will dismantle the mystery of the sugar molecule and rebuild it through the lens of thermal engineering. You will learn how to monitor the Maillard reaction and caramelization simultaneously, how to manage the carry-over heat that destroys delicate batches, and why the addition of an acid or a fat can completely alter the texture and stability of your final product. Prepare your heavy-bottomed pans and your infrared thermometers, because we are about to turn the heat up on your understanding of what happens when sugar hits the fire. The transition from sweet to complex is a journey, and after today, you will possess the map to navigate it with absolute confidence.
The Chemistry of Sweetness: Understanding the Thermal Threshold
At the heart of every great dessert lies a delicate chemical process that most home cooks navigate through intuition alone. True caramelization is not simply melting sugar; it is a complex series of chemical reactions—primarily pyrolysis—that occurs when sugars are heated to temperatures typically exceeding 320°F to 330°F (160°C to 165°C). At these thermal levels, the sugar molecules become dehydrated and begin to polymerize, breaking down into volatile compounds like diacetyl (which provides a buttery aroma) and furan derivatives (which contribute nutty, caramel-like notes). Understanding this threshold is essential because it is the point where the sugar ceases to be a crystal and begins its transformation into a viscous, flavorful liquid.
The Stages of Sugar Breakdown
When you place granulated sucrose in a pan, it undergoes a predictable series of phases. First, the crystalline structure absorbs heat, leading to a phase change from solid to liquid. As the temperature climbs past 320°F, you will witness the color shift from clear to a pale yellow. This is the initiation of flavor development. It is crucial to maintain a consistent heat source during this phase to ensure that all sugar crystals liquefy at a uniform rate, preventing localized burning that can introduce unpleasant, acrid notes before the rest of the batch has developed its desired complexity.
The Danger Zone of 338°F
The magic truly happens at 338°F. At this temperature, the degradation is rapid and significant. If you are aiming for a classic, deep caramel, you must be prepared for the darkening process to accelerate exponentially once this thermal ceiling is breached. The color changes from light gold to amber in seconds, and from amber to deep bronze almost as quickly. Many professional chefs use a high-precision thermometer to ensure they hit this window, as the difference between a perfect caramel and a carbonized disaster is often a matter of five to ten degrees.
"The difference between a pedestrian sauce and a culinary masterpiece is often nothing more than the control of heat in those final, critical ten degrees of the caramelization process."
Essential Gear for the Serious Home Cook
While it is tempting to believe that the secret to great cooking lies solely in technique, the tools you choose play a vital role in your success. When working with molten sugar, thermal conductivity is the most important factor. You need a pan that can maintain a steady temperature without creating "hot spots"—those localized areas of extreme heat that lead to uneven cooking. A heavy-bottomed, tri-ply stainless steel pan or a professional-grade copper saucier are the gold standards for these tasks.
The Role of Thermal Mass
A heavy pan acts as a heat sink, providing a buffer against the erratic nature of modern stovetops. If your pan is too thin, the sugar will caramelize instantly where it touches the metal while remaining unmelted elsewhere, leading to a grainy, uneven texture. By investing in heavy cookware, you provide yourself with a margin of error that allows for more precise control. Always opt for light-colored pans; a dark interior makes it nearly impossible to judge the true color of the caramel, leaving you blind to the critical moment when the sugar is perfectly bronzed and ready for the next step.
Precision Instrumentation
Do not rely on your eyes alone when starting out. While experience will eventually teach you to recognize the scent of perfect caramel, a digital infrared thermometer or a high-quality glass candy thermometer is an indispensable guide. Clip the thermometer to the side of the pan, ensuring the bulb is submerged in the sugar but not touching the metal bottom, which will yield a false high reading. This data is the key to repeatability, allowing you to replicate your success batch after batch.
Dry vs. Wet Methods: Selecting Your Technique
There are two primary ways to approach the caramelization of sugar: the dry method and the wet method. Both result in caramel, but the path they take is distinct. The dry method involves placing sugar directly into the pan without the addition of water, relying on the heat to melt the crystals into their own molten state. This method is faster and often yields a more intense, complex flavor because the sugar is allowed to reach higher temperatures more quickly. However, it requires a vigilant chef who can swirl the pan to encourage even melting.
The Benefits of the Dry Method
The dry method is preferred when you want maximum depth of flavor. Because there is no water to evaporate, you spend less time waiting for the sugar to reach the target temperature. This reduces the risk of crystallization (where sugar crystals reform into a grainy texture), which is a common plague for beginners. To perform this effectively, spread the sugar in a thin, even layer across the bottom of your pan and heat over medium-low heat. As it begins to melt at the edges, gently shake the pan to pull the melted sugar toward the center, allowing the unmelted crystals to move into contact with the heat.
Mastering the Wet Method
The wet method introduces water—usually about one part water to four parts sugar—to create a syrup. This approach is much more forgiving for home cooks, as the water acts as a heat buffer, ensuring all the sugar melts into a uniform solution before the temperature rises high enough to begin the caramelization process. While it takes longer, the wet method provides better control over the final color and is ideal for delicate preparations like crème caramel or when creating sugar cages. The key here is to avoid agitation once the sugar has dissolved; stirring with a spoon after the syrup has begun to boil can introduce "seed" crystals that cause the entire batch to turn into a solid, grainy mass.
The Science of Stabilization and Texture
Once you have achieved that perfect amber hue, the caramel is essentially a ticking time bomb of residual heat. Even after you pull the pan off the burner, the temperature continues to rise due to the thermal mass of the sugar. To stop the process, professional chefs employ a technique called arresting. This is typically done by adding a small amount of liquid or fat to the molten sugar. When making a sauce, this is the moment you introduce warmed cream or butter. The moisture cools the caramel instantly, bringing the temperature down below the caramelization threshold while simultaneously incorporating fats that provide a luxurious, silky mouthfeel.
Managing Crystallization
Crystallization is the enemy of smooth caramel. It occurs when a sugar crystal enters the syrup and acts as a template for other sugar molecules to latch onto, creating a cloudy, gritty structure. To prevent this, always ensure your pan is spotlessly clean before starting. Additionally, you can incorporate an "interfering agent"—a small amount of acid, such as lemon juice or cream of tartar, or even a tablespoon of corn syrup. These additives work at the molecular level to inhibit the sugar from recrystallizing, ensuring your final product remains as smooth as glass.
Balancing Flavor with Fat
When you are aiming for a salted caramel or a rich toffee, the fat content is just as important as the heat level. Butter, specifically, introduces milk solids that undergo their own Maillard reaction, blending with the sugar to create a depth of flavor that is truly transcendental. When adding butter, ensure it is room temperature or slightly softened, and add it in stages. Adding a large piece of cold butter all at once can cause a violent sputtering of the molten sugar, which is not only dangerous but can cause the fat to separate from the sugars rather than emulsifying into a cohesive sauce.
"To master the art of caramel, you must learn to fear the sugar less and respect the chemistry more. A steady hand and a room-temperature addition are the cornerstones of a stable, emulsified result."
Advanced Applications: Beyond the Simple Sauce
Once you have mastered the basics of sugar, you can begin to use this knowledge in more experimental ways. Think of caramelization not just as a dessert component, but as a flavor bridge for savory cooking. Roasted root vegetables, for instance, undergo a natural caramelization of their starches when exposed to high, dry heat. By understanding the temperature at which these sugars brown, you can adjust your oven settings to achieve that perfect, caramelized exterior without burning the interior of the vegetable. This is the logic behind the "low and slow" method for onions, which can take an hour but results in a deeply sweet, complex jam that is essentially a vegetable-based caramel.
Creating Sugar Sculptures
For the ambitious home cook, the mastery of 338°F opens the door to sugar artistry. By pulling the caramel from the heat at the exact moment of perfect amber saturation and letting it cool slightly, you create a medium that can be spun into webs, poured into molds, or shaped into intricate cages. The trick is patience and environmental control. High humidity is the enemy of pulled sugar; the sugar is hygroscopic, meaning it will absorb moisture from the air and lose its structural integrity within minutes. If you are attempting sugar work, do it on a dry day and consider keeping a dehumidifier running in your kitchen.
Culinary Pairings
Consider the profile of your caramel when pairing it with other ingredients. A light, golden caramel retains notes of honey and vanilla, pairing beautifully with fruits like pears or peaches. A dark, mahogany caramel takes on a bitter, toasted quality that demands the contrast of sea salt, dark chocolate, or even aged spirits like bourbon or dark rum. By manipulating the duration of the caramelization process, you are essentially customizing the "spice" level of your sugar, allowing you to bridge the gap between sweet and savory in ways that a simple tablespoon of sugar never could.
Troubleshooting Common Failures
Every chef has ruined a batch of caramel. It is a rite of passage. If your caramel turns out grainy, it is almost certainly a case of premature crystallization. This can be caused by stirring too early, having a dirty pan, or failing to use an interfering agent. If the batch is already grainy, unfortunately, there is little you can do to fix it; it is better to start over than to try and force a recrystallized mess into a smooth sauce. Learn from the error, rinse your pan, and try again with a cleaner surface and a more cautious approach to the initial melting phase.
Dealing with Burnt Sugar
If you have pushed the sugar too far and it tastes burnt, do not attempt to serve it. The bitterness caused by over-caramelization is not "complex"; it is simply unpleasant. If you smell smoke, pull the pan immediately and look for black specks. If the sugar has turned black rather than dark brown, the molecular structure has broken down into pure carbon, and it is impossible to recover. Always keep a bowl of water nearby, not just to arrest the cooking process, but for safety. Splashes of molten sugar are incredibly painful and can cause severe burns; treat the liquid with the same respect you would a high-heat fryer.
Safety Protocols
The Legacy of the Caramelized Note
Ultimately, the mastery of sugar at 338°F is about more than just technique; it is about cultivating a culinary intuition. When you begin to recognize the scent of sugar turning from sweet to toasted, you are no longer following a set of instructions; you are listening to the pan. This transition from "recipe-follower" to "chef" is the goal of every serious home cook. It is a transition defined by the confidence to stand over a flame, watch the color shift, and know exactly when to pull it, when to stir it, and when to let it sit.
The Professional Mindset
The professional chef approaches every task with an eye toward consistency and quality. They understand that a perfect batch of caramel isn't an accident—it’s the result of temperature control, clean equipment, and an understanding of the chemical reaction occurring inside the pan. By applying these standards to your home cooking, you are elevating your entire repertoire. Whether you are folding a salted caramel into a batch of buttercream or drizzling a simple burnt-sugar glaze over a roasted chicken, the principles remain the same.
Developing Your Palate
As you continue to experiment with different shades of brown, try to keep a "flavor diary." Note the exact temperature at which you stopped the process, the color of the final result, and how it tasted when paired with different elements. Did the dark, bitter notes overpower the cream? Did the light, honeyed notes lack the necessary punch? These small observations are how you build a library of culinary experiences, allowing you to instinctively reach for the right level of caramelization for every dish you create in the future.
Conclusion
Caramelization is, at its core, a testament to the transformative power of heat. It is a simple, elegant process that relies on the precise intersection of temperature and time. When we speak of mastering the 338°F threshold, we are really speaking about mastering our own attention to detail. The home cook who learns to harness this reaction possesses a skill that can turn a mundane dessert into a work of art and a simple savory dish into something truly unforgettable. It requires bravery to let the sugar darken, intelligence to stop it at the right moment, and the willingness to learn from the occasional failure.
As you move forward in your culinary journey, remember that the goal is not to achieve perfection every single time, but to understand the "why" behind the "what." When you understand the science of the caramel, you are no longer at the mercy of the recipe. You become the architect of your own flavors, capable of adjusting the depth, the bitterness, and the texture to suit your personal vision. The next time you find yourself at the stove, watching those tiny sugar crystals begin to liquefy and swirl into gold, take a moment to appreciate the science at work. You aren't just making a sauce; you are conducting a chemical symphony.
Finally, do not let the fear of the dark keep you from exploring the outer limits of flavor. The most interesting profiles often hide in the deepest shades of bronze, just before the threshold of true bitterness. With the right tools, a sharp eye, and the knowledge of the chemistry involved, you are fully equipped to master the transformation of sugar. Take your time, monitor your temperatures, and above all, trust the process. The kitchen is your laboratory, and the art of caramelization is your most powerful tool for creating complexity that will define your signature style for years to come.


Get the Next Recipe
Weekly recipes, techniques, and gear picks — straight to your inbox.
