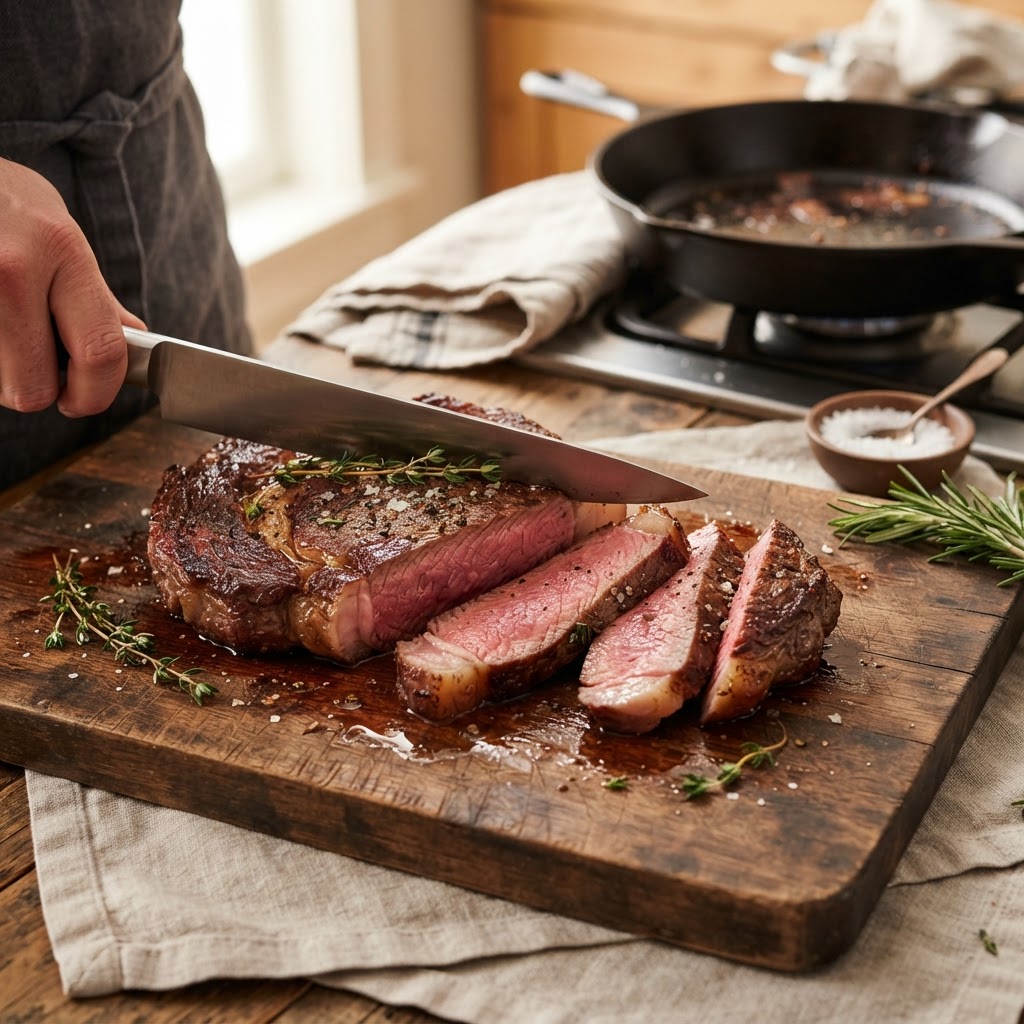
The Home Cook’s Guide to Carryover Heat: Mastering Residual Temperature for Perfectly Cooked Proteins
We have all stood in front of our stoves, armed with a digital probe thermometer and a sense of mounting anxiety, waiting for that specific temperature to hit. It is the defining moment of the home cook’s journey: that split-second decision to pull a seared steak or a roasted chicken out of the searing heat and onto the cutting board. Most amateur cooks view the moment they remove their protein from the pan or oven as the end of the cooking process, but in the professional culinary world, we know that is when the real transformation happens. Understanding the physics of heat transfer is not just for scientists in white coats; it is the most effective tool in your kitchen arsenal for achieving professional-grade results.
The secret to why restaurant proteins often taste superior to those prepared at home rarely lies in a secret marinade or an overpriced piece of equipment. It lies in the sophisticated application of carryover heat, also known as residual cooking. When you remove a piece of meat from a heat source, the exterior is significantly hotter than the interior, creating a temperature gradient that continues to push inward. If you account for this, you can achieve a perfectly edge-to-edge medium-rare steak or a succulent, juicy pork chop every single time. Failing to account for it, however, leads to the dreaded "overcooked center" that ruins even the highest-quality ingredients.
In this guide, we are going to demystify the science of thermodynamics as it applies to your dinner plate. We will explore how mass, surface area, and ambient temperature dictate the speed at which your proteins continue to cook once they leave the heat. By the end of this post, you will no longer be guessing whether or not your roast is done. You will be practicing the same deliberate, precise timing that allows professional chefs to serve hundreds of identical, perfectly cooked dishes every single night. Grab your thermometer, sharpen your knives, and let’s get to work mastering the final, and often most important, stage of the cooking process.
The Science of Residual Thermal Energy
To truly master the kitchen, you have to stop thinking of cooking as a static event and start thinking of it as a dynamic energy transfer. When you expose a protein to high heat—whether through searing in a cast-iron skillet or roasting in a convection oven—you are essentially forcing energy into the fibers of the meat. This energy travels from the exterior toward the core. The moment you remove the meat from the heat, that energy doesn't just disappear. It continues its migration inward, balancing out the thermal differences between the scorching crust and the cooler center.
This migration is what we call carryover cooking. If you don't calculate for this "extra" heat, you will inevitably end up with a piece of meat that is overdone by the time you sit down to eat. Think of it like driving a car; if you wait until you are exactly at your destination to take your foot off the gas, you will overshoot your parking spot. You have to anticipate the momentum of the vehicle. Similarly, with protein, you must stop the direct heat application before you reach your target internal temperature so that the residual heat finishes the job to perfection.
The amount of carryover heat you experience is determined primarily by the intensity of your cooking method and the size of the protein. A thin flank steak, for example, has very little mass and will experience minimal carryover—perhaps only two or three degrees. Conversely, a large, thick prime rib roast has significant thermal inertia; it can continue to rise by as much as ten to fifteen degrees after it is pulled from the oven. Learning to gauge this rise based on the specific protein you are handling is the mark of a seasoned home cook.
Understanding Thermal Inertia
Thermal inertia is the tendency of an object to resist changes in temperature. Larger proteins have higher thermal inertia. This means that a large roast holds a massive amount of heat in its outer layers. Once that roast sits on a resting rack, that heat is forced to go somewhere. Since it cannot leave the meat easily, it dives deeper into the center. This is why a large roast needs to be pulled at a much lower temperature than a thin cut.
"Cooking is not about the fire; it is about the management of heat. Once you realize that the food continues to work long after the flames are off, you finally hold the keys to consistency."
Establishing Your Target Temperatures
Setting your target temperature requires a two-part calculation: your pull temperature and your final serving temperature. For many home cooks, these two numbers are identical, which is the primary reason for overcooked meat. To stop this cycle, you must decide on your final goal and then work backward. If you want a steak at a perfect medium-rare (130°F), you must decide exactly how much carryover your specific cooking technique is likely to produce and pull it early.
For most standard home cooking scenarios—such as a 1-inch thick steak or a chicken breast—a pull temperature of 5 to 7 degrees below your target is the "sweet spot." This provides enough buffer to account for the carryover without risking an undercooked result. If you are searing at a very high heat, such as a black-and-blue sear, that gap might need to be wider because the exterior surface is significantly hotter than the interior, driving more energy into the center during the resting period.
It is also vital to consider the environment in which you are resting your meat. If you wrap your meat in heavy aluminum foil and place it under a towel, you are creating an insulated environment that prevents heat from escaping. This will dramatically increase the amount of carryover cooking. If you want to stop the cooking process quickly to ensure the internal temperature doesn't spike, place the meat on a wire rack uncovered. This allows heat to dissipate into the air rather than trapping it against the protein.
The Cheat Sheet for Carryover
Small cuts (Steaks, Chops):* Pull 5 degrees early.
Medium roasts (Tenderloins, Whole Fish):* Pull 8-10 degrees early.
Large roasts (Prime Rib, Leg of Lamb):* Pull 10-15 degrees early.
Poultry (Whole Chicken, Turkey):* Pull 5 degrees early (for safety and moisture).
The Crucial Role of the Resting Period
The resting period is not just a suggestion found in cookbooks; it is a fundamental requirement of protein preparation. When meat is exposed to high heat, the muscle fibers contract and tighten, squeezing the juices toward the center of the protein. If you cut into the meat immediately, these juices will rush out onto the cutting board, leaving the meat dry, chalky, and flavorless. Allowing the meat to rest enables those muscle fibers to relax and re-absorb the moisture.
During the resting phase, two distinct things are happening simultaneously: the redistribution of internal moisture and the equilibrium of residual heat. By waiting, you allow the interior temperature to stabilize. This is why, if you check the temperature of a roast when you first pull it and then check it again five minutes later, you will see it steadily rising. If you cut into it too early, you interrupt this essential phase, losing both texture and flavor.
As a rule of thumb, you should plan to rest your proteins for at least 20% of the total cooking time. For a thick ribeye, this is roughly 5 to 10 minutes. For a large roast, you might need 20 to 30 minutes. This patience is often the hardest part of the cooking process for an enthusiastic home cook, but it is the most rewarding. Use this time to prepare your sauce, set the table, or toss your salad. By the time you return, the meat will have reached its perfect final temperature and will be significantly juicier than if you had rushed the service.
Professional Techniques for Resting
The Rack Method:* Use a wire rack set over a rimmed baking sheet. This ensures air flows underneath the meat, preventing the bottom from becoming soggy.
The Tent Strategy:* Use foil lightly. Do not seal it tight, or you will steam the crust you worked so hard to develop.
The Probe Check:* Leave your digital probe in the meat during the rest so you can monitor exactly when the temperature peaks and begins to plateau.
Managing Heat Sources and Equipment
Your choice of equipment plays a massive role in how much residual heat is available to continue the cooking process. A cast-iron skillet, for instance, holds an incredible amount of heat. If you leave your steak in that hot pan while you try to plate your side dishes, the bottom of the steak will continue to cook much faster than the top. Always transfer your protein to a cutting board or a room-temperature resting rack immediately upon hitting your pull temperature.
Oven roasting introduces different variables. If you are roasting in a glass or ceramic dish, that dish itself is holding heat. Even after you pull the chicken out of the oven, the dish will continue to radiate heat into the bottom of the bird. This is why stainless steel or aluminum pans are preferred by chefs; they don't hold residual heat as aggressively as ceramic, giving you more control over the carryover process.
Furthermore, consider the ambient temperature of your kitchen. If you are cooking in a drafty, cold kitchen in the winter, your proteins will lose heat faster, meaning you may actually have less carryover than you would on a hot summer day. While this sounds like a minor detail, it is exactly the type of environmental awareness that separates a master chef from a casual home cook. Always stay aware of your kitchen's climate and adjust your timing accordingly.
"The difference between a steak that is gray and a steak that is pink edge-to-edge is the difference between guessing and measuring. Do not let your ambition outweigh your accuracy."
Comparing Heat Retention
Cast Iron:* High heat retention; removes quickly to avoid overcooking.
Ceramic/Glass:* Moderate to high retention; be cautious of "bottom-side" cooking.
Stainless Steel/Aluminum:* Low retention; the gold standard for controlled, consistent results.
Precision Measurement: Why Your Eyes Are Lying
If there is one piece of advice that will change your cooking career forever, it is this: throw away your intuition. Your eyes, your finger-poking, and the "time-based" advice from old family recipes are all unreliable. Proteins are organic, meaning no two steaks or chickens have the exact same density or fat content. The only way to truly master carryover heat is to use a high-quality, instant-read digital thermometer.
A high-quality thermometer gives you the data you need to make an informed decision. When you are five degrees away from your pull target, you can watch the temperature climb in real-time. This provides a sense of calm. Instead of panicking or wondering if the meat is "done," you are simply watching a process unfold. You are in control because you are observing the physics of the food rather than guessing based on how the exterior looks.
Consistency is the goal. When you learn to hit your target internal temperature every single time, you start to build a "mental library" of how different cuts behave. You begin to notice that a grass-fed steak might cook slightly faster than a grain-fed one, or that a dry-brined bird holds heat differently than one fresh from the package. This is the path to culinary mastery—moving from being a cook who follows a recipe to a chef who understands ingredients.
The Three Golden Rules of Thermometry
Advanced Techniques: The Reverse Sear and Sous Vide
To see the benefits of carryover cooking taken to their logical extreme, look no further than the reverse sear and sous vide methods. Both of these techniques rely entirely on the careful management of internal temperatures, making them the ultimate practice ground for understanding residual heat. By slowly bringing the protein to temperature, you minimize the temperature gradient between the crust and the center, which gives you much more control over the final carryover result.
In a reverse sear, you cook the meat at a low oven temperature until it is roughly 10-15 degrees below your final goal. You then pull it out and sear it at a very high heat for just long enough to create a crust. Because the center is already near temperature, the sear step acts as the final "push." This method is practically foolproof because it removes the guesswork of trying to achieve a perfect center while simultaneously searing a crust.
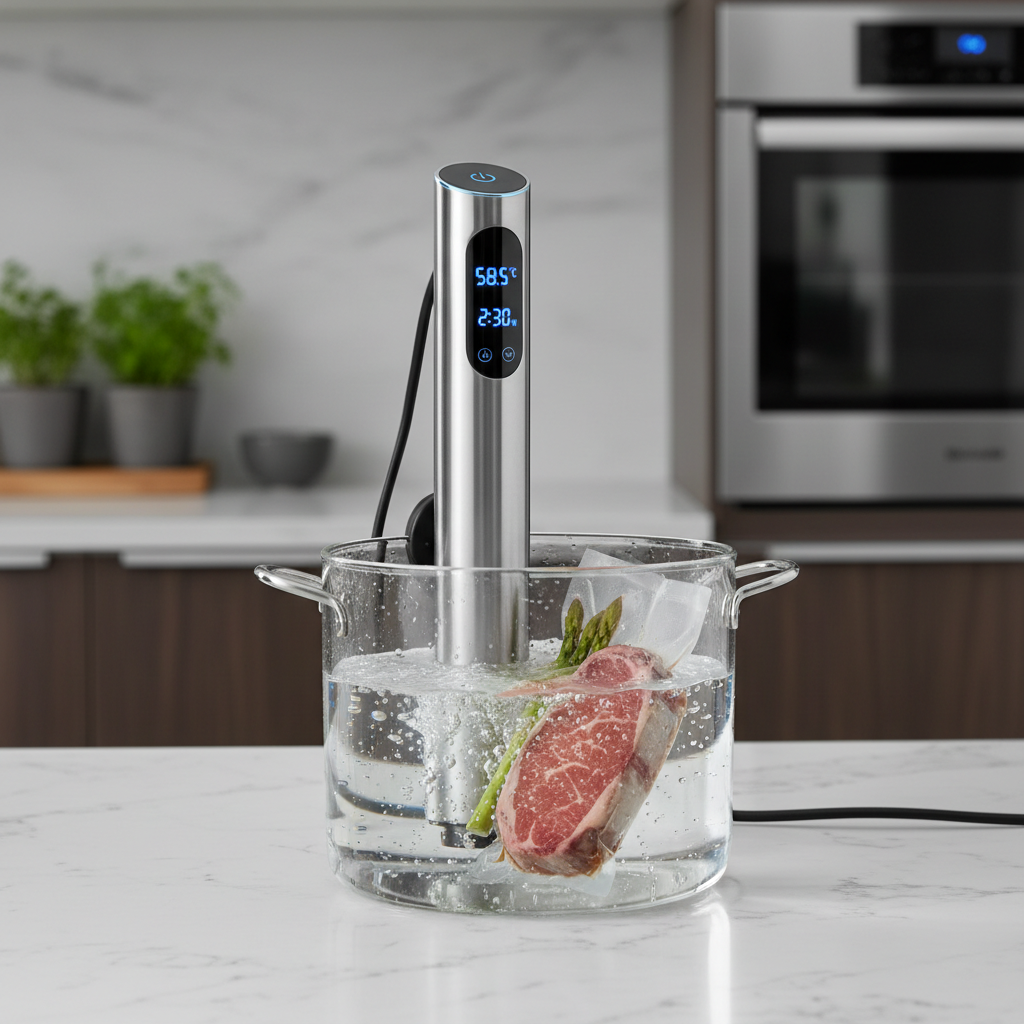
Sous vide is the pinnacle of this logic. By cooking the protein at the exact final temperature you desire for an extended period, you eliminate the risk of carryover altogether because the meat can never exceed the temperature of the water bath. While you still want to give your protein a quick sear for texture, you don't need to worry about the center rising further. These methods provide a great baseline to learn how different proteins feel and look when they are truly "done."
How to Master the Reverse Sear
Troubleshooting Common Errors
If you consistently find that your proteins are ending up on the "well-done" side of the spectrum, it is almost certainly a failure of the pull temperature. You are likely waiting too long to move the meat off the heat. Remember, the food is not finished when you take it off the fire; it is finished when it hits your plate. If you find your meat is too rare, you simply didn't account for the resting time, or you pulled the meat while the surface was still too cool to contribute any carryover energy.
Another common mistake is ignoring the surface-to-mass ratio. A thin, small chicken breast has almost no carryover because it loses heat to the air faster than it can transfer it to the center. If you try to pull a thin cut 10 degrees early, you will likely end up with raw poultry. Understanding the "scale" of what you are cooking is just as important as knowing the temperature. Always adjust your buffer based on the sheer size of the item you are working with.
Finally, resist the urge to peek or cut. Every time you slice into a piece of meat to "see how it’s doing," you are releasing the heat and the juices that you worked so hard to preserve. Trust your thermometer. If the probe says it is time, it is time. The meat will finish its journey in the five minutes it takes you to walk it to the table. Stay the course and trust the process.
Quick Fixes for Common Issues
Meat too tough?* Likely overcooked. Lower your pull temperature by 3-5 degrees next time.
Meat too cool?* You let it rest too long in a cold environment or pulled it too early. Use a warmer resting space.
No crust?* You didn't pat the surface dry enough. Moisture is the enemy of a good sear.
Final Thoughts
Mastering the art of carryover heat is perhaps the most significant "level up" a home cook can experience. It shifts your focus from the panic of the stovetop to the precision of the plate. When you realize that the resting phase is an active part of the cooking process—not just a pause in the action—you gain a level of consistency that most people only experience at high-end restaurants. It is a humble, quiet skill, but it is one that will define your reputation as a cook among your friends and family.
Remember that temperature is a guide, not a dictator. As you gain more experience, you will learn to feel the weight of the meat, observe the color of the sear, and instinctively know when it is time to move the protein to the cutting board. Keep that digital thermometer handy, keep your resting times consistent, and never underestimate the power of residual thermal energy.
Cooking is a lifelong pursuit of understanding heat, time, and chemistry. By embracing these basics, you are laying the foundation for a lifetime of incredible meals. The next time you find yourself standing in front of the stove, take a breath, look at your thermometer, and remember: you aren't just cooking the meat, you are managing its journey to perfection. Now, put these techniques to the test and start blaming the heat, not yourself. Happy cooking.
Further Reading and Continued Practice
To continue refining your skills, we highly recommend keeping a cooking journal. Note down the type of protein, the weight, the cooking method, the pull temperature, and the final temperature after a 10-minute rest. Over time, you will start to see patterns emerge that are specific to your kitchen, your stove, and your favorite grocery store cuts. This data is invaluable and will save you from making the same mistakes twice.
Don't be afraid to experiment with different resting environments as well. Try resting a steak on a wooden board versus a metal rack. See how the crust reacts. Try tenting one piece of salmon with foil and leaving another uncovered. These small, controlled experiments will teach you more about thermodynamics than any textbook ever could. You are the scientist in your own laboratory, and the results are delicious.
Finally, keep an eye on your tools. A thermometer that is off by five degrees can be the difference between a perfect steak and a disappointing one. Test your equipment regularly, keep your knives sharp to ensure clean slices during service, and always prioritize the quality of your ingredients. If you start with a great product and apply the correct thermal management, you will be unstoppable. The journey to the perfect bite starts with the first degree of heat and ends with the final rest.
Recommended Equipment for the Precise Cook
Instant-read Digital Thermometer:* Look for models with thin-tip probes for minimal puncture marks.
Wire Cooling Racks:* Essential for airflow and preventing "soggy bottom" syndrome.
Heavy-gauge Steel Pans:* For superior heat distribution and consistent searing performance.
Kitchen Journal:* Any notebook will do; focus on consistency in your notes.
By consistently applying these principles, you will notice a change in your confidence in the kitchen. You will stop rushing the sear, you will stop obsessively cutting into the meat, and you will begin to enjoy the ritual of the rest. This is what it means to cook with authority. You are the architect of your dinner, and every degree matters. So, the next time the pan gets hot, keep your cool—you’ve got the carryover handled.
Final Thoughts: The Philosophy of the Rest
At the end of the day, cooking is about care. It is about the care we put into sourcing our food, the care we put into preparing it, and—crucially—the care we put into the final minutes before we serve it. The resting period is an act of respect for the ingredient. By allowing the meat the time it needs to find its own equilibrium, we are honoring the animal and the effort it took to bring it to our table.
It can be difficult to embrace the wait. In a world that prizes speed and convenience, taking ten minutes to let a steak sit can feel like an eternity. But culinary excellence is rarely found in a hurry. It is found in the deliberate, thoughtful execution of technique. When you master carryover heat, you are proving that you understand the process from start to finish. You are a complete cook.
We hope this guide serves as a staple in your kitchen. Print it out, keep it near your spice rack, and revisit it whenever you are preparing a special roast or a weekend feast. The principles here are universal; whether you are cooking for one or for a dozen, the physics remain the same. Go forth, keep the heat in check, and enjoy the perfect results that come from precision. You have mastered the basics—now, go make something truly memorable.


Get the Next Recipe
Weekly recipes, techniques, and gear picks — straight to your inbox.
