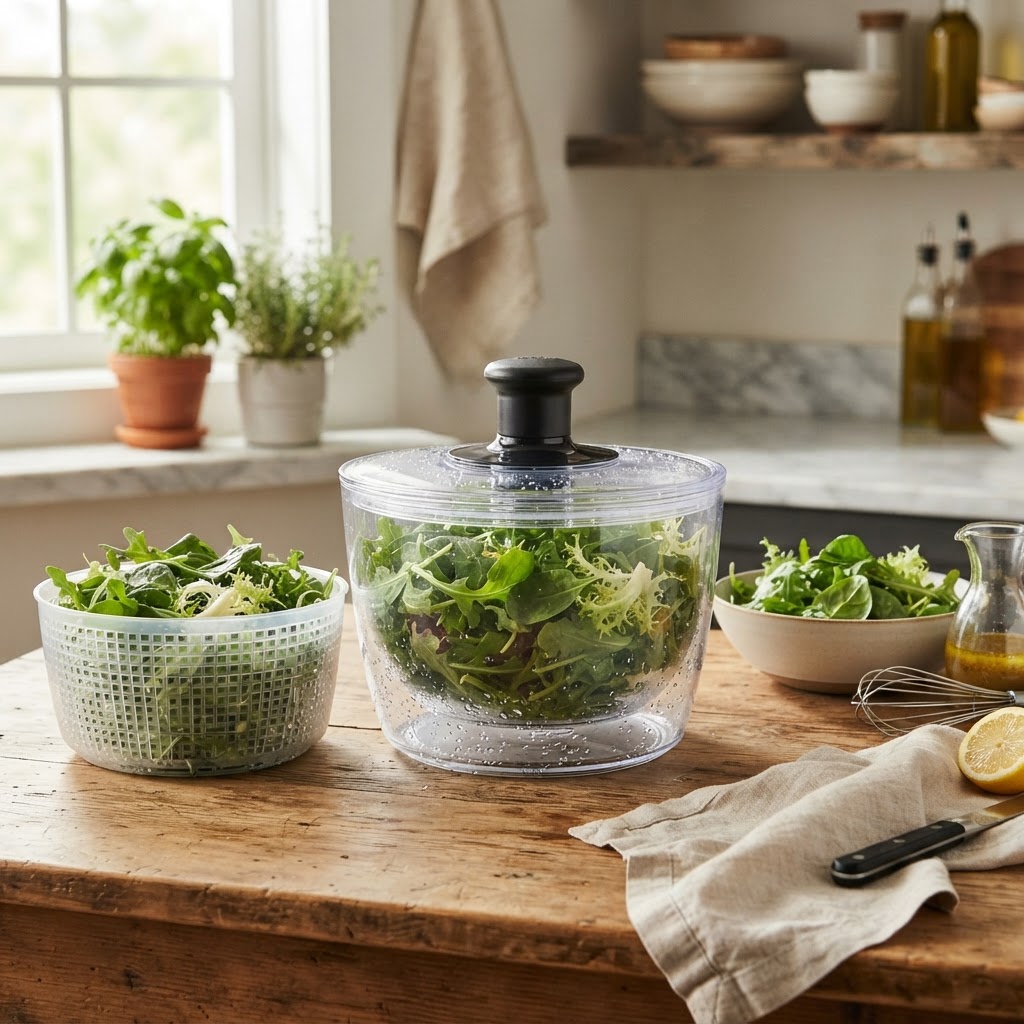
The Home Cook’s Guide to Centrifugal Separation: Mastering Salad Spinner Techniques for Perfectly Dry, Dressing-Ready Greens
We have all been there: standing in the kitchen, staring down a soggy mound of iceberg or mesclun that looks more like a wilted science experiment than a vibrant salad. You pour your carefully emulsified vinaigrette over the leaves, only to watch it slide right off, pooling at the bottom of the bowl in a watery, pale mess. The culprit isn’t your dressing, and it certainly isn’t your produce; it is the insidious moisture clinging to the surface of your greens. When water coats a leaf, it acts as a hydrophobic barrier, preventing oil-based dressings from adhering to the cell walls. This fundamental failure in prep work is the primary reason home-cooked salads lack that professional, restaurant-quality snap and flavor profile that we all strive for in our own kitchens.
Mastering the physics of the salad spinner is the single most transformative technique any home cook can adopt to elevate their vegetable game. Often relegated to the back of a cabinet or viewed as a bulky, single-use gadget, the centrifugal spinner is actually a precision instrument designed for one job: the rapid expulsion of surface moisture. By utilizing centrifugal force, we can strip away every droplet of rinse water without bruising the delicate capillaries of the lettuce. This process not only preserves the structural integrity of the greens but also ensures that the seasoning you apply later actually stays put. It is a small, quiet change in your routine that yields a massive difference in the plate's texture and overall enjoyment.
In the following guide, we will move past the simple act of "giving it a spin" and dive into the professional nuances of handling delicate lettuces, robust brassicas, and everything in between. We will explore why the temperature of your rinse water matters, how over-crowding the basket destroys your outcome, and why the "dry-then-chill" method is the secret to a salad that stays crisp for hours. If you are ready to stop blaming your ingredients for subpar results and start taking control of your culinary toolkit, then it is time to embrace the spinner as the hero it truly is. Grab your favorite greens, clear some counter space, and let’s get down to the business of perfect, dressing-ready salad foundations.
The Science of Moisture Management
At its core, salad preparation is an exercise in managing the surface tension of water. When you wash your lettuce—which is an essential step to remove grit, field soil, and potential bacteria—you introduce a layer of liquid that is not naturally part of the plant’s biological state. If this water is not removed, it dilutes the density of your dressing, turning a sharp, acidic vinaigrette into a watered-down liquid that lacks body. Professional chefs understand that the surface area of a leafy green is vast, and that surface area acts like a sponge if not properly dried.
Centrifugal separation functions by forcing water molecules outward from the center of rotation, stripping them away from the leaves and depositing them onto the interior walls of the spinner's outer bowl. It is a clean, efficient mechanism that does not rely on physical abrasion or towel-drying, which can often wilt leaves or cause premature oxidation. By understanding the speed and momentum required to clear the water without smashing the leaves against the plastic basket, you begin to master the transition from a soggy mess to a crisp, ready-to-toss salad.
Understanding Centrifugal Force
The effectiveness of your spinner is governed by the speed at which you initiate the spin. Most home spinners come with a pump-handle mechanism or a pull-cord, both of which are designed to reach an optimal rotational velocity within three to five pulls. It is important to avoid a frantic, uneven start. Instead, apply a steady, consistent rhythm to build up inertia gradually. This prevents the greens from clumping together in a dense mass at the bottom of the basket, which would trap water rather than expelling it.
"A salad is only as good as its foundation. If your greens are wet, you are simply serving a diluted, sad version of what could have been a crisp, vibrant experience."
The Art of the Rinse: Temperature and Technique
Before you even reach for the spinner, your process begins at the sink. Many home cooks make the mistake of using warm or room-temperature water to rinse greens, which accelerates the wilting process. Lettuce is mostly water and air, and it is highly sensitive to thermal shock. Using water that is just a few degrees above freezing is a professional trick that helps the leaves tighten their cellular structure, effectively "waking them up" before the spin.
When washing, fill a large basin or your salad spinner’s bowl with cold, filtered water. Gently agitate the leaves with your hands to loosen any dirt or sand. This manual agitation is key, as it forces the debris to sink to the bottom of the bowl. After soaking for about two to three minutes, lift the greens out of the water rather than pouring the water out; if you pour, you are simply dumping the grit back onto your clean leaves. This is the first step in ensuring your greens are truly "ready for the centrifuge."
The Ice Water Shock
If your greens are looking a bit tired after coming home from the grocery store, try an ice-water bath for ten minutes before spinning. By submerging the leaves in a mixture of half ice and half water, you cause the cells to absorb just enough moisture to achieve turgidity. A turgid leaf is a crisp leaf. Once they have been shocked in the ice bath, transfer them immediately to the spinner basket. Do not worry about the excess water dripping off; that is exactly what the spinner is about to remove.
Managing Capacity: The Golden Rule of Aeration
One of the most common reasons for damp greens is the "overload error." We often try to fit an entire head of romaine into a spinner designed for half that capacity. When the basket is packed too tight, the centrifugal force cannot reach the leaves in the center. The greens at the edges get dry, but the core remains saturated, leading to uneven results. For a professional result, the basket should never be more than two-thirds full, allowing for airflow and space for the water to be ejected.
If you are preparing a large quantity of salad for a dinner party, do it in batches. It is faster and more effective to spin two small, organized batches than one giant, dense cluster that never truly dries. Think of the spinner basket as a vacuum chamber of sorts—the leaves need enough space to move, albeit slightly, to ensure that the water is physically thrown away from the leaves during the rotation.
Professional Tips for Loading
Don't mash:* Gently place the greens into the basket without pressing them down.
Layering:* If you are washing mixed greens, try to keep the heavier, heartier leaves (like kale or endive) at the bottom and the delicate herbs (like cilantro or parsley) toward the top.
Check the base:* Ensure the basket is properly seated on the internal spindle before you start pulling the handle. If it’s off-center, you will have a shaky, noisy machine that does a poor job of spinning.
The "Dry-Then-Chill" Method
Once you have completed your initial spins, you might notice that the greens still feel slightly cool and potentially damp to the touch. This is the perfect time to introduce the "dry-then-chill" method. After spinning, leave the greens in the spinner basket, cover the top of the basket with a damp paper towel or a clean, lint-free kitchen towel, and place the entire assembly in the refrigerator. The paper towel absorbs any remaining residual humidity that the centrifugal force missed, while the cool air of the fridge keeps the greens crisp.
This method is standard practice in high-end restaurant kitchens. Chefs prepare their "mis-en-place" hours before service, keeping the salad greens in a dry, chilled state until the very moment a ticket comes in. By doing this, you are not only ensuring the greens are dry for the dressing, but you are also maximizing the shelf life of the produce. Stored this way, even delicate baby spinach can remain vibrant and crunchy for up to forty-eight hours after washing.
"True professional technique is about preparation that happens long before the first guest walks through the door. Dry your greens early and let them rest; patience in the prep phase is what separates a home cook from a master."
Selecting the Right Spinner
Not all salad spinners are created equal. When selecting a tool for your kitchen, prioritize stability and speed. A good spinner should have a non-slip rubber base to ensure that as you pull the handle or turn the crank, the bowl stays firmly planted on your countertop. If the bowl is sliding around, you cannot apply the necessary force to get the RPMs high enough to effectively strip the water from the leaves.
Look for a spinner that offers a "brake" button. This feature is more than just a convenience; it allows you to stop the rotation instantly, which prevents the greens from bruising if the basket starts to wobble at high speeds. A clear, BPA-free plastic bowl is also preferable, as it allows you to see exactly how much water is being collected at the bottom, letting you know when the spin is truly complete.
Maintenance and Cleaning
Hand wash:* While many bowls are dishwasher safe, the internal gear mechanisms of the lids are often susceptible to heat damage and mineral buildup. Always hand-wash the lid with warm, soapy water.
Deep cleaning:* Every few months, check the underside of the lid for trapped food particles that may have worked their way into the gearing. Use a small brush to keep the mechanism moving smoothly.
Dry completely:* Never store your spinner with the lid on while it is still damp, as this can lead to mold and mildew inside the gearing. Let it air-dry completely before reassembling.
Mastering Dressing Adhesion
Now that you have perfectly dry, chilled greens, let’s discuss why this matters for your final dish. Vinaigrettes are emulsions of oil and acid (or other flavorings). Because oil is hydrophobic, it has a natural tendency to bead up on a wet surface. When you put a heavy, water-based salad in a bowl and drizzle dressing over it, the water on the leaves acts as a buffer. You end up with a puddle of dressing at the bottom of the bowl and flavorless, sad leaves on top.
With dry leaves, the vinaigrette coats the surface evenly, sticking to the cell walls of the lettuce. This means you actually need less dressing to achieve a punchy, flavorful result. A tablespoon of dressing on dry greens is significantly more impactful than three tablespoons on wet greens. When the dressing coats the leaf, it provides a consistent, high-impact flavor in every single bite, which is the hallmark of a salad that people will rave about.
The Ratio Rule
3:1 Ratio:* A classic vinaigrette ratio is three parts oil to one part acid.
The Coating Test:* After tossing, a leaf should be coated but not drowning. If you see oil pooling in the bottom of your bowl, you have used too much dressing.
Add Slowly:* Start by adding just a small amount, tossing, and assessing the coating. You can always add more, but you can never take it away.
The Final Integration: Seasoning the Greens
Once your greens are dry and ready for the bowl, the final step in professional preparation is the seasoning of the greens themselves, independent of the dressing. A common mistake is to rely solely on the salt content within the dressing to season the salad. However, if you sprinkle a small amount of fine-grain sea salt and a crack of black pepper directly onto your dry, spun greens before you add the dressing, you create a deeper layer of flavor that is actually fused to the leaf.
This technique is often overlooked by home cooks, but it is standard in the culinary world. By seasoning the lettuce first, you ensure that even the parts of the leaf that don't get a heavy hit of dressing are still flavorful. It turns the lettuce from a vehicle for dressing into a structural component of the salad that has its own seasoned integrity. Combine this with your perfectly spun leaves, and you are operating at a level of detail that turns a standard weeknight meal into a restaurant-grade experience.
Final Thoughts
Mastering the salad spinner might seem like a small, technical victory, but it is emblematic of the "Blame The Chef" philosophy: success in the kitchen is rarely about luck, and almost always about the mastery of the small, invisible steps. When you take the time to wash your greens in cold water, spin them with precision, and allow them to dry and chill, you are showing respect for the ingredients. You are ensuring that every element of your salad is performing the role it was intended to play.
Do not be discouraged if your first attempt at this process feels slightly slower than your usual "rinse-and-toss" method. Culinary technique is a muscle memory, and like any other skill, it gets faster and more intuitive with repetition. Soon, the rhythmic pull of the spinner handle and the sensation of perfectly crisp lettuce will be as natural to you as chopping an onion or searing a steak. You will stop blaming your ingredients for the lack of restaurant-quality results and realize that you have had the power to elevate your home cooking all along.
Take these techniques—the cold water shock, the proper batch sizing, the dry-then-chill method—and apply them the next time you prepare a side salad. You will immediately notice the difference in how the dressing clings to the leaves, how the texture remains crisp even twenty minutes into the meal, and how the overall flavor profile is more intense and balanced. The humble salad spinner is not just a gadget; it is the bridge between a soggy, uninspired bowl of greens and a truly professional culinary creation. Keep practicing, keep spinning, and most importantly, keep cooking with intention. Your future salads will thank you.
Get the Next Recipe
Weekly recipes, techniques, and gear picks — straight to your inbox.
