The Home Cook’s Guide to Clarified Butter: How to Make Ghee for Higher Smoke Points and Pure Flavor
If you have ever found yourself standing in front of a scorching hot skillet, only to watch in horror as your butter turns from a beautiful golden hue into a bitter, acrid puddle of black soot, you are certainly not alone. Many home cooks struggle with the limitations of standard dairy fats, often reaching for oils that lack the depth and character that only real butter can provide. The secret weapon that separates the seasoned line cook from the average kitchen amateur is a fundamental mastery of clarified butter, and more specifically, its richer, nuttier cousin: ghee. By removing the water content and milk solids that cause butter to burn, you unlock a versatile, shelf-stable cooking medium that boasts an incredibly high smoke point and a shelf life that will make you wonder why you ever relied on bottled vegetable oils.
Understanding the chemistry of fat is the first step toward true culinary autonomy, and learning to clarify your own butter is the ultimate rite of passage. While you can certainly purchase ghee at specialty markets, the quality, flavor, and cost-effectiveness of preparing it in your own kitchen are vastly superior to any mass-produced alternative. When you take the time to simmer, skim, and strain, you aren't just making an ingredient; you are creating a foundational building block for everything from searing a thick ribeye steak to achieving the perfect, shatteringly crisp crust on a batch of homemade hash browns. It is a process that demands patience and a watchful eye, but the reward is a culinary gold standard that will elevate every savory and sweet dish you create.
In this guide, we are going to dive deep into the science of fat separation, the precise techniques required to achieve perfection, and the various ways you can infuse your clarified fats with aromatics to truly take your cooking to the next level. We will strip away the mystery surrounding this process, ensuring that whether you are a novice who barely knows your way around a saucepan or a home cook looking to sharpen your technique, you will walk away with the confidence to master this essential skill. Grab a high-quality block of unsalted European-style butter, ready your heavy-bottomed pan, and prepare to transform your pantry with the purest, most flavorful fat in the culinary world.
The Chemistry of Butter: Understanding Solids and Water
To master the art of clarification, one must first respect the composition of the butter itself. Butter is not just a uniform block of fat; it is a complex emulsion consisting of approximately 80 to 82 percent milk fat, 16 to 18 percent water, and about 1 to 2 percent milk solids. Those milk solids—comprised primarily of proteins like casein and sugars like lactose—are exactly what cause butter to brown and eventually burn when subjected to high heat. By stripping away the water and the solids, we are left with nothing but pure, golden, shelf-stable butterfat.
The smoke point of standard butter is relatively low, typically ranging between 300°F and 350°F (150°C to 175°C). This limited range is why sautéing with butter often leads to a charred kitchen and ruined ingredients. Once you successfully clarify the butter, you remove those reactive solids, effectively raising the smoke point to a remarkable 450°F to 485°F (230°C to 250°C). This allows you to achieve a hard, professional-grade sear on proteins without sacrificing the luxurious, creamy flavor that only dairy can provide.
Why Quality Matters
Not all butter is created equal, and for this project, you should aim for the highest quality unsalted, European-style butter you can find. European butter typically has a higher fat percentage than American-style butter, which means less water to evaporate and a more efficient yield. Look for butter with a high butterfat content, often marked on the package as 83% or higher, and ensure it is unsalted to prevent the salt from concentrating during the reduction process, which would result in an inedible, overly salty final product.
"The true test of a chef is not how they handle the expensive ingredients, but how they elevate the staples. Clarified butter is the gold standard of fundamental cooking fats, providing the control of an oil with the soul of a cream."
The Essential Equipment List
You do not need a commercial kitchen to produce professional-quality ghee, but you do need the right tools to ensure success. The most important piece of equipment is a heavy-bottomed saucepan. A heavy base ensures even heat distribution, preventing hot spots that could scorch the milk solids before the water has fully evaporated. A thin pan, conversely, will lead to uneven cooking and potentially bitter results.
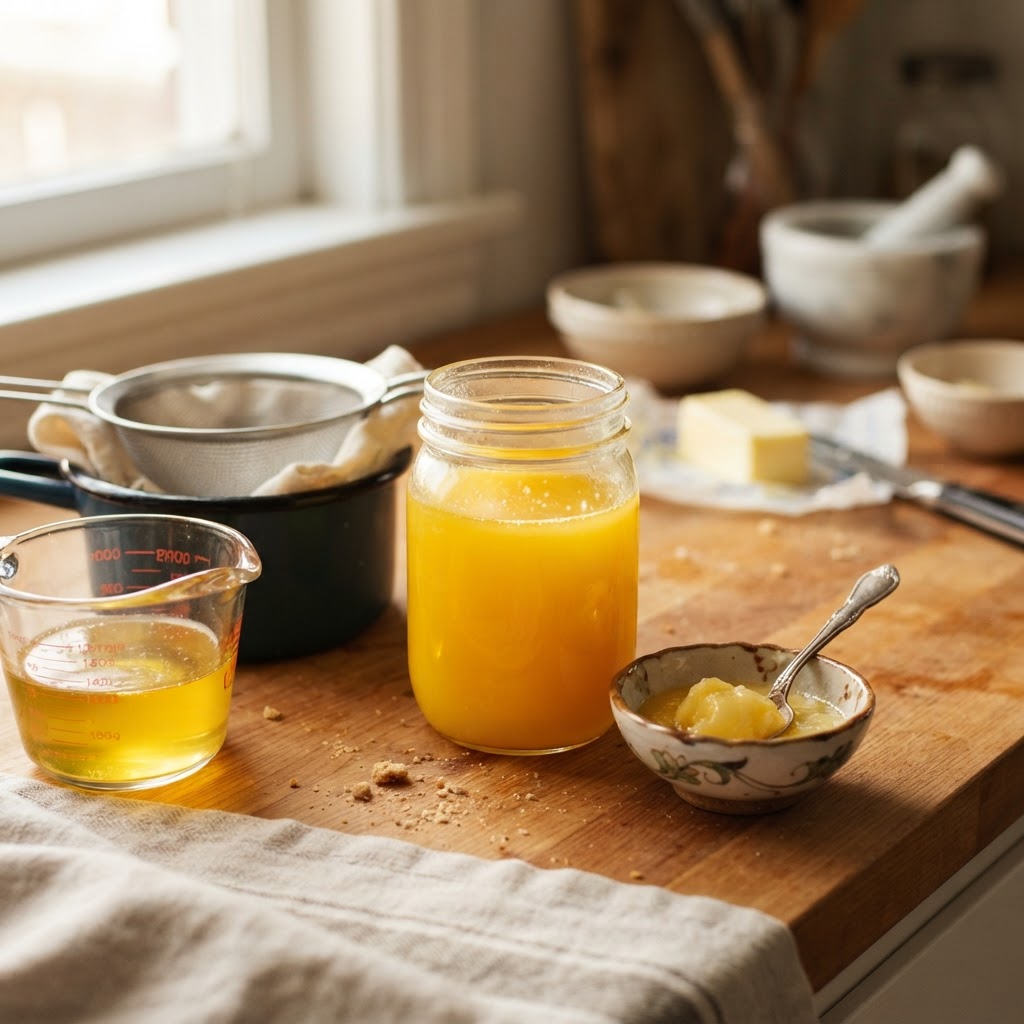
You will also need a fine-mesh strainer, a piece of cheesecloth, and a clean, sterilized glass jar for storage. If you want to get very precise, a digital thermometer is an invaluable tool for ensuring you reach the proper temperature without overshooting the mark. Finally, a stainless steel spoon or a deep ladle will be necessary for the delicate process of skimming the frothy white foam that rises to the surface during the cooking process.
Sterilization and Prep
Before you begin, ensure your glass storage jars are perfectly clean and dry. Any moisture trapped in the jar can lead to spoilage later on, effectively negating the shelf stability you are working so hard to achieve. You can sterilize your jars by boiling them for ten minutes and letting them air dry completely upside down on a clean kitchen towel. A dry jar is the key to keeping your ghee fresh for months, or even years, in your pantry.
Step-by-Step: The Clarification Process
Begin by cutting your butter into uniform, one-inch cubes. Uniform sizing is key to consistent melting; if your chunks are wildly different sizes, the smaller ones will melt and start to simmer long before the larger ones have even softened. Place the cubes into your heavy-bottomed saucepan and turn the heat to medium-low. Your goal is a slow, steady melt, not a frantic boil.
Once the butter is fully melted, you will notice a distinct separation occurring. A white, frothy foam will appear on the surface; this is the water vapor and some of the milk solids attempting to escape. Below this foam, a thin layer of liquid fat will begin to form, while a milky, cloudy layer—the remaining milk solids—will begin to settle at the bottom of the pan. Do not stir the butter at this stage. You want the layers to separate naturally.
The Stages of Transformation
As the water continues to evaporate, the bubbling will become less aggressive and take on a different, higher-pitched sound. This is your cue to begin the skimming process. Using your spoon, gently remove the white foam from the surface. Do not try to rush this; take your time to pull away the froth until the golden fat below is visible and clear. The clearer the fat, the higher your final smoke point will be.
Mastering the Ghee Technique
While clarified butter is simply the removal of solids and water, ghee takes the process one step further. To make traditional Indian-style ghee, you must allow the milk solids that have settled at the bottom of the pan to caramelize. As these solids toast, they release nutty, aromatic compounds into the fat, deepening the flavor profile significantly. This is where the term "nutty" comes from in the context of ghee.
Monitor the heat closely during this stage. You are looking for the solids at the bottom of the pan to turn a light golden-brown color. If they turn dark brown or black, you have taken the process too far, and your ghee will taste burnt and acrid rather than sweet and nutty. Once you smell that distinct, warm, toasted aroma, immediately remove the pan from the heat. This transition happens quickly, often in the span of thirty seconds, so remain vigilant.
Temperature Control
Keep your heat at the lowest setting once the foam has been removed. If you are using a candy thermometer, you are aiming for a temperature between 230°F and 250°F. Anything below this, and the milk solids won't properly caramelize; anything significantly above this, and you risk burning the proteins that provide the flavor. If your stovetop runs hot, consider using a flame tamer or a heat diffuser between the burner and the pan.
"A kitchen without a jar of ghee is a kitchen that is missing its backbone. It provides the stability to sear, the fat to fry, and the depth to finish, all while remaining as pure as the ingredients from which it came."
Filtration and Final Storage
Once your ghee has reached that perfect golden-brown color and the nutty fragrance fills your kitchen, you must strain the fat immediately to halt the cooking process. Set up your fine-mesh strainer lined with at least two layers of cheesecloth over your sterilized glass jar. Carefully pour the hot fat through the strainer. The goal is to catch all those toasted milk solids, leaving you with nothing but perfectly clear, liquid gold.
Be patient with the straining process. The cheesecloth will trap the fine solids, and it may take a minute or two for all the fat to pass through. Do not squeeze the cheesecloth to force it through faster, as this may push through some of the smaller solids you are trying to remove. Once the fat has been fully strained, let the ghee sit at room temperature until it has completely cooled and solidified.
Identifying Potential Issues
Cloudiness:* This usually means you didn't strain well enough or there is still a small amount of moisture remaining.
Graininess:* This is a result of cooling too quickly. For the smoothest texture, let your ghee cool slowly at room temperature rather than in the refrigerator.
Bitter Aftertaste:* This is almost always caused by letting the milk solids burn during the caramelization stage.
Applications: How to Use Your Ghee
Now that you have a jar of pristine, high-smoke-point fat, how should you use it? The most obvious application is high-heat searing. Because the solids that usually cause burning are gone, you can achieve an incredible Maillard reaction on steaks, lamb chops, or even firm white fish without the butter tasting like burnt trash. Use it to baste a steak in the final minutes of cooking, and you will notice that the butter doesn't foam up and threaten to burn the meat.
Ghee is also arguably the greatest fat for roasting vegetables. Toss your carrots, Brussels sprouts, or parsnips in melted ghee and roast them at high heat; you will get a level of caramelization that regular butter simply cannot provide. The ghee coats the vegetables, protects them from the intense heat, and imparts a richness that bridges the gap between a roasted vegetable and a decadent side dish.
Beyond the Pan
Don't limit yourself to just savory applications. Ghee is a phenomenal fat for baking. In recipes that call for melted butter—such as certain quick breads, cookies, or even granola—ghee can be substituted with wonderful results. It adds a deeper, more sophisticated flavor profile to baked goods. It is also an excellent medium for making traditional flaky pastries or even as a simple spread for a piece of toasted sourdough bread.
Refining Your Culinary Technique
As you become more comfortable with this process, you can start experimenting with infusions. Because ghee is a pure fat, it acts as an incredible solvent for aromatic compounds. Before you finish the straining process, you can add herbs like rosemary, thyme, or even crushed garlic cloves to the fat while it is cooling. The fat will carry these flavors into whatever you are cooking, effectively giving you a "seasoned" fat that is ready to go at a moment's notice.
Consider adding whole spices to the melting butter, such as cardamom pods, black peppercorns, or even a cinnamon stick, if you are planning to use the ghee for Indian-inspired dishes or desserts. These spices infuse the ghee with layers of flavor that permeate your entire meal. Just ensure you strain these out thoroughly so that the solids don't end up in your final jar, as that can lead to spoilage if not handled with care.
Professional Tips for Consistency
Final Thoughts
The journey from a simple block of butter to a jar of golden, clarified ghee is one of the most rewarding transformations you can undertake as a home cook. It is a process that strips away the unnecessary, leaving only the essential, and in that process, you discover a deeper understanding of how heat, fat, and flavor interact. You are no longer just following a recipe; you are manipulating the ingredients to suit the needs of your cooking, rather than allowing the ingredients to dictate your limitations.
When you master the art of clarification, you gain a sense of culinary freedom. No longer will you worry about your searing fat burning in the pan. No longer will you be tethered to refined oils that lack the character and depth of dairy. You now possess a tool that is as effective as a professional shortening but as flavorful as a pasture-raised cream. It is a foundational skill that, once learned, becomes second nature—a quiet, constant companion in your culinary evolution.
Take the time to practice this in your own kitchen. Start with a single pound of high-quality butter and watch the stages unfold. Smell the change in the air, listen to the whisper of the water evaporating, and observe the vibrant shift in color. These are the moments that build a cook’s intuition. "Blame The Chef" is here to support you, but remember that the true genius is found in the pan, in the heat, and in your willingness to refine your craft every single day. Happy cooking, and may your pans always be perfectly seasoned and your butter always beautifully clear.
Get the Next Recipe
Weekly recipes, techniques, and gear picks — straight to your inbox.
