The Home Cook’s Guide to Clarified Butter: Mastering Ghee for High-Heat Searing and Rich Flavor Finishing
There is a moment in the life of every aspiring home cook when they realize that the secret to restaurant-quality flavor isn't just about expensive cuts of meat or exotic spices. It is about understanding the fundamental properties of fat and how different lipids behave under the intense pressure of a hot pan. For years, I struggled with the acrid smell of burnt butter every time I attempted a simple pan-seared steak. I would stand over my stovetop, panicking as the milk solids turned from a nutty brown to a bitter black, ruining my dinner before the first flip. That was the day I finally stopped blaming my stove and started learning the alchemy of clarified butter and its golden-hued cousin, ghee.
The process of clarification is, at its core, a simple separation of components: water, milk solids, and pure butterfat. When you clarify butter, you are essentially stripping away the elements that cause it to burn, leaving behind a stable, high-smoke-point fat that is pure culinary magic. It transforms from a delicate ingredient that must be treated with caution into a workhorse that can handle the searing heat of a cast-iron skillet without batting an eye. Understanding this transition is the hallmark of a cook who is ready to move from following recipes to truly mastering the kitchen. By taking control of your fats, you are taking control of the very foundation of your dish.
In this guide, we are going to peel back the curtain on this classic French technique and its Ayurvedic counterpart, ghee. Whether you are looking to achieve the perfect crust on a scallop, a rich finish to a bowl of steamed vegetables, or simply want a staple fat that can live on your counter for months, this is the skill that will change your life. We will cover the science, the ratios, the precise temperature control, and the professional chef secrets that elevate home cooking to a professional standard. Prepare to clear your pantry of those smoking, sputtering butter sticks and replace them with a jar of liquid gold that will become your new best friend in the kitchen.
The Science of Smoke Points and Butterfat
To understand why we clarify butter, we must first understand why regular butter fails under heat. Butter is composed of approximately 80 to 82 percent butterfat, 16 to 18 percent water, and 1 to 2 percent milk solids—specifically, lactose and proteins like casein and whey. When you heat butter, the water evaporates, causing the butter to sputter and foam. Once the water is gone, those remaining milk solids begin to brown, which is delicious in a beurre noisette, but catastrophic if you are trying to sear a steak at 400 degrees Fahrenheit. The smoke point of whole butter is roughly 350°F (175°C), which is far too low for effective searing.
Clarification raises that smoke point significantly by removing the water and the solids entirely. Once those elements are stripped away, you are left with pure anhydrous milk fat. This fat can withstand temperatures upwards of 450°F (232°C), allowing you to achieve a beautiful, deep, mahogany crust on proteins without the bitter, burnt taste of carbonized proteins. It is the culinary equivalent of giving your cooking oil a superpower. The resulting product is shelf-stable, cleaner in flavor, and infinitely more versatile than standard butter.
"The difference between an amateur and a professional isn't necessarily their repertoire, but their mastery of the fat they cook in. Once you eliminate the bitterness of burnt milk solids, you gain the freedom to push your searing technique to its absolute limit."
Why Stability Matters in the Kitchen
Stability refers not just to the smoke point, but to the shelf life and reactivity of the fat. Because you have removed the water, you have also removed the environment where bacteria thrive. Furthermore, by removing the milk solids, you remove the reactive agents that oxidize and turn rancid. A properly clarified fat is a pantry staple that resists degradation. When you cook with pure fat, your ingredients are coated evenly, heat is transferred more efficiently, and the finish on your dishes becomes silky and refined.
Essential Tools for the Clarification Process
You do not need a commercial kitchen or expensive equipment to produce high-quality clarified butter. However, having the right setup makes the process seamless and mess-free. You will need a heavy-bottomed saucepan, preferably stainless steel, to ensure even heat distribution. Avoid non-stick pans if you can, as the light-colored surface can make it difficult to judge the color of the milk solids as they begin to toast at the bottom of the pan. A light-colored pan allows you to see the transition from golden to brown with total clarity.
The Filtration System
The most critical part of your toolkit is your filtration setup. You will need:
* A fine-mesh metal sieve to catch the larger bits of foam.
Cheesecloth* or a clean, lint-free cotton flour sack towel for the final polish.
* A glass jar or container for storage.
I highly recommend using a four-layer fold of cheesecloth to ensure that even the finest protein particles are caught. If you leave behind too many milk solids, your "clarified" butter will not be as stable as it should be, and it will eventually cloud up and potentially spoil. Patience is your greatest tool; let gravity do the work, and resist the urge to squeeze the cheesecloth, which might force solids through.
The Step-by-Step Technique: Clarified Butter vs. Ghee
While the terms are often used interchangeably, there is a distinct difference in the process. Clarified butter is essentially a quick extraction—you melt the butter, skim the foam, and strain it before the milk solids have a chance to toast. Ghee, on the other hand, is cooked for longer, allowing the milk solids to caramelize and settle at the bottom of the pan, imparting a distinct, nutty, roasted flavor that is essential in South Asian cuisine.
The Standard Clarification Method
The Ghee Method (Toasted Nutty Flavor)
If you are looking for that depth of flavor found in professional cooking, take the process further. After skimming the foam, keep the heat on low. Watch the bottom of the pan intently. You will see the white milk solids start to settle and begin to turn a light golden brown. As soon as you smell a faint aroma reminiscent of toasted hazelnuts, remove the pan from the heat immediately. The residual heat will continue to cook the solids, and you want them golden, not mahogany. Strain as usual. The result is a richer, more complex fat that provides an incredible depth of flavor to finishes and aromatics.
"Ghee is not merely butter that has been cleaned; it is butter that has been matured. That nutty, toasted aroma is the signature of a chef who understands how to build layers of flavor from the very start of a dish."
Troubleshooting Common Culinary Mistakes
Even with a simple process like this, mistakes happen. The most common error is heat management. If your heat is too high, the milk solids will burn instantly, giving your butter a harsh, acrid smell that cannot be fixed. If you find your fat turning a dark, brownish color before you have even begun to clarify it, you have essentially made burnt butter, which is delicious for a brown butter sauce but useless as a high-heat frying fat. Start over if the smell is bitter; your taste buds will thank you later.
Another issue is the quality of the raw butter. Always choose high-quality, unsalted butter with the highest butterfat content you can find. Cheap butter often contains more water and hidden additives that can affect the stability and flavor of your clarified batch. If you are using salted butter, the salt crystals will often settle with the milk solids, but you may find the finished product tastes overly salty when used for baking or delicate applications. Stick to unsalted for maximum versatility.
Managing the Yield
Remember that you will lose volume during this process. You are losing the water content and the mass of the milk solids. Generally, you can expect to retain about 75% to 80% of your starting weight. If you start with one pound of butter, expect to finish with roughly 12 to 13 ounces of clarified fat. Account for this in your meal planning, especially if you are using the fat for deep-frying or for a large batch of pastry.
Applications: From High-Heat Searing to Pastry Perfection
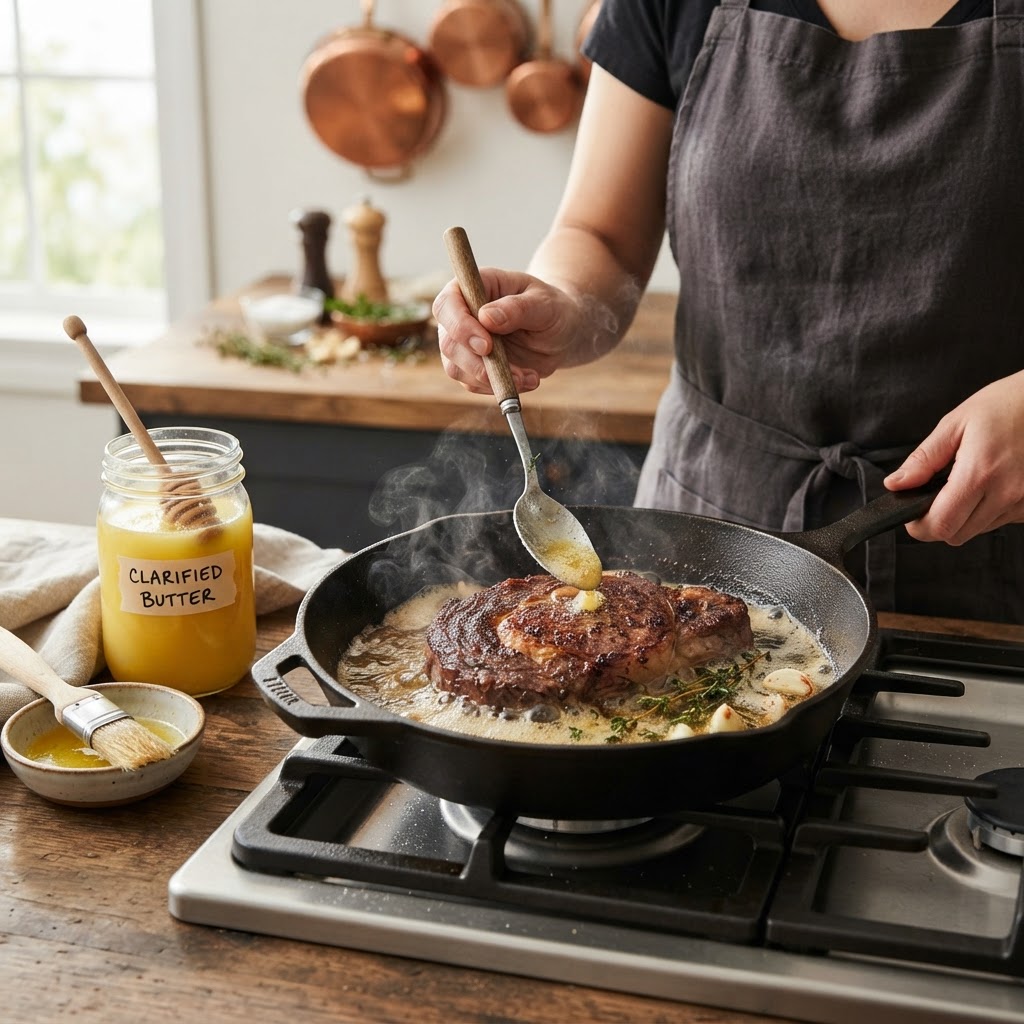
Now that you have your jar of golden fat, how do you use it? The most obvious application is pan-searing. Whether it is a thick-cut ribeye, a filet of sea bass, or even a bundle of asparagus, clarified butter provides a clean, conductive medium for heat. Because there are no milk solids to burn, you can sear your protein at higher temperatures for longer periods, resulting in a consistent, glass-like crust without the risk of burnt spots.
Beyond the sear, consider the finishing touch. A spoonful of ghee stirred into a pan of roasted carrots adds a level of luxury that plain butter cannot match. It is also exceptional for high-temperature roasting. Toss your root vegetables in a tablespoon of clarified butter before putting them in a 425°F oven; the fat will help them caramelize and crisp up rather than steaming in the pan.
The Baker’s Secret
In pastry, clarified butter is an unsung hero. If you are making a delicate laminated dough or a shortbread, the water content in regular butter can sometimes make the dough tough by developing too much gluten. By using clarified butter, you are working with pure fat, which helps keep pastries incredibly tender and flaky. It is also a secret weapon for greasing pans when you need a perfectly clean release for cakes or muffins, as it doesn't leave behind the brown, burnt residue that whole butter does.
For the perfect sear:* Use it to coat a cast-iron skillet for a butter-basted steak without the smoke.
For vegetable glazes:* Emulsify a little bit of warm water or stock into the ghee for a stable, glossy finish.
For pastry:* Substitute 1:1 for melted butter to improve the tenderness of your shortcrusts.
For aromatics:* Sweat onions or garlic in ghee to add a subtle nuttiness that builds a foundation of flavor.
Storing and Preserving Your Liquid Gold
One of the greatest benefits of clarifyng your butter is its longevity. Unlike standard butter, which can absorb odors from your refrigerator and go rancid within a few weeks, clarified butter is incredibly shelf-stable. If you have removed the water and the milk solids thoroughly, your clarified butter can sit in an airtight jar at room temperature for several months. I keep a dedicated ceramic crock near my stovetop for quick access during busy dinner services.
If you are worried about your environment being too hot or humid, it is perfectly fine to store it in the refrigerator. In the fridge, it will harden into a solid, but it softens quickly the moment it hits a warm pan. To maintain the highest quality, always use a clean, dry spoon every time you dip into the jar. Introducing moisture or food particles back into the jar can cause it to lose its shelf stability, so treat it with the same respect you would a high-quality oil.
"A well-stocked pantry is built on foundations that don't spoil easily. Clarified butter is the ultimate bridge between the perishability of dairy and the shelf-stable utility of culinary oils."
Final Thoughts
Mastering the art of clarified butter and ghee is a rite of passage for the serious home cook. It forces you to slow down, pay attention to the transition of ingredients, and respect the chemistry happening in your pan. When you stop blaming the equipment for your burnt butter and start controlling the medium through which you cook, you elevate every meal that leaves your kitchen. This is not just about technique; it is about confidence.
When you reach for that jar of golden fat, you are reaching for a product that you crafted with your own hands. You know exactly what went into it, and you know exactly how it will perform under fire. It is this level of intimacy with your ingredients that separates a cook who is merely following instructions from a cook who truly understands the craft. The next time you sear a piece of fish or sauté a handful of mushrooms, use your clarified butter and notice the difference. The clarity, the flavor, and the sheer reliability will make it an essential part of your cooking arsenal from this day forward.
Take the time this weekend to prepare a batch. Watch the butter melt, observe the foam, listen to the whisper of the water evaporating, and keep a watchful eye on those golden solids as they settle at the bottom. By the time you strain that clear, vibrant liquid into a jar, you will have more than just a culinary ingredient—you will have a testament to your own growth in the kitchen. Keep practicing, keep experimenting, and most importantly, enjoy the rich, toasted, professional-grade flavor that only you can provide to your table.
***
Deepening Your Culinary Intuition
Beyond the technical steps, I want you to consider how this process changes your relationship with the pan. When you are cooking, you are managing heat energy. Whole butter is a volatile messenger; it gives you signals—spluttering, foaming, browning—that indicate it is approaching its death. It warns you to move fast. Clarified butter is a calm, steady partner. It stays quiet. It doesn't scream at you as you raise the heat. This allows you to listen to the other ingredients in the pan—the sear of the meat, the softening of the onions, the crusting of the starch.
You gain the ability to cook with your ears as much as your eyes. By removing the distraction of the burning milk solids, you are actually clearing the path for better culinary intuition. This is the difference between struggling against your ingredients and dancing with them. It is the reason why, in the high-stress environment of a professional kitchen, we reach for clarified fat. We need the consistency, the reliability, and the clean flavor profile that allows the star ingredient to shine.
Expanding Your Repertoire
Once you are comfortable with the base technique, try infusing your ghee. While the fat is still warm and liquid, toss in a few sprigs of fresh rosemary, a smashed clove of garlic, or even a few dried chili flakes. As the fat cools, it will absorb these aromatics, giving you a flavored finishing oil that can transform a simple piece of toast or a bowl of popcorn into something truly gourmet. The sky is the limit once you have the base fat mastered.
Remember, cooking is a continuous process of refinement. You will find that as your skills grow, your reliance on recipes diminishes, replaced by a deep understanding of what your food needs to taste and feel like at every stage of the cooking process. Clarified butter is one of those foundational pillars that supports that growth. So, keep that jar topped up, keep your pans hot, and keep pushing the boundaries of what you thought you could achieve in your home kitchen. You aren't just making dinner; you are curating a sensory experience, one golden spoonful at a time.
Keep in mind that the quality of your raw material dictates the final output. If you can find high-quality, grass-fed butter, use it. The flavor profile of grass-fed butter is significantly more nuanced and complex, and that depth will be preserved and even intensified during the clarification process. It is a small investment that pays dividends in the final taste of your dishes. Do not settle for average ingredients when you have gone through the trouble of mastering professional-grade techniques.
Finally, do not be afraid to experiment with the color. Some chefs prefer their ghee very light, while others push the caramelization of the milk solids to the brink. Find the profile that matches your cooking style. Do you love the deep, nutty, nearly browned-butter aroma in your savory dishes? Then keep the heat on a little longer. Do you prefer a clean, neutral fat for delicate baking? Then strain early. You are the chef, and this is your technique to adapt. The kitchen is yours to conquer. Happy cooking!


Get the Next Recipe
Weekly recipes, techniques, and gear picks — straight to your inbox.
