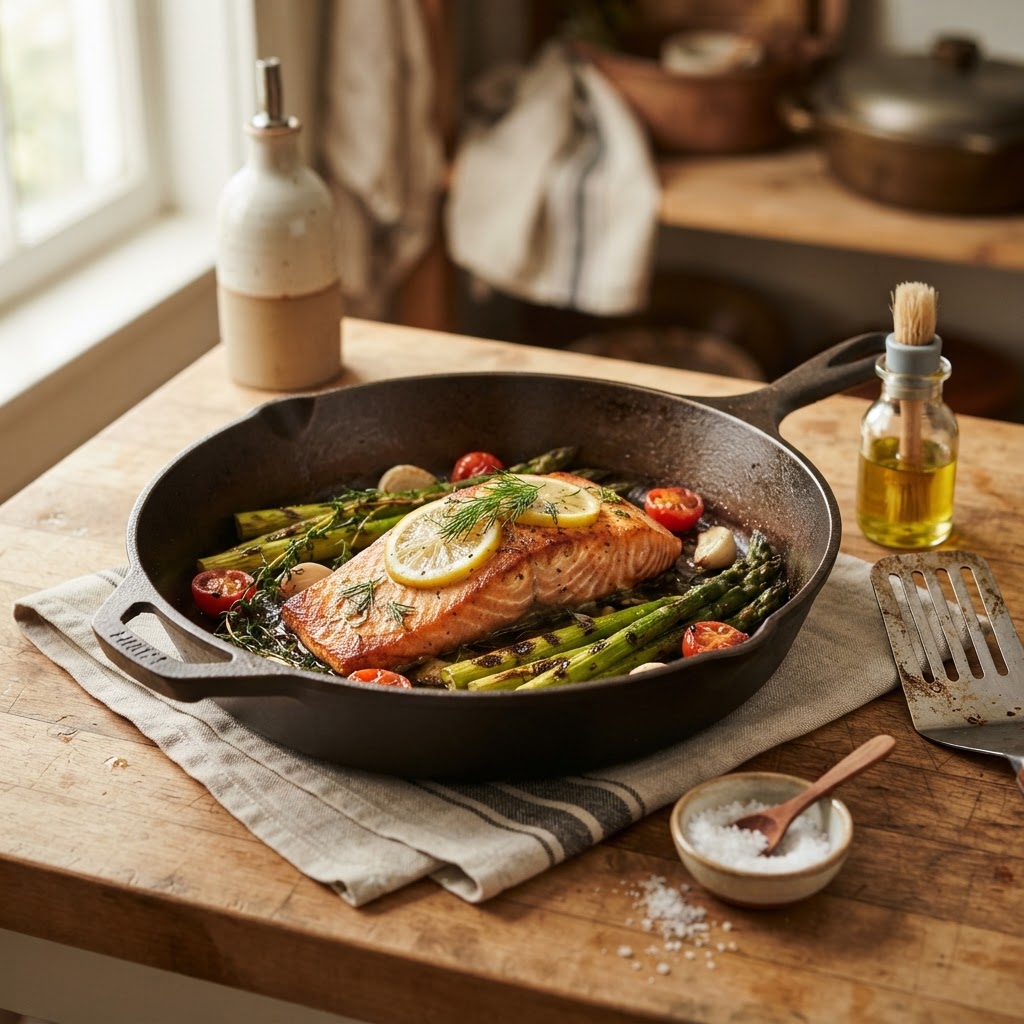
The Home Cook’s Guide to Cleaning and Maintaining Cast Iron: From Seasoning to Restoration
The humble cast iron skillet is the undisputed workhorse of the professional kitchen, yet it remains one of the most misunderstood tools in the home cook’s arsenal. Often treated with a mix of reverence and fear, these heavy, forged pieces of iron are far more durable than the modern non-stick pans lining the aisles of big-box stores. When you invest in a quality piece of cast iron, you are not just buying a vessel for searing steaks or baking cornbread; you are inheriting a heirloom that, with the right care, will outlive you by several generations. The secret to its longevity lies in the science of polymerization, a process where fat molecules bond to the metal surface to create a naturally slippery finish. Mastering this process is the gateway to becoming a more confident, capable home cook.
Many beginners are intimidated by the perceived maintenance requirements, worrying that one misplaced wash or a bit of moisture will ruin their pan forever. Let me put those fears to rest right now: cast iron is virtually indestructible. Unless you drop it on a hard tile floor from a great height or subject it to extreme thermal shock that causes the metal to crack, there is almost nothing you can do to a cast iron pan that cannot be undone with a little bit of elbow grease and patience. The "rules" often touted online—such as never using soap—are largely outdated myths stemming from the days when lye-based soaps could strip away seasoning. In our modern kitchen, we approach maintenance through the lens of chemistry and heat control rather than superstition.
Throughout this guide, we will peel back the layers of mystery surrounding these blackened pans to reveal the simple, repeatable practices that keep them performing at their peak. From the first wash out of the box to the complex restoration of a rusted relic found at a dusty antique store, we will cover every aspect of ownership. You will learn the exact ratios for oiling, the optimal temperatures for oven seasoning, and the daily rituals that transform a sticky surface into a mirror-like non-stick finish. Grab your favorite pan, clear some counter space, and let’s dive into the rewarding, meditative practice of caring for the most reliable tool in your culinary kit.
The Anatomy of Seasoning: What Actually Happens?
At its core, seasoning is not just about keeping the pan black and shiny; it is the physical manifestation of a chemical reaction called polymerization. When you coat your cast iron in a thin layer of fat—whether it is vegetable oil, flaxseed oil, or refined lard—and heat it past its smoke point, the oil molecules break down and bond to the surface of the metal. This creates a hard, plastic-like layer that is resistant to rust and food adhesion. This layer is not just sitting on top of the iron; it is structurally integrated into the microscopic pores of the metal itself.
The quality of your seasoning is directly correlated to the number of layers you build up over time. While a factory-pre-seasoned pan is a great starting point, nothing compares to a pan that has been lovingly curated over years of daily use. You are essentially building a microscopic shield that prevents moisture from reaching the iron, thereby stopping the oxidation process that causes rust. Think of your pan as a living organism; it thrives on consistent heat and the occasional feeding of high-quality fats.
Understanding the Smoke Point
Not all fats are created equal when it comes to seasoning. You need a fat with a high smoke point so that it can transition from a liquid state into a polymerized solid without simply burning off into soot. Grapeseed oil, canola oil, and refined avocado oil are excellent choices because they remain stable at the high temperatures required for the bond to form. Avoid butter, extra virgin olive oil, or bacon grease for the initial seasoning process, as their lower smoke points or impurities can result in a gummy, uneven finish that will flake off during your next cooking session.
"The magic of cast iron is not in the metal itself, but in the history of the meals you have prepared within it; every sear and every sauté adds a microscopic layer of flavor and protection that no brand-new pan can replicate."
Daily Care: The Truth About Soap and Water
Let’s address the elephant in the room: yes, you can use soap. In the early 1900s, soaps were made with harsh lye, which would indeed strip the seasoning off a pan. Modern dish soap, however, is essentially a surfactant designed to lift grease from surfaces without affecting polymerized fats. Using a small amount of mild dish detergent after cooking is perfectly fine, provided you are not soaking the pan in a basin of water for hours. The real enemy of your pan is not soap; it is water left on the surface, which inevitably leads to rust.
After you have finished cooking, the most important step is cleaning the pan while it is still warm, but not scorching hot. If there is stubborn, stuck-on food, use a chainmail scrubber or a stiff-bristled plastic brush. Avoid steel wool unless you are intentionally trying to strip the pan for a full restoration. The goal is to remove the charred food particles without abrading the hard-earned layer of seasoning you have spent weeks or months building.
The Drying Ritual
Once the pan is clean and rinsed, you must remove every trace of moisture. Place your pan back on the stovetop over low-to-medium heat for about three to five minutes. You want to evaporate any water trapped in the microscopic pores of the metal. Once the pan is bone dry, apply a tiny drop of neutral oil—about a quarter-sized amount—and use a paper towel to buff it into the surface until it looks dry again. You want the thinnest possible film; if the pan looks wet or oily, you have used too much.
The Art of Oven Seasoning: Step-by-Step
If you find that your food is beginning to stick, or if the pan looks patchy and dull, it is time for an oven seasoning cycle. This process is the "reset button" for your cookware. Begin by preheating your oven to 450°F (232°C). While the oven is heating, wash your pan thoroughly with warm water and soap to remove any lingering food debris or old, sticky oil. Dry the pan completely on the stove as described in the previous section.
Once dry, apply a very thin, even layer of your chosen high-smoke-point oil to the entire surface of the pan, including the handle and the bottom. Use a clean, lint-free cloth or a paper towel to wipe away any excess. You want the pan to look matte, not glossy. If you leave too much oil on the surface, it will bead up in the oven, creating sticky, tacky spots that are difficult to remove later. This is a common mistake that turns beginners away from the process, so err on the side of "too little" rather than "too much."
The Baking Phase
Place the pan upside down on the middle rack of your preheated oven. Putting the pan upside down prevents any excess oil from pooling at the bottom of the skillet. I recommend placing a sheet of aluminum foil on the rack below to catch any potential drips. Bake the pan at 450°F for one hour, then turn off the oven and let the pan cool down completely inside the oven for at least another hour. The cooling process is just as important as the baking process, as it allows the polymerized layer to set properly without being shocked by room-temperature air.
"A well-seasoned cast iron skillet is a testament to the cook's discipline; it is a tool that demands respect and in return, provides a non-stick performance that rivals the most expensive Teflon pans on the market."
Restoration: Bringing a Rusty Pan Back to Life
Do not despair if you find a neglected, rusted cast iron pan at a yard sale or tucked away in the back of a relative's cabinet. Rust is just oxidized iron, and it is entirely reversible. To begin the restoration process, you first need to remove the rust and the old, flaking seasoning. You can start by scrubbing the pan with steel wool and a mixture of water and vinegar. The acidity of the vinegar helps break down the rust, but be careful: do not soak the pan in vinegar for more than 30 minutes, or you risk damaging the integrity of the iron.
Once the bulk of the rust and gunk is removed, you may need to use a more aggressive method if the pan is heavily encrusted. Some professionals use a lye bath or an electrolysis tank to strip the pan down to raw metal. For the average home cook, a thorough scrub with a heavy-duty scouring pad and a paste of baking soda and water is usually sufficient. Once the pan is stripped to bare, gray metal, you must move quickly to the next step, as raw cast iron will begin to flash-rust within minutes of contact with air.
Rebuilding the Foundation
After stripping, dry the pan in the oven at 200°F (93°C) for 15 minutes. Once it is completely dry, you must begin the seasoning process from scratch. Since you are working with bare iron, you will need to perform the oven seasoning cycle three to four times in a row before you attempt to cook with the pan. This builds up the initial barrier required to keep food from sticking to the raw surface. It takes time, but there is immense satisfaction in transforming a piece of neglected "trash" into a high-performance culinary instrument.
Common Culinary Techniques for Cast Iron
Cooking with cast iron requires a different mindset than cooking with stainless steel or non-stick cookware. The most important factor is preheating. Because cast iron has relatively low thermal conductivity compared to copper or aluminum, it takes longer to get hot, but once it is hot, it stays that way for a long time. Always give your skillet at least five to ten minutes over low-to-medium heat before adding your oil or food. This ensures the heat is evenly distributed across the entire surface of the pan, eliminating cold spots.
When searing proteins, let the food do the work. If you are cooking a steak or a chicken breast, lay it in the pan and leave it alone. The protein will naturally release from the surface of the cast iron once a proper crust has formed. If you try to flip the food too early, it will stick. Listen to the sound of the sizzle; if the pan is at the right temperature, the protein should immediately begin to react with the oil. This Maillard reaction is what gives cast iron-cooked food its signature depth of flavor.
Managing Temperature and Searing
Low Heat:* Perfect for pancakes, grilled cheese, and delicate items.
Medium Heat:* Ideal for sautéing vegetables, bacon, or searing fish.
High Heat:* The domain of steak, pork chops, and other thick cuts requiring a deep crust.
Preheat:* Always preheat on the stove before moving to the oven or adding fats.
When using high heat, be mindful of the "smoke point" of your oil. If you are searing a steak at 500°F, you need an oil like avocado or grapeseed. If you use butter, you will have a kitchen full of smoke and a bitter-tasting, burnt crust. Add the fat just before you add the protein, and ensure the fat is shimmering but not smoking before the food hits the pan.
Troubleshooting Sticky and Flaky Pans
If you notice bits of black "gunk" coming off your pan and into your food, you have a flaking issue. This usually happens when the seasoning was applied too thickly or when the pan was not heated long enough during the seasoning cycle. It is not harmful—it is just carbon—but it is certainly not appetizing. To fix this, you don't necessarily need to strip the pan. Simply scrub the area with a stiff brush to remove the loose flakes, then perform a single oven seasoning cycle to seal the area back up.
If your food consistently sticks despite your best efforts, you may be using too little fat or the pan simply isn't hot enough. It is also possible that your pan has developed a "burnt-on" residue that hasn't fully polymerized. In these cases, a gentle scrub with a bit of coarse salt and a paper towel acts as a mild abrasive to buff out the sticky patch. After scrubbing, always re-apply a very thin layer of oil and heat the pan on the stove to "re-feed" the surface.
The Importance of Maintenance
Consistent use is the best way to maintain a non-stick surface. The more you cook fatty foods like bacon, sausage, or even just sautéing vegetables in oil, the more you are contributing to the polymerization process. Avoid cooking highly acidic foods—like tomato sauce, wine-based braises, or vinegar-heavy marinades—in a brand-new pan. Acid can react with the iron and eat away at the seasoning. Once your pan is 5-10 years old and has a thick, well-established patina, it can handle acid much better, but until then, stick to high-fat cooking to build your base.
Advanced Tips for the Home Chef
Once you are comfortable with the basics, you can start treating your cast iron with more creativity. One of my favorite professional chef tricks is using the pan for pan-roasting. You can sear your protein on the stove and then transfer the entire pan into a 400°F oven to finish cooking. This allows for an even, gentle heat that keeps the inside of the meat juicy while maintaining that beautiful crust on the outside. Because cast iron holds heat so well, it effectively acts as a secondary heating element.
Another advanced tip is the use of a stainless steel chainmail scrubber. While some old-school enthusiasts insist on using only natural-fiber brushes, I have found that a chainmail scrubber is a game-changer for daily cleanup. It is gentle enough to leave the seasoned layers intact but strong enough to remove stubborn, crusty bits of food without having to soak the pan. If you find your pan becoming dry over time, try "oil-searing" it by adding a tablespoon of oil and heating it until it just starts to smoke, then wiping it out with a clean cloth. This keeps the finish looking polished and slick.
Storage and Organization
How you store your cast iron matters just as much as how you clean it. Never stack your cast iron pans directly on top of each other, as the rough bottom of one pan can scratch the seasoning off the surface of the pan below it. Instead, place a paper towel or a felt pan protector between the pieces. If you have the space, hanging your pans on a sturdy rack is the best way to avoid damage and keep them easily accessible. Moisture is the enemy, so if you live in a humid climate, consider storing your pans with a very light coating of food-grade mineral oil to keep rust at bay.
"A kitchen without cast iron is a kitchen that is missing its heartbeat; it is a tool that connects the present cook to the long, storied traditions of culinary history, proving that the best technology is often the simplest."
Final Thoughts
Caring for cast iron is not a chore; it is an act of culinary stewardship. When you spend the time to clean, season, and restore your pans, you are participating in a cycle that rewards you with better-tasting food and more consistent results every time you step up to the stove. Remember that these pans are designed for life, not for perfection. A few small scratches or an uneven spot here and there are simply badges of honor, proof that your skillet is being put to good use in the kitchen rather than sitting decorative on a shelf.
As you gain experience, you will learn to "listen" to your pan. You will know exactly when the heat is right by the sound of the sizzle, and you will know when it needs a bit more oil by the way food slides across the surface. Do not be afraid to experiment, and certainly do not be afraid to get your hands a little dirty during the restoration or seasoning phases. Cast iron is the most forgiving material in the kitchen, and it is ready to work for you for years to come.
Take this knowledge and put it to practice tonight. Whether you are searing a simple ribeye, baking a batch of cornbread, or slowly roasting a chicken, let your cast iron be your guide. By following these simple rituals of cleaning, drying, and oiling, you are ensuring that your tools are always ready for the next recipe. Blame the chef all you want for the long cleaning times, but when you serve that perfectly crusted, flavorful meal, you will know exactly why the cast iron remains the undisputed king of the kitchen. Stay curious, stay hungry, and keep that iron seasoned.
The journey with your skillet will evolve as your skills do. Start with small, manageable dishes, and as your confidence grows, explore the deeper, more complex recipes that cast iron excels at—like dutch baby pancakes, deep-dish pizzas, or slow-simmered stews. Always ensure your ventilation is good when doing high-heat seasoning, keep a stash of high-smoke-point oil in your pantry, and never, ever be intimidated by a little bit of rust. You are now equipped with the knowledge to maintain your cookware for decades, and that is a skill that will serve you well every single time you cook. Happy cooking, and may your skillet always be slick, dark, and ready for the fire.
Get the Next Recipe
Weekly recipes, techniques, and gear picks — straight to your inbox.
