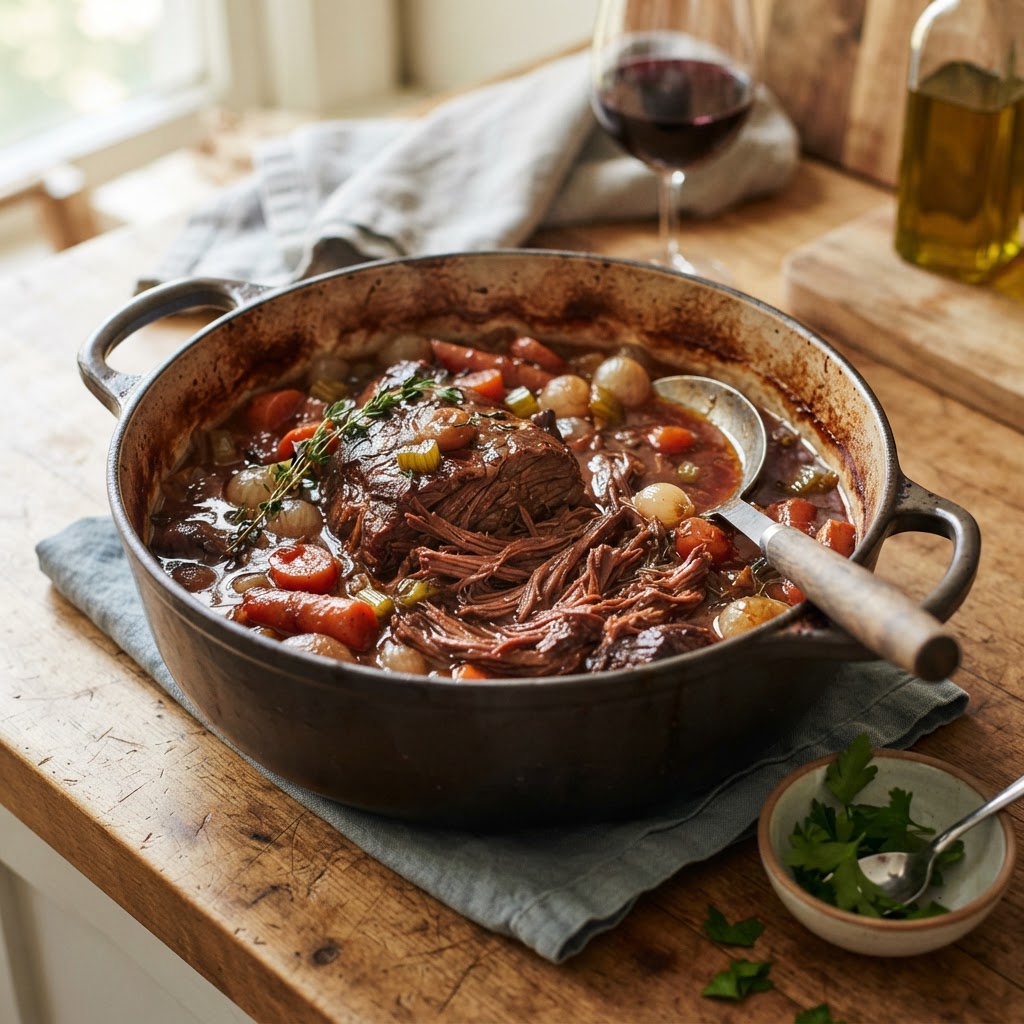
The Home Cook’s Guide to Collagen Breakdown: Mastering Low-and-Slow Braising for Tender, Succulent Meat and Rich Gravies
The art of the braise is perhaps the most transformative skill a home cook can master, turning humble, tough cuts of meat into velvet-soft masterpieces that command the center of the table. Many novice cooks are intimidated by the long cook times associated with these dishes, assuming that hours of heat will inevitably lead to dry, stringy protein. In reality, the science of braising is a graceful dance of chemistry, where patience replaces high-speed intensity. When you commit to a three or four-hour braise, you are essentially performing a culinary alchemy that converts the most rigid connective tissues into luscious, mouth-coating gelatin. It is a process that rewards the slow and steady, allowing you to reclaim your kitchen as a sanctuary of depth and flavor rather than a source of stress.
Understanding the anatomy of the meat you choose is the first step toward achieving professional results in your own kitchen. We are not looking for the lean, expensive fillets that demand a quick sear and a medium-rare finish; instead, we are seeking out the workhorse muscles. These cuts—shoulders, shanks, briskets, and cheeks—are packed with collagen, the structural protein that gives muscles their integrity. While tough in their raw state, this substance is the hidden treasure that provides the luxurious texture of a perfect pot roast. When managed correctly through the application of gentle, sustained heat, that collagen relaxes and hydrates, creating the signature "melt-in-your-mouth" quality that defines comfort food at its finest.
In this guide, we will peel back the curtain on the mechanics of heat, moisture, and time to ensure your braises are never dry or stringy again. We will explore how to manage your braising liquid, the critical importance of proper searing, and why the "carry-over" period is just as vital as the time spent in the oven. By the end of this journey, you will feel confident enough to experiment with various aromatics, liquids, and cuts, turning every Sunday dinner into a restaurant-quality experience. Let’s prepare to slow down, lean into the process, and finally master the art of the low-and-slow braise.
The Science of Collagen and Heat
At the heart of every great braise is the breakdown of connective tissue, primarily collagen. Unlike muscle fibers, which contract and toughen under high heat, collagen is a robust network of proteins that requires consistent, low-temperature exposure to transform into gelatin. When you subject a tough cut of meat to a long, slow bath in liquid at temperatures typically between 250°F and 300°F, you are allowing the collagen to hydrolyze. This process is not just about tenderness; it is about the structural integrity of the gravy itself. As the collagen breaks down, it leaches into the braising liquid, thickening it naturally and providing that glossy, lip-smacking quality that distinguishes a homemade stew from a simple soup.
Why Temperature Matters
The sweet spot for collagen breakdown is significantly lower than the boiling point of water. If your braising liquid is boiling vigorously throughout the cooking process, the muscle fibers will tighten and squeeze out their internal moisture, leaving you with dry, stringy meat regardless of how much liquid you used. Instead, you want to maintain a gentle simmer or, ideally, a very quiet bubble. Utilizing a heavy-bottomed Dutch oven is crucial here, as the cast iron acts as a thermal buffer, stabilizing the internal temperature and providing an even, consistent radiant heat that surrounds the meat on all sides.
The Role of Moisture
Braising is defined by the inclusion of liquid, but it is important to remember that you are not boiling the meat. You only need enough liquid to cover about one-third to one-half of the protein. The portion of the meat exposed to the air inside the covered pot will be cooked by the steam, which is a much gentler medium than liquid. This creates a dual-action environment: the lower part of the meat undergoes a moist heat braise, while the upper portion undergoes a gentle steam-roast. This variation in texture adds layers of complexity to the final dish, ensuring that the meat isn't one-dimensional in its tenderness.
"The magic of the braise lies in the invisible work of the oven. When you close the lid, you aren't just cooking; you are creating a microscopic pressure cooker where time and temperature rewrite the structure of the meat."
Preparation: The Art of the Sear
Before you introduce any liquid to your pot, you must address the exterior of your meat. Searing is not just about color; it is a chemical reaction known as the Maillard reaction. When you sear your protein in a hot pan with a small amount of oil, you are creating hundreds of new flavor compounds that will eventually dissolve into your braising liquid. Do not skip this step, and do not rush it. A proper sear requires a dry surface, a hot pan, and enough patience to allow the meat to release naturally from the metal before flipping. If the meat is sticking, it isn't ready to turn.
Choosing Your Fat and Pan
For the best results, use a high-smoke-point oil like avocado, grapeseed, or clarified butter. Avoid extra virgin olive oil for the sear, as its delicate compounds will burn and turn bitter at the high temperatures required for browning. Your vessel should be wide enough to accommodate the meat without overcrowding. If you crowd the pan, the meat will steam in its own juices instead of browning, and you will lose the potential for a rich, dark fond at the bottom of the pot. Remember, the fond—those browned bits stuck to the bottom of the pan—is the foundation of your gravy.
Deglazing the Fond
Once the meat is seared to a deep, mahogany brown, remove it from the pot and pour in your deglazing liquid. This could be wine, stock, or even vinegar. As the liquid hits the hot pan, scrape the bottom with a wooden spoon to release the fond. This is where the depth of your final sauce begins. The wine or stock will pick up the caramelized juices, effectively lifting the flavor of the meat into the liquid base. This process is essential; without it, you are throwing away the most concentrated flavor profile your dish will ever possess.
Building the Braising Liquid
The liquid you choose serves as both the cooking medium and the base for your sauce. A classic braise usually involves a mix of aromatics—onions, carrots, celery, and garlic—and a liquid component. For a savory, robust braise, start with a base of mirepoix (onions, carrots, and celery). Sauté these in the fat left behind from the meat until they are softened and fragrant. This provides a sweet, earthy foundation that balances the richness of the protein. The quality of your stock is also paramount; if you have the time, use homemade chicken or beef stock, as it contains natural gelatin that will further enrich the final sauce.
Integrating Aromatics and Herbs
Herbs such as thyme, rosemary, and bay leaves are staples of the braise. Because the cooking time is long, these hardy herbs will have plenty of time to infuse their essential oils into the liquid. To make your cleanup easier and your final presentation more professional, consider tying your herbs into a bouquet garni or using a cheesecloth bag. This prevents stray stems or leaves from ending up in your finished gravy, allowing you to remove them easily once the meat has reached the desired tenderness.
The Ratio of Liquid to Solids
A common mistake in home kitchens is using too much liquid. If your meat is submerged completely, you are essentially boiling it, which ruins the texture. Aim for your liquid to reach about one-third of the way up the side of the protein. If you find your liquid level dropping too far during the cooking process, you can add a splash of warm stock, but do so sparingly. Remember that as the vegetables break down, they will release their own moisture, and the meat will also shed juices, meaning your liquid level will often rise slightly during the first hour of cooking.
The Low-and-Slow Process: Patience Personified
Once you have added your liquid, your aromatics, and your meat back into the pot, it is time to move the vessel into the oven. Most home ovens are prone to temperature fluctuations, so placing your Dutch oven on the middle rack is ideal for consistent airflow. Ensure the lid is tight-fitting. If you have any concerns about the seal, you can crimp a piece of parchment paper over the pot before placing the lid on, or use a piece of heavy-duty aluminum foil to ensure no moisture escapes. This creates a semi-hermetic seal that keeps the environment stable.
Time and Temperature Table
For most braises, the target temperature is roughly 275°F to 300°F. Here is a general breakdown of timing for common cuts:
Testing for Doneness
How do you know when a braise is truly finished? Do not rely solely on a timer. The meat is done when it is fork-tender. This means that when you insert a fork into the thickest part of the meat, it should slide in and out with almost no resistance. If the meat offers any "spring-back," it needs more time. It is far better to overcook a braise by 30 minutes than to pull it out too early. A braise that is under-cooked will be tough and chewy; a braise that is cooked just long enough will be succulent and fall-apart tender.
"The beauty of a well-executed braise is that it is almost impossible to overcook in the traditional sense. Once the collagen has fully converted to gelatin, the meat enters a state of grace where it remains moist and tender for a long window of time."
Mastering the Gravy: Reduction and Finishing
Once the meat is perfectly tender, the work isn't quite done. You are left with a pot of liquid that is flavorful but perhaps too thin. To create a restaurant-quality gravy, you need to reduce it. Carefully remove the meat from the pot and set it aside, tenting it with foil. Strain the solids—the mirepoix and herbs—from the liquid. You can discard these, or blend them into the sauce if you prefer a thicker, more rustic texture. Take the strained liquid and put it back on the stovetop over medium-high heat.
The Reduction Technique
Bring your liquid to a steady simmer and let it reduce by about half. As the water evaporates, the flavors become more concentrated, and the natural gelatin from the meat thickens the sauce. You can enhance this further by whisking in a small amount of cold butter, a technique known as monter au beurre. This adds a beautiful, glossy sheen to the sauce and mellows out the intensity of the reduction. Taste the sauce at this stage—does it need a splash of acidity? A teaspoon of sherry vinegar or a squeeze of lemon juice can brighten up a rich, heavy gravy, cutting through the fat and making the flavors pop.
Serving Suggestions
A perfect braise deserves a base that can soak up every drop of that luscious gravy. Creamy polenta, buttery mashed potatoes, or even a crusty sourdough loaf are classic pairings. Because the meat is so tender, it doesn't need to be served in a neat slab; rather, it should be served as a "composed" dish, with the sauce spooned generously over the top. This is the moment where all that patience pays off, and the simple, humble ingredients you started with are transformed into a decadent, deeply satisfying meal.
Troubleshooting Common Braising Issues
Even experienced chefs encounter challenges with braises from time to time. If your meat turns out dry, the most likely culprit is the temperature being too high during the cooking process. Remember to keep the heat low and the liquid at a gentle simmer. If your sauce tastes flat, it usually indicates a lack of salt or a lack of depth in the foundation. Don't be afraid to season your meat well before searing, and be generous with the salt at every stage of the cooking process. Remember that the volume of the dish is significant, and salt is what allows the individual flavors of the aromatics and the meat to shine.
When the Sauce Won't Thicken
If your sauce remains too thin even after reduction, you have a few options. A classic beurre manié—a paste made of equal parts softened butter and flour—is the perfect solution. Whisk small bits of this paste into your simmering liquid until you reach the desired consistency. Alternatively, you can use a slurry of cornstarch and cold water. Be cautious, however, as cornstarch can give a slightly opaque look to the sauce, whereas a natural reduction or a beurre manié will keep it glossy and dark.
Preventing Over-Salty Gravy
If you find that your braising liquid has become too salty, it is often a result of using a store-bought stock that was already heavily seasoned. To mitigate this, always taste your base liquid before adding it to the pan. If it is already salty, add a bit of water or unsalted wine to dilute it. If the final dish is too salty, you can add a touch of sweetness—a teaspoon of honey or brown sugar—or a bit of acidity to balance the palate. However, the best way to avoid this is to always use low-sodium stock as your starting point.
Essential Gear for the Home Braiser
You do not need a professional kitchen to master the art of braising, but a few key pieces of equipment will make your life significantly easier. A heavy-bottomed, enameled cast-iron Dutch oven is the gold standard. It provides the heat retention and stability necessary for long, slow cooking. Look for one with a heavy, tight-fitting lid. Additionally, a set of high-quality stainless steel tongs is essential for maneuvering large cuts of meat without tearing the crust you worked so hard to create.
Beyond the Dutch Oven
If you do not have a Dutch oven, you can use a heavy stainless steel pot, but be aware that it may require closer monitoring as it won't hold heat as evenly. For those who enjoy kitchen gadgets, a slow cooker or an electric multi-cooker can also be used for braising. However, a traditional oven-braise still produces the best flavor and texture because the radiant heat of the oven cooks the meat more evenly than the direct bottom-heat of a slow cooker. If you use a slow cooker, be sure to sear the meat in a separate pan first, as this step cannot be replicated inside the slow cooker itself.
The Importance of the "Rest"
Just like a steak, your braised meat needs to rest. Once you take the pot out of the oven, let it sit for at least 15 to 20 minutes before serving. This allows the internal juices to redistribute throughout the meat, ensuring that every bite is as tender and succulent as possible. If you cut into the meat immediately, the juices will run out onto the cutting board, leaving the meat drier than it needs to be. Patience is the theme of this entire process, and the final resting period is the last, and perhaps most important, exercise in restraint.
Final Thoughts
Mastering the braise is a rite of passage for any home cook. It is a technique that shifts the focus from "doing" to "watching," moving the kitchen experience away from high-stress sautéing and toward a more contemplative, rewarding process. By understanding the science of collagen and the importance of gentle, sustained heat, you are no longer just following a recipe; you are controlling the chemistry of your food. Every time you prepare a short rib, a lamb shank, or a pot roast using these techniques, you are building a foundation of flavor that is uniquely your own.
Do not fear the long cook times. Embrace the quiet afternoon hours when the oven is doing the work for you, filling your home with the intoxicating, savory aromas of slow-cooked protein and aromatics. A braise is the ultimate "make-ahead" meal, often tasting even better the next day after the flavors have had time to settle and meld. Whether you are hosting a formal dinner party or simply providing a comforting meal for your family on a rainy Sunday, the skills you have learned here will serve you for a lifetime.
Take these principles—the heavy pan, the diligent sear, the modest amount of liquid, and the patient wait—and apply them to your favorite cuts of meat. Experiment with different aromatics, play with the balance of your wine and stock, and don't be afraid to adjust the seasoning until it speaks to your palate. You now have the knowledge to transform the toughest, most modest cuts into the star of the show. So, tie on your apron, preheat your oven, and remember: the best flavor is always worth the wait. Happy cooking, and may your gravies always be glossy and your meat always be perfect.


Get the Next Recipe
Weekly recipes, techniques, and gear picks — straight to your inbox.
