
The Home Cook's Guide to Cultured Butter: Fermenting Cream for Complex, Nutty Flavor
There is a quiet, transformative magic that happens when you take the humble components of your refrigerator and coax them into something entirely new. For years, I believed that butter was simply a staple ingredient—a solid brick of fat to be tossed into a pan or spread onto sourdough without a second thought. It wasn’t until I spent time in professional kitchens, watching chefs meticulously culture their own cream, that I realized how much depth we were leaving on the table. Cultured butter is the secret weapon of the culinary world, providing a complexity, acidity, and unmistakable nutty finish that supermarket brands simply cannot replicate. It turns the act of butter-making from a chore into a foundational culinary practice that connects you to the history of farmhouse cooking.
When we talk about culturing, we are essentially harnessing the power of beneficial bacteria to transform the sugar in cream—lactose—into lactic acid. This process, known as fermentation, doesn't just add a bright, tangy profile to the final product; it changes the structure of the fats and creates a flavor profile that is profoundly more robust. By controlling the fermentation process at home, you become the artisan of your own kitchen, adjusting the tanginess to your personal preference and ensuring the highest quality of ingredients. You will quickly find that once you experience the silky, nuanced, and deeply aromatic profile of homemade cultured butter, the store-bought sticks will seem one-dimensional and lackluster by comparison.
This guide is designed to take you from a curious home cook to a master of cultured dairy, providing you with the exact techniques and temperatures required to achieve consistent, professional-grade results. We will explore the science behind the cultures, the precise mechanics of churning, and the crucial post-processing steps that define a truly great butter. Along the way, we will break down the myths that suggest this is a "difficult" process, revealing instead that it is simply a game of patience and temperature management. Put on your apron, clear some counter space, and prepare to redefine what a slice of bread and butter can actually be.
The Science of Culturing: Why Fermentation Matters
At its heart, the process of culturing is a biological one. By introducing a specific bacterial starter to heavy cream, we are encouraging the production of lactic acid and volatile aromatic compounds, most notably diacetyl. This compound is responsible for that iconic "buttery" aroma and the subtle nuttiness that separates European-style butters from standard American options. Without culturing, butter is essentially just isolated milk fat; with culturing, it becomes a dynamic ingredient with a life of its own.
The choice of culture is paramount to your success. You can use buttermilk (ensure it contains live cultures, not just acid-added versions), crème fraîche, or professional-grade mesophilic starter packets. Each will impart a slightly different acidity and texture to your final butter. I personally prefer high-quality mesophilic cultures because they are engineered for consistency, but if you want to lean into the farmhouse aesthetic, a high-quality, full-fat cultured buttermilk is a fantastic starting point for any home cook looking to experiment.
Temperature control is your greatest ally during this phase. If the cream is too cold, the bacteria will remain dormant and the fermentation will fail to launch. If it is too warm, you risk encouraging the growth of unwanted bacteria that can cause the cream to spoil rather than culture. The sweet spot for most mesophilic cultures is between 68°F and 74°F. By maintaining this temperature for 12 to 24 hours, you create the ideal environment for the beneficial bacteria to thrive and produce that complex, tangy flavor profile we are aiming for.
"To master the art of butter, one must stop viewing it as a fat and start viewing it as a living, breathing ingredient that reacts to its environment with every degree of temperature change."
Sourcing and Preparing Your Cream
The quality of your butter is directly proportional to the quality of the cream you start with. If you begin with low-quality, ultra-pasteurized cream that has been treated at extreme temperatures, you will struggle to achieve the proper structural breakdown during churning. Always strive to source heavy whipping cream that is pasteurized but not ultra-pasteurized. The homogenization process can sometimes affect how the fat globules clump together, so if you can find local, non-homogenized cream from a dairy farm, you are already halfway to greatness.
The Importance of Fat Content
Aim for a cream with at least 36% to 40% milk fat. The higher the fat content, the better your yield will be, and the more stable your final butter will remain at room temperature. Lower fat percentages result in a thinner, more watery butter that lacks the luxurious mouthfeel we crave. If your cream is too thin, it will take significantly longer to churn, and you may find that the butter breaks apart during the washing process, leading to a frustrating experience for the home cook.
Preparing the Cream
Before you begin the culturing process, ensure your cream is clean and free of any foreign odors, as fat is highly absorbent and will soak up scents from your refrigerator. If your cream has been stored near strong-smelling foods, consider moving it to a neutral area for a few hours before you begin. Here is the preparation checklist for your cream:
The Churning Process: From Liquid to Solid
Once your cream has finished culturing and has developed a pleasant, slightly sharp aroma, it is time to move to the churning phase. This is the stage where most home cooks get nervous, but there is no need for anxiety. You are essentially agitating the cream until the fat globules collide and stick together, eventually separating into solid butter and liquid buttermilk. You can do this with a stand mixer, a food processor, or even a specialized butter churn if you want to lean into the tradition of the process.
Utilizing a Stand Mixer
The stand mixer is the most efficient tool for the modern home cook. Use the whisk attachment to incorporate air into the cream, which accelerates the breakdown of the fat structures. Start on a medium speed to prevent splashing, and as the cream thickens into whipped cream, increase to medium-high. You will see the cream pass through several distinct stages:
Soft Peaks*: The cream is aerated but still liquid enough to pour.
Stiff Peaks*: The cream holds its shape and becomes quite dense.
The Break*: Suddenly, the whipped cream will collapse, and you will see small yellow grains of butter forming as the liquid buttermilk splashes against the sides of the bowl.
Managing the Mess
When the butter breaks, the machine will suddenly sound much louder and the buttermilk will splatter everywhere if your bowl isn't properly covered. I recommend using a splash guard or wrapping a clean kitchen towel around the top of your stand mixer. Keep the mixer running on a lower speed once the break happens, allowing the butter grains to coalesce into a single mass. You know you are done when the buttermilk appears thin and white, and the butter has gathered into a solid clump on the whisk.
"Patience during the churn is not just about time; it is about observing the subtle physical shifts in the emulsion, waiting for that glorious moment when the fat separates from the serum."
Washing and Salting: Ensuring Longevity
Many home cooks skip the washing step, and this is where they make their biggest mistake. The liquid remaining in your bowl is buttermilk, but it is also full of residual lactose and proteins that will cause your butter to turn rancid or sour very quickly if left inside the fat. To ensure your cultured butter has a clean flavor and a decent shelf life, you must wash away every last drop of the buttermilk until the water runs completely clear.
The Ice Water Technique
After draining the buttermilk, pour very cold, filtered ice water over the butter. Use a spatula to fold and press the butter against the sides of the bowl. You will see the water turn cloudy as it picks up the leftover buttermilk. Drain this cloudy water, add more ice-cold water, and repeat the process. You may need to do this 4 to 6 times. Do not rush this, as the quality of the wash dictates the final shelf life of your product.
The Salt Factor
Once the water runs clear, it is time to salt your butter. The salt does more than enhance flavor; it acts as a preservative. Use a high-quality sea salt or a fine-grained kosher salt for even distribution. I recommend a ratio of approximately 1% to 1.5% salt by weight for a mild salted butter, but you can increase this to 2% if you prefer a punchier profile. Use your spatula or clean hands to fold the salt into the butter thoroughly. If the salt isn't fully integrated, you will end up with gritty pockets, which ruins the texture.
Refining the Texture: Working the Butter
Now that you have your clean, salted butter, you need to work it to remove any remaining water pockets. Even after thorough washing, there will be microscopic beads of water trapped inside the butter. If you don't press these out, your butter will have a streaky appearance and may spoil. This process is known as "working the butter" and it is essential for achieving that professional, smooth consistency you find in high-end creameries.
The Spatula Press
Transfer your butter to a wooden butter board or a clean marble surface if you have one. Using a wooden paddle or a flat spatula, press and flatten the butter repeatedly. This is a rhythmic, almost meditative process. As you press, you will see tiny beads of water weep out of the butter. Wipe them away with a paper towel or a clean cloth, then fold the butter back over itself and repeat. Continue this until the butter is perfectly smooth and uniform.
Shaping for Presentation
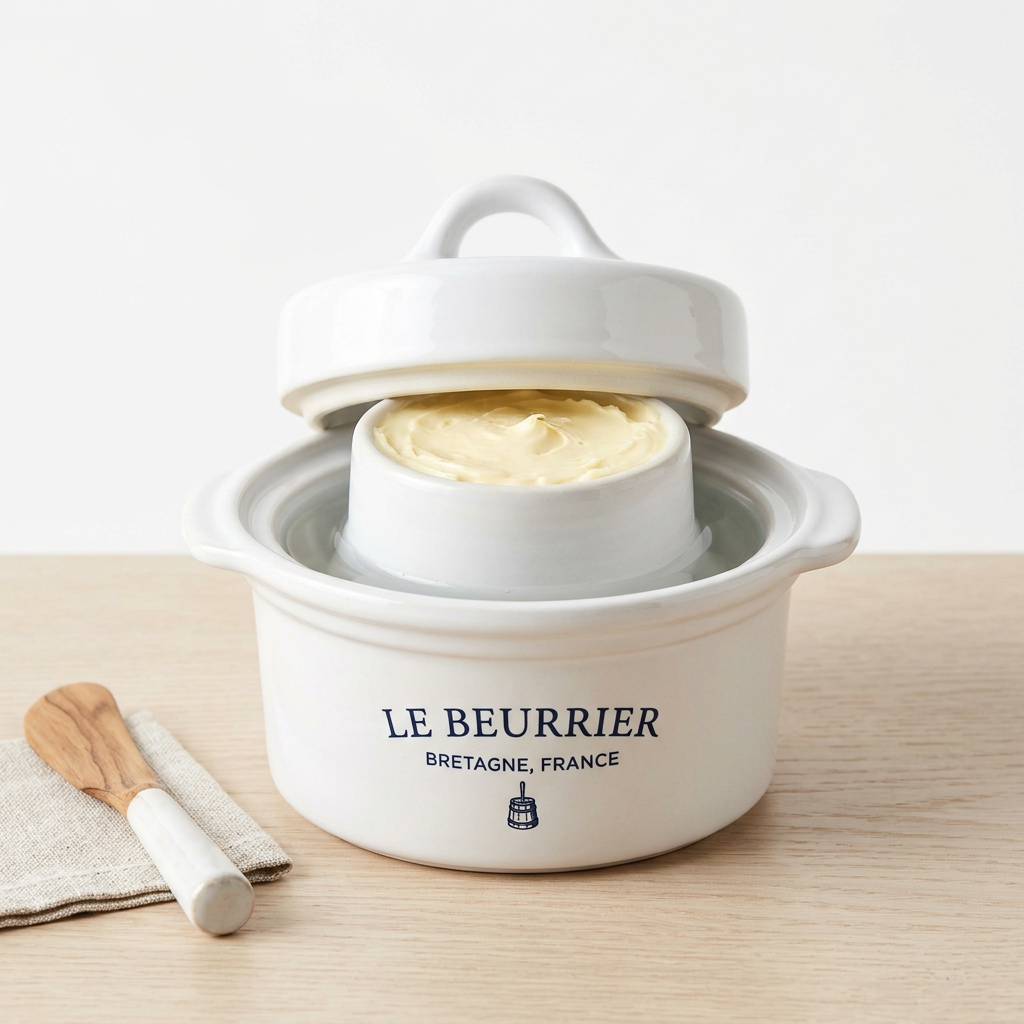
Once the butter is worked and devoid of water, you can shape it however you like. You can roll it into a cylinder using parchment paper, place it into a butter mold, or simply store it in a glass jar. If you are forming a cylinder, lay out a piece of parchment, place the butter in the center, and roll it tightly, twisting the ends like a candy wrapper to create a uniform log. This makes it incredibly easy to slice into consistent rounds for serving on toast or melting over grilled vegetables.
Troubleshooting Common Issues
Even with the best instructions, problems can arise. Perhaps your butter didn't break, or maybe it feels greasy rather than silky. Here are some solutions to common frustrations encountered by home cooks:
The butter won't break*: Your cream is likely too cold. If you are churning for more than 15 minutes without progress, let the cream sit at room temperature for another 30 minutes, or gently warm the bowl with a warm towel.
The butter is greasy/oily*: This usually happens if the butter gets too warm during the working stage. If the butter starts to melt on your counter, put it in the freezer for five minutes, then continue working it.
The butter tastes too sour*: You likely cultured the cream for too long or in too warm an environment. Next time, reduce your culturing time by two hours or lower the temperature of your kitchen by a few degrees.
Professional Tips for Consistency
Temperature Consistency*: Invest in a digital thermometer. Guessing the temperature of your cream is the most common cause of inconsistent batches.
Filtering*: Always use filtered water for the washing step. Chlorine in tap water can impart a metallic or chemical off-flavor to your delicate cultured butter.
Storage*: Store your cultured butter in an airtight container in the coldest part of your refrigerator. It will stay fresh for up to three weeks, but keep in mind that its flavor will continue to evolve slightly as it sits.
The Culinary Applications of Cultured Butter
Now that you have produced a batch of high-quality cultured butter, it is time to put it to work. Its higher acidity and complex, nutty profile make it an incredible ingredient for both baking and cooking. Because it has a different water content than standard butter, you may find that it behaves slightly differently in pastry, but once you learn to adjust for it, you will never want to go back.
Baking Excellence
In cookies and cakes, cultured butter adds a depth that balances sweetness perfectly. Try using it in a classic shortbread recipe; the tanginess of the butter cuts through the richness of the fat and creates a sophisticated finish. If you are making pie crust, ensure the cultured butter is very cold. The result will be a crust that is not only flaky but carries a slight, aromatic tang that elevates the entire dessert.
Finishing and Sautéing
Cultured butter is best utilized in applications where its flavor can shine, such as finishing a pan sauce or melting over a perfectly grilled steak. You can also brown your cultured butter—a process known as beurre noisette—to intensify those nutty notes even further. The lactic acid in the cultured butter reacts with the sugars in the milk solids during the browning process, resulting in a depth of flavor that is simply unmatched by standard sweet cream butter.
Compound Butters*: Take your cultured butter to the next level by folding in herbs, roasted garlic, or citrus zest.
Toast Service*: Serve it at room temperature with high-quality, crusty sourdough to really appreciate the nuance of the culturing process.
Pan-searing*: Use it toward the end of your cooking time to baste fish or mushrooms; the lower heat will preserve the delicate aromatic compounds.
Conclusion
The journey into the world of cultured butter is one of the most rewarding endeavors a home cook can undertake. It is a process that rewards patience, rewards precision, and rewards your willingness to engage with the science of your ingredients. While it may seem intimidating to move beyond the grocery store aisle, you have now been equipped with the knowledge to handle everything from the initial culturing phase to the final shaping of your butter logs.
As you become more comfortable, I encourage you to experiment with different cultures and different culturing durations. You might find that you prefer a milder, buttery profile for your morning toast, or a sharper, more aggressive tang for your savory cooking. There is no "right" way to make cultured butter, only the way that best fits your palate. Once you master this, you have elevated your kitchen—and your future dishes—permanently.
Remember that every time you make butter, you are participating in a tradition that spans centuries. You are honoring the ingredients, slowing down the pace of your culinary practice, and creating something beautiful and delicious from scratch. The next time you find yourself reaching for that store-bought block, I hope you pause, remember these steps, and decide to create your own masterpiece instead. The difference is not just in the butter; it is in the intent, the skill, and the pride you take in your culinary home. Keep testing, keep tasting, and above all, keep blaming the chef when your guests demand to know why your butter is so much better than anything they’ve ever had before.
It is important to emphasize that even if your first attempt is not "perfect" by professional standards, it is still a significant step forward in your growth as a cook. You are moving from a consumer to a creator. You are learning the texture of the fat, the sound of the churn, and the scent of fermentation. These are skills that transfer to every other aspect of your kitchen life, from baking bread to emulsifying sauces. When you understand how a simple emulsion like butter works, you begin to understand the building blocks of almost everything else you cook.
Take the time to share your results with others. A log of homemade, cultured, salted butter is one of the most generous and impressive gifts you can bring to a dinner party. It is a conversation starter and a testament to your commitment to the craft. As you continue to refine your technique, consider keeping a simple notebook to track your culturing times, temperatures, and cream brands. You will soon find that you have a "house style" of butter that is entirely your own.
Final advice? Don't be afraid to fail. Even a batch that is "over-churned" or slightly less acidic than intended will still be superior to most commercial options. Culinary mastery is built on the accumulation of these lessons. Enjoy the quiet moments of the process, the physical labor of the paddle, and the incredible, rich reward at the end. Your kitchen is now a laboratory, a studio, and a farmhouse all in one. Embrace the tang, relish the fat, and never settle for anything less than exceptional.
Final Thoughts
Making cultured butter at home is a pursuit that perfectly embodies the philosophy here at Blame The Chef: it is about taking control of the process, understanding the raw materials, and finding the joy in the labor. While there are plenty of shortcuts in the culinary world, this is one place where the slow, deliberate approach is not just encouraged—it is required. You cannot rush the bacteria, you cannot cheat the fat, and you cannot fake the flavor.
By committing to this guide, you have opened the door to a world where dairy is not a commodity, but an artisanal product crafted with intent. Whether you are using it to bake a complex tart or simply spreading it over a piece of warm, crusty bread, you will taste the difference that your own attention and care have made. The nutty, tangy, and rich profile of your cultured butter is the hallmark of a cook who understands what it means to truly elevate their work.
So, gather your heavy cream, set your starter, and embrace the rhythm of the churn. Your journey doesn't end here; it is merely beginning. Every batch you make will teach you something new, helping you refine your palate and sharpen your techniques for years to come. Your home kitchen is a powerful place, and with the skills you have learned today, it is now capable of producing results that rival the best boutiques in the world. Enjoy the process, enjoy the final product, and keep striving for that next level of culinary brilliance. You have the tools, you have the knowledge, and now, you have the butter. Now, go ahead and let them blame the chef for making everything else on the table taste just a little bit too ordinary by comparison.
Get the Next Recipe
Weekly recipes, techniques, and gear picks — straight to your inbox.
