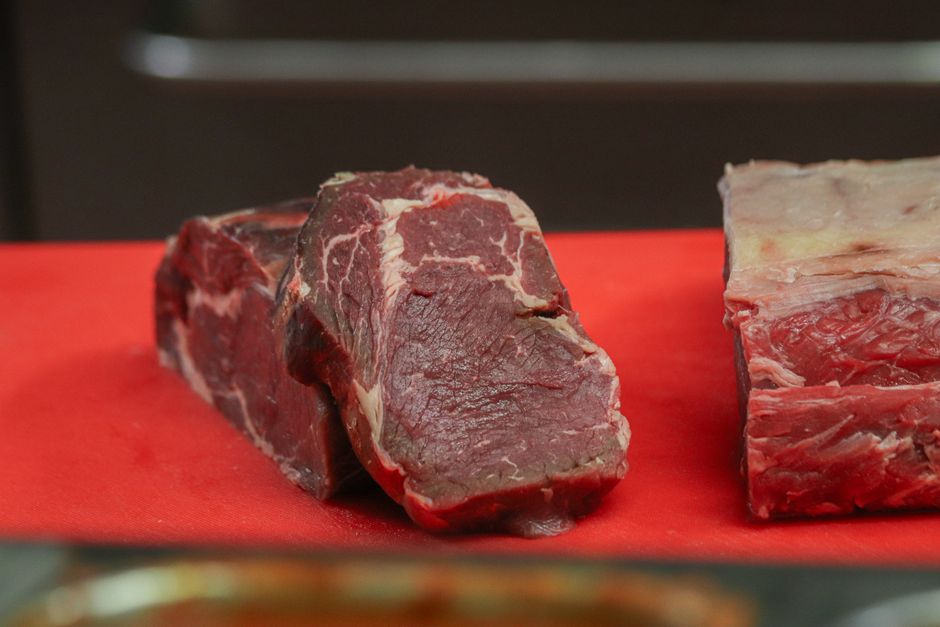
The Home Cook's Guide to Dry-Aging Beef at Home: Controlled Decomposition for Intense Flavor
There is a certain thrill that comes with walking into a high-end steakhouse, that singular moment when the waiter presents a menu featuring a forty-five-day dry-aged ribeye. You look at the price tag, you look at the marbling of the meat, and you realize that you are paying for the mastery of time. Dry-aging is not merely a process of preservation; it is a calculated act of controlled decomposition that transforms the very molecular structure of a primal cut of beef. For the home cook who has mastered the sear and perfected the internal temperature of a medium-rare filet, the transition into the world of dry-aging represents the ultimate frontier of culinary competence. It moves you away from being a mere assembler of ingredients and places you firmly in the role of a kitchen scientist.
Many people are intimidated by the prospect of keeping raw meat in their refrigerator for weeks at a time, fearing the specter of spoilage and foodborne illness. However, when executed with precision, dry-aging is a safe, predictable, and profoundly rewarding process that relies on the basic principles of humidity control, temperature management, and air circulation. By understanding how enzymes break down collagen and how water loss concentrates the natural amino acids in the beef, you can turn a supermarket-grade primal cut into a culinary masterpiece that rivals the output of the finest boutique butchers in the world. It requires patience, a dedicated space, and a refined attention to detail, but the payoff is a flavor profile characterized by deep, nutty notes of bleu cheese, mushroom, and toasted umami.
In this guide, we will strip away the mystery surrounding this high-level technique and provide you with a roadmap for building your own home-aging environment. Whether you are using a specialized aging fridge or a modified dedicated cooler in your kitchen, the science remains consistent regardless of the scale. We will explore the nuances of selecting the right beef, the importance of maintaining an ideal micro-climate, and the critical safety protocols that ensure your end product is as safe as it is delicious. By the time you reach the end of this deep dive, you will have the confidence to clear out a shelf, set your monitors, and embark on a project that will fundamentally change the way you think about and consume meat.
The Science of Enzymatic Breakdown
At its most fundamental level, dry-aging is about the manipulation of the meat’s internal enzymes. When an animal is slaughtered, the muscles immediately begin to undergo chemical changes as the cells cease to function. The enzymes naturally present within the meat—specifically calpains and cathepsins—start to break down the complex proteins and connective tissues, such as collagen, within the muscle fibers. This process, known as proteolysis, is what makes meat tender as it ages. In a wet-aged scenario, such as a vacuum-sealed package, these enzymes have some effect, but they are limited by the environment. In a dry-aged environment, we allow the meat to lose moisture, which drastically concentrates the flavor.
Understanding Proteolysis and Flavor Development
The breakdown of proteins into smaller peptides and amino acids, such as glutamate, is the primary driver behind the intense umami experience associated with aged beef. As the muscle fibers soften, the fat remains stable, creating a unique contrast between the tender, buttery interior and the slightly firmer, dehydrated exterior. This is where the magic of the "funk" resides. As the surface dries, it creates a protective barrier, essentially a hide of desiccated beef, which shields the interior meat from spoilage while allowing the interior enzymes to continue their slow, methodical work.
The Role of Moisture and Temperature
To prevent the growth of harmful bacteria, you must maintain a strictly controlled environment. The target temperature range is between 34°F and 38°F (1°C to 3°C). If the temperature climbs too high, you invite the growth of pathogenic bacteria; if it drops too low, the enzymatic activity slows to a crawl, rendering the aging process ineffective. Moisture is equally vital. Ideally, you want to maintain relative humidity between 75% and 85%. If the air is too dry, the meat dries out too quickly, creating an excessively thick rind and wasting edible product. If it is too humid, you run the risk of mold growth that goes beyond the beneficial surface culture.
"Dry-aging is the culinary equivalent of listening to a vinyl record; it is analog, it is textured, and it possesses a depth that digital, quick-cook methods simply cannot replicate. You aren't just aging meat; you are curating time."
Selecting the Right Primal Cut
You cannot dry-age just any piece of meat you find in the refrigerated case at the grocery store. Because of the significant weight loss that occurs during the process—typically between 15% and 30%—you need to start with a large, bone-in primal cut. A single steak will dehydrate entirely, leaving you with beef jerky rather than a tender, aged ribeye. The bone provides a natural anchor for the meat and helps maintain the structure, while the fat cap acts as a critical insulator.
The Superiority of Bone-In Ribeye and Striploin
The bone-in standing rib roast is the gold standard for home dry-aging. The large size of the roast protects the integrity of the muscle, and the spinal processes of the vertebrae help to keep the meat from collapsing. A bone-in New York strip loin is another excellent choice, offering a slightly leaner profile but an equally intense depth of flavor. Always look for a cut with a thick, uniform layer of fat covering the exterior, as this fat layer will protect the meat from over-drying during the weeks of exposure to the airflow.
Sourcing Quality Meat
When you speak to your butcher, do not just ask for a roast; ask for a "Grade AAA" or "Prime" primal. You want the highest level of intramuscular fat (marbling) possible. Because dry-aging concentrates flavor, any existing fat within the meat will become exponentially richer and more flavorful as the process continues. Avoid meat that has been previously frozen, as the cell structure has already been compromised by ice crystals; you want the freshest possible product that has not yet been processed beyond the initial quartering stage.
Setting Up Your Aging Environment
The biggest misconception about dry-aging at home is that you need a ten-thousand-dollar climate-controlled cabinet. While those units are beautiful, they are not strictly necessary if you are methodical about your setup. The primary goal is a dedicated space where the meat will not be disturbed, where temperatures are stable, and where there is sufficient airflow to facilitate the surface dehydration required for success.
Using a Dedicated Mini-Fridge
A small, dedicated mini-fridge is the ideal home solution. Because it is small, it is easier to regulate the temperature than a large kitchen refrigerator that is opened dozens of times a day. If you choose this route, you must ensure the fridge is properly ventilated. You should also install a small, battery-operated circulating fan inside the fridge. Airflow is the unsung hero of dry-aging; it ensures that the surface of the meat stays dry enough to prevent bad mold and yeast growth while allowing the beneficial, dry-aged crust to form uniformly.
Monitoring with Precision
Never rely on the built-in thermostat of a refrigerator. Invest in a high-quality, external digital hygrometer and thermometer that can be monitored remotely. You want to see alerts on your phone if the temperature drifts out of the 34-38°F range. Consistency is your best friend. Every time the fridge door is opened, the humidity spikes, and the temperature rises. Therefore, the cardinal rule of dry-aging is to keep the door closed as much as possible throughout the process.
The Aging Process: Timeline and Management
The aging process is a marathon, not a sprint. While some people claim that 14 days is sufficient to notice a difference, the true, characteristic "dry-aged flavor" typically begins to develop after the 21-day mark. Many professional chefs prefer 30 to 45 days, as this is when the transformation from "fresh beef" to "aged umami bomb" really peaks. Beyond 60 days, you are venturing into territory where the flavor can become incredibly pungent and the yield loss becomes substantial.
The Weekly Checklist
During the first week, check the meat daily. You are looking for the development of a dark, dry, reddish-brown pellicle. This is the pellicle, a protective layer of desiccated beef that is not actually rotten. If you see any fuzzy mold—which looks like white, green, or black fur—you must address it. Beneficial molds, which are often the same species used in cheese making, appear as a light, dusty bloom. Anything fuzzy or slimy must be trimmed away immediately with a sterilized knife.
Patience and the Yield Loss Factor
It is heartbreaking to start with a 15-pound roast and end with a 10-pound yield, but remember that the weight lost is primarily water. When you sear that aged steak, it will not weep moisture into the pan the way a store-bought steak does. It will crust over almost instantly, creating a deep, mahogany exterior that tastes like toasted nuts and beef marrow. Do not be discouraged by the shrinkage; you are concentrating the essence of the animal.
"The most dangerous thing you can do while dry-aging is to overthink it. Once the environment is set, leave it alone. The enzymes don't need your help; they just need time."
The Art of Trimming and Preparation
Once you have reached your desired age, the final stage is the preparation of the meat for cooking. You will notice that the exterior of the roast looks somewhat unappealing—dark, hard, and perhaps a bit leathery. This is normal. This exterior layer must be removed before you cut the meat into individual steaks. Failing to trim this layer will result in a chewy, intensely sour, and unpleasant experience, as the pellicle has become too dehydrated and oxidized to enjoy.
Trimming Techniques
Use a sharp, flexible boning knife to remove the pellicle. Work slowly, following the curve of the muscle. Do not worry about being perfectly efficient; it is better to take off a little extra meat than to leave any of the hard, dark rind behind. Once you have removed the exterior, you will be rewarded with a bright, ruby-red interior that smells incredibly fragrant—almost like high-quality butter or aged cheese. This is the heart of the roast.
Portioning for Success
Once the roast is trimmed, cut it into thick steaks—at least 1.5 to 2 inches thick. Thick-cut steaks are essential for dry-aged beef because they allow you to achieve that perfect contrast between a hard, crusty sear and a tender, edge-to-edge medium-rare center. If the steaks are too thin, you will overcook the center before you achieve the desired exterior crust. Vacuum-seal the steaks you aren't planning to eat immediately; they will keep perfectly for several months in the freezer.
Sterilize your work surface*: Ensure your cutting board is clean and dry.
Use a long, steady stroke*: Don't saw at the meat; pull the knife through the pellicle.
Save the trimmings (optional)*: Some chefs render the fat from the trimmings to use in sauces or for frying potatoes, but discard the dark, dry meat portion.
Cooking the Perfect Aged Steak
Now that you have labored for weeks, the final step is the cook. Cooking dry-aged beef is different from cooking fresh beef. Because the meat has lost a significant amount of its water content, it is much more susceptible to drying out during the cooking process. You must be precise with your heat and your timing. High, direct heat is your goal to develop that beautiful Maillard reaction on the surface, followed by a gentle finish to ensure the interior is perfect.
The Reverse Sear Method
The reverse sear is the gold standard for thick-cut, dry-aged steaks. By bringing the internal temperature of the steak up slowly in a low-temperature oven (around 225°F) until it reaches an internal temperature of about 115°F, you ensure that the entire steak is perfectly consistent. Once you remove it from the oven, you finish it in a ripping-hot cast iron skillet with a knob of high-smoke-point butter or rendered beef tallow for no more than 60 seconds per side.
Seasoning and Resting
Dry-aged beef has a naturally higher concentration of salt per ounce than fresh beef because of the water loss. You do not need to over-salt it. A simple dusting of coarse Kosher salt is all you need to elevate the natural flavors. After the sear, let the steak rest for at least ten minutes. This allows the juices—which are now incredibly potent—to redistribute throughout the meat. Resting is not a suggestion; it is a requirement for a juicy, flavorful bite.
Troubleshooting Common Issues
If you find yourself in a situation where the meat doesn't smell quite right, or the humidity seems off, don't panic. The most common issues arise from poor airflow or an unstable temperature. If the fridge is too crowded, the air cannot circulate effectively, creating pockets of stagnant humidity. Always ensure there is at least two inches of space between the meat and the walls of the fridge, and never stack pieces of meat on top of each other.
Managing Mold
If you see light, powdery, white mold, do not worry. This is usually the same type of culture that creates the rind on fine brie or camembert. However, if you see blue, black, or fuzzy mold, this is a sign that the environment is too humid or the temperature is too high. You must cut away any affected areas immediately and consider relocating the roast to a different shelf or checking your fridge calibration. If the odor is ammonia-like or sickly sweet, the meat has likely spoiled and should be discarded.
Maintaining Equipment
Your equipment is only as good as its maintenance. Clean your fridge with a mild bleach solution or a dedicated food-safe sanitizer before every new cycle. Ensure that the door gasket is tight and that there are no leaks. If you notice the fridge is running constantly, it may be struggling to pull moisture out of the air. Consider placing a small bag of food-grade silica gel or a salt-block in the corner of the fridge to help stabilize the humidity if you are in a particularly damp climate.
Final Thoughts
The journey of dry-aging beef is one of the most rewarding endeavors a home cook can undertake. It demands a marriage of patience, scientific rigor, and culinary intuition. You are effectively taking control of the clock, slowing down the biological processes of nature to unlock depths of flavor that simply do not exist in a supermarket-fresh cut of meat. While the process can feel intimidating at first, the repetition and the experience you gain with each successful batch will turn the "unknown" into a standard part of your kitchen repertoire.
Beyond the flavor itself, there is a profound sense of accomplishment in serving a steak that you have aged yourself. It is a story you tell your guests, a testament to the fact that you are willing to invest weeks into the preparation of a single meal. This is the essence of "Blame The Chef"—the idea that the kitchen is a laboratory, and the chef is the lead researcher. When you finally cut into that first steak, noticing the deep color, the intense aroma, and the complex, buttery, umami-rich flavor, you will understand why dry-aging is considered the pinnacle of culinary craft.
Remember that there is no shortcut to excellence. While it might be easier to pay a premium at the butcher shop, the satisfaction of standing in your own kitchen and pulling a perfectly aged roast from your dedicated fridge is an experience that cannot be purchased. Treat your beef with respect, keep your equipment clean, stay vigilant with your temperature checks, and trust the science. As you gain more experience, you might find yourself experimenting with different aging times, different breeds of cattle, or even different types of protein altogether. Keep pushing your boundaries, keep questioning the status quo of home cooking, and above all, keep cooking with purpose. The world of dry-aging is wide open for you, and the next forty-five days of patience will result in the best steak you have ever had the privilege of preparing. Your kitchen is ready, your tools are prepped, and the beef is waiting; it is time to start the clock on your next great culinary project.
Get the Next Recipe
Weekly recipes, techniques, and gear picks — straight to your inbox.
