The Home Cook's Guide to Ethiopian Injera: Mastering Teff Fermentation for Spongy, Tangy Flatbread
There is something undeniably transformative about the process of fermentation. It is the invisible alchemy that turns simple, humble grains into something complex, aromatic, and deeply nourishing. When we talk about Ethiopian Injera, we are not merely discussing a side dish or a simple flatbread; we are discussing the backbone of an entire culinary culture. It is a labor of love that demands patience, precision, and an intuitive understanding of the environment in your own kitchen. For the home cook, mastering the art of the sourdough teff crepe is a rite of passage that bridges the gap between following a recipe and truly understanding the science of sustenance.
The secret to a perfect, authentic Injera lies in the quality of your teff flour and the patience you afford your ersho, or the starter culture. Teff, a tiny, ancient grain native to the Horn of Africa, is rich in iron, calcium, and protein, and its lack of gluten makes it a unique challenge to work with. Unlike wheat-based breads that rely on gluten networks for structure, Injera relies on the bubbles formed during the fermentation process to create its signature spongy texture, known as the eyes. When you embark on this culinary journey, you are engaging in a practice that has sustained civilizations for millennia, turning dust-like grains into a platter that serves as both vessel and nourishment.
In this guide, we will peel back the layers of complexity surrounding this fermented staple. We will explore the ratios, the temperature control, and the delicate wrist movements required to achieve that elusive, lacelike pattern on the surface of the bread. This is not a recipe that rewards rushing; it is a test of your ability to listen to the fermentation bubbling in your jar. Whether you are a seasoned baker looking to expand your sourdough horizons or a curious cook seeking to recreate the vibrant flavors of an Ethiopian feast at home, this deep dive will provide you with the professional insight necessary to bring authentic, tangy, and cloud-like Injera to your own dining table.
The Science of the Ersho: Cultivating Your Fermentation Base
The heart of any great Injera is the starter, known in Ethiopia as ersho. This is a living colony of wild yeasts and lactic acid bacteria that gives the bread its signature tangy flavor and its light, airy structure. Without a vigorous, healthy starter, your Injera will be dense, lackluster, and devoid of the characteristic sourness that balances the rich, spicy stews—the wats—that typically accompany it. The goal is to build a culture that is active enough to produce significant carbon dioxide, which creates those famous "eyes" or holes on the surface of the bread during the cook.
Selecting Your Teff Flour
To start, you must source high-quality brown or ivory teff flour. While brown teff offers a slightly nuttier, earthier flavor, ivory teff is often preferred for a cleaner, more delicate taste. Ensure your flour is finely milled, as coarser grinds can interfere with the formation of the bubbles. When selecting your starter, you can either cultivate one from scratch using just flour and water or, if you have a friend in the community, source a portion of an established starter. A wild-fermented starter is always superior in flavor, capturing the unique microbiome of your kitchen environment.
The Fermentation Ratio and Temperature
The golden ratio for your initial starter is roughly 1:1 by weight of flour and water. Mix them thoroughly in a glass or ceramic container, ensuring no dry pockets remain. Cover the container with a clean cheesecloth or a loose-fitting lid to allow it to breathe while protecting it from debris. Temperature control is paramount here; aim for a stable environment between 70°F and 75°F. If your home is colder, the fermentation will be sluggish, potentially inviting unwanted bacterial growth; if it is too hot, the yeasts may become overactive and then crash, leading to a sourness that is unpleasant rather than bright.
The magic of Injera isn't in the speed of the bake, but in the slow, rhythmic transformation of the batter. It is a conversation between the grain and the air, a lesson in patience that rewards you with every bubble that forms on the griddle.
Building the Batter: The Multi-Stage Fermentation Process
Once your ersho is bubbly and aromatic—usually after 3 to 5 days—you are ready to move into the multi-stage fermentation process. This is where most home cooks stumble, as they attempt to rush the hydration of the grain. You want to create a batter that has a consistency somewhere between thin pancake batter and heavy cream. Because teff has a high fiber content, it needs time to fully hydrate and release its starches, which will ultimately act as the binder that holds your flatbread together.
The Primary Fermentation
In your main mixing bowl, combine your active starter with a larger portion of teff flour and lukewarm water. For a standard batch, aim for a consistency that coats the back of a spoon. Cover this and let it rest for another 24 to 48 hours. During this time, the lactic acid bacteria will produce the lactic and acetic acids that give the Injera its characteristic zing. You will see bubbles rising to the top and a clear liquid, known as hooch, may settle on the surface; this is a sign of healthy, active fermentation.
Adjusting for Consistency
After the primary fermentation, you will notice a thick layer of sediment at the bottom of your bowl. Carefully pour off most of the hooch if it has become too acidic, or stir it back in if you prefer a sharper bread. Add a small amount of fresh flour and warm water, stir vigorously to aerate the mixture, and let it rest for a final 4 to 6 hours before cooking. This final boost of energy ensures that the yeast is primed for the high heat of the griddle, which is essential for that rapid expansion and eye formation.
Mastering the Griddle: The Art of the Pour
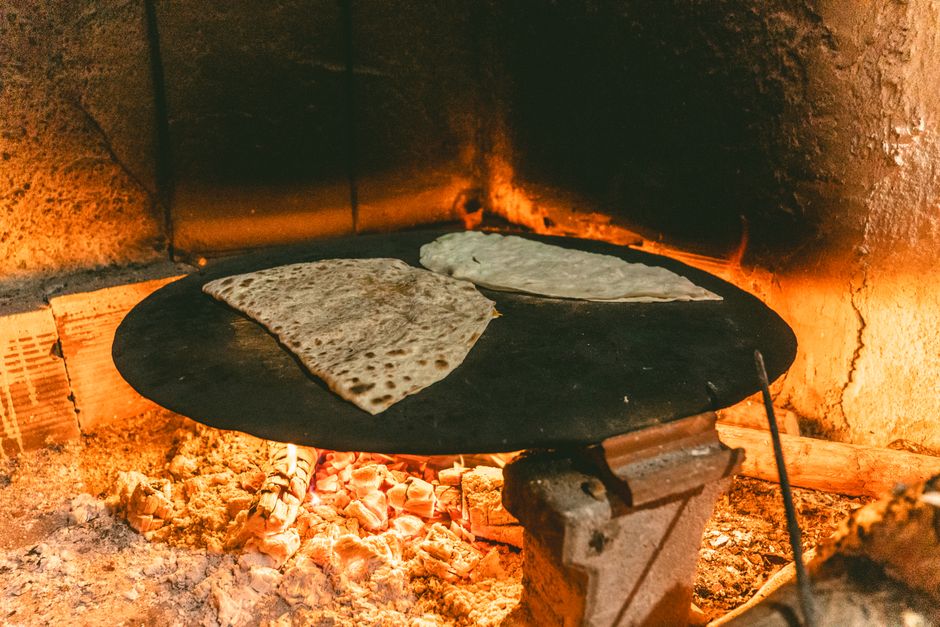
The transition from bowl to griddle is where the "Blame The Chef" philosophy really comes into play—it is all about equipment, heat management, and technique. You cannot use just any pan; for authentic results, you should ideally use a Mitad, the traditional Ethiopian electric circular griddle. If you are using a standard stovetop, a high-quality, heavy-duty cast iron or a non-stick crepe pan is your best bet. The pan must be perfectly level, or your Injera will be thicker on one side than the other, resulting in uneven cooking.
The Heat Threshold
Heat is the catalyst for the "eyes." If the pan is too cold, the bread will simply cook through without forming the signature holes. If the pan is too hot, the edges will burn and curl before the center has a chance to set. You are looking for a medium-high temperature where a drop of water dances and evaporates instantly. Do not add oil to the pan; Injera is traditionally cooked on a dry surface to ensure it maintains its specific spongy, slightly elastic texture.
The Circular Technique
The pour is a beautiful, rhythmic motion. Start at the outer edge of the pan and pour the batter in a thin, steady stream while moving in a spiral motion toward the center. Do not overlap your circles too much, or the bread will be double-layered in places. Once the batter is poured, cover the pan immediately with a tight-fitting lid. This traps the steam, which is the secret ingredient for cooking the top of the bread and ensuring the bubbles (eyes) set properly.
Authentic Injera is more than bread; it is a canvas for flavor. When you see those perfectly formed, lace-like eyes covering the surface, you know you have mastered the balance of fermentation and heat.
Troubleshooting the "No-Eyes" Dilemma
Every home cook encounters the dreaded "smooth Injera" at least once. This happens when the batter is either under-fermented, over-mixed, or the heat source was insufficient to cause the rapid release of carbon dioxide. If your Injera comes out looking like a solid, rubbery pancake, do not be discouraged. Use this as a diagnostic tool. First, check your fermentation time—perhaps your room temperature was lower than you thought, necessitating a longer fermentation period.
Assessing the Batter Strength
If your batter is too thin, it will fail to hold the structure of the bubbles. If it is too thick, the bubbles will struggle to rise to the surface. You can perform the "spoon test": if the batter leaves a thin, uniform coating on the back of your spoon that doesn't slide off immediately, you are in the right ballpark. If the batter is too thick, add water a tablespoon at a time. If it’s too thin, a small amount of extra teff flour will tighten it up.
The Role of Air Incorporation
Remember that the act of pouring is, in itself, an act of aeration. When you pour the batter, you are introducing small air pockets. If you stir your batter too aggressively right before pouring, you may deflate all the work your yeast has done. Gently whisk the batter once before starting, then treat it with care. Keep your ladle steady, and move your arm with confidence. The more you practice the spiral pour, the more consistent your bubbles will become.
Pairing and Serving: Beyond the Wat
Once you have mastered the Injera, the real fun begins: the feast. In Ethiopia, the Injera is both the plate and the utensil. It is spread across a large circular tray called a gebeta, and a variety of wats (stews) are arranged on top. Whether you are serving a spicy Doro Wat (chicken stew), a rich lentil Misir Wat, or a vibrant vegetable sauté, the Injera acts as the sponge, soaking up the flavorful sauces and spices.
The Etiquette of the Feast
Eating with your hands is the standard, and it is a communal experience. Tear a piece of Injera, using your thumb and index finger to pick up a small amount of stew, and bring it to your mouth. The interplay between the sour, fermented notes of the Injera and the bold, savory, and often spicy flavors of the stews is what makes this cuisine so incredibly balanced and satisfying.
Storing Your Finished Injera
Injera keeps well for a few days, but it is best enjoyed fresh. If you have leftovers, stack them between sheets of parchment paper and store them in an airtight container or a plastic bag. They will soften as they sit, which some people prefer, but you can also lightly steam them to restore that fresh, fluffy quality. Avoid the microwave if possible, as it tends to make the teff rubbery and loses the delicate texture you worked so hard to create.
Doro Wat*: The king of stews, slow-cooked chicken with berbere spice.
Misir Wat*: Red lentils cooked with aromatics, perfect for soaking.
Gomen*: Braised collard greens that provide a fresh, earthy contrast.
Ayib*: A mild, cottage-cheese-like fresh cheese that cools the palate.
Nutritional Powerhouse: Why Teff Matters
It is impossible to discuss Injera without highlighting the nutritional profile of teff. As a gluten-free ancient grain, teff is an incredible source of plant-based protein, dietary fiber, and essential minerals like iron, calcium, and magnesium. By fermenting the flour, you are also making these nutrients more bioavailable, as the fermentation process breaks down some of the anti-nutrients found in grains.
Dietary Benefits
Because of its complex carbohydrates, Injera has a lower glycemic index compared to refined wheat breads, providing a sustained release of energy throughout the day. For those with dietary sensitivities, it serves as a fantastic alternative to traditional breads, and the probiotic nature of the fermentation contributes to improved gut health. This is truly "slow food" in every sense—nourishing to the body, the culture, and the soul.
The Culinary Versatility of Teff
Beyond Injera, teff flour can be incorporated into pancakes, waffles, and even cookies for a boost of earthiness. However, its most expressive form remains the flatbread. When you master the fermentation of teff, you are unlocking a versatile pantry staple that is both ancient and thoroughly modern in its health benefits. Keep your starter active, keep your kitchen warm, and keep your curiosity high.
Advanced Tips for the Seasoned Enthusiast
For those who have reached a point where their Injera is consistently good, the next step is to explore the subtle nuances of "sourness control." If you prefer a sharper bread, let your starter sit for an extra 24 hours at room temperature, or introduce a small amount of dark rye flour to the starter to increase the microbial activity. Conversely, if you want a milder flavor, ensure that you are refreshing your starter more frequently and storing it in the refrigerator between baking sessions to slow down the fermentation.
The "Cheat" Flour Debate
Many home cooks, especially those outside of Ethiopia, mix their teff with a portion of barley or wheat flour. While this does make the batter easier to work with because of the added gluten, it dilutes the authentic, nutty profile of the teff. I always encourage students to strive for 100% teff if possible. It takes more practice, certainly, but the flavor payoff is incomparable. If you are struggling with the structural integrity of 100% teff, add a very small percentage—no more than 10%—of barley flour, but try to wean yourself off it as you grow more comfortable with your fermentation technique.
Creating the Perfect Edge
The "curl" of the Injera edge is a mark of a master. To achieve this, pay attention to the hydration of the batter as it hits the pan. If the edge of the bread lifts away from the pan while the center is still cooking, it means the steam is doing its job perfectly. You do not need to flip the Injera. It is a single-sided cook. The steam creates the structure, the heat creates the bubbles, and the result is a masterpiece of culinary engineering that is as functional as it is delicious.
Troubleshooting Common Culinary Issues
Even for the most experienced baker, the variables of the home kitchen can cause inconsistencies. If your batter develops a layer of mold (fuzzy growth), discard it immediately—do not attempt to save it. If the smell changes from a pleasant, sourdough-like tang to something truly putrid, the culture has been compromised by the wrong bacteria and should be started over. Your starter should always smell bright, sour, and yeasty.
Issue: No eyes.* Solution: Increase fermentation time or check your griddle heat.
Issue: Batter is too gummy.* Solution: It is likely over-fermented or the flour-to-water ratio is off.
Issue: Edges won't crisp.* Solution: Your pan is not hot enough, or the lid is not trapping enough steam.
Issue: Bread is too thick.* Solution: Thin your batter with more water in the final stage.
The Cultural Significance of the Injera
It is important to remember that Injera is not just a food item; it is a centerpiece of communal living. In Ethiopian culture, eating is a shared experience, often from a single large platter. The Injera serves as the common denominator, the shared canvas upon which the meal is built. When you prepare Injera at home, you are participating in a tradition that celebrates togetherness, hospitality, and the fundamental joy of sharing a meal with those you love.
When you master this craft, you are not just making bread; you are honoring a deep, historical lineage. Take your time, document your fermentation stages, and don't be afraid to experiment with the timing. Your kitchen will soon smell like a traditional Ethiopian bakery, and your friends and family will surely appreciate the labor and love that goes into every single batch. The "Blame The Chef" promise is that once you experience the satisfaction of pulling a perfectly bubbly, tangy, and authentic Injera off the griddle, you will never look at store-bought bread the same way again.
Conclusion
Mastering Ethiopian Injera is a journey of patience, precision, and profound reward. By understanding the role of your ersho, the importance of hydration, and the delicate dance between heat and steam, you elevate your home cooking from mere assembly to true culinary artistry. While the process requires time, the result—a spongy, tangy, and nutrient-dense flatbread—is an essential component of one of the world's most vibrant cuisines. Continue to nurture your starter, refine your pouring technique, and embrace the slow, rhythmic nature of fermentation. As you grow more confident in your abilities, you will find that the Injera you produce becomes a reflection of your own skill and dedication. Happy baking, and may your platter always be full of flavor.
Final Thoughts
The path to mastering this ancient bread is paved with trial and error, but that is exactly what makes the process so rewarding. Do not be discouraged by a flat batch or a lack of bubbles on your first, second, or even third attempt. Every failure is simply a lesson in the chemistry of your specific kitchen environment. Keep your starter healthy, keep your griddle clean, and most importantly, keep cooking. The transition from a beginner to a master of Injera is a path that every great chef has walked, and the destination—a plate that brings people together through the power of authentic, fermented food—is worth every single minute of effort. Embrace the tang, celebrate the holes, and enjoy the beautiful, spongy outcome of your hard work. You have the tools, the knowledge, and the passion to make this your signature dish.


Get the Next Recipe
Weekly recipes, techniques, and gear picks — straight to your inbox.
