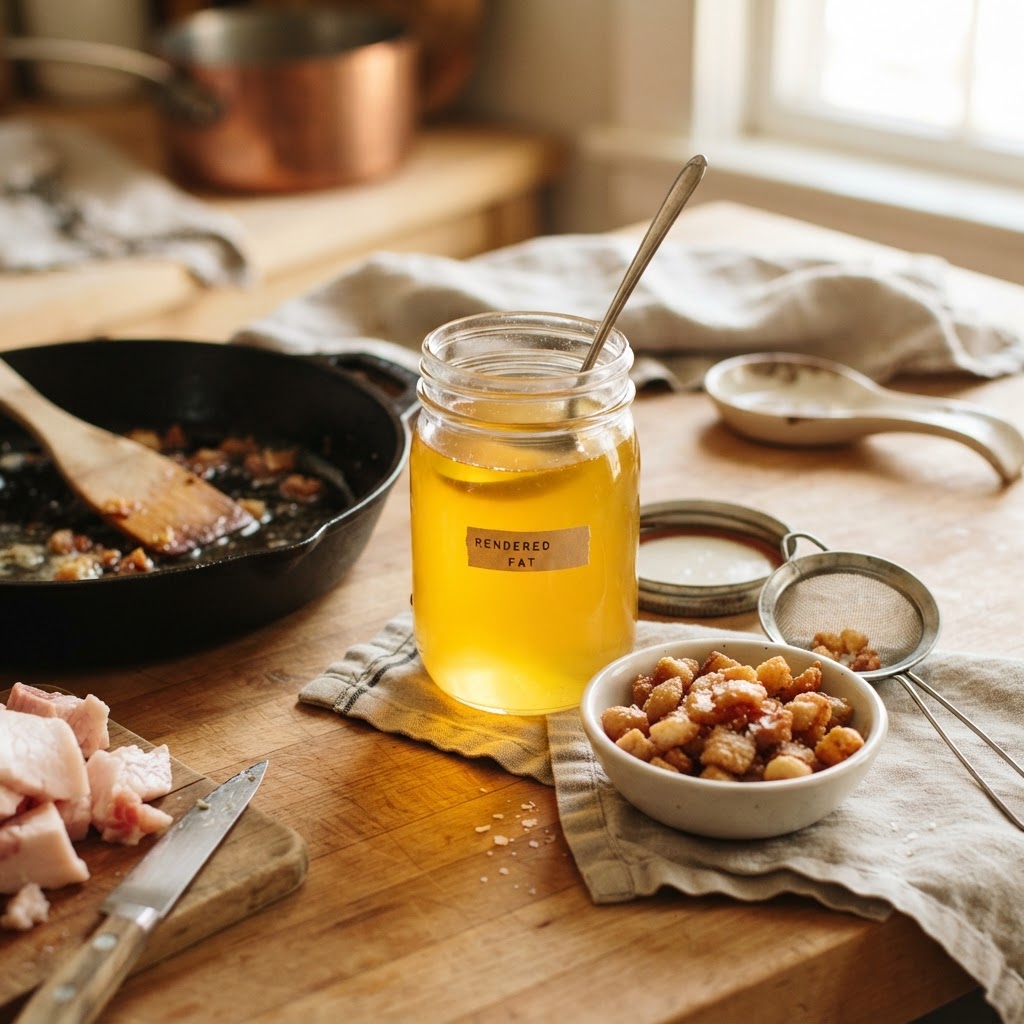
The Home Cook’s Guide to Fat Rendering: How to Transform Scraps Into Liquid Gold for Superior Flavor and Texture
In the bustling heart of any professional kitchen, there is a silent, golden economy that dictates the quality of the final plate. While amateur cooks often view the trimmings of a roast, the skin of a chicken, or the thick edges of a prime brisket as waste to be tossed into the bin, the seasoned chef sees a pantry staple waiting to be unlocked. This process, known as rendering, is the ancient culinary art of melting down adipose tissue—or animal fat—into a pure, stable, and incredibly flavorful cooking medium. By learning to harness these forgotten scraps, you aren't just saving money; you are elevating the baseline flavor profile of every single dish that leaves your stove, turning potential garbage into the secret weapon of your home kitchen.
Many home cooks find themselves intimidated by the idea of rendering fat, perhaps fearing the smell of burning grease or the complexity of the process. In reality, it is one of the most forgiving and rewarding techniques you can master, requiring little more than a heavy-bottomed pot, low heat, and a measure of patience. When you take the time to carefully melt down your trimmings, you strip away the water and impurities, leaving behind a clean, shelf-stable, and shelf-stable fat that can fry eggs, sear steaks, or even act as the base for exquisite pie crusts. The transformation from raw, gelatinous tissue to liquid gold is a mesmerizing process that connects you to generations of cooks who knew that nothing useful should ever go to waste.
Welcome to "Blame The Chef," where we believe that the difference between a good meal and an unforgettable one lies in the details you often overlook. Over the next few thousand words, we are going to dive deep into the science, the technique, and the endless culinary applications of rendering your own fats. Whether you are dealing with pork lard, beef tallow, or schmaltz, the principles remain the same, and the rewards are profound. So, grab your apron, clear some space on your counter, and prepare to stop throwing away the most flavorful parts of your groceries; it is time to turn your kitchen scraps into the culinary equivalent of high-yield liquid gold.
Understanding the Science of Rendering
At its most fundamental level, rendering is the process of heating animal fatty tissue until the fat cells rupture, releasing the liquid oil trapped within them. These fat cells, known as adipocytes, are bound together by a structural matrix of connective tissue. Through the application of gentle, sustained heat, we break down these barriers, allowing the fat to liquefy and separate from the protein solids and water content. The result is a refined product that is free from the bits of meat or blood that would otherwise cause the fat to go rancid quickly.
Why Quality Matters
The flavor of your finished fat is entirely dependent on the quality of the raw material. If you are starting with beef suet—the hard, white fat found around the kidneys—you will achieve a clean, neutral, and high-melting-point fat that is perfect for deep frying. If you are rendering trimmings from a well-marbled brisket or a ribeye cap, you are going to get a product that carries a deep, beefy, umami-rich flavor. Always source your fat from the highest quality animals you can afford, as toxins and undesirable compounds often concentrate in the fat stores of the animal.
The Role of Temperature
Temperature control is the absolute cornerstone of a successful render. If you apply heat that is too high, you risk burning the proteins and creating "cracklings" that impart a bitter, charred flavor to the final oil. You want to maintain a consistent temperature, ideally hovering between 225°F (107°C) and 250°F (121°C). This is just high enough to evaporate any residual moisture—which is essential for long-term storage—without scorching the delicate fats. Using a digital probe thermometer is highly recommended, as it removes the guesswork and ensures a consistent result every time.
"The true secret to professional cooking isn't a complex sauce or a fancy tool; it is the mastery of the fat you use. Rendered fat is the medium through which all other flavors are expressed, and learning to make your own is the single greatest upgrade you can make to your home pantry."
Preparing Your Raw Materials
Before you even think about turning on the stove, the preparation of your fat is paramount. If you are starting with large chunks of fat, you must ensure they are properly sized to allow for even rendering. Think of the fat like a solid block of butter; if you put a massive, cold slab into a pan, the outside will burn before the center even begins to soften. Precision in the prep phase saves you significant time during the cooking phase and yields a much clearer, purer product.
The Cold-Chill Technique
To achieve the best results, start by freezing your raw fat scraps for about 30 to 60 minutes. When the fat is firm, it becomes much easier to handle and, more importantly, much easier to cut into uniform, small pieces. Aim for cubes roughly 1/2 inch (1.25 cm) in size. This increased surface area allows the heat to penetrate the tissues rapidly and evenly, resulting in a quicker render that is less likely to scorch or develop an "off" flavor during the process.
Removing Impurities
While you are chopping, take a moment to meticulously remove any stray bits of meat, hair, or connective tissue that shouldn't be there. While a few bits of meat will naturally become the delicious "cracklings" we all love, excessive protein will lead to burning. A clean start yields a clean end product. Remember that your goal is to extract pure, clarified fat, and the fewer non-fat particles you introduce to the pot, the less work you will have to do when it comes time to strain the finished liquid.
The Wet vs. Dry Rendering Methods
There are two primary schools of thought when it comes to rendering fat, each with its own set of advantages and challenges. The Dry Rendering Method is the most common technique used for high-quality fats intended for baking or high-heat searing. In this method, the fat is placed in a heavy pot, perhaps with a tiny splash of water to prevent the bottom from scorching before the fat begins to flow, and heated very slowly. It is a slow, methodical process that produces a very clean-tasting, stable fat.
The Wet Rendering Method
The Wet Rendering Method, on the other hand, involves adding a significant amount of water to the pot alongside the fat. The water helps to regulate the temperature, preventing the fat from ever exceeding the boiling point of water (212°F / 100°C) until the water has fully evaporated. This is an excellent technique if you are working with slightly "dirtier" fat or if you are worried about burning your batches. The water pulls out impurities, which then settle at the bottom or are discarded during the final cooling stage.
Choosing Your Path
If you are aiming for the purest, most neutral flavor, the Dry Method is usually preferred. It requires more attention—you have to stir the pot regularly and keep a close eye on the thermometer—but the result is a shelf-stable, crystal-clear fat that stores beautifully. The Wet Method is slightly more forgiving and is ideal for beginners, but it adds an extra step of chilling the fat to allow the water and impurities to separate completely from the solid fat block before you can finally store it.
Mastering the Art of the Slow Render
Once your prep is done and your method is chosen, the cooking phase begins. This is where the magic happens. Place your fat into a heavy-bottomed Dutch oven or a high-sided saucepan. If you are using the dry method, add just a tablespoon of water per pound of fat to help start the process. Set your heat to the lowest possible setting. If you have a heat diffuser, now is the time to use it. You want the fat to gently sweat, not bubble or boil aggressively.
The Patience Factor
This is not a process you can rush. Depending on the amount of fat you are rendering, this could take anywhere from 45 minutes to three hours. You will notice the liquid gold beginning to accumulate at the bottom of the pot. As the cubes shrink and become golden brown, they are turning into cracklings. Do not be tempted to turn the heat up. If you see the fat smoking, you have gone too far; turn the heat off immediately and remove the pot from the burner.
Monitoring for Completion
You will know the process is complete when the cracklings are small, crispy, and deeply golden, and the liquid fat is clear and free of bubbling. The bubbles you see are the last of the moisture escaping. Once the bubbling stops almost entirely, it is a sign that the fat is ready to be strained. This is a critical point; if you stop too early, the water content remaining in the fat will cause it to go rancid or moldy during storage.
"Rendering fat is a lesson in patience. You cannot bully the adipose tissue into releasing its bounty; you must coax it out with steady, low heat. The resulting clarity and flavor are the direct rewards for your restraint."
Straining and Storing Your Gold
Once the rendering is finished, you need to separate the liquid fat from the crispy, golden bits of leftover tissue. Place a fine-mesh strainer over a heat-proof glass jar or a stainless steel container. For the absolute cleanest result, line the strainer with two layers of high-quality cheesecloth or a coffee filter. This will remove even the smallest particles, ensuring that your fat is perfectly translucent.
Proper Cooling
Never rush the cooling process. Allow the rendered fat to sit at room temperature for about 20 to 30 minutes before sealing the container. If you seal a hot container, you will create condensation, which introduces water back into your fat. Once the liquid has cooled slightly, place it in the refrigerator. As the fat cools, it will transition from a beautiful golden liquid to an opaque, creamy, or solid state, depending on the type of animal.
Shelf Life and Preservation
When properly rendered and stored, your fat is remarkably stable. Stored in an airtight container in the refrigerator, most rendered animal fats will easily last for six months to a year. For even longer storage, you can freeze your rendered fat in small, portion-controlled silicone molds. This allows you to pop out a single "cube" of flavor whenever you need to sauté a few cloves of garlic or sear a single steak, without having to defrost your entire supply.
Culinary Applications: How to Use Your Rendered Fat
Now that you have jars of liquid gold sitting in your pantry, how do you use them to elevate your cooking? The possibilities are truly endless. Beef tallow, with its high smoke point and rich, savory depth, is the gold standard for roasting potatoes. Toss parboiled potatoes in hot, melted tallow with a generous pinch of sea salt and a sprig of rosemary before putting them in a screaming hot oven. The result is a crunch that oil simply cannot replicate.
Schmaltz in the Kitchen
Schmaltz, which is rendered chicken or goose fat, is a powerhouse of flavor. It is a staple in traditional Jewish cooking, used to dress everything from matzo balls to liver pâté. In a modern kitchen, try using schmaltz to sauté mushrooms. The deep, savory notes of the chicken fat amplify the earthiness of the mushrooms in a way that butter or vegetable oil never could. It is also excellent for roasting root vegetables or as a fat component in a savory pie crust for a chicken pot pie.
The Lard Advantage
Lard, rendered from pork fat, is perhaps the most versatile of the bunch. When using "leaf lard"—the fat from around the kidneys—you have the ideal medium for the flakiest pastries you will ever bake. Because lard has larger fat crystals than butter, it creates distinct, beautiful layers in pie crusts, biscuits, and empanadas. For savory applications, use leaf lard to fry pork chops or as a base for refried beans. If you are rendering standard back fat, use it for pan-frying or as a replacement for lard in traditional tamale recipes.
Troubleshooting Common Issues
Even with the best intentions, things can go wrong in the kitchen. If your fat has a strong "funky" or burnt smell, you likely cooked it at too high a temperature. Unfortunately, there is no way to fix a burnt batch; it is best to discard it and learn from the experience by keeping your heat lower next time. If the fat has a cloudy appearance, it usually means it wasn't fully rendered or that some moisture remained. If you find your fat has cloudy bits, you can gently remelt it and strain it once more through a fresh coffee filter.
Preventing Rancidity
If your fat develops an unpleasant odor after a few months, it means it has gone rancid. This usually happens due to the presence of leftover protein or water. To prevent this, always ensure your straining process is thorough and that you aren't leaving any meat bits in the final storage container. If you are living in a hot or humid climate, keep your fat in the freezer rather than the pantry or fridge to extend its shelf life significantly.
When to Dispose
While rendered fat is a wonderful resource, it does have a finite lifespan. If you notice mold growth—which is rare but possible—or a sour, metallic smell, it is time to discard the batch. Don't worry about the waste; the beauty of this hobby is that there is always another roast or another chicken dinner just around the corner to provide you with the raw materials for your next batch of liquid gold.
Final Thoughts
The art of rendering fat is one of those foundational skills that separates the "cook" from the "chef." It requires you to look at your ingredients not just as a single meal, but as a collection of parts, each with its own potential. When you take the time to render your own fat, you are engaging in a process that is sustainable, economical, and—most importantly—delicious. You are reclaiming the lost traditions of our ancestors, who knew that the fat was often the most valuable part of the animal.
As you begin to incorporate your homemade tallow, lard, or schmaltz into your daily cooking, you will start to notice a marked difference in the quality of your results. Your roasted vegetables will have a deeper caramelization, your searing will be more consistent, and your baking will reach new levels of texture and flavor. You aren't just making dinner anymore; you are building flavor from the ground up, utilizing the highest quality ingredients you can find, and creating a kitchen legacy that is uniquely yours.
So, the next time you are preparing a large cut of meat or cleaning up after a poultry dinner, don't reach for the trash bin. Reach for your rendering pot. Take those scraps, trim them down, and transform them into the liquid gold that will become the backbone of your culinary identity. There is a deep, quiet satisfaction in knowing that your kitchen pantry is stocked with homemade ingredients that outperform anything you could find on a grocery store shelf. Keep cooking, keep experimenting, and remember: at "Blame The Chef," we never waste the best parts.
Beyond the technical steps and the science of the render, there is a certain rhythm to the process. It is a slow, methodical task that forces you to slow down in a world that is always rushing. When you watch the fat melt and the gold clarify, you are witnessing the true essence of ingredient-focused cooking. It is a reminder that the best flavors don't come from a bottle or a box, but from the raw potential of the food we buy. Embrace the process, share your finished products with friends and family, and take pride in the fact that you have mastered the basics of one of the kitchen's most essential arts. Your future roasts, fries, and pastries will thank you for it, and your pantry will be richer for the effort.
To recap the essentials: start with quality fat, keep your heat consistently low, use a thermometer to guide your progress, strain meticulously to ensure purity, and store your final product in a cool, dark environment. Do not fear the fat; respect it, work with it, and let it work for you. Whether you are a beginner or a seasoned pro, there is always more to learn and more to gain from the humble scrap. Happy rendering, and may your kitchen always be filled with the rich, comforting scent of liquid gold.
In our journey today, we have covered the science, the technique, and the application of fat rendering. We have looked at how to choose the right fat, how to safely render it down without compromising quality, and how to store it for the long term. But more than that, we have hopefully shifted your perspective on what constitutes "waste." When you begin to see the potential in the trimmings, you change your relationship with your groceries. You become a more thoughtful shopper, a more diligent preparer, and ultimately, a more creative cook. This is the goal of "Blame The Chef"—to empower you to take control of your culinary destiny, one render at a time.
As you stand at your stove with your pot of gently bubbling fat, remember that you are participating in a tradition that spans thousands of years. You are using the same techniques that were once necessary for survival, now repurposed for the sake of superior flavor. This is the magic of the home kitchen: the ability to turn the mundane into the extraordinary. We hope this guide serves you well in your culinary adventures. Keep practicing, keep tasting, and don't be afraid to blame the chef when your dishes start turning out better than you ever imagined possible.
One final piece of advice for the road: don't be afraid to experiment with different animal combinations. Sometimes, a mix of beef tallow and pork lard can create a unique flavor profile that is perfect for specific types of frying. Keep a small journal of your rendering projects, noting the animal, the temperature, the time, and any unique observations you have about the final product. Over time, you will develop an intuition for the process that no recipe can teach you. Your kitchen is your laboratory, and these fats are your most precious tools. Use them well, enjoy the process, and above all, never settle for anything less than the best. The gold is in the scraps, and now, you know exactly how to find it.
Get the Next Recipe
Weekly recipes, techniques, and gear picks — straight to your inbox.
