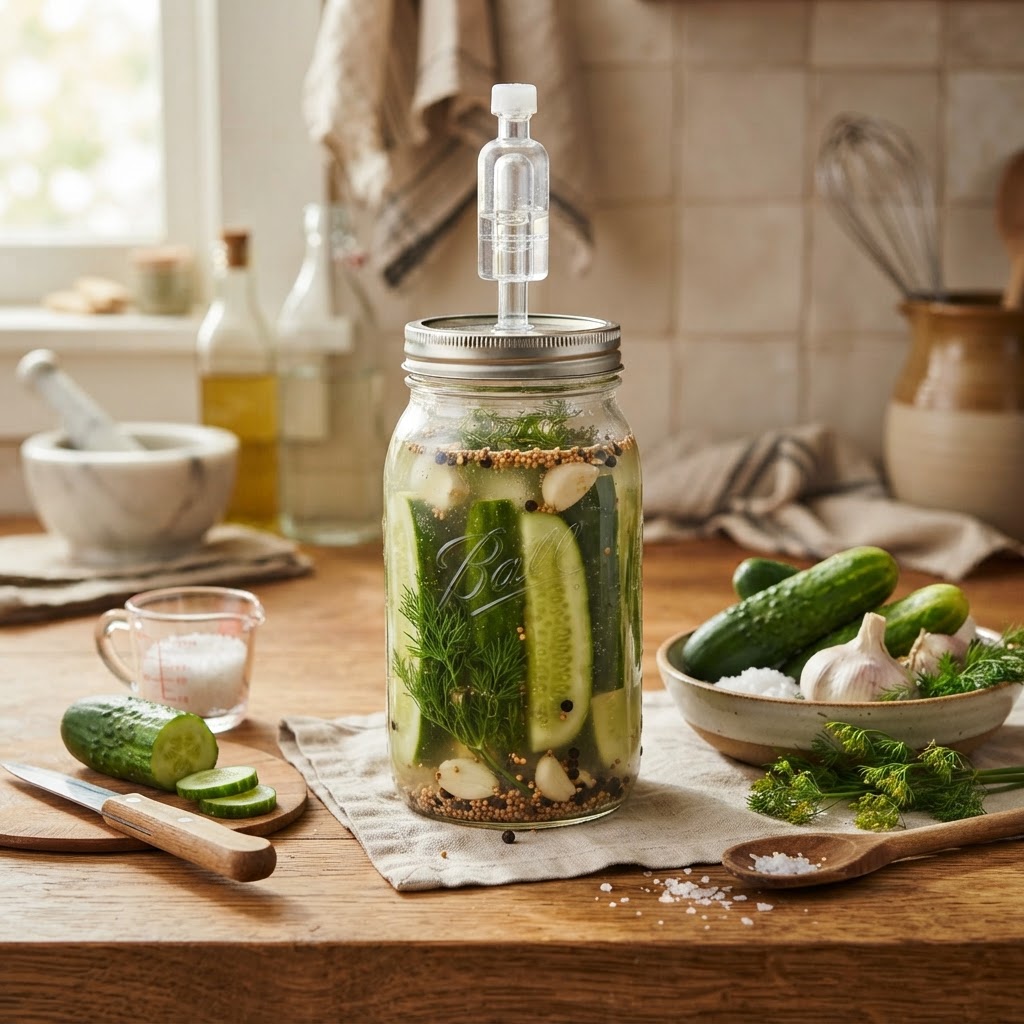
The Home Cook’s Guide to Fermentation: Mastering Brine-to-Produce Ratios for Perfectly Crisp and Tangy Pickles
The art of fermentation is perhaps the oldest preservation method in human history, yet it remains shrouded in an unnecessary layer of modern mystery. While many home cooks glance at a jar of bubbling cucumbers with a mix of awe and trepidation, the science behind it is remarkably straightforward and forgiving. At its core, lacto-fermentation is simply the process of encouraging beneficial bacteria—specifically Lactobacillus—to consume the natural sugars in produce, transforming them into lactic acid. This byproduct is what grants pickles their signature tang, vibrant color, and improved shelf stability, all while enhancing the bioavailability of nutrients within the vegetable. By mastering a few foundational rules, you can transform a handful of garden-fresh produce into a gourmet probiotic pantry staple.
Many beginners fall into the trap of over-complicating their first batch, agonizing over specialized equipment or expensive starters when nature provides everything required. You do not need fancy airlocks, weighted springs, or imported salt to succeed; all that is truly necessary is fresh produce, filtered water, non-iodized salt, and a clean glass vessel. The shift from "cook" to "fermenter" is a mental one, moving away from the strict, heat-driven constraints of canning and into the fluid, living world of biological transformation. Once you understand how to control the environment for your tiny microbial partners, you will find that your kitchen becomes a laboratory of endless flavor possibilities. This guide is designed to strip away the jargon and provide you with a concrete framework for building the perfect ferment every single time.
When I started my culinary journey, my first attempt at sauerkraut was a salty, mushy disaster that ended up in the bin, and I spent months blaming my technique instead of the math. The secret, as I eventually learned, isn’t in the specific vegetable you choose, but in the precision of your brine-to-produce ratio. Achieving that perfect, satisfying "crunch" requires a balance that keeps pathogens at bay while allowing the Lactobacillus to thrive in a controlled salt environment. In the following sections, we will break down the chemistry of salinity, the anatomy of a perfect brine, and the subtle environmental cues that signal your pickles are ready for the table. Prepare to reclaim your countertop and embrace the tangy, probiotic power of home-fermented goodness.
The Chemistry of Salt and the 2-5% Rule
The foundation of any successful ferment is the salinity of your brine, which acts as the gatekeeper of your jar. Salt serves two primary purposes: it draws moisture out of the vegetable tissues through osmosis and, more importantly, it creates an inhospitable environment for harmful spoilage bacteria. If you use too little salt, your produce will turn soft and mushy before the beneficial acids can form; use too much, and you may halt the fermentation process entirely. Finding that "sweet spot" is the difference between a jar of high-end, crisp pickles and a jar of compost.
Understanding Salinity Percentages
For most home ferments, a salt concentration of 2% to 5% by weight is the professional gold standard. To calculate this accurately, you must use a kitchen scale to weigh both your produce and your water. If you are making a submerged ferment—like whole or spears of cucumbers—you weigh the total mass of the water plus the vegetables, then multiply by your desired percentage. A 3% brine is generally considered the safest bet for beginners, as it provides enough protection against pathogens while still allowing the wild yeasts and bacteria to thrive in the room temperature environment of your kitchen.
"Salt is the silent partner in every great ferment; without it, you are not preserving, you are simply facilitating decay."
Choosing the Right Salt
Not all salts are created equal, and this is where many home cooks stumble. You must avoid iodized table salt, as the additives intended to prevent clumping and the iodine itself can interfere with the bacterial growth or cause the brine to turn an unsightly color. Instead, reach for kosher salt or high-quality sea salt. I personally prefer a coarse, non-refined sea salt because it contains trace minerals that can actually aid in the fermentation process and contribute to a more complex final flavor profile.
The Anatomy of the Perfect Cucumber Spear
If you are looking to master the classic "deli-style" pickle, the cucumber itself is just as important as the brine. Store-bought, wax-coated cucumbers are generally unsuitable for fermentation, as they lack the structural integrity required to stand up to the process. You want small, firm, pickling-specific varieties like the Kirby or Persian cucumber. These types have thinner skins and fewer seeds, which results in a crisper texture and a more efficient infusion of aromatics and salt.
The Role of Tannins for Crunch
The biggest complaint I hear from home cooks is that their pickles lose their snap within a few weeks of fermentation. This usually happens because the enzymes in the cucumber continue to break down the cell walls even as the acidity rises. The secret trick of the trade is to introduce tannins into your jar. By adding a single grape leaf, a bit of black tea, or a few oak leaves to the bottom of the jar, you introduce natural tannins that inhibit those softening enzymes, keeping your pickles firm and crisp for months.
Preparing the Produce
Before you even think about the brine, you must ensure your cucumbers are pristine. Scrub them thoroughly under cold water to remove any field dirt or residual pesticides, and then trim the blossom end off entirely. The blossom end contains enzymes that can cause the cucumber to soften prematurely, regardless of how much salt you use. Once trimmed, pierce the skin slightly or leave them whole, depending on how quickly you want the fermentation to occur.
* Always use filtered water—chlorine in tap water can hinder bacterial growth.
* Keep your glass jars sterilized with boiling water before use.
* Ensure the vegetables are fully submerged beneath the brine level at all times.
Creating the Brine: Step-by-Step
Once you have your vegetables, aromatics, and salt, it is time to master the brine. A brine is essentially a solution of salt dissolved in water that fills the gaps between your produce. When you pack your jar, you want to leave enough room at the top for the brine to cover everything, but not so much room that oxygen has excessive contact with the surface. Maintaining an anaerobic environment—one without oxygen—is the ultimate goal for a healthy, mold-free ferment.
The Mathematical Formula
To execute this perfectly, follow this simple calculation:
Aromatics and Flavor Profiles
While the brine provides the safety, the aromatics provide the personality. Feel free to experiment with garlic cloves, dill seeds, mustard seeds, peppercorns, or even thin slices of ginger. I find that a combination of fresh dill heads, whole garlic cloves, and toasted coriander seeds provides the most professional, classic flavor profile. Add these to the bottom of the jar so they remain trapped by the vegetables, preventing them from floating to the surface where they might attract mold.
"Fermentation is not an exact science, but it is an exact discipline. Treat your salt ratios with the same respect as a master baker treats their hydration percentages."
Controlling the Fermentation Environment
The speed of your fermentation is dictated almost entirely by temperature. A warmer kitchen (75°F to 80°F) will cause your vegetables to ferment rapidly, which can lead to a softer texture or, in extreme cases, spoilage. A cooler environment (65°F to 70°F) is the "slow and steady" route, which usually results in a more complex flavor and a crisper pickle. Avoid placing your jars in direct sunlight, as UV rays can damage the delicate bacterial balance and degrade the quality of your aromatics.
Signs of Success
Within 24 to 48 hours, you should see small bubbles rising to the top of the jar. This is the carbon dioxide produced by the Lactobacillus as they work. You may also notice the brine becoming cloudy; this is perfectly normal and actually a great sign. It means that the bacteria are active and multiplying, creating the probiotic-rich environment you are aiming for. If the brine becomes too cloudy or develops a thin, white film on the surface, don’t panic. This is often just kahm yeast, which is harmless but can affect the flavor if left too long. Simply skim it off and ensure your vegetables remain pushed down below the liquid line.
Troubleshooting Common Issues
If you encounter a foul odor (not just a "funky" fermentation smell, but something resembling rotten eggs), your salt ratio was likely too low or your hygiene was compromised. If your pickles develop a mushy, slimy texture, you may have forgotten the tannins or failed to remove the blossom end. Fermentation is a learning process, and every batch tells you a story about what went right and what went wrong in your process. Never be afraid to toss a bad batch and start fresh; even the best chefs have jars that don't make the cut.
Managing the "Fermentation Curve"
How do you know when the pickle is actually finished? There is no set timer, as every kitchen is different, but you should aim for a taste test around day 5 to day 7. Use a clean, sterilized fork to remove a sample from the jar. If the pickle is still too raw or salty, put it back and wait another 48 hours. The flavor will deepen and the acidity will sharpen over time, so frequent tasting is the only way to find your preferred balance.
Transitioning to Cold Storage
Once your pickles have reached your desired level of tang, it is time to slow things down. Moving your jars to the refrigerator effectively pauses the fermentation process by putting the bacteria into a dormant state. A cold jar will keep for several months, provided the vegetables are kept submerged. If you find your pickles are still too active, ensure the jars are "burped" once a week—simply open the lid for a second to release any built-up gases, then seal it back up and return it to the shelf.
Professional Tips for Consistency
Keep a Journal:* Note the date, the ambient temperature of your kitchen, the exact salt ratio used, and the types of aromatics added.
The Weight Trick:* Use a small glass weight or a heavy cabbage leaf tucked at the top of the jar to keep vegetables submerged; contact with air is the primary cause of mold.
Consistency is Key:* Once you find a ratio and timing that works in your specific home climate, stick with it until you are comfortable enough to experiment with new flavor profiles.
The Science of Bio-Availability
It is worth noting that beyond the flavor, the health benefits of home-fermented pickles are substantial. Because the vegetables are not heat-treated (like they would be in water-bath canning), the nutrients remain intact, and the addition of healthy, live-culture bacteria supports gut health. This is why we call them "live" foods. When you consume these pickles, you are essentially seeding your microbiome with beneficial strains of bacteria that have been linked to improved digestion and immune support.
Why Home Fermenting Beats the Store
If you look at the label of most store-bought pickles, you will find vinegar, yellow dye #5, and preservatives. These are "quick-pickled" products, meaning they are shelf-stable because they have been soaked in an acidic solution, not because they have undergone a biological transformation. When you ferment at home, you aren't just making a snack; you are producing a medicinal food item that is free from additives and brimming with enzymes that your body will thank you for.
"A jar on your counter is more than just food; it is a living, breathing microcosm that links your kitchen to the ancient traditions of our ancestors."
Scaling Your Production
Once you have mastered the quart-sized jar, feel free to scale up to half-gallon crocks or multiple jars. The ratios remain the same, but you will find that larger batches tend to be more stable because the environmental impact on the brine is slower. If you are serious about this, invest in a ceramic fermentation crock with a water-sealed lid. These allow gas to escape while preventing oxygen from entering, making them the ultimate tool for the dedicated home fermenter.
Final Thoughts
Mastering the brine-to-produce ratio is the single most important step in your transition from a casual observer of fermentation to a confident practitioner. We have covered the science of salt, the necessity of tannins, the importance of environmental control, and the health benefits of maintaining live cultures. By following these steps, you are not just making a pickle—you are mastering a fundamental culinary skill that bridges the gap between science and gastronomy. Do not be discouraged by the occasional failure; each jar is a lesson in biology, flavor, and patience.
Keep your equipment clean, your measurements precise, and your curiosity high. Fermentation is a journey that never truly ends, as there are always new vegetables to try, new spice blends to curate, and new techniques to explore. From quick-pickled radishes to complex, long-aged sauerkrauts, the world of fermentation is yours to discover. Take these principles, apply them to your next batch, and remember that when the flavor is this good, you never have to blame the chef—you can just credit the bacteria. Happy fermenting, and may your jars always be crisp, your brine always be clear, and your gut always be happy.
If you find yourself becoming a fermentation fanatic, do not stop at pickles. The same principles of osmotic pressure and bacterial inoculation can be applied to carrots, green beans, cauliflower, and even hot peppers. Start building your "pantry of the future" today, one jar at a time. The transition to a more probiotic-focused diet starts in your kitchen, and you now have the tools to make it happen with confidence. Trust the math, respect the environment, and enjoy the transformative power of nature's simplest chemistry. This is the foundation upon which great culinary experiences are built, and you are officially equipped to begin your journey.


Get the Next Recipe
Weekly recipes, techniques, and gear picks — straight to your inbox.
