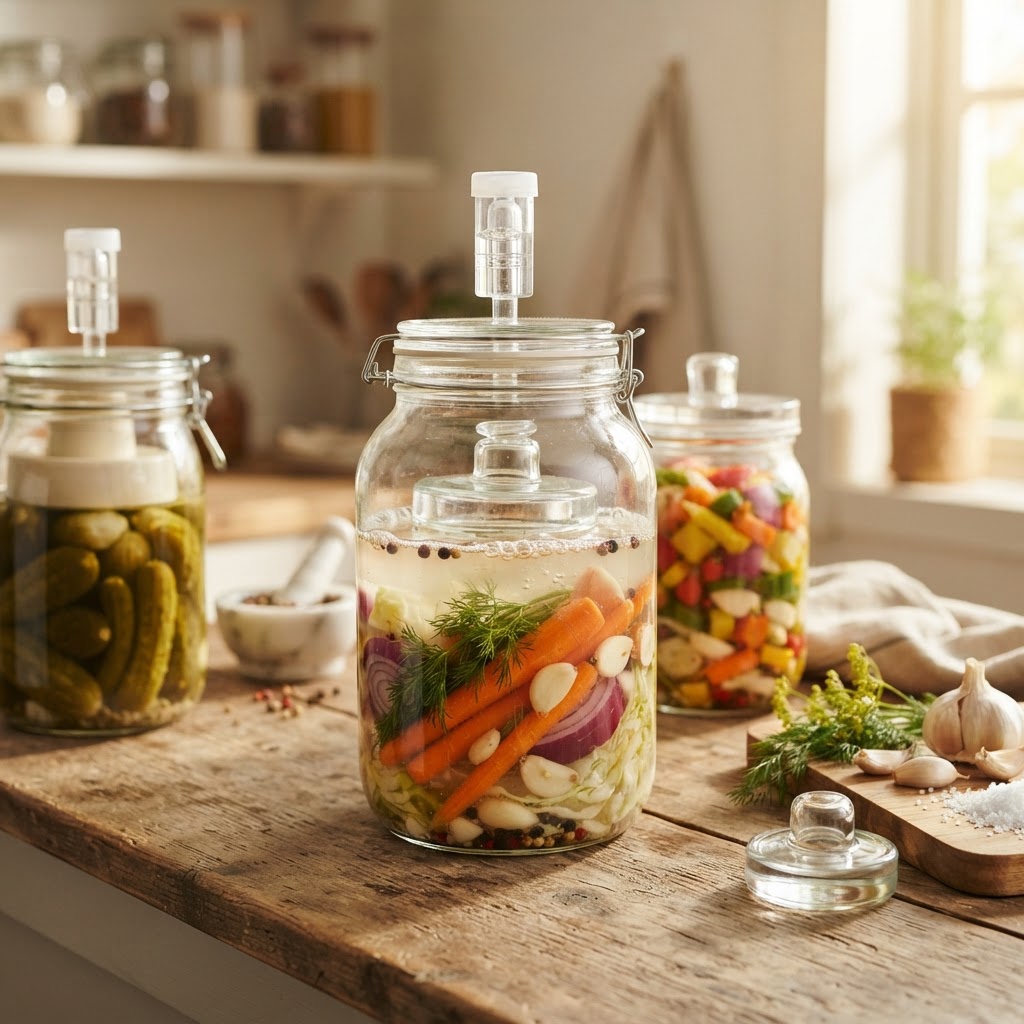
The Home Cook’s Guide to Fermentation Weights: Mastering Submersion Techniques for Perfectly Safe and Crisp Vegetable Pickling
Fermentation is often shrouded in mystery, viewed by the uninitiated as a dangerous chemistry experiment performed in the dark corners of the pantry. In reality, it is one of the most ancient and reliable methods of food preservation, relying on the elegant simplicity of lacto-fermentation. By creating an environment where beneficial bacteria thrive and harmful pathogens are suppressed, you can transform humble garden vegetables into tangy, probiotic-rich delicacies. Mastering this process is not merely about following a recipe; it is about understanding the symbiotic relationship between salt, time, and, most importantly, the physical containment of your produce. When we talk about the mechanics of a perfect ferment, the conversation inevitably circles back to the humble fermentation weight.
The greatest challenge facing the home fermenter is the threat of surface mold and yeast, which inevitably form when vegetable matter is exposed to oxygen. As your vegetables release their juices through the process of osmosis triggered by salt, they naturally want to float to the surface, creating a "dead zone" of air exposure. This is the moment where spoilage bacteria find their footing, potentially ruining weeks of patient work. Using proper submersion techniques ensures that your vegetables remain beneath the brine line throughout the entire curing process, which is the singular most important factor in achieving that signature snap and clean acidity we all crave. Without effective weights, even the most carefully calibrated salt ratios can succumb to the whims of surface oxidation.
Whether you are a seasoned kraut maker or someone attempting their very first jar of spicy dill pickles, the tools you choose to keep your harvest submerged will dictate your consistency and success. Many beginners start with improvised methods, hoping that a heavy plate or a plastic bag filled with water will suffice. While these methods can work in a pinch, professional-grade fermentation weights provide a level of security and ease of use that is worth the investment. In this guide, we will break down the science of buoyancy, the different materials available, and the foolproof methods to ensure your kitchen remains a sanctuary of safe, delicious, and incredibly crisp ferments. Welcome to the art of controlled decomposition; let’s make sure we blame the chef only for the excellence of the flavor, not for a batch gone sour.
The Science of Submersion and Salt Ratios
At the heart of every successful ferment lies the delicate balance of salt. Salt acts as the gatekeeper of your jar, drawing moisture out of the vegetable cells while simultaneously inhibiting the growth of putrefactive bacteria. For most vegetable ferments, a salt-to-vegetable ratio of 2% to 3% by weight is the industry standard. This ensures that the lactic acid bacteria have the upper hand, working to lower the pH of your brine to a safe level—typically below 4.6—where pathogenic organisms simply cannot survive. However, salt alone cannot save a ferment if the vegetable material is allowed to dry out or come into contact with the ambient air of your kitchen.
Submersion is the physical counterpart to the chemical protection provided by salt. Once the vegetables have been massaged or packed into the jar, the goal is to create a brine that completely coats every shred, spear, and slice. When vegetables float—which they will, due to trapped air and the release of carbon dioxide—they become a breeding ground for kahm yeast and fuzzy, colorful molds. By applying constant downward pressure with a fermentation weight, you are essentially locking in a vacuum-like state that encourages the anaerobic conditions necessary for a perfect ferment. This isn't just about safety; it is about maintaining the texture of the product throughout the entire process.
Understanding Osmosis and Brine Production
The release of liquid is the first stage of the ferment. If you are working with cabbage, the salt will pull moisture out in a matter of minutes. Denser vegetables, such as carrots or cucumbers, may require a pre-made brine solution of 3.5% salt dissolved in water to ensure full coverage from the start.
Always use non-iodized salt, such as Kosher salt or sea salt*, as iodine can sometimes interfere with the fermentation process.
* Ensure your brine covers the vegetables by at least half an inch to account for evaporation or absorption over time.
Monitor the temperature closely; the ideal range for a consistent ferment is between 65°F and 72°F*.
"The true secret to a crunch that resonates across the dinner table is not found in the variety of vegetable, but in the steadfastness of its submersion. A ferment that floats is a ferment that risks its very soul to the air."
Navigating the World of Fermentation Weights
Not all weights are created equal, and your choice of material can influence the flavor profile and safety of your ferment. When looking for the ideal weight, you must prioritize non-reactive, food-safe materials that will not leach chemicals into your acidic brine. Glass is the gold standard, favored by professional chefs and fermentation experts alike for its inert properties and ease of sterilization. Because glass is heavy and non-porous, it creates a clean, downward force that doesn't harbor residual bacteria from previous batches.
Ceramic weights are another popular choice, often seen in traditional pickling crocks. These are typically coated in a lead-free food-safe glaze and provide a rustic, reliable weight. However, one must be cautious with ceramic; if the glaze is chipped, the porous clay underneath can absorb brine and potentially harbor unwanted microorganisms, making thorough inspection mandatory after every use. Plastic weights, while convenient and inexpensive, are generally considered a temporary solution. They are prone to scratching, and over time, those small fissures can become a home for bacteria that are difficult to scrub away.
Why Glass Remains the Chef’s Choice
If you are aiming for longevity in your fermentation hobby, investing in a set of glass fermentation weights is the most prudent decision you can make. They are dishwasher safe, heat-tolerant, and perfectly sized for standard wide-mouth Mason jars. They provide just enough weight to keep even the most stubborn, buoyant cabbage shreds pinned below the surface without crushing the structural integrity of your vegetables.
The Art of Packing and Managing Buoyancy
Packing your jars is a tactile experience that demands attention to detail. Whether you are creating a sauerkraut or a fermented hot sauce, how you pack the jar influences how effectively your weights can perform their duty. When you pack the jar, you should use a tamper or a clean pestle to push the vegetables down firmly, eliminating air pockets between the layers. This not only encourages the natural brine to rise, but it also establishes a solid foundation that makes the job of the weight much easier. If you leave large gaps, the vegetables will float independently, making it difficult for a single weight to manage the mess.
Once the jar is packed to within an inch or two of the rim, place your weight on top. You should see the brine rise to fully cover the surface of the weight. If, after adding the weight, the brine is still below the vegetables, you must add a bit more brine solution (the 3.5% mix mentioned earlier) to create a perfect seal. This liquid buffer is your best defense against spoilage. Always leave enough "headspace" in the jar—about an inch or two—to prevent the contents from overflowing as the fermentation gases build up and expand the volume of your ferment.
Dealing with "Floaters" and Small Bits
Small fragments of vegetables, such as stray caraway seeds or tiny shreds of kraut, are the enemies of a clean ferment. If these small pieces break free and float to the surface, they are almost guaranteed to grow mold. A pro-tip from the kitchen: use a cabbage leaf or a thin, food-safe silicone disk as a barrier layer underneath the weight. This "follower" acts as a net, capturing any stray bits and ensuring that the brine surface remains pristine and free of debris.
"Consistency is the bedrock of the home kitchen. By treating every jar as a controlled environment, you remove the guesswork and replace it with the confidence of a master preserver."
Troubleshooting Common Fermentation Issues
Even with the best weights and the most careful packing, the fermentation process can be unpredictable. When something goes wrong, it is almost always a result of either temperature fluctuations or improper submersion. If you see a thin, white, powdery layer on the surface of your brine, you are likely dealing with kahm yeast. While it is technically harmless and non-toxic, it can impart an off-flavor to your vegetables. Simply skim it off, ensure your weight is pressed firmly down, and keep a closer eye on your temperature. If the smell ever turns truly putrid, rotten, or offensive—like wet socks or sulfur—do not take a chance. When in doubt, throw it out.
On the other hand, a slight cloudiness in the brine is entirely normal and, in fact, desirable. This is the lactobacillus at work, and it is a sign that your ferment is thriving. If you find your vegetables losing their crunch, check your fermentation time and temperature. Fermenting too quickly in a warm kitchen will cause the cell walls of the vegetables to break down prematurely, resulting in mushy pickles. A slower, cooler ferment—ideally around 60°F to 65°F—will yield a much crisper result and a more complex depth of flavor. If you live in a warm climate, consider a cool cellar, a basement, or even a specialized fermentation fridge to regulate the environment.
The Impact of Temperature on Crunch
75°F+:* Rapid fermentation, risk of mushy vegetables and aggressive kahm yeast.
65°F–70°F:* Ideal for most vegetable ferments; a balanced, steady pace.
55°F–60°F:* Slow fermentation, excellent for long-term storage and maintaining maximum crunch in pickles and root vegetables.
Advanced Techniques for Expert Picklers
Once you have mastered the basics of weights and brine, you might want to experiment with more advanced techniques to elevate your ferments. One such technique involves the use of tannin-rich ingredients. Adding a single dried grape leaf, a slice of horseradish root, or even a piece of black tea bag to your jar can provide natural tannins that help keep the pectin in your vegetables firm, preventing the softening that often happens over long fermentation periods. This is a classic trick used by old-world picklers to ensure their cucumbers remain crisp for months.
Another advanced consideration is the management of the fermentation vessel itself. While Mason jars are convenient for small batches, if you plan on fermenting larger quantities of cabbage or radishes, you might consider an airlock system. An airlock allows carbon dioxide to escape while preventing oxygen from entering, essentially automating the safety of your jar. This is particularly helpful if you cannot check your jars daily to burp them or ensure the weights are still seated correctly. When combined with a glass weight, an airlock creates a foolproof, "set it and forget it" environment.
The Role of Tannins
The chemical reaction between the tannins in the leaf and the pectin in the vegetable creates a firmer, more resistant structure. This is especially important for delicate vegetables like zucchini or thinly sliced cucumbers, which can turn soft rapidly under the pressure of bacterial activity. Keep a supply of dried oak or grape leaves in your pantry for these specific projects; they are a small, cost-effective upgrade to your kitchen arsenal.
Integrating Fermentation into Your Culinary Lifestyle
Incorporating fermented foods into your diet is a culinary investment that pays off in both flavor and health benefits. However, it also requires a shift in how you view your kitchen schedule. Fermentation is a living process, and you should treat it as such. I often tell my students at the institute that you must approach a jar of fermenting kraut with the same level of care you would a sourdough starter. Label your jars with the date and the specific ratio of salt used so that you can replicate your successes. Keeping a fermentation journal is one of the most effective ways to sharpen your skills; note the temperature of your kitchen, the weight of the salt, and the duration of the ferment.
When you finally open that jar, do not just consume the vegetables. The fermented brine itself is a liquid gold. It is rich in enzymes and beneficial bacteria, and it makes for an incredible base for salad dressings, a tangy addition to soups, or a bold splash in a bloody mary. By saving the brine, you are extracting every bit of value from your effort. Remember, the "Blame The Chef" philosophy is built on the idea that the best meals start with the best ingredients and the most diligent preparation. Your ferments are no different. They are the hidden stars of your kitchen, working quietly in the background to provide a punch of umami and brightness to your finished dishes.
Using Brine as a Secret Ingredient
Salad Dressings:* Replace the vinegar in your vinaigrette with a splash of sauerkraut brine for an immediate probiotic boost and complex acidity.
Marinades:* The lactic acid in the brine helps tenderize meat. Marinate chicken or pork in leftover pickle brine for two hours before grilling.
Soups:* Stir a tablespoon of brine into a finished bowl of lentil or bean soup just before serving to brighten the earthy flavors.
Final Thoughts
Mastering the use of fermentation weights is not just a technical requirement—it is a rite of passage for the home chef. It represents the transition from haphazardly "hoping" for a good result to having the capability to dictate the outcome of your culinary experiments. By ensuring constant submersion, you are not only safeguarding your ingredients against the pervasive threat of spoilage, but you are also creating the precise, stable, and clean environment that allows the complex biology of lacto-fermentation to flourish. It is a process that demands patience and respect, yet rewards you with a product far superior to anything you could find on a store shelf.
As you move forward in your fermentation journey, remember that failure is a part of the process. If a batch turns soft or a jar develops a persistent layer of mold, do not get discouraged. Analyze your environment: Was the room too warm? Was the salt content too low? Was the weight displaced during a particularly vigorous stage of gas production? Each failed jar is a lesson in the chemistry of your specific kitchen environment. Keep refining your technique, stick to your ratios, and continue to prioritize the integrity of your submersion.
Ultimately, fermentation is about connecting with a tradition of preservation that has defined human civilization for millennia. It is a slow, quiet, and deeply satisfying way to eat. As you become more comfortable with the physics of the brine and the weight, you will find yourself experimenting with more complex spice profiles and more diverse vegetables, further cementing your role as the culinary architect of your home. So, gather your jars, weigh down those greens, and wait for the magic to happen. The results will be crisp, tangy, and undeniably worth the wait. Here’s to many more jars on your counter and many more flavors in your repertoire. Happy fermenting, and may your brine always stay clear and your vegetables always stay submerged.
Finally, remember that the "Blame The Chef" promise is that we never settle for mediocrity. When your friends and family taste that perfect, crisp fermented radish or that robust, sour kraut, you can take pride in knowing it wasn't an accident. It was the result of deliberate, informed, and professional-grade technique. Take your time, stay curious, and keep the weights pressed firmly down. The world of live-culture food is vast, and you have only just begun to scratch the surface of what is possible in your own home. Whether you are aiming for the perfect probiotic gut health or just searching for that elusive, restaurant-quality pickle, you now have the tools and the knowledge to make it happen every single time. Stand by your kitchen, trust the science, and enjoy the delicious fruits—and vegetables—of your labor. The perfect ferment is just one weight away.

Get the Next Recipe
Weekly recipes, techniques, and gear picks — straight to your inbox.
