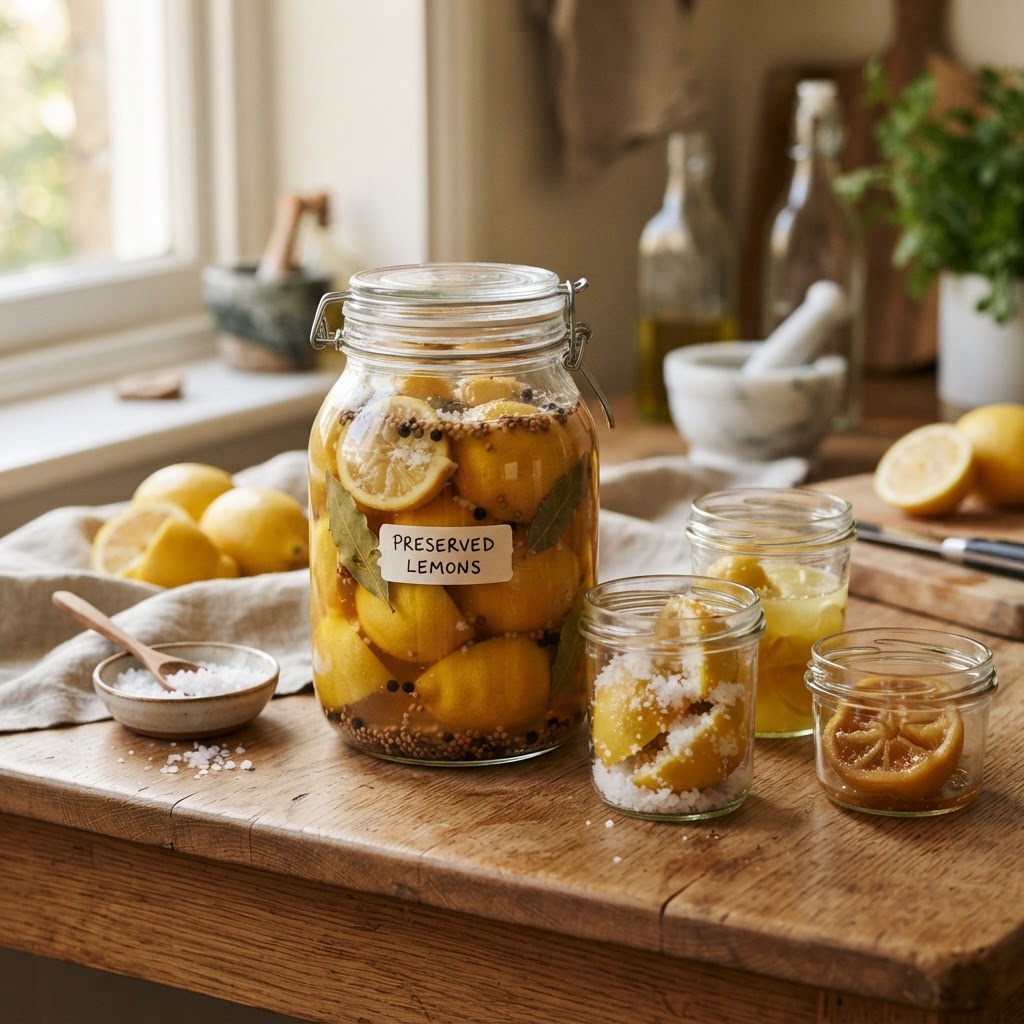
The Home Cook’s Guide to Fermented Citrus: Mastering Salt-Curing Ratios for Vibrant, Umami-Rich Preserved Lemons
There is a distinct, almost electric thrill that comes from opening a dusty jar tucked into the back of your pantry, only to be greeted by the heady, sun-drenched aroma of preserved lemons. For many home cooks, the idea of fermentation feels like a culinary high-wire act, reserved for bearded scientists or ancient ancestors with endless patience. Yet, the process of salt-curing citrus is perhaps the most forgiving and rewarding entry point into the world of live-culture preservation. When you submerge fresh lemons in a precise ratio of salt, you are not merely storing fruit; you are orchestrating a transformation that unlocks a depth of flavor impossible to achieve with fresh juice or zest alone. It is an act of preservation that leans into the alchemy of time, turning bitterness into a mellow, savory, and complex condiment that acts as a secret weapon in your kitchen repertoire.
Understanding the science behind this process is essential for any cook who wants to move beyond following recipes and start mastering ingredients. At its core, salt-curing citrus is a lacto-fermentation process where the salt draws out moisture to create a brine, while simultaneously suppressing harmful bacteria and encouraging the growth of beneficial lactic acid bacteria. This creates a stable environment where the lemon rinds soften, the sharp acidity rounds out, and a profound umami profile develops over the course of several weeks. By mastering the salt-to-fruit ratio, you gain control over the texture and the speed of the fermentation, ensuring that your final product is vibrant, safe, and perfectly balanced. The beauty of this technique lies in its simplicity; with just two primary ingredients, you are effectively "blaming the chef" for the incredible depth of flavor that will soon anchor your tagines, vinaigrettes, and roasted vegetable dishes.
As you embark on this culinary journey, remember that patience is the third, invisible ingredient. While the physical labor of prepping the lemons takes less than twenty minutes, the actual maturation process requires weeks of quiet existence on your countertop. This is a practice that teaches us to slow down, to observe the subtle changes in color and consistency as the brine turns from opaque to golden, and to trust in a technique that has sustained cultures for centuries. Whether you are a seasoned fermenter looking to refine your ratios or a curious novice ready to embrace the jar, this guide will provide you with the technical foundation and the creative encouragement needed to master preserved lemons once and for all. By the time you reach the final step, you will find that the time invested pays dividends in the sheer quality of your home-cooked meals, elevating the mundane to the extraordinary.
The Chemistry of Salt-Curing and Ratios
The primary objective in successful salt-curing is to achieve an environment that is hospitable to beneficial bacteria while keeping spoilage at bay. The salinity percentage is the most critical variable here. A general rule of thumb for home preservation is to aim for a total salt content of about 15% to 20% by weight of the fruit being processed. This sounds mathematically intimidating, but it is remarkably simple to implement. When you add enough salt to draw out the pectin and moisture from the lemon rind, you create a self-contained ecosystem that protects the fruit. If you use too little salt, the fruit may become soft or mushy; too much, and the fermentation process will be sluggish and overly abrasive.
Finding the Golden Ratio
When we talk about ratios, we are usually looking at the weight of the salt relative to the weight of the lemons. A common professional standard is to use salt equivalent to 20% of the lemon weight. This provides a robust brine that guarantees safety while allowing the natural enzymes in the citrus to do their work. For example, if you have 1,000 grams of fresh lemons, you should measure out 200 grams of high-quality sea salt. Always opt for coarse, non-iodized sea salt or kosher salt for this process. Iodized table salt contains anti-caking agents and iodine, both of which can interfere with the chemistry of fermentation and potentially discolor your final product.
The Role of Moisture and Brine
The brine is the lifeblood of the preserved lemon. As the salt penetrates the lemon cells, it draws out the internal juices, which then combine with the salt to create a concentrated pickling solution. You want the lemons to be completely submerged in their own juice. If your lemons aren’t particularly juicy, or if they don't release enough liquid to cover the fruit after twenty-four hours, you may need to add a splash of freshly squeezed lemon juice to bring the level up. This submergence is vital because it prevents oxidation; any piece of lemon left exposed to the air for extended periods is susceptible to mold, even in a salted environment.
"Fermentation is not merely a way to store food; it is a way to manipulate time and chemistry to create flavors that nature, in its raw state, simply does not provide. Salt-curing is the quietest, most elegant version of this alchemy."
Selecting and Prepping Your Fruit
Not all lemons are created equal when it comes to long-term preservation. The thickness of the rind is your most important consideration. You want fruit with a thick, aromatic, and unblemished skin, as the rind is the part of the lemon that will be transformed during the curing process. Avoid fruit with deep bruises or soft spots, as these are weak points that can lead to decay before the fermentation has a chance to stabilize the jar. Ideally, organic or unwaxed lemons are preferred, as you will be eating the entirety of the peel. If you must use waxed fruit, ensure you scrub them thoroughly under warm water with a vegetable brush to remove the chemical coating.
The Art of the "Four-Way Cut"
The physical preparation of the lemon is designed to maximize surface area contact with the salt. The traditional "four-way cut" involves slicing the lemon lengthwise from the stem toward the base, stopping about a half-inch before you reach the bottom so that the lemon stays connected at the base like a flower. You then rotate the fruit 90 degrees and cut it again, creating four wedges held together at the bottom. This allows you to pry the segments apart and pack the salt directly into the center of the fruit, ensuring that the salt reaches the inner membranes and flesh, which is where the moisture release begins.
Incorporating Aromatics
While salt and lemon are the classic combination, you have the freedom to introduce aromatics that will infuse the brine with deeper layers of flavor. Consider adding whole spices like black peppercorns, coriander seeds, bay leaves, or even a split vanilla bean for a sophisticated twist. These aromatics should be placed at the bottom of the jar and interspersed between the layers of lemons. Remember that these flavors will intensify over time, so start with conservative amounts. A little goes a long way, and you want to complement the brightness of the lemon, not bury it under an aggressive spice profile.
The Fermentation Timeline and Environment
Once your lemons are salted, packed, and shoved into their glass jar, the wait begins. The environment in which you store your jars is as important as the recipe itself. You want a cool, dark place—a pantry shelf or a kitchen cupboard that doesn’t receive direct sunlight is ideal. The fermentation temperature should ideally be between 65°F and 72°F (18°C–22°C). In warmer climates, the process will happen much faster, but you risk the fruit becoming mushy. In cooler temperatures, the process is slower and arguably more controlled, yielding a firmer texture in the final result.
Monitoring the Progress
For the first week, make it a habit to inspect your jar daily. You should see a steady rise in liquid as the salt pulls moisture from the peels. If you notice that the lemons aren't fully covered, gently press them down with a sterilized wooden spoon. Every time you open the jar to check on them, you are introducing a tiny bit of fresh air, which is generally fine, but try to keep the contact to a minimum. After about four weeks, you will notice the brine becoming slightly syrupy and the rinds turning a translucent, deep yellow.
The Shift to Cold Storage
Once the lemons have reached your desired consistency—usually between four to six weeks—it is time to move them to the refrigerator. The cold temperature acts as a "pause button" on the fermentation, keeping the lemons stable for months or even up to a year. You don't have to worry about the jar "exploding" like some volatile ferments, but the refrigerator keeps the flavor profile consistent and prevents the lemons from over-softening. Always use a clean spoon when removing lemons from the jar to prevent cross-contamination, which is the most common cause of spoilage in home-preserved goods.
"When you master the salt-to-fruit ratio, you are no longer just a cook following instructions. You become a culinary curator, balancing the salinity and the acidity to create a product that is distinctively yours."
Troubleshooting Common Issues
Even with the best preparation, things can sometimes go sideways in the kitchen. Understanding what is "normal" versus what is "problematic" is a key part of the home cook's education. A common sight that often panics beginners is the appearance of a white, cloudy sediment at the bottom of the jar. This is perfectly normal; it is simply the salt and natural yeast settling. Another common occurrence is the brine turning cloudy or slightly yellow. Again, as long as it smells clean, citrusy, and savory—and not like rot or sewage—your lemons are perfectly healthy and ready to use.
The "Mold" Factor
True mold—which presents as fuzzy, multicolored spots—is rare in a salt-cured lemon jar because the salt concentration is quite high. If you see fuzz growing on the surface, do not try to scoop it off; unfortunately, it is safer to discard the batch. This usually happens if the fruit was exposed to too much air or if the salt ratio was too low. Always ensure your jar is glass, as plastic can hold onto odors and harbor bacteria, and always ensure your jar has been properly sanitized with boiling water before you begin the packing process.
Texture Discrepancies
If your lemons end up feeling too tough or leathery, it is usually because the salt-to-moisture ratio was too high, or the curing time was too short. On the flip side, if the lemons become mushy or disintegrate when you touch them, they have likely fermented for too long in an environment that was too warm. To fix a "tough" batch, you can often slice the rinds very thinly and submerge them in a bit of warm water or honey for a few hours before using them in a dish. This rehydrates the peel and mellows the saltiness, making them more palatable for dressings or salads.
Incorporating Preserved Lemons into Your Cooking
Now that you have a jar of golden, fermented goodness sitting in your fridge, how do you actually use it? The mistake most beginners make is using the whole lemon as if it were a fresh one. Preserved lemons are an intense condiment, not a fresh ingredient. You should almost always discard the pulp—which can be extremely bitter and overly salty—and focus entirely on the rind. Rinse the rind under cold water to remove the excess salt, then mince or julienne it into tiny pieces.
Flavor Profiles and Pairings
The magic of preserved lemons is their ability to bridge the gap between savory, acidic, and sweet. They are iconic in Moroccan cuisine, particularly in chicken tagines with olives and onions. However, their utility goes far beyond that. Toss a finely minced preserved lemon peel into a greased baking dish with roasted potatoes, or stir it into a Greek yogurt-based sauce for grilled lamb or fish. They also add an incredible depth to vinaigrettes—whisk a little bit of the brine into olive oil and mustard for a dressing that will make your simple garden salad taste like it was prepared in a high-end bistro.
Professional Chef Tips for Maximum Impact
One of the most effective ways to use preserved lemons is to incorporate them into compound butters. Take a stick of softened unsalted butter and whip in one minced, rinsed preserved lemon rind and a pinch of fresh parsley. Roll it into a log, chill it, and slice it over a hot seared steak or a piece of pan-fried halibut. The heat of the protein will melt the butter, releasing the citrus oils and the salt-cured essence throughout the dish. It is a simple, five-minute technique that screams "chef-level" execution and will have your dinner guests asking for your secret.
The Cultural Significance of Preservation
Preserved lemons are more than just a recipe; they are a link to a long tradition of food security. In North Africa, the practice of salting citrus emerged as a way to extend the harvest well beyond the season, ensuring that the flavor of fresh fruit could be enjoyed during the leaner months. This is the foundation of traditional cooking: taking what the earth gives you in abundance and finding a way to make it last. By keeping this practice alive in your own kitchen, you are participating in a global culinary heritage that prizes resourcefulness over waste.
Passing the Knowledge Along
Once you have mastered the ratio, teach someone else. Preservation is a communal act. Sharing a jar of your own fermented lemons with a friend is one of the most generous gifts a cook can give. It’s not just a physical object; it’s a representation of your time, your patience, and your culinary evolution. When you explain the process—the weighing of the salt, the waiting for the brine, the anticipation of the final flavor—you are passing on the skills that turn a home cook into a master.
Sustainability in the Kitchen
Finally, consider the environmental impact of your preservation. By curing your own lemons, you reduce your reliance on store-bought, heavily processed condiments that often arrive in single-use plastic packaging. You are choosing to buy fresh, whole fruit and utilizing the entire ingredient. You are reducing food waste by extending the shelf life of produce that might otherwise go soft in your refrigerator. It is a small act, but when multiplied across thousands of home kitchens, it contributes to a more conscious, sustainable way of feeding ourselves and our families.
"The jar of preserved lemons on your counter is a testament to the fact that the most sophisticated flavors are rarely found in a store-bought bottle, but in the slow, patient work of your own hands."
Final Thoughts
Mastering preserved lemons is the first step in a lifelong journey into the world of fermentation, a journey that transforms your kitchen from a space where you merely follow directions into a laboratory where you innovate and explore. By focusing on the salinity ratios, the quality of your ingredients, and the patience required for the maturation process, you have equipped yourself with the tools to create a condiment that will define your cooking for years to come. Do not be afraid to experiment with new aromatics or to tweak the ratios slightly once you feel comfortable with the base method. After all, the best version of this recipe is the one that tastes like home to you.
Remember that every jar of lemons is a unique creation, influenced by the season, the type of citrus, and the temperature of your home. If a batch doesn't turn out exactly as you planned, don't view it as a failure; view it as a lesson in the chemistry of your specific environment. The "Blame The Chef" philosophy is built on the idea that the chef is responsible for the result—not because the chef is perfect, but because the chef is an active participant in the process. You are the conductor of this flavor-making, and with these techniques in your arsenal, you are well on your way to becoming the master of your own culinary world.
As you move forward, keep a simple notebook near your jars. Record the date you started, the exact ratio of salt you used, and any spices you decided to incorporate. In six months, when you are looking for that perfect, bright, umami punch to elevate a simple roast chicken or a bowl of grains, you will have a record of exactly how you achieved that perfect balance. This is the difference between a cook who guesses and a cook who understands. Keep fermenting, keep tasting, and most importantly, keep enjoying the process of making food that is vibrant, alive, and profoundly delicious. The lemons are just the beginning; once you realize how much control you have over the flavors in your jar, you will start looking at every ingredient in your pantry as a potential project waiting to be transformed. Stay curious, stay diligent, and always blame the chef—for the success of the meal, for the intensity of the flavor, and for the joy of the kitchen experience. Enjoy your preserved lemons!


Get the Next Recipe
Weekly recipes, techniques, and gear picks — straight to your inbox.
