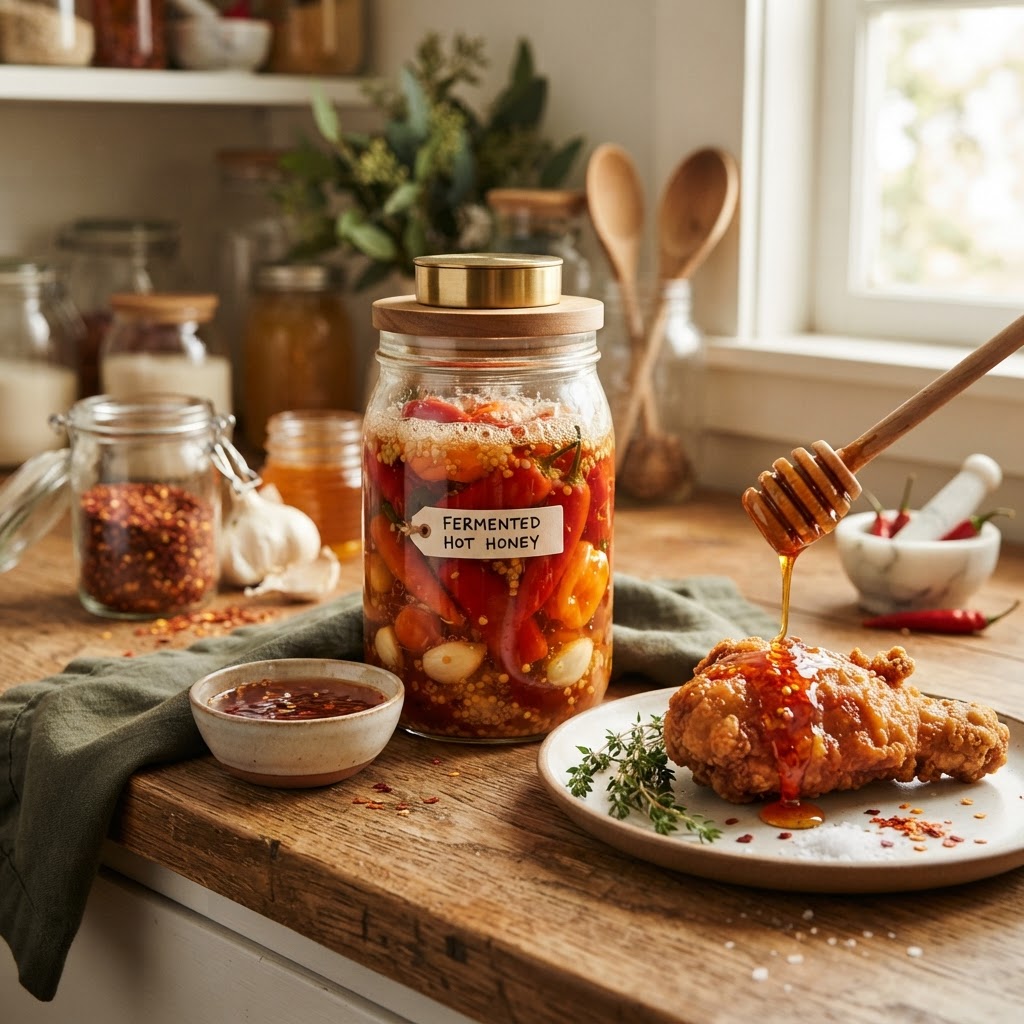
The Home Cook’s Guide to Fermented Hot Honey: Mastering Infusion Ratios for Sweet, Spicy, and Probiotic Condiments
The alchemy of fermentation is perhaps the most profound transformation a home cook can initiate in their kitchen. By simply combining raw, enzymatic honey with the volatile heat of fresh chili peppers, you trigger a biological process that deepens flavors far beyond a mere infusion. This isn't just about adding spice to sweetness; it is about creating a living, evolving condiment that develops complex, tangy undertones through the work of wild lactobacilli. When you harness these microorganisms, you are moving away from the flat, syrupy profiles of store-bought hot honeys and stepping into the realm of professional-grade culinary layers. Understanding how to manage this environment is the key to unlocking a pantry staple that will permanently alter how you approach roasted vegetables, fried chicken, and complex cheese boards.
To master this process, one must first respect the delicate biological balance of the jar. Fermented hot honey relies entirely on the presence of wild yeast and beneficial bacteria naturally occurring on the skins of fresh produce, specifically our peppers. When submerged in the high-osmotic pressure environment of raw honey, these microbes begin to feed on the natural sugars, releasing carbon dioxide and producing lactic acid as a byproduct. This acidifying effect is what provides that signature "zip" that sets fermentation apart from a simple oil or vinegar infusion. Because honey is hygroscopic, it will draw the moisture out of the peppers, effectively thinning the viscosity of the syrup while concentrating the heat of the capsaicin into a potent, shelf-stable nectar.
Many home cooks fear the mention of fermentation, imagining complex setups or specialized laboratory equipment. In reality, the beauty of this technique lies in its accessibility and the remarkably low barrier to entry. All you truly need is a clean glass vessel, a healthy source of raw honey, and high-quality fresh chili peppers. Throughout this guide, we will explore the precise ratios and environmental factors required to ensure your honey achieves a perfect, bubbling profile without risk of spoilage. We are not just making a sauce; we are cultivating an ingredient that captures the spirit of the season in every golden, spicy drop.
The Chemistry of Honey and Capsaicin
The synergy between honey and chilies is not purely a matter of flavor profile; it is a structural interaction. When you introduce fresh peppers into raw honey, you are creating a high-sugar environment that serves as a protective medium. Raw honey is inherently antimicrobial due to its low water activity and the presence of hydrogen peroxide produced by enzymes within the bees. However, by adding the moisture content of the peppers, we dilute this concentration just enough to allow Lactobacillus—the good bacteria—to thrive while suppressing most spoilage organisms. It is a precise dance between inhibition and cultivation that results in a condiment that can last for months, if not years, in your cupboard.
Understanding Osmotic Pressure
Osmotic pressure is the fundamental force at work here. Because honey is so dense with sugars, it exerts a "pull" on the cell walls of the chilies, drawing out their water content. This process, known as osmosis, is why your honey will naturally thin out over the first week of fermentation. As the water leaves the chili, it brings with it the essential oils and capsaicin that provide the heat. By the time the mixture has stabilized, you have essentially created a pepper-infused syrup that has been chemically altered by the production of lactic acid, resulting in a flavor that is far more rounded than simple heat.
The Role of Raw Honey
It is absolutely critical that you use unpasteurized, raw honey for this project. Commercially processed, heat-treated honey has been stripped of the wild yeasts and enzymes necessary to kickstart the fermentation process. If you use filtered, supermarket-grade honey, you will likely end up with a stagnant jar of syrupy peppers that may simply rot rather than ferment. Always source your honey from local apiaries if possible; the terroir of your specific region—the pollen, the nectar sources, the local microbial load—will contribute to the unique flavor profile of your finished product.
The magic of fermentation lies in the patience of the cook; you are not just mixing ingredients, you are curating a biological timeline that demands observation rather than just execution.
Selecting Your Peppers for Maximum Impact
Not all peppers are created equal when it comes to the fermentation jar. You want a variety that provides both a distinct heat profile and a flavor note that complements the floral or earthy sweetness of your chosen honey. Whether you are aiming for the bright, citrusy punch of a Habanero or the smoky, deep intensity of a Fresno or Jalapeño, the variety you choose will dictate the personality of the final condiment. When selecting your peppers, look for firm, unblemished skins that feel taut to the touch, as these hold the highest concentration of the beneficial microbes we need to begin the process.
Heat Profiles and Culinary Intent
For a classic, crowd-pleasing hot honey, I recommend a blend of Fresno chilies and a single Habanero. The Fresno offers a vibrant, approachable red color and a moderate, lingering warmth, while the Habanero introduces a fruity, complex heat that bridges the gap between the floral notes of clover honey and the savory depth of the chilies. If you prefer a sharper, more aggressive kick, Thai bird’s eye chilies are excellent, but be warned: their high capsaicin content can be intense. Always consider the final application; a honey intended for pizza or fried chicken should have a different heat curve than one meant for glazing roasted root vegetables.
Preparing the Peppers
Preparation is the most vital physical step in the process. You must wash your peppers thoroughly in cold, filtered water to remove any field dirt, but do not use harsh soaps or sanitizers that could kill the beneficial bacteria on the skins. Once dried, you should slice the peppers into thin rounds, leaving the seeds and membranes intact if you desire maximum heat. The seeds and white pith (placenta) hold the highest concentration of capsaicin, and they also provide a textured surface area for the lacto-bacteria to colonize. For a cleaner look, you can remove these, but you will sacrifice a significant portion of the "bite" that makes hot honey so addictive.
Mastering the Ratio: The Chef’s Golden Rule
Achieving a consistent, safe, and delicious fermented honey requires strict attention to the honey-to-pepper ratio. If the ratio is off, you risk too much moisture, which can lead to mold, or too little moisture, which will stall the fermentation entirely. The general rule of thumb used by professional fermenters is to fill your jar roughly 25% to 33% full with prepared pepper slices before covering them completely with honey. This leaves enough "headroom" in the jar for the mixture to expand as the gases are produced, and ensures that the ratio of sugar to water is high enough to favor the right kind of bacterial growth.
Calculating Volume and Weight
While some home cooks prefer to measure by eye, I strongly suggest using a kitchen scale for your first few batches to establish a baseline. A good starting point is approximately 150 grams of fresh chili peppers to 400 grams of raw honey. If you find that your honey is not thinning enough after three days, you can add a small amount of sea salt—no more than 2% of the total weight—to encourage the release of liquid. However, be cautious with salt; in a honey-based environment, too much salt can actually inhibit the lacto-fermentation process, so it is often better to rely on the natural osmotic pressure of the honey first.
Maintaining the Submersion
One of the most common mistakes in fermentation is allowing the solid ingredients to float above the liquid line, where they are exposed to oxygen. If a piece of pepper is exposed to air for too long, it acts as a gateway for mold spores to land and colonize the surface of your jar. To prevent this, use a glass fermentation weight or a small, sanitized glass insert to keep the peppers pushed down beneath the surface of the honey. During the first week, you must "burp" the jar daily, which involves unscrewing the lid slightly to release the buildup of carbon dioxide, and gently stirring the peppers back into the honey with a clean, sterile spoon.
The Fermentation Timeline and Environmental Cues
The length of your fermentation process is entirely dependent on the ambient temperature of your kitchen. In a warm environment (around 70°F to 75°F), you will see significant activity within the first 48 hours. The honey will begin to darken slightly, the consistency will become thinner and more syrup-like, and you will notice small bubbles rising to the top when you stir it. This is the primary fermentation phase, where the lactobacilli are most active. After about one to two weeks, the bubbling will slow significantly, signaling that the primary activity has concluded.
Watching for Success
How do you know if your ferment is healthy? The aroma is your best indicator. A successful fermentation will smell bright, slightly acidic, and deeply fruity, reminiscent of a complex balsamic glaze or a spicy gastrique. If your jar develops a smell of rotten produce, sulfur, or vinegar-heavy funk, the batch has likely been compromised by unwanted bacteria. Additionally, keep an eye out for kahm yeast, a white, film-like substance that sometimes forms on the surface. While harmless, it can affect the flavor; it is best to skim it off immediately if you notice it forming.
The Aging Process
Once the primary bubbles have subsided, the honey is ready for a secondary, slower maturation phase. I personally recommend letting your honey age for at least four weeks before consuming. During this time, the flavors will mellow and integrate. The sharp, aggressive heat of the raw chili will soften into a rich, layered spice that permeates the honey entirely. Store your jar in a cool, dark place during this maturation, or move it to the refrigerator if you prefer to halt the fermentation process entirely after the first month of activity.
Fermentation is not an exact science of clock-watching; it is an art of observation, requiring the cook to listen to the sounds and watch the subtle movements of the jar.
Troubleshooting Common Issues
Even the most seasoned chefs encounter challenges when working with live cultures. The most common issue is the lack of visible activity, often caused by using honey that has been pasteurized or peppers that were treated with fungicides. If after five days you see absolutely no movement or change in the viscosity of the honey, consider checking the source of your honey. If you are certain your ingredients were high quality, sometimes a drop or two of raw apple cider vinegar—the kind with "the mother"—can act as a jumpstart for the fermentation cycle.
Dealing with Mold
Mold is the home fermenter’s greatest fear, but it is easily managed with good sanitation. If you see fuzzy, blue, green, or black spots on the surface of your honey, you must discard the entire batch. Never attempt to scrape off mold and salvage the rest of the contents; the mycelium of the mold can reach deep into the liquid, potentially harboring toxins that are invisible to the eye. Sanitation is the best preventative: ensure your jars are sterilized in boiling water and that your spoons are wiped down with high-proof alcohol before they touch the honey.
Viscosity Adjustments
If your honey ends up too thin, it may be because you used peppers with an exceptionally high water content. You can fix this by simply leaving the jar lid loose for an extra day or two in a warm spot, allowing some of the water to evaporate. Conversely, if the honey is too thick and difficult to drizzle, you can add a teaspoon of filtered water or a dash of neutral-flavored vinegar to help break down the sugar matrix. Remember that every batch will be slightly different, and these adjustments are part of the learning curve.
Creative Pairings and Professional Applications
Now that you have mastered the technique, it is time to integrate your fermented hot honey into your culinary rotation. The acidity provided by the fermentation process makes this condiment remarkably versatile. It cuts through the richness of fatty proteins like pork belly or duck, and it provides a necessary brightness to earthy roasted root vegetables like carrots or parsnips. I often use a spoonful of this honey to finish a pan sauce for roast chicken, whisking it into the deglazed juices for a glossy, sweet-heat finish that tastes like it took hours to develop.
The Ultimate Charcuterie Board
The most classic application is, of course, the cheese board. The probiotic tang of the honey pairs exceptionally well with funky blue cheeses, sharp aged cheddars, and creamy goat cheeses. The contrast between the cold, creamy cheese and the acidic, spicy honey is a textural and flavor experience that never fails to impress. Try drizzling it over a baked brie or using it as a glaze for toasted pecans to add a layer of complexity to your hors d'oeuvres.
Beyond the Drizzle
Don't limit yourself to using it as a topping. Fermented hot honey can be an incredible secret ingredient in salad dressings and marinades. Mix it with olive oil, lemon juice, and a touch of Dijon mustard for a salad dressing that hits every note on the palate. Alternatively, use it as a finishing glaze for grilled stone fruits, or even incorporate it into a cocktail. A "Spicy Honey Margarita" or an "Old Fashioned" with a teaspoon of fermented honey creates a drink with a depth of flavor that a simple sugar syrup can never replicate.
Final Thoughts
The journey into fermented hot honey is an invitation to slow down and appreciate the microbial life that makes our food taste extraordinary. By moving away from the industrial, shelf-stable versions of our favorite condiments and embracing the time-tested techniques of the larder, you are reclaiming a piece of the chef’s craft that has been lost in the age of instant gratification. The result is more than just a sweet and spicy treat; it is a testament to the power of natural fermentation and the culinary satisfaction that comes from creating something truly unique in your own home kitchen.
Take your time with your first batch. Experiment with different varieties of peppers—perhaps add a slice of ginger for an aromatic kick, or a sprig of rosemary for a woody, resinous undertone. Once you understand the basic ratios and the signs of a healthy, active ferment, the possibilities become limitless. Your kitchen should be a laboratory of flavor, and your pantry, a collection of these evolving, living infusions.
Finally, remember that the "Blame The Chef" philosophy is built on the idea that even if a dish doesn't come out perfectly the first time, the lesson learned is worth the effort. Do not be discouraged if your first batch of honey bubbles a little too much or if you decide it needs more heat. Adjust, refine, and keep fermenting. The nuance you develop in your palate will serve you well across every other aspect of your cooking, turning everyday meals into professional-grade dining experiences one jar at a time. Happy fermenting, and may your kitchen always be filled with the subtle, sweet, and spicy hum of a healthy, active jar of honey.
If you are looking for further inspiration, try incorporating a touch of smoked paprika or toasted coriander seeds into your next infusion to add an even deeper, more savory complexity. When you bring your finished, aged honey to the table to share with friends and family, be prepared to share the story of how it was made. It is not just a condiment; it is a conversation piece, a link to ancient traditions, and a beautiful, golden representation of patience and flavor. Start your first batch today, and I promise you will never look at a jar of grocery-store honey the same way again. The wait is worth it, the process is rewarding, and the flavor is unparalleled. Embrace the bacteria, enjoy the process, and let your culinary creativity flourish.


Get the Next Recipe
Weekly recipes, techniques, and gear picks — straight to your inbox.
