The Home Cook’s Guide to Fermented Hot Sauce: Mastering Lacto-Fermentation Ratios for Tangy, Probiotic Condiments
There is a primal satisfaction in taking the bounty of a late-summer harvest and transforming it into something that can outlast the season. In the world of professional kitchens, we are often obsessed with the immediate gratification of a searing hot pan or a lightning-fast reduction. However, there is a quieter, more meditative art that every home cook should master: lacto-fermentation. By harnessing the natural power of Lactobacillus bacteria, you are not just preserving vegetables; you are unlocking complex layers of flavor, acidity, and a deep, savory funk that no vinegar-based hot sauce can ever replicate. It is a slow dance with biology, one that requires patience, respect for the process, and a bit of curiosity.
When you decide to make your own fermented hot sauce at home, you aren’t just creating a condiment; you are cultivating a living ecosystem. The beauty of this technique lies in its simplicity—essentially, all you need is salt, water, and fresh chili peppers. Unlike the mass-produced, shelf-stable sauces that rely on artificial gums and aggressive acetic acid to mimic depth, a fermented sauce develops its own vibrant, tangy personality over time. It is a transition from the raw, sharp heat of a fresh pepper to a mellowed, rounded, and nuanced fire that lingers on the palate. Once you understand the basic ratios, the culinary possibilities become practically endless.
Welcome to the kitchen, where we don’t look for excuses, and we certainly don't shift the blame elsewhere when a ferment goes south. Making your own hot sauce is an act of empowerment. It is an invitation to experiment with different pepper varieties, garlic intensity, and the subtle infusion of aromatics like ginger, turmeric, or even stone fruit. Throughout this guide, we will break down the chemistry behind the salt, the importance of maintaining an anaerobic environment, and how to troubleshoot the common hiccups that might arise. Grab your apron, sharpen your knife, and prepare to elevate your pantry with the best sauce you have ever tasted.
The Chemistry of the Crunch: Understanding Salt Ratios
At the heart of every successful ferment is the salt-to-vegetable ratio. This is the non-negotiable science that keeps the harmful, spoilage-causing bacteria at bay while giving our friendly Lactobacillus a competitive edge. If your salinity is too low, you risk the growth of mold or pathogenic bacteria; if it is too high, you might halt the fermentation process entirely. In professional culinary circles, we generally aim for a 2% to 3% total weight salinity. This means if you have 1,000 grams of peppers, garlic, and water combined, you need 20 to 30 grams of non-iodized sea salt.
Why Non-Iodized Salt Matters
You might wonder why we specify the type of salt. Iodized salt can inhibit the very bacteria you want to encourage and can sometimes result in a metallic, unpleasant off-flavor in the final product. Always reach for kosher salt or sea salt that contains no anti-caking agents or iodine. These pure salts ensure that your ferment starts clean and stays clean. Furthermore, using a digital kitchen scale is not optional—it is the only way to ensure your ratios are consistent. Measuring by volume, like tablespoons, is simply too risky when the stakes are as high as a three-week ferment.
The Math Behind the Ferment
To calculate your salt accurately, use this simple formula: Take the total weight of your prepared ingredients (peppers, aromatics, and the water used to fill the jar) and multiply by 0.025 for a perfect 2.5% concentration. This middle-ground ratio provides enough protection to keep the jar safe while allowing for an active and robust fermentation. Record these numbers in a kitchen journal; professional chefs rely heavily on documentation to replicate successes and analyze failures. You want your sauce to be consistent enough that you can share it with friends, but experimental enough to keep you excited about the process.
"Fermentation is the culinary equivalent of alchemy; you are not just changing the structure of an ingredient, you are inviting a invisible host to cook alongside you, turning simple capsaicin into liquid gold."
Selecting Your Harvest: The Art of the Pepper Profile
The character of your hot sauce starts entirely with the quality and variety of the peppers you choose. While the vibrant, grassy profile of a fresh Jalapeño or Serrano makes for a fantastic green sauce, the fruit-forward intensity of a Habanero or Scotch Bonnet brings a tropical sweetness that pairs beautifully with the tangy acidity of fermentation. When selecting your peppers, look for those that are firm, bright, and show no signs of bruising or decay. Remember, the bacteria will be interacting with the skins, so if you are using store-bought peppers, give them a gentle, thorough wash in cool, filtered water to remove any unwanted debris.
Incorporating Aromatics
Peppers are the canvas, but aromatics are the paint. Garlic, shallots, and white onions are staples for a reason, providing a sulfuric depth that balances the heat. However, do not be afraid to branch out. Adding sliced carrots or parsnips can add a natural sweetness that rounds out the sharp heat, while chunks of ginger or galangal introduce a bright, citrusy undertone. For a truly unique profile, try adding a few pieces of fresh turmeric or even a handful of toasted cumin seeds. These additions don't just influence the flavor; they influence the complexity of the ferment's final aroma.
Preparing the Peppers
Once you have your selection, the preparation is simple but precise. You don't need to over-process them. A rough chop is usually sufficient, as the fermentation process will soften the cellular structure of the vegetables over time. Keep the seeds if you want a hotter, more rustic sauce, or remove them if you prefer a smoother, milder heat. The key is to ensure that your pieces are uniform enough to pack tightly into the jar, leaving as little headspace as possible to prevent oxygen from lingering.
Creating the Anaerobic Environment
The golden rule of lacto-fermentation is that your ingredients must stay submerged. Lactobacillus bacteria are facultative anaerobes, meaning they thrive in an oxygen-free environment. If your vegetables poke up above the surface of the brine, you invite the dreaded kahm yeast or, worse, mold to set up shop. To combat this, utilize glass fermentation weights or a smaller, food-safe jar lid that can press the peppers down. Some home cooks prefer to use a cabbage leaf tucked over the top of the peppers to act as a barrier, ensuring that everything stays safely beneath the salt water.
The Role of the Airlock
While you can ferment in a standard mason jar by "burping" it daily—a process where you briefly open the lid to release carbon dioxide—I highly recommend investing in a set of airlock lids. These one-way valves allow the CO2 produced during fermentation to escape without letting a single molecule of oxygen back inside. This creates a worry-free environment where you can walk away and let the biological work happen without the constant fear of contamination. It is a small investment that significantly improves the quality and success rate of your ferments.
Managing Temperature
Your kitchen counter is usually the perfect spot for fermentation, provided it stays between 65°F and 75°F. Fermentation is a temperature-sensitive process; if your home is too cold, the process will move at a snail’s pace. If it is too warm, you might over-ferment and lose the crisp, fresh flavor you are aiming for. Keep the jars away from direct sunlight, which can heat them up unevenly and degrade the beautiful, vibrant colors of your peppers. Treat these jars like they are maturing; they need a quiet, steady, and dark space to do their best work.
The Waiting Game: Timing and Sensory Cues
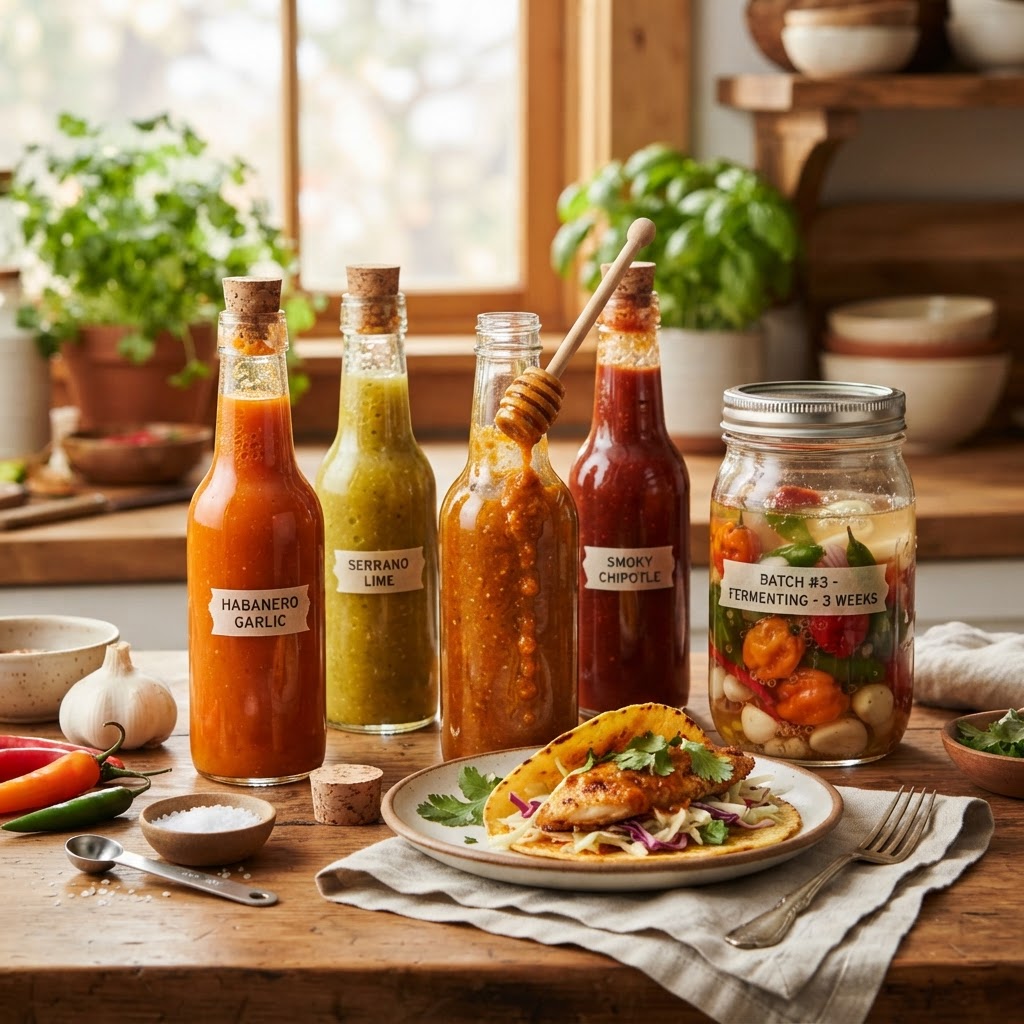
Patience is the ingredient that most home cooks fail to add. While you might see bubbles after just 24 hours, a good hot sauce needs time to develop the lactic acid complexity that defines a superior product. I suggest a minimum of 14 days, though 21 to 28 days will result in a much more balanced and "mellow" heat. During this time, check your jar visually every few days. You are looking for a steady stream of tiny bubbles rising to the top and a brine that is becoming slightly cloudy—this is the sign that your colony is active and working well.
Identifying Trouble
If you see white, fuzzy, or dark-colored growth on the surface, you have developed mold. Unfortunately, in the world of food safety, there is no "scooping it off" if the mold is fuzzy. If your ferment smells rotten, earthy, or simply "off" (resembling compost rather than a bright, sour tang), trust your nose and discard it. However, if you see a thin, white, powdery layer on top, it is likely just kahm yeast, which is harmless but can be unsightly and slightly alter the flavor. With clean tools and the right salt ratio, these issues should be few and far between.
When to Blend
When you feel the ferment has reached its peak, it is time to transition from the jar to the blender. The transformation here is where the "Chef" part of your identity really shines. Do not just dump everything into a blender; carefully remove your weights and aromatics. Strain the vegetables from the brine, but do not discard the brine. It is packed with flavor and probiotics. Start by blending the vegetables with a portion of the brine, slowly adding more until you reach your desired consistency.
"A great hot sauce is not defined by its ability to hurt you, but by its ability to elevate a dish. If you can taste the nuance of the pepper beneath the heat, you have succeeded."
Emulsification and Final Touches
The texture of a professional-grade hot sauce is all in the emulsification. Once you have blended your fermented vegetables and brine, you might find that the sauce separates into a thick pulp at the bottom and a thin, watery layer on top. To prevent this, consider adding a small amount of xanthan gum—a tiny pinch goes a long way. Xanthan gum acts as a stabilizer, binding the solids and liquids together to create a smooth, pourable, and visually appealing sauce that clings to your food rather than running off it.
The Vinegar Adjustment
While your sauce will have plenty of natural acidity from the fermentation, many chefs choose to add a splash of high-quality vinegar, such as apple cider vinegar or sherry vinegar, at the very end. This adds a bright, sharp "top note" that cuts through the creamy, funky base of the lacto-fermented peppers. It also acts as a final preservative and lowers the pH further, making your sauce even shelf-stable for longer periods. Taste as you go, and remember that you can always add more, but you can never take it out.
Straining for Elegance
Depending on your preference, you may want to strain your final blend through a fine-mesh sieve or a chinois. If you prefer a rustic, chunky, "salsa-style" sauce, leave it as is. If you are aiming for a refined, silky, Louisiana-style sauce, pushing it through a fine-mesh sieve will remove the skins and seeds, resulting in a smooth liquid that is professional in every sense of the word. Don't waste the solids left in the sieve! They make an incredible addition to scrambled eggs, marinades, or even a batch of chili.
Storing and Aging Your Creation
Once your sauce is bottled, it is technically ready to eat, but it will continue to evolve in the bottle. Store your finished hot sauce in the refrigerator to slow down the fermentation process significantly. While the acidity of the sauce makes it safe for long-term storage, the cool temperature will preserve the brightness of the colors and the vibrancy of the flavors. I recommend waiting at least another week after bottling before you start using it regularly. This "rest period" allows the flavors to integrate, smoothing out any rough edges and allowing the vinegar and lactic acid to marry perfectly.
Bottling for Success
Use sterilized glass bottles with dropper tops or flip-top seals. If you are giving these away as gifts, invest in some high-quality labels. Knowing exactly what is inside—and when it was made—is the mark of a serious home cook. I usually label my bottles with the main pepper variety and the date of bottling. This creates a sense of accomplishment and allows you to track which of your experimental batches turned out best, helping you refine your recipe for the next round of harvests.
The Probiotic Benefit
Remember that because this is a raw, lacto-fermented product, it is teeming with beneficial probiotics. By not heat-processing (canning) your sauce, you are maintaining these healthy bacteria that aid in digestion. This is a massive upgrade over store-bought versions that are often cooked and filtered until they are essentially just vinegar and flavorings. Be proud of the fact that you are consuming a living food that is as good for your gut as it is for your taste buds.
Troubleshooting Common Questions
Why is my sauce too spicy?
If you find your batch is overpowering, you can dilute it with more brine or add a non-fermented vegetable like roasted bell pepper or mango to balance the capsaicin. Remember, fermentation does not reduce the heat of a pepper; it only changes the flavor profile around the heat. If you want a milder sauce, start with milder peppers like Anaheim or Poblano.
How do I know when it's done?
There is no specific "done" date. Taste is the ultimate arbiter. If you like it tangy and sharp, pull it at two weeks. If you prefer a more mellow, deep, and complex profile, let it go for four or five weeks. Always use a clean spoon for every taste test to avoid introducing cross-contamination.
Can I mix batches?
Absolutely. One of the best parts of being a home cook is the ability to create your own signature blends. Once you have a batch of pure Habanero sauce and a batch of pure Jalapeño sauce, you can mix them to create your own house blend. This is exactly how professional sauce makers create their "original" recipes, and it allows you to showcase your personal culinary style.
Final Thoughts
Mastering the art of lacto-fermentation is a journey that will forever change the way you interact with your pantry. You have moved beyond the role of a consumer and into the role of a creator. By understanding the balance of salt, the necessity of anaerobic conditions, and the nuance of time, you have the keys to create infinite variations of hot sauce that are far superior to anything you could buy in a store. Do not fear the process, embrace the funk, and continue to experiment with the ingredients that define your personal palate.
Every bottle you pull from your fridge is a testament to your patience and your willingness to learn a traditional skill that is rapidly being lost in the modern world of instant convenience. Share your sauces with friends, use them to brighten up your weeknight dinners, and take pride in the fact that you took a handful of peppers and a pinch of salt and turned them into something truly alive. Remember, when the sauce is this good, you won't need to blame the chef—you'll be the one they're asking for the secret ingredient. Happy fermenting, and enjoy every drop of your hard work.
In closing, always keep your kitchen clean and your curiosity high. Fermentation is a living, breathing aspect of culinary history, and you are now an active participant in it. Whether you are aiming for the blistering heat of a Ghost Pepper mash or the subtle, sweet tang of a fermented Fresno sauce, the principles remain the same. Stick to the ratios, respect the biology, and most importantly, have fun with the process. Your pantry is now a laboratory, and the results are yours to enjoy. Stay spicy, keep fermenting, and until next time, keep cooking with passion and purpose.



Get the Next Recipe
Weekly recipes, techniques, and gear picks — straight to your inbox.
