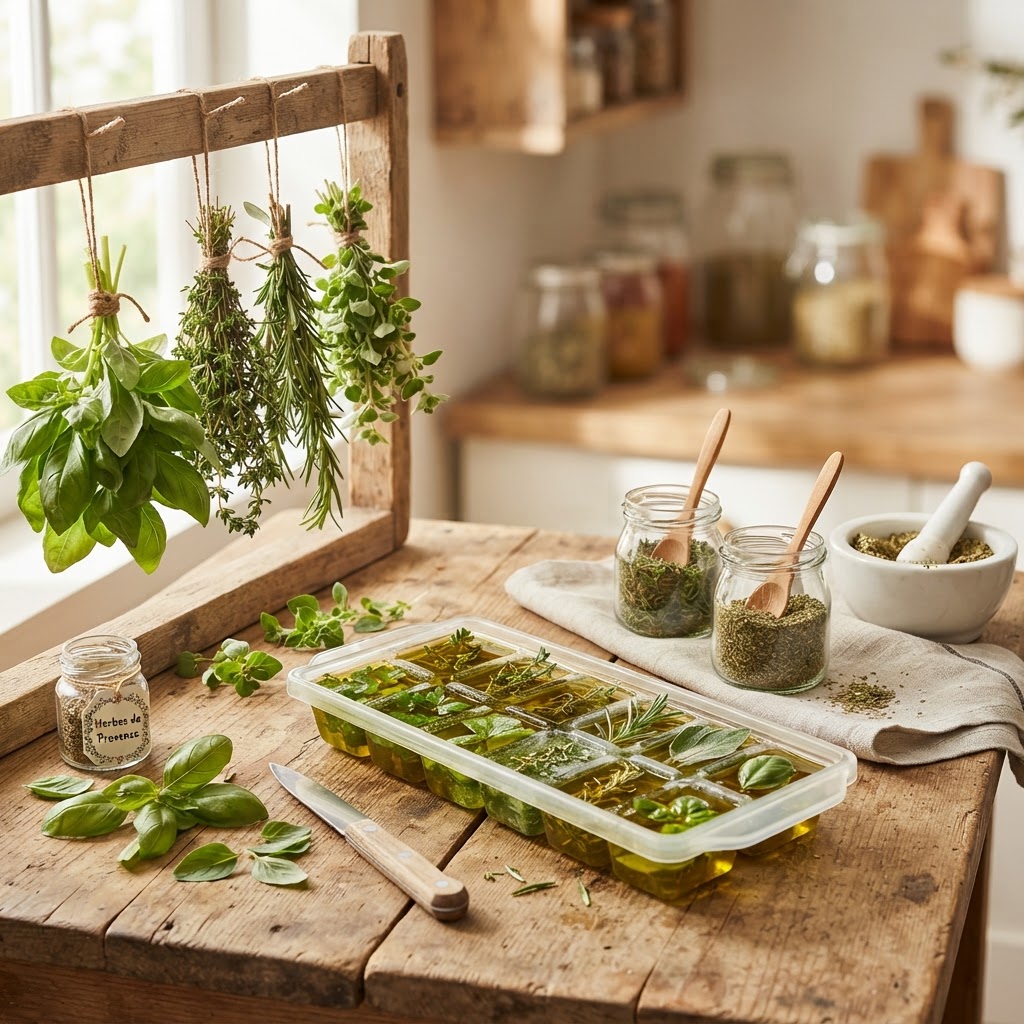
The Home Cook’s Guide to Fresh Herb Preservation: Mastering Oil-Freezing and Drying Techniques for Seasonal Flavor All Year
There is nothing quite as heartbreaking in the culinary world as reaching for a bunch of basil or cilantro, only to find it has turned into a slimy, wilted mess in the back of your vegetable crisper. We have all been there, standing over the trash can with a bag of herbs that looked vibrant and promising just three days ago. It is a universal struggle of the home cook, but it is also one that is entirely preventable with the right mindset and a few professional techniques. When you understand how to treat these delicate plants as living organisms rather than just garnishes, you unlock a world of year-round flavor that elevates every dish you prepare.
At "Blame The Chef," we believe that your pantry and freezer should act as a library of seasonal ingredients, ready to be deployed at a moment’s notice. Fresh herbs are the high-voltage electricity of the cooking world; they provide the brightness, the depth, and the aromatic punch that transforms a mundane Tuesday night meal into something truly restaurant-worthy. However, the lifespan of fresh herbs is notoriously short, making the ability to preserve them not just a savvy kitchen hack, but a foundational skill for any serious home cook. By mastering the arts of dehydration and oil-suspension, you essentially stop the clock on peak freshness.
In this guide, we are going to walk through the science and the artistry of herb preservation, stripping away the mystery of long-term storage. We will explore which herbs thrive in the heat of a dehydrator, which ones demand the cold embrace of the freezer, and how to combine them into flavor-packed pucks that can be dropped directly into a hot skillet. You no longer need to fear the end of summer or the arrival of a frost, because your kitchen will be stocked with the emerald essence of the garden, preserved exactly at its prime. Let’s roll up our sleeves, sharpen our knives, and start saving those precious greens.
Understanding Herb Classification for Preservation
Before we dive into the specific methods of drying and freezing, we have to understand that not all herbs are created equal. In the professional kitchen, we categorize herbs based on their structural integrity, which dictates exactly how they react to various preservation methods. Soft-stemmed herbs, such as basil, cilantro, parsley, and mint, contain a high water content and possess delicate essential oils that dissipate quickly when exposed to improper heat or air. These varieties generally perform better in the freezer, specifically when suspended in fats like olive oil or butter, as this protects their fragile cellular walls.
Conversely, hard-stemmed or woody herbs like rosemary, thyme, oregano, and sage are built for endurance. They possess a much lower moisture content and a more robust concentration of stable oils, making them the ideal candidates for traditional air-drying or low-temperature dehydration. Understanding this distinction is the key to preventing "flavor loss," a common frustration where herbs turn into flavorless dust after a few months. When you identify the category of the herb in front of you, you are already halfway to success.
The Golden Rule of Harvest and Prep
Regardless of how you plan to preserve your herbs, the preparation process remains consistent across the board. You must always work with herbs that are completely dry to the touch, as any residual moisture can lead to mold and rot during the storage phase. We recommend harvesting your herbs in the early morning, just after the dew has evaporated but before the heat of the day draws out the essential oils. Once harvested, gently wash them in cool water and spin them dry in a salad spinner or pat them thoroughly between layers of lint-free paper towels.
"The difference between a vibrant, aromatic preserved herb and a dull, earthy one lies entirely in the speed of the drying process and the protection from oxygen."
Never chop your herbs until you are ready to process them, as slicing initiates oxidation, which causes them to turn brown. If you are freezing herbs in oil, keep the pieces relatively large so you can retain the integrity of the leaves. For drying, it is often better to keep the leaves whole on the stem, removing them only after they are completely crispy. This prevents the loss of volatile oils that occurs when the plant surface is broken too early in the cycle.
Mastering the Art of Oil-Freezing
Freezing herbs in oil is perhaps the most revolutionary technique you can introduce to your repertoire, especially for soft-stemmed herbs. By submerging chopped leaves in high-quality extra virgin olive oil or melted unsalted butter, you create a barrier against air and ice crystals—the two primary enemies of frozen produce. This method is incredibly efficient for creating "flavor bombs" that you can drop directly into soups, stews, or pasta sauces, allowing the fat to carry the herbal aromatics throughout your entire dish.
To begin this process, you will need a reliable silicone ice cube tray. Silicone is superior to hard plastic because it allows for easy removal of the frozen pucks without needing to run them under warm water, which could melt the outer layer of your herbs. Chop your herbs to the desired consistency—a rough chop for stews, or a fine mince for finishing oils—and fill each compartment about two-thirds of the way. Then, pour your oil over the herbs until they are fully submerged, leaving a tiny bit of room at the top for expansion during the freezing process.
The Ratio and Technique
For the best results, use a ratio of two parts herbs to one part oil. If you pack the herbs too tightly, they will not be adequately protected by the fat, leading to freezer burn. Conversely, too much oil will dilute the flavor intensity when you eventually use the puck. Once your trays are filled, place them in the freezer on a level surface. After approximately six to eight hours, your herbs will be frozen solid. At this stage, transfer the oil pucks into a heavy-duty freezer bag, labeling them clearly with the date and the herb variety.
These pucks will stay vibrant and flavorful for up to six months. When you are ready to use them, simply grab a single puck and toss it directly into your preheated skillet or Dutch oven. Because the oil is already infused with the herbs, you gain the benefit of flavor diffusion before the aromatics even have a chance to burn. This technique is particularly effective for herbs like basil, which notoriously loses its bright, peppery profile when dried, but sings when preserved in fat.
The Science of Dehydration and Air-Drying
When it comes to woody herbs, dehydration is the gold standard for long-term storage. By removing the moisture from the plant, we are effectively halting the growth of microorganisms and enzymatic reactions that lead to spoilage. While many home cooks swear by the classic "hang-to-dry" method, I always suggest using a dedicated dehydrator for a more controlled, professional result. The goal is to dry the herbs as quickly as possible at a low temperature to preserve the flavor profile, rather than leaving them out to collect dust and absorb ambient odors in your kitchen.
Set your dehydrator to its lowest setting, which is usually between 95 and 105 degrees Fahrenheit. Anything higher than 110 degrees risks cooking the herbs, which results in a loss of the volatile compounds that give rosemary its piney sharpness or thyme its floral sweetness. Lay the herbs out in a single layer on the trays, ensuring that there is plenty of space for air to circulate around them. Depending on the humidity of your home and the thickness of the leaves, this process can take anywhere from three to eight hours.
Identifying the Perfect State
You will know your herbs are fully dehydrated when they reach a state of brittle, snap-dry texture. Test a leaf by bending it; if it bends without snapping, it needs more time. If it crumbles easily between your fingers with a satisfying crackle, it is ready for storage. Once cooled to room temperature, strip the leaves from the woody stems and store them in airtight glass jars. Keep these jars in a cool, dark place, such as a pantry shelf away from the stove or direct sunlight.
"When drying herbs, patience is not just a virtue; it is the difference between a jar of flavor-packed seasoning and a container of bland, hay-like botanical waste."
Avoid the common mistake of crushing your herbs into a powder immediately after drying. If you keep the leaves whole and only crumble them right before you add them to your cooking, you will release a much higher concentration of aromatic oils. The act of crushing the leaf is a localized trigger for fragrance, so save that final step for the very last minute to ensure the most vibrant experience for your palate.
Beyond the Basics: Infused Butters and Salt Cures
Once you have mastered freezing and drying, you can begin to explore more creative ways to preserve your bounty. Compound butters, or beurre composé, are a professional chef's secret weapon for finishing steaks, roasting vegetables, or creating a quick sauce for pasta. To make these, simply blend softened unsalted butter with finely minced fresh herbs, a touch of lemon zest, and a pinch of sea salt. Roll the butter into a cylinder using parchment paper or plastic wrap, chill it until firm, and then slice it into coins for individual use.
Another fantastic, often overlooked technique is the salt cure. This is specifically effective for hardier herbs like rosemary, sage, and thyme. By layering fresh herb leaves with coarse sea salt in a small glass jar, you draw out the moisture while simultaneously infusing the salt with the herb’s essential oils. This results in an incredibly potent, flavor-packed salt that can be used to season roast chicken, potatoes, or even focaccia bread. The salt acts as both a preservative and a flavor enhancer, creating a shelf-stable seasoning that lasts for months.
Managing Herb Salt Ratios
When creating herb salt, ensure you are using a non-reactive vessel, such as glass or ceramic. Start with a layer of kosher salt at the bottom, then a layer of herbs, and continue in that pattern until the jar is full. Close the lid tightly and shake gently to ensure the salt is evenly distributed around the leaves. Over the course of a few weeks, the salt will darken as it absorbs the oils from the herbs. You can either use the mixture as-is or grind it into a fine finishing salt for your final dishes.
Remember that salt-cured herbs are significantly more intense than dried herbs. Because the salt has pulled out the moisture and replaced it with a concentrated saline environment, a little goes a very long way. Always taste as you go when seasoning with these, as you will likely need to adjust your usual salt intake downward to compensate for the brine-like quality of the infused seasoning. It is a wonderful way to minimize waste while creating a bespoke ingredient that you simply cannot buy at the store.
Equipment and Kitchen Hygiene Essentials
Professional culinary results require professional-grade preparation. When you are processing large quantities of herbs, cleanliness is paramount. Ensure your knives are impeccably sharp; a dull blade will bruise the delicate cell walls of the herb, causing it to turn black and release its juices prematurely. Use a clean, sanitized cutting board—preferably wood, as it is gentler on the leaves—and wipe it down frequently as you work. The less trauma you inflict on the herb, the more vibrant the final product will remain.
For those serious about dehydration, investing in a dehydrator with a built-in timer and temperature control is a game-changer. While you can use your home oven on its lowest setting with the door slightly ajar, most ovens do not maintain the low temperature consistently enough to prevent partial cooking. A dedicated dehydrator allows for better airflow, ensuring that your herbs dry uniformly and don't end up with "hot spots" that can lead to uneven flavor profiles.
Inventory Management
Preservation is only as good as your organizational system. I recommend keeping a simple ledger or using masking tape and a permanent marker to label every single jar or freezer bag. Include the date of preservation and the name of the herb. Even the best home cooks will struggle to distinguish between dried tarragon and dried thyme after six months in the pantry. Create a "first in, first out" system in your freezer, where you move older bags to the front so they get used up before the newer batches.
If you find that you have an excess of a specific herb, such as basil during the peak of summer, do not hesitate to share the wealth. Preserved herbs in beautiful glass jars or freezer-safe containers make incredible gifts for friends and family. It is a gesture that demonstrates both your culinary skill and your appreciation for seasonal ingredients. When you treat your preservation projects with the same care as your dinner preparation, you become a master of the sustainable kitchen.
Troubleshooting Common Preservation Failures
Despite your best efforts, you may occasionally run into issues where your preserved herbs lose their color or smell like "old hay." This is almost always a result of oxidation or moisture. If you notice your dried herbs have lost their green hue, it means they were exposed to too much light or heat during the drying process. While this doesn't necessarily mean they are unsafe to eat, it does mean the flavor has faded significantly. In the future, try to keep your drying process strictly under 105 degrees and ensure your storage jars are kept in a dark, cool cupboard.
If you see any signs of mold in your oil-frozen pucks or your dried jars, discard the entire batch immediately. Mold is a sign that moisture was present in the container, usually because the herbs were not fully dried before storage or because the oil-to-herb ratio was off. Never try to "salvage" part of a batch if mold is present, as the spores can be microscopic and widespread. It is better to lose one small container than to risk the quality of your meals.
The Importance of Color
Color is the most reliable indicator of quality in preserved herbs. A vibrant green is the sign of chlorophyll retention and a job well done. If your dried basil looks brown or grey, it has likely oxidized; while it may still add a faint, earthy flavor, it will lack the bright, sweet notes that make basil special. This is why we focus so heavily on the speed of the drying process. The longer it takes for an herb to reach its brittle, dehydrated state, the more time oxygen has to attack the plant's cell structure and ruin its vibrant color.
If you are freezing herbs and notice a lot of ice crystals on the surface, this is known as "freezer burn." This happens when air has access to the herb surface. To prevent this in the future, make sure your freezer bag is completely airtight. Use a straw to suck out the remaining air from the bag before sealing, or consider vacuum-sealing your herb pucks for long-term storage. A vacuum sealer is an excellent investment for any serious home cook, as it removes the oxygen that causes freezer burn and flavor degradation.
Final Thoughts
The journey toward a sustainable and flavor-filled kitchen is one that rewards consistency and curiosity. By embracing these preservation techniques, you are doing more than just saving money—you are capturing the spirit of the season and ensuring that your culinary creativity is never stifled by the calendar. When you pull a disk of frozen basil and garlic butter out of the freezer in the middle of a snowy January, or sprinkle your own home-grown, dried rosemary over a roasted chicken dinner, you are tasting the labor of your own hands. You are connecting with your food in a way that is increasingly rare in our modern, fast-paced world.
Start small, practice these techniques with one or two herb varieties this week, and observe the results. Do not be discouraged if your first batch of dried mint isn't quite as vibrant as you had hoped; every failed experiment is just another step toward becoming a more capable, resourceful cook. The beauty of these methods is that they are forgiving. Even if your herbs are a bit less than perfect, they will still provide a better flavor profile than the dusty, years-old jars sitting on the back of the grocery store shelf.
Remember that at "Blame The Chef," we believe that the kitchen should be a place of empowerment, not stress. If you have a disaster, learn from it, clean it up, and try again. The goal is to make your kitchen work for you, creating an environment where high-quality ingredients are always available, regardless of the season. Your pantry is now a storehouse of summer sunshine and spring vitality, ready to be unleashed whenever inspiration strikes. Now, go forth and preserve with confidence, knowing that you have the tools to keep your meals bright, fresh, and exceptionally delicious all year round.
The true secret of the professional chef is not a hidden ingredient or a magical piece of equipment, but the ability to plan ahead. When you have your mise-en-place sorted, when your herbs are dried or frozen, and when your pantry is organized, you create the mental space to focus on the joy of cooking. It is a transformation of the home kitchen from a place of daily chores into a workshop of seasonal culinary delight. Stay adventurous, keep learning, and never forget that the most important element in any dish is the care you put into its preparation. Happy cooking, and may your kitchen always be filled with the intoxicating aroma of fresh, perfectly preserved herbs.
Get the Next Recipe
Weekly recipes, techniques, and gear picks — straight to your inbox.
