The Home Cook's Guide to Ghee and Clarified Butter: Mastering Fat Separation for High-Heat Cooking and Nutty Aromatics
Every home cook eventually hits a wall in their culinary journey where the standard tools of the trade—namely olive oil and whole butter—cease to be enough. You might find yourself frustrated by the smoking point of extra virgin olive oil when trying to achieve that perfect, crusty sear on a thick ribeye, or perhaps your delicate sauces are breaking because the milk solids in your butter are burning before you can reach the proper flavor profile. This is where the mastery of fat separation becomes your greatest asset in the kitchen. By stripping away the water content and the volatile milk proteins that act as impurities, you are left with a golden, stable, and highly aromatic cooking medium that will fundamentally change how you approach everything from morning eggs to intricate Indian curries.
The process of clarifying butter is a fundamental skill that every professional chef learns in their first month of culinary school. It is an act of purification, turning a perishable, temperamental ingredient into a shelf-stable powerhouse that can withstand the intense heat required for professional-grade roasting, sautéing, and frying. While most supermarket shelves are now stocked with expensive jars of ghee, there is a profound satisfaction and cost-saving advantage to rendering your own in the comfort of your kitchen. Understanding the science behind the fat, the water, and the solids allows you to control the exact degree of nuttiness and stability in your final product, ensuring that your home-cooked meals reach a level of quality typically reserved for restaurant kitchens.
As we dive into this guide, I want you to view your stove not just as a heat source, but as a laboratory for flavor. We are going to strip away the myths surrounding these fats and get down to the brass tacks of temperature control, visual cues, and sensory analysis. Whether you are aiming for the clean, neutral profile of traditional French clarified butter or the deeply toasted, earthy depth of authentic ghee, this post will provide you with the technical foundation to execute both with total confidence. Prepare to elevate your pantry and, more importantly, your palate, as we break down the chemistry and the craft of liquid gold.
The Science of Fat Separation: Understanding Your Ingredients
At its core, standard butter is a complicated emulsion. It consists of approximately 80 to 82 percent butterfat, about 16 to 18 percent water, and 1 to 2 percent milk solids—specifically casein, whey proteins, and lactose. When you heat whole butter, the water begins to evaporate, causing the milk solids to settle at the bottom or foam at the top. If you continue to apply heat, those solids will burn, turning bitter and black, which is precisely why you cannot use standard butter for high-heat cooking. The smoking point of whole butter is roughly 350 degrees Fahrenheit, but once you remove the water and solids, the remaining pure fat—clarified butter or ghee—can reach smoking points as high as 485 degrees Fahrenheit.
This massive increase in stability is what makes these fats so indispensable. By removing the solids, you are essentially removing the "fuel" that causes the butter to scorch. The water, meanwhile, acts as a heat sink; by boiling it off, you allow the temperature of the fat to climb much higher without the risk of spattering or uneven cooking. This is a scientific process of refinement that creates a medium that is not only heat-stable but also incredibly long-lasting. Because bacteria need moisture and proteins to thrive, the removal of both renders your final product shelf-stable for months, even without refrigeration.
It is important to understand that while all ghee is a form of clarified butter, not all clarified butter is ghee. The primary difference lies in the Maillard reaction. When you make clarified butter, the goal is to remove the solids quickly once they begin to brown, keeping the fat clear, yellow, and relatively neutral in taste. When making ghee, you allow those milk solids to cook in the fat for an extended period, allowing them to caramelize and toast. This imparts a nutty, complex flavor that is distinctively different from the clean profile of clarified butter.
"To understand fat is to control the outcome of your plate. When you master the separation of milk solids, you stop fighting your heat source and start working in harmony with it, unlocking flavors that remain locked away in standard butter."
Selecting Your Butter: Quality Matters
You might be tempted to reach for the cheapest block of butter at the grocery store when practicing this technique, but I advise against it. The quality of your raw ingredients dictates the depth and richness of your final product. When you concentrate butter, you are also concentrating its impurities and its flavor profiles. If you start with a low-quality butter that tastes somewhat sour or has been improperly stored, that off-note will become significantly more pronounced in your finished ghee. Always opt for high-quality, unsalted European-style butter if possible, as it typically has a higher fat percentage and less water content, making the clarification process faster and more efficient.
Pay close attention to the label. Look for butter with a minimum of 82 percent butterfat. You will often see labels like "high-fat" or "European style," which typically contain 84 percent or more. This higher fat content means you have less water to evaporate, which translates to a shorter cooking time and a lower risk of burning the milk solids prematurely. Avoid salted butter at all costs; the salt does not evaporate with the water and will instead concentrate in the fat, leaving you with a product that is intensely salty and unsuitable for general cooking or baking.
When purchasing, try to source butter from grass-fed cows. The difference in the color and nutrient profile is remarkable. Grass-fed butter is generally deeper in color due to the higher concentration of beta-carotene, and it tends to have a more complex flavor profile that benefits from the gentle toasting involved in making ghee. While this may cost a few dollars more per pound, remember that you are essentially creating a pantry staple that will replace other expensive cooking fats, making the overall cost-per-use quite reasonable.
The Technical Process: Making Clarified Butter
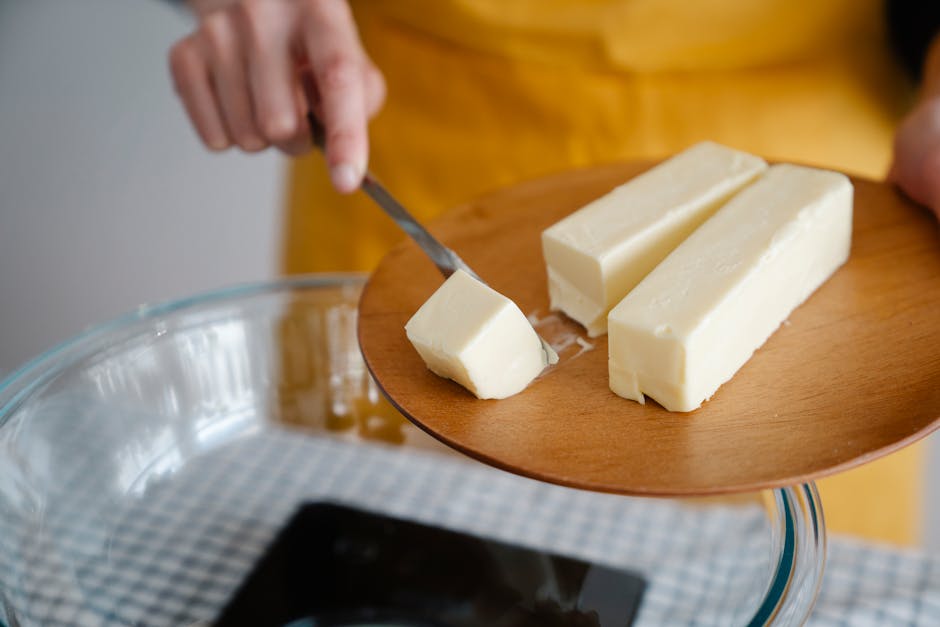
To begin, you will need a heavy-bottomed saucepan. Thin pans can cause hot spots that scorch the milk solids before the water has fully evaporated. Place your unsalted butter in the pan over medium-low heat. The goal is to melt the butter slowly and evenly. Once it is fully melted, it will begin to foam. This foam is the water escaping the emulsion, carrying some of the milk proteins with it. Do not stir the butter during this process, as you want the solids to have the chance to settle or stay in the foam where they can be easily handled.
As the foam subsides, you will notice the liquid becoming clear and golden. You will see a layer of milky white solids at the bottom of the pan—this is the casein. Use a skimmer or a fine-mesh spoon to remove the foam from the surface. Once the foaming stops and the bubbling becomes tiny and rhythmic, the water is mostly gone. At this point, the butter should be translucent and gold. If you are making standard clarified butter, you should remove it from the heat immediately.
Essential Steps for Success:
Mastering Ghee: The Art of the Maillard Reaction
If your goal is to make ghee, you simply extend the process described above. Once you have removed the water and the initial foam, do not take the pan off the heat. Instead, continue to simmer the fat on low. You will notice the milk solids at the bottom of the pan begin to change color from white to a golden brown, and finally to a dark, toasted hazelnut color. This is the Maillard reaction in action—the amino acids and sugars in the milk solids are reacting to the heat, creating a deep, complex, and savory flavor.
The timing here is critical. Once the solids turn that rich, toasted color, you must remove the pot from the heat immediately. The residual heat in the pan and the oil can easily push the solids from "toasted" to "burnt" in a matter of seconds. You will smell the difference; it should be reminiscent of toasted nuts or browned butter. If you smell acrid smoke, you have gone too far, and you will need to start over to avoid an unpleasant, bitter finish.
Strain the ghee immediately through a fine-mesh strainer lined with several layers of cheesecloth. The ghee should be a deep, vibrant gold. As it cools, it will transition from a clear liquid to a creamy, opaque, semi-solid texture. This is a sign of a perfectly rendered batch. If it remains completely grainy or separates, it usually indicates that there was still a small amount of water left in the fat. While this won't ruin the flavor, it does reduce the shelf life, so aim for that smooth, solid texture by ensuring the initial boil was thorough.
"Ghee is not merely a fat; it is the essence of butter, concentrated and tempered by the flame. It is the bridge between the simple dairy aisle and the sophisticated pantry, offering a depth of flavor that can transform a basic sauté into a culinary event."
Storage and Shelf Life: Keeping Your Gold Fresh
One of the greatest benefits of both clarified butter and ghee is their incredible longevity. Because you have removed the water and the milk proteins—the primary vectors for spoilage—these fats can survive for months at room temperature. However, "shelf-stable" does not mean "indestructible." To ensure your ghee stays as fresh as the day you made it, you need to follow a few simple storage protocols that protect the integrity of the fat.
Store your finished product in an airtight glass jar. Plastic containers can absorb odors and, over time, leach chemicals into the fat, especially if the fat is still warm when poured. Glass, specifically amber or dark-colored glass, is ideal because it protects the fat from light-induced oxidation. Oxidation is the primary enemy of fats, leading to rancidity. By keeping your ghee away from direct sunlight, you prevent the fat molecules from breaking down and developing that "off" metallic taste.
If you live in a particularly hot climate or you do not use your ghee very often, you can certainly store it in the refrigerator. However, note that ghee becomes extremely hard when chilled, making it difficult to scoop out for daily cooking. A better compromise is to keep a small amount in a convenient countertop jar and store the bulk of your batch in the back of the pantry or the fridge. Always use a clean, dry spoon to remove your ghee from the jar. Introducing even a drop of water or a crumb of bread back into the jar can reintroduce bacteria and cause the fat to spoil prematurely.
Culinary Applications: Where to Use Your Fat
Once you have mastered the technique, the real fun begins: putting your ghee to work. Because of its high smoking point, it is the absolute best fat for searing meats. When you sear a steak in standard butter, the milk solids burn at roughly 350 degrees, leaving a bitter, black residue on your steak. With ghee, you can crank your cast-iron skillet up to 450 or 500 degrees, creating a magnificent, flavorful crust (the Maillard crust) without any bitterness. It is a game-changer for anyone who loves a high-end steakhouse-style finish at home.
Beyond searing, ghee is the gold standard for Indian and Middle Eastern cooking. It is traditionally used to bloom spices—a technique known as tadka or tempering. By heating ghee and then adding whole spices like cumin, mustard seeds, or turmeric, you release the fat-soluble compounds in the spices that would otherwise remain locked away. The nutty, toasted flavor of the ghee pairs perfectly with these aromatic spices, creating a base of flavor that is infinitely more complex than what you can achieve with neutral oils.
Don't forget about baking. Many professional pastry chefs use clarified butter in recipes where they want the richness of butter but need the physical properties of a pure fat. For example, when making certain laminated doughs or shortbreads, the water in whole butter can lead to gluten development, which can make the finished product tough. By using clarified butter, you control the moisture content, resulting in a more tender, delicate crumb. You can also experiment with "browned ghee" in cookies, where the added nuttiness provides a savory counterpoint to the sweetness of the sugar.
Troubleshooting Common Issues
Even for experienced cooks, things can sometimes go sideways. If you find your ghee is turning cloudy after a few days, it is almost certainly a sign that there was still residual moisture trapped in the fat. This happens if you stop the clarification process too early, before the tiny bubbles have completely stopped. Do not fret; you can fix this by simply melting the batch again over very low heat and letting it simmer for another five to ten minutes until the water evaporates. Skim, strain, and you are back on track.
Another issue is the "burnt" flavor profile. This occurs when the heat was too high or you waited too long to pull the pan off the burner. Unfortunately, there is no way to "fix" a burnt batch. If your ghee tastes bitter or smells like charred popcorn, it is best to discard it and start over. Learn from the process—the next time, lower your heat and pull the pan off the stove the moment you see the solids turn a deep tan color. Remember, the residual heat will continue to cook the solids even after the pan is off the flame.
Finally, if you find your ghee has a grainy, sandy texture rather than a creamy one, it is usually due to the cooling rate. If you let the ghee cool too quickly, such as in the refrigerator, the fat crystals grow large and uneven. For a smooth, velvety texture, let your jars sit at room temperature, undisturbed, for at least 12 to 24 hours. This allows the fat to solidify slowly, resulting in a superior, spreadable consistency that mimics high-end commercial brands.
Conclusion
The transition from using standard supermarket fats to masterfully rendered ghee and clarified butter is a hallmark of a cook who cares about the details. By taking control of your ingredients—removing the impurities, understanding the heat thresholds, and appreciating the delicate science of the Maillard reaction—you are stepping into a higher tier of culinary competence. These fats are more than just cooking media; they are flavor enhancers and technical tools that reward the patient and the precise.
Whether you are searing a thick-cut steak, tempering spices for a complex curry, or looking to add a new layer of richness to your weekend baking projects, the home-rendered fat you create in your own kitchen will be miles ahead of anything you can buy in a jar. It is a testament to the fact that when you slow down and treat your ingredients with respect, the results are always worth the time.
So, gather your high-quality butter, clear your schedule for an afternoon of slow simmering, and prepare to fill your kitchen with the intoxicating, nutty aroma of liquid gold. Your pantry will be better for it, your searing game will be revolutionized, and your guests will certainly notice the difference. You have the guide, you have the knowledge, and now you have the opportunity to take your kitchen to the next level. Happy cooking, and remember: if the meal is divine, blame the chef, but if it is truly transcendent, you can thank the ghee.
Final Thoughts on Mastery
Mastery, in any culinary pursuit, is rarely about following a recipe to the letter. It is about understanding the why behind every step. When you make ghee, you are not just following a sequence of instructions; you are learning how to read the fat. You learn to listen to the sound of the evaporation, to watch the color of the foam, and to trust your nose to signal the exact moment of perfection. This intuitive connection to your ingredients is what separates a cook from a chef.
I encourage you to take this practice and make it your own. Experiment with different brands and types of grass-fed butter. Try adding aromatics like a single sprig of sage or a small piece of cinnamon stick during the final stages of the ghee-making process to infuse the fat with a subtle, baseline flavor that can elevate your everyday dishes. Keep track of your timing and your results, and don't be afraid to fail; even a "failed" batch of clarified butter is a learning experience that brings you closer to that perfect, golden end result.
Finally, share your work. Food is meant to be shared, and there is something uniquely rewarding about gifting a jar of your own homemade ghee to a fellow food lover. It is a gesture that says you value quality, patience, and the craft of cooking from scratch. As you continue your culinary journey, remember that the smallest details—like the clarification of a simple stick of butter—are often the ones that leave the most lasting impressions on those you cook for. Keep exploring, keep learning, and keep blaming the chef for being so darn good. Your journey into the heart of fat and flavor has only just begun.
Get the Next Recipe
Weekly recipes, techniques, and gear picks — straight to your inbox.
