The Home Cook's Guide to Ghee: Mastering Clarified Butter for High-Heat Cooking and Nutty Depth
There is a point in every home cook’s journey where the limitations of standard butter become glaringly apparent. You are searing a beautiful, dry-aged ribeye or perhaps sautéing a delicate handful of aromatics, only to watch in frustration as your pan turns into a smoking, blackened graveyard of milk solids. This is the moment most cooks learn the hard way that butter, while delicious, is structurally ill-equipped for the intensity of high-heat cooking. When butter hits a hot pan, its water content evaporates while its milk proteins begin to caramelize and eventually char, lending a bitter, acrid note to your otherwise perfect dish. Learning to bypass these culinary hurdles by mastering the art of clarifying butter is the single most effective way to upgrade your kitchen repertoire without needing a professional-grade stove or a bank-breaking set of copper pots.
Ghee, the golden, shelf-stable, and nutty byproduct of this process, is not merely a substitute for butter; it is a culinary powerhouse that has been revered for millennia across South Asian cultures and beyond. By isolating the pure butterfat from the water and milk solids, you create a cooking medium that boasts a significantly higher smoke point—roughly 485°F (250°C) compared to standard butter’s 350°F (175°C). This allows you to achieve the Maillard reaction on proteins and vegetables with unprecedented precision. The nutty, toasted aroma that develops during the simmering process is not a flaw; it is a feature that adds an incredible depth of flavor to everything from morning eggs to complex curries. Once you understand the chemistry behind this golden liquid, you will find yourself reaching for it instinctively whenever you need to marry intense heat with sophisticated flavor.
Transitioning from a casual cook to a confident kitchen artist requires an appreciation for the nuances of your ingredients, and ghee is a masterclass in transformation. It is more than just fat; it is a shelf-stable, concentrated essence of dairy that respects the ingredients it cooks. When you clarify butter at home, you are taking control of the moisture, the flavor profile, and the stability of your pantry staples. You are shifting from a passive consumer of ingredients to an active creator of your own culinary building blocks. This guide will take you through the rigorous science of butter composition, the step-by-step methodology for crafting the perfect batch, and the creative applications that will make your home kitchen smell like a professional establishment. Prepare to set aside your misconceptions about "healthy fats" and dive into the deep, aromatic world of liquid gold.
Understanding the Anatomy of Butter
The Science of Dairy Composition
At its most basic level, butter is an emulsion consisting of approximately 80-82% milk fat, 16-18% water, and 1-2% milk solids (which include proteins like casein and carbohydrates like lactose). In standard culinary application, this composition is perfectly fine for baking or gentle sautéing. However, in the presence of high heat, those water droplets cause splattering, and the milk solids act as a fuel source for burning. When you clarify butter, you are systematically removing these variables. The process of making ghee goes one step further than simple clarified butter by simmering the mixture until the milk solids begin to brown, which imparts that signature, toasted flavor.
Why Smoke Points Matter
The smoke point is the temperature at which a fat begins to break down and release harmful compounds, visible as a thin blue wisp of smoke. For the home cook, the smoke point is the boundary between a delicious, crispy-edged protein and a bitter, off-putting mess. Because standard butter contains milk solids, its smoke point is quite low, forcing many cooks to rely on vegetable oils that lack flavor. Ghee solves this by providing a clean, high-heat medium that carries the richness of butter without the volatile proteins. It allows for a hard sear that creates a superior crust while maintaining a tender, juicy interior in your proteins, effectively changing the texture of your home-cooked meals entirely.
"True culinary mastery begins when you understand the breaking point of your ingredients. Ghee isn't just fat; it's a tool for temperature control that turns the home stove into a professional range."
The Equipment and Ingredients You Need
Choosing the Right Butter
You cannot make excellent ghee with low-quality ingredients. Seek out high-fat European-style butter if possible, as it naturally contains less water and more butterfat than standard American-style butter. Look for options that list "cream" as the only ingredient, avoiding anything labeled as "whipped" or containing added salt. Salt can make the clarify process uneven and result in a finished product that is overly salty when reduced. Aim for unsalted, grass-fed butter if your budget allows; the fat profile of grass-fed cows is often higher in CLA (conjugated linoleic acid) and fat-soluble vitamins, leading to a richer, more vibrant yellow hue in your final ghee.
The Essential Toolkit
You don't need a lab to make ghee, but you do need the right hardware to ensure consistency.
The Step-by-Step Methodology
Step 1: The Melt and Separation
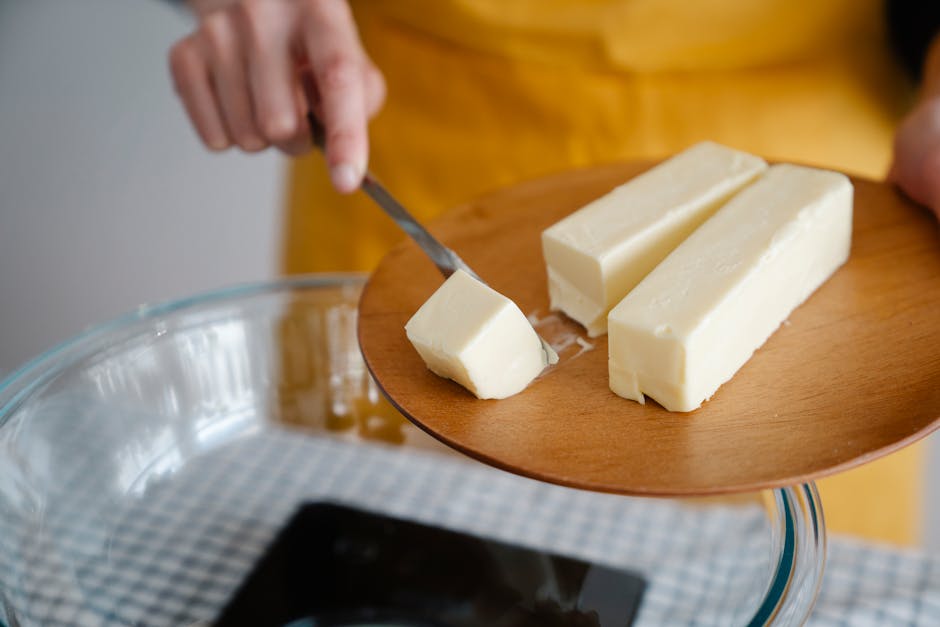
Start by cutting your butter into uniform cubes, which encourages even melting. Place them in your heavy-bottomed saucepan over low heat. As the butter melts, you will see a distinct separation occur. The bottom layer will be the water, the middle layer will be the golden liquid fat, and the top layer will be a white, foamy froth of milk solids. Resist the urge to turn up the heat. High heat at this stage will scorch the solids before they have the chance to sink or foam properly.
Step 2: The Gentle Simmer
Once the butter is fully melted, increase the heat to medium-low. You want to achieve a gentle, persistent simmer. As the water evaporates, you will hear a crackling or popping sound; this is the water vapor escaping. Do not stir the butter vigorously. You want the milk solids to settle naturally at the bottom or gather into that top layer of foam. Keep a close eye on the temperature—aim for a range between 212°F (100°C) and 250°F (120°C). Anything higher and you risk browning the solids too quickly, which ruins the delicate flavor of your ghee.
Step 3: Achieving the Nutty Depth
The distinction between clarified butter and ghee happens here. Continue to simmer the liquid until the foaming subsides and the liquid fat becomes crystal clear. At this point, the milk solids at the bottom of the pan will begin to turn a light, golden tan. You will start to smell an aroma reminiscent of roasted nuts or warm biscuits. This is your cue to remove the pan from the heat immediately. If you let it go too long, those solids will turn dark brown and impart a burnt flavor to the entire batch, which is impossible to reverse.
Straining and Storage Mastery
Filtration Techniques
Pouring the molten ghee through your sieve is a delicate process. Do not be tempted to scrape the bottom of the pan. The brown milk solids that have settled there are the source of bitterness, and you want to leave them behind. If you are using cheesecloth, use four layers to ensure that every microscopic particle of protein is caught. If you are using a paper coffee filter, be patient; it will take time for the thick, hot fat to pass through. The result should be a beautiful, translucent amber liquid that sets into a smooth, creamy solid at room temperature.
Proper Storage for Longevity
One of the primary benefits of ghee is its shelf stability. Because you have removed the water (which encourages microbial growth) and the milk solids (which can oxidize), ghee can last for months—even up to a year—if stored properly. Keep it in an airtight container in a cool, dark place. You do not need to refrigerate your ghee. In fact, keeping it at room temperature ensures a consistent, spreadable texture. If you live in an extremely hot climate, refrigeration is acceptable, but be aware that it will turn into a harder, less malleable block that may require a few minutes of tempering before use.
"A well-stocked pantry is defined by the quality of its fats. Ghee is the backbone of traditional cooking, offering a shelf-stable richness that transcends cultural boundaries."
Culinary Applications: How to Use Your Ghee
Elevating High-Heat Searing
Now that you have this liquid gold, how should you use it? Start with the basics: searing. Because ghee can handle high temperatures without smoking, it is the perfect medium for steak, scallops, or even crispy-skin chicken. Get your cast-iron skillet ripping hot, add a tablespoon of ghee, and let it melt. When the ghee shimmers, lay your protein into the pan. You will notice less smoke and a much more even, golden-brown crust. The flavor contribution is subtle but undeniable—a rich, buttery note that permeates the surface of the meat without the bitter aftertaste of charred milk solids.
Enhancing Vegetables and Grains
Ghee is not just for meat. It is a transformational fat for vegetables. Try roasting cauliflower florets or carrots in a little melted ghee and a sprinkle of sea salt. The fat coats the vegetables, allowing the heat to conduct efficiently for a perfect, caramelized exterior. For grains, stir a teaspoon of ghee into your rice or quinoa while it's still warm. It adds a luxurious mouthfeel and a depth of flavor that makes even a simple bowl of basmati rice taste like a side dish served in a five-star hotel. It is also the secret ingredient for the fluffiest, most indulgent scrambled eggs you will ever consume.
Baking and Beyond
Don't be afraid to experiment with ghee in your baking, though keep in mind it is 100% fat. In recipes that call for melted butter, ghee can be a direct swap. In recipes that call for creaming butter with sugar, you will need to chill your ghee until it has a firm, creamy consistency similar to room-temperature butter before proceeding. The nutty undertones of ghee can add a sophisticated twist to classic shortbread, cookies, or even pie crusts. Just remember that because ghee lacks the water content of butter, it may slightly change the structure of your doughs, so start by swapping it into recipes where texture is less critical, like brownies or denser cakes.
Advanced Troubleshooting and Chef Tips
When Things Go Wrong
The most common mistake home cooks make is burning the ghee. If you notice dark brown flecks floating in your fat, you have likely pushed the temperature too high for too long. If the ghee smells acrid, it is unfortunately best to discard it and try again, as the flavor will be impossible to mask. Another issue is a grainy texture in the finished product. This usually happens if the ghee cools down too quickly after straining. To ensure a smooth, creamy texture, let the ghee cool slowly at room temperature rather than immediately placing it in the fridge.
Achieving Consistency
Consistency in your ghee depends on consistency in your heat. If you find that your stovetop has dramatic temperature fluctuations, consider using a heat diffuser under your saucepan. This metal plate acts as a buffer, ensuring the heat is evenly distributed across the bottom of the pan rather than focused in the center. If you are preparing a large batch, you may need to increase the simmering time, but monitor the color of the milk solids carefully; as the volume increases, the risk of scorching rises proportionally. Always trust your nose over your eyes. If it smells like popcorn and toast, it is ready.
"Cooking is the process of manipulating ingredients to unlock their best potential. With ghee, you aren't just using an ingredient; you are using a medium that carries heat, flavor, and tradition into every dish you touch."
Integrating Ghee into a Healthy Kitchen
Debunking the Fat Myth
For decades, the culinary world was plagued by the fear of fat, but modern nutrition science has shifted toward a more nuanced understanding of dietary lipids. Ghee, being a pure form of butterfat, consists of short-chain and medium-chain fatty acids, which are easily utilized by the body for energy. Because the lactose and casein have been removed through the clarifying process, many people who are sensitive to dairy find that they can tolerate ghee without the digestive discomfort associated with butter or cream. It is a traditional ingredient that fits surprisingly well into modern diets that prioritize nutrient density and minimal processing.
The Holistic Approach
When you make your own ghee, you are choosing to avoid the additives and preservatives often found in store-bought cooking fats. You are curating your own environment by selecting the best base butter and controlling the thermal process. This is the essence of "Blame The Chef"—taking responsibility for the quality of what is on the plate. When you serve a meal cooked in homemade ghee, you are serving a product of your own labor and attention to detail. It is a small change in the way you manage your pantry, but the compounding effect of these choices is what separates a good cook from a great one.
Sustainability and Waste
If you are worried about the waste produced during the clarifying process, consider saving those discarded milk solids. While they shouldn't be used for high-heat cooking, they are packed with concentrated flavor. You can stir them into mashed potatoes, fold them into a batch of savory biscuits, or use them as a topping for roasted vegetables. By utilizing the entire ingredient, you minimize waste and maximize the flavor output of your kitchen, which is a hallmark of professional culinary practice.
Final Thoughts
The journey to mastering ghee is one that rewards patience, precision, and an appreciation for the chemistry of cooking. It is a bridge between the humble pantry staple of butter and the sophisticated demands of high-heat culinary techniques. By removing the impurities that hold butter back, you unlock a world of potential where your pans can get hotter, your sears can get crispier, and your flavor profiles can reach a level of depth that is difficult to achieve with standard ingredients. It requires only a few minutes of your time, a small amount of focus, and a willingness to step outside the bounds of conventional cooking methods.
As you integrate ghee into your kitchen routines, take a moment to notice the difference in your results. Pay attention to the way the fat behaves in the pan, the aroma that fills your kitchen as the milk solids toast to perfection, and the cleaner, more vibrant flavors in your finished dishes. This is not just about making a fancy ingredient; it is about reclaiming the power to control your cooking environment. Whether you are searing a steak to perfection, roasting seasonal vegetables, or adding a final touch of richness to a sauce, ghee will quickly become the MVP of your culinary collection.
So, put down the vegetable oils and the standard butter sticks for a moment. Head to the store, pick up a high-quality block of unsalted butter, and take an hour this weekend to craft your first batch. Watch closely as the water evaporates, listen to the sizzle of the solids, and take pride in the amber liquid you produce. You are now better equipped to handle the demands of the stove, and your future meals will undoubtedly reflect that newfound expertise. Welcome to the world of clarified butter—where the smoke is managed, the flavor is amplified, and the chef is finally in complete control.
Remember, the kitchen is a laboratory as much as it is a place for nourishment. Do not be discouraged if your first batch is not perfect. Culinary intuition is built on the foundation of trial and error. Each time you clarify butter, you learn more about the thermal properties of fats and the timing required to achieve that elusive, nutty, golden perfection. Keep refining your technique, keep testing the limits of your equipment, and keep seeking out the highest-quality ingredients. Your palate will thank you, and your dinner guests will wonder why everything you cook seems to have that extra "something" that they just can't quite place. That, of course, will be your secret—the golden, nutty, high-heat wonder that is your homemade ghee.
As you move forward, challenge yourself to incorporate ghee into at least three different types of dishes: a high-heat sear, a low-and-slow braise, and a baked good. Notice the nuances in how it behaves differently than oil or butter in each scenario. By doing so, you will cement your understanding of the ingredient and expand your ability to manipulate fats in all your future cooking. The world of culinary arts is vast and complex, but it is built on simple, essential building blocks. Mastering ghee is one of those foundational skills that will pay dividends for years to come. You have the tools, the technique, and the knowledge—now it is time to turn up the heat.
Finally, remember the philosophy of the home cook: simplicity is often the ultimate sophistication. Ghee is an ancient, simple, and effective tool that has stood the test of time for a reason. It doesn't rely on synthetic additives or complex chemical processes; it relies on the natural transformation of a basic ingredient into something greater than the sum of its parts. Embrace this process. Let the nutty aroma fill your kitchen, and take pride in the fact that you are engaging in a culinary tradition that connects you to generations of cooks before you. Keep cooking, keep learning, and as always, if anything goes wrong, you can always just blame the chef—or better yet, learn from the mistake and make the next batch even better.
The transformation from butter to ghee is a metaphor for the evolution of a home cook. You start with something basic and perhaps a bit messy, and through patience and clear direction, you refine it into something pure, stable, and incredibly potent. That is exactly what you are doing with your own skills as you read, practice, and refine your approach to the culinary arts. Continue to seek out these transformations in your cooking. Every time you sharpen your knife skills, learn to temper a sauce, or master a new way of processing ingredients, you are refining your own personal "ghee"—the golden core of your expertise that makes you the master of your own kitchen.
As we conclude this deep dive, keep the core principles in mind: low heat for the melt, medium-low for the simmer, watch for the nutty smell, and strain with patience. These simple steps lead to the most effective upgrade you can give your stove. Do not fear the fat, for it is the vessel through which flavor is delivered. By clarifying your own butter, you are ensuring that every meal you prepare is cooked with the highest quality, most stable, and most aromatic medium possible. You are now ready to take on any sear, any sauté, and any dish that demands the best of your culinary focus. Happy cooking, and may your ghee always be golden and your pans always perfectly seasoned.
As you look back on this guide, remember that the most important ingredient is your presence in the kitchen. Ghee is a passive ingredient, but it is an active catalyst. It asks only that you pay attention to the signs—the sound, the smell, and the color. When you bring that level of attention to every aspect of your cooking, you elevate the experience for yourself and for everyone who sits at your table. Whether it's a simple breakfast of eggs or a complex holiday dinner, the foundation you lay with your ingredients will determine the success of the dish. Make the ghee, store it with care, and let it lead you to your next great meal.
In the end, it is about the joy of creating something wonderful from raw components. You started this post looking for a way to stop your butter from burning, and you ended with a fundamental skill that changes the way you approach the heat. That is the goal of "Blame The Chef"—to provide the knowledge that turns obstacles into opportunities for mastery. Carry this confidence with you into your next cooking session. The stove is waiting, the pan is clean, and you have a jar of golden ghee ready to perform. Go make something unforgettable.

Get the Next Recipe
Weekly recipes, techniques, and gear picks — straight to your inbox.
