The Home Cook’s Guide to Ghee: Mastering Milk-Solid Clarification and Temperature Control for Deep, Nutty Flavor and High-Heat Cooking
In the world of professional kitchens, there is a recurring joke that if a sauce breaks or a sear goes wrong, the blame inevitably falls on the chef. However, when we speak about ghee, the blame often shifts toward the stubborn nature of milk solids and the unforgiving reality of high-heat cooking. Many home cooks approach this golden nectar with hesitation, viewing it as an intimidating component reserved only for high-end Indian cuisine or specialized wellness diets. In reality, it is one of the most practical, shelf-stable, and flavor-enhancing tools you can possibly keep in your pantry. By stripping away the water and the proteins that burn at lower temperatures, you are left with a pure, concentrated essence of butter that can withstand the intense heat required for a perfect crust on a ribeye.
The transformation of common butter into this clarified, nutty-scented elixir is a masterclass in patience and observation. It is not merely about melting fat; it is about the gentle orchestration of evaporation and caramelization. When you understand the science behind clarification, you stop viewing the process as a chore and begin to see it as a culinary alchemy that elevates every ingredient it touches. From the initial foam to the final aromatic amber liquid, the journey of making ghee provides a rare glimpse into the fundamental mechanics of flavor development. It is the bridge between the delicate nature of cream and the robust resilience of a professional-grade cooking fat.
As we dive into this guide, I want you to shed the anxiety that often accompanies cooking fats. Whether you are aiming for that restaurant-quality sear on a scallop or simply looking to add a deep, toasted complexity to your roasted vegetables, ghee is your new best friend. We are going to explore the precise ratios, the visual cues that tell you exactly when to stop, and the storage techniques that keep your supply fresh for months. Put aside the idea that butter is "too fragile" to handle the heat. With the right technique, you are about to unlock a level of heat resistance that will change the way you approach your daily stovetop rituals forever.
The Science of Clarification: Why We Do It
To master the art of ghee, one must first understand the anatomy of butter. Standard unsalted butter is an emulsion of roughly 80 to 82 percent milk fat, 16 to 18 percent water, and 1 to 2 percent milk solids. These solids—primarily proteins like casein and sugars like lactose—are the troublemakers of the culinary world. While they provide the wonderful browning capabilities in cookies or pastries, they are also the first elements to burn when subjected to high heat. When you pan-sear a steak in regular butter, those solids turn bitter and acrid long before the center of the meat has reached its desired internal temperature.
Clarification is the controlled removal of these elements. By slowly heating the butter, you force the water to evaporate entirely. Once the water is gone, the milk solids have nowhere to hide. They begin to drop to the bottom of the pan and, if you allow the heat to continue gently, they begin to undergo the Maillard reaction. This is the key to the flavor of traditional ghee: that toasted, nutty, almost caramel-like depth is actually the result of the milk solids browning in the residual fat. Without this stage, you simply have "clarified butter," which is clean and high-heat stable but lacks the soul and aroma of authentic ghee.
When we talk about smoke points, we are essentially talking about the temperature at which a fat begins to break down and release harmful, acrid fumes. Butter typically has a smoke point of around 300°F to 350°F, which is far too low for serious searing. By isolating the pure fat, you push that smoke point well above 450°F. This makes ghee an incredibly versatile tool, allowing you to achieve a beautiful, deep-brown crust on proteins or vegetables without the risk of an unpleasantly charred or burnt flavor profile infiltrating your dish.
Understanding the Smoke Point
Butter:* 300°F–350°F (limited by milk solids)
Clarified Butter:* 400°F+ (removed solids, no caramelization)
Ghee:* 450°F+ (concentrated fat with toasted solids)
"The true magic of ghee lies in the patience of the cook. You cannot rush the evaporation process without sacrificing the delicate, nutty compounds that make the final product truly exceptional."
Selecting the Right Ingredients
The old culinary adage "garbage in, garbage out" applies nowhere more strongly than in the production of ghee. Because you are concentrating the fat by a significant factor, any impurities or low-quality additives in your starting butter will be magnified in the final result. Always prioritize high-quality, grass-fed unsalted butter whenever possible. Grass-fed butter possesses a higher concentration of conjugated linoleic acid and a more vibrant, deep yellow color, which typically translates to a more nuanced flavor profile. The butter should be unsalted because salt does not evaporate; it would concentrate during the boiling process, resulting in a finished product that is far too aggressive and salty for versatile culinary use.
Look for butter with a high fat content—often labeled as European-style or cultured butter. While standard American butter works perfectly fine, European-style butters generally have a slightly higher fat percentage and lower moisture content, which reduces your total cooking time. When choosing your blocks, make sure they are fresh. Butter readily absorbs the odors of its environment, so if it has been sitting in an open package in the back of your refrigerator next to a half-finished onion, that oniony flavor will inevitably find its way into your ghee.
Consider the quantity you plan to make. Since ghee is shelf-stable, it is highly recommended to make a larger batch rather than a small one. A standard process takes between 30 and 60 minutes regardless of whether you are using two pounds or five pounds of butter. By scaling up, you maximize your time and ensure you always have a reliable, high-heat fat on hand. Just ensure that your pot is large enough to account for the aggressive foaming that occurs during the initial boiling phase, which can easily double or triple the volume of the mixture.
The Criteria for Quality Butter
The Equipment and Setup
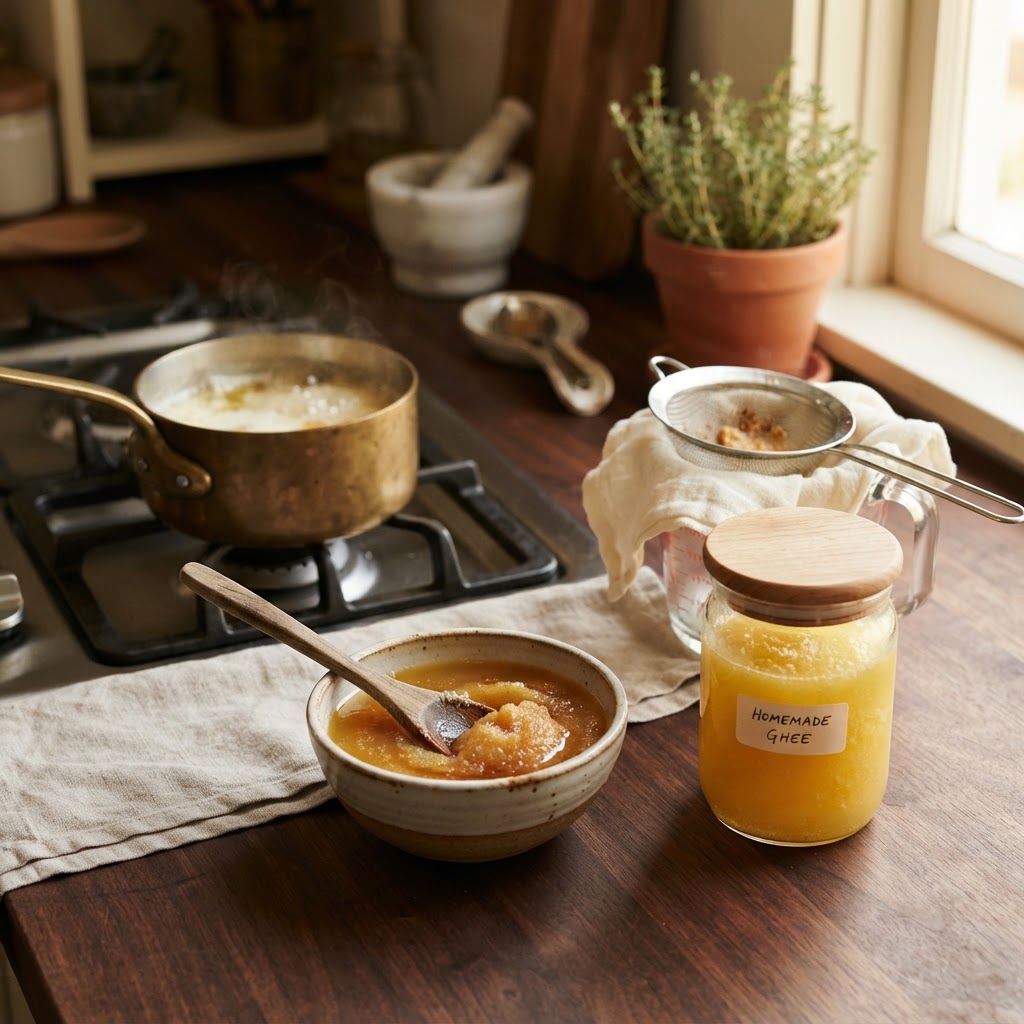
You do not need a professional kitchen to make world-class ghee, but you do need the right vessel. The ideal pot for this process is a heavy-bottomed stainless steel saucepan or a Dutch oven. The heavy bottom is essential for heat distribution; a thin, cheap pan will create hot spots that might cause your milk solids to scorch on the bottom before the evaporation process is complete. You want a consistent, gentle heat that permeates the fat evenly, rather than aggressive bursts of heat that could ruin the delicate lipids.
Beyond the pot, you will need a fine-mesh strainer and several layers of cheesecloth. Some traditionalists prefer using a coffee filter, but I find that it often filters out the very fine, toasted milk solids that provide ghee with its characteristic texture and flavor. A double layer of high-quality, lint-free cheesecloth is the industry standard. It catches the larger, burnt bits while allowing the refined, golden fat to pass through clearly. You will also need a clean, dry glass jar for storage. Never store your ghee in plastic, as the fats can leach chemicals over time and the heat of the freshly poured ghee can warp or melt the container.
Finally, do not underestimate the importance of a reliable heat source and a thermometer. While professional chefs often cook by sight and sound, an instant-read digital thermometer is an indispensable tool for the home cook. Keeping your temperature within a specific range ensures you aren't accidentally flash-boiling the butter or, conversely, barely heating it at all. The goal is a steady, quiet simmer, not a vigorous, rolling boil. If you find your burner is too aggressive on the lowest setting, use a heat-diffuser plate to mediate the contact between the stove and your pan.
Step-by-Step Clarification Technique
Begin by placing your butter in the saucepan over medium-low heat. As it melts, you will notice the first phase: the separation of the mixture. The fat will rise to the top, while the white, milky solids will sink to the bottom or create a white froth on the surface. Resist the urge to stir. At this stage, the water is beginning to boil off. You will hear a steady, crackling sound—this is the sound of moisture escaping. As long as you hear that crackling, there is still water present, and you must continue the process.
Once the crackling settles into a very low, rhythmic hum, the water is mostly gone. Now is the time for vigilance. The milk solids at the bottom of the pan are beginning to turn from creamy white to a soft, golden brown. This is the stage where the nutty aroma will begin to fill your kitchen. If you smell something acrid or see dark, charred particles floating, you have pushed the heat too far or left it on for too long. You are looking for a gentle, light hazelnut color. Once the solids reach this stage, remove the pot from the heat immediately.
The residual heat in the heavy pan will continue to cook the solids for a minute or two, so do not wait for them to turn dark brown while on the burner. Once you have pulled it off, let it sit for a few minutes to allow the remaining solids to settle completely. This makes the filtration process much cleaner. Carefully pour the liquid fat through your cheesecloth-lined strainer into your storage jar. Be careful not to let the sediment at the bottom of the pan slide into your final container. That sediment is essentially dehydrated butter solids, and while it is delicious in some savory recipes, it will make your ghee cloudy and prone to spoiling if left in the jar.
The Stages of the Clarification Process
"Watch the foam, listen to the crackle, and trust your nose. Your kitchen will tell you when the ghee is ready long before your eyes do."
Managing Temperature and Avoiding Common Pitfalls
The most frequent error home cooks make with ghee is impatience. In an attempt to speed up the process, they turn the heat up too high, causing the milk solids to jump straight from white to burnt black. This creates a bitter, dark ghee that lacks the refined, toasted notes of a properly prepared batch. If you are ever in doubt, err on the side of a lower temperature. It is far better to have a process take 60 minutes than to burn your ingredients in 15 minutes. Remember, low and slow is the golden rule of rendering fats.
Another common pitfall is the introduction of moisture during storage. Even a single drop of water in your ghee jar will act as a breeding ground for bacteria or cause the fat to turn rancid over time. Before you pour your ghee into the storage vessel, ensure the jar is not just clean, but 100% dry. I recommend running your glass jars through a dishwasher or rinsing them with boiling water and allowing them to air dry completely for several hours. This simple step is the difference between ghee that lasts for six months and ghee that spoils in a matter of weeks.
Temperature control also applies to the cooling process. Do not put a piping-hot jar of ghee directly into the refrigerator. Let it cool on the counter until it reaches room temperature. Cooling the fat too quickly can result in a grainy, uneven texture. While the texture does not affect the flavor, a smooth, buttery consistency is a sign of a well-controlled, high-quality product. Once it is at room temperature, it will naturally solidify into a semi-soft, creamy state that is perfect for scooping.
Preventing Ghee Spoilage
Dry Utensils Only:* Never use a wet spoon to scoop from the jar.
Sterile Containers:* Ensure jars are sterilized and thoroughly dried.
Avoid Cross-Contamination:* Use a clean spoon every time you dip into the jar.
Seal Tightly:* Keep the lid on to prevent oxidation and moisture ingress.
Culinary Applications: Beyond the Pan
Now that you have your beautiful, golden ghee, how do you use it? The most obvious application is pan-searing. Because of the high smoke point, you can heat your skillet until it is smoking hot before adding the ghee. The ghee will not burn or turn acrid, allowing you to create that deep, dark crust on a steak or a piece of salmon while keeping the interior perfectly medium-rare. It provides a clean, buttery flavor that butter alone cannot achieve without turning into a brown, burnt mess.
Beyond searing, ghee is exceptional for roasting vegetables. Toss your carrots, Brussels sprouts, or cauliflower in melted ghee and salt before roasting them at 425°F. The ghee acts as a carrier for the heat, ensuring the vegetables roast uniformly and develop a rich, nutty flavor that complements the natural sweetness of the produce. It also makes for an incredible finishing fat. A small spoonful stirred into a bowl of steaming basmati rice, or drizzled over a piece of crusty sourdough, adds a level of complexity that elevates a simple meal into something truly memorable.
For those who enjoy baking, ghee can also be a secret weapon. While you generally don't want to replace all the butter in a delicate cake, using ghee in pie crusts or shortbread cookies can provide a stable, consistent fat that yields an incredibly tender, flaky crumb. Because it is pure fat without the water content of butter, it creates less gluten development, which is ideal for pastries where you want maximum flake and minimal chew. Always experiment with small ratios first to see how it affects the specific bake of your favorite recipes.
Best Uses for Your Homemade Ghee
High-Heat Searing:* Perfect for steak, scallops, and pork chops.
Roasting:* Gives root vegetables a rich, toasted profile.
Finishing:* A dollop on warm grains or cooked legumes.
Pastry Work:* Provides stability and a unique, nutty flavor to biscuits.
Sauteing:* Ideal for garlic, onions, and aromatics that benefit from a toasted flavor.
Storage and Longevity
Ghee is a marvel of food preservation. Because it is free of water and proteins, it is naturally shelf-stable for long periods. In an airtight container kept in a cool, dark pantry, ghee can last for several months without any noticeable degradation in quality. If you want to keep it even longer, or if you live in an exceptionally warm climate, you can store it in the refrigerator. Note that refrigerated ghee will be quite firm, so you may need to let it sit on the counter for a few minutes before you can easily scoop it out with a spoon.
Always store your ghee away from direct heat sources—avoid keeping it in a cupboard directly above your stove or next to your oven. While the fat itself is heat-stable, prolonged exposure to ambient heat can slowly degrade its delicate aroma. Treat your ghee like you would a fine olive oil: respect the product by giving it a dedicated, cool, and dark home in your pantry. If you notice any "off" smells, a change in color to a dull grey, or any signs of mold (which is incredibly rare if you followed the moisture-free rules), discard it.
Remember that ghee is a luxury, even when you make it yourself. It is the result of your time and effort. Keep a small "daily use" jar on your counter for easy access, and keep the larger "stock" jars sealed tightly in the back of the pantry. By managing your supply, you ensure that you never run out during a high-stakes cooking session. It is the ultimate insurance policy against burnt butter and a gateway to a richer, deeper flavor profile in every meal you prepare.
Final Thoughts
Mastering the production of ghee is one of the most rewarding milestones for any home cook. It transforms a humble stick of butter into a professional-grade ingredient that empowers you to cook with confidence, regardless of the heat level required. By taking the time to understand the role of milk solids, the necessity of moisture removal, and the importance of temperature management, you have effectively elevated your entire culinary repertoire. You no longer have to fear the smoke point or accept the bitter taste of burnt butter as an inevitable cost of a good sear.
As you move forward, continue to refine your process. Play with the depth of the color of your ghee; you might find that you prefer a lighter, cleaner version for baking and a darker, more intensely toasted version for searing meats. Culinary arts are all about personal preference, and this guide provides the foundational framework upon which you can build your own signature style. Do not be afraid to experiment, and remember that even if your first batch is not perfect, it will still be leagues better than what you can find in the average grocery store.
The next time you find yourself at the stove, take a moment to appreciate the process. The golden color, the nutty scent, and the satisfying crackle of the pan are the signatures of a chef who cares about the details. The "blame" may usually fall on the chef, but with a supply of your own homemade ghee, you will find that you have very little left to blame for. You are now equipped to handle the heat, coax out the best flavors from your ingredients, and serve dishes that possess the depth, complexity, and professional finish that define true culinary mastery. Happy cooking, and may your ghee always be clear, golden, and perfectly toasted.



Get the Next Recipe
Weekly recipes, techniques, and gear picks — straight to your inbox.
