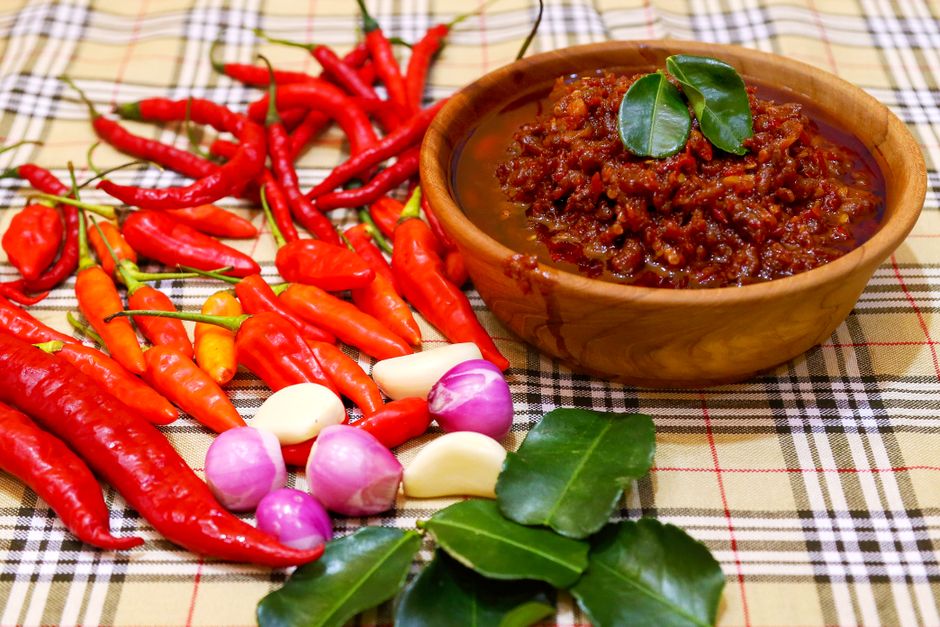
The Home Cook's Guide to Harissa: North Africa's Fiery Chili Paste from Scratch
There is a profound, transformative magic that occurs when you move beyond the convenient jars found on supermarket shelves and begin to craft your own foundational condiments from scratch. For the home cook looking to sharpen their palate and command their kitchen, harissa represents one of the most rewarding endeavors you can undertake. Originating from the Maghreb region of North Africa, this vibrant, fiery chili paste is far more than a simple condiment; it is a complex, aromatic marriage of roasted peppers, pungent garlic, and a proprietary blend of warm, earthy spices. When you prepare it yourself, you control the texture, the heat profile, and the depth of the flavor, ensuring that every spoonful added to your tagines, marinades, or morning eggs is a masterclass in seasoning.
Many home cooks are intimidated by the prospect of balancing the volatile oils of dried chilies with the delicate nuances of toasted seeds, fearing either a paste that is aggressively one-note or one that lacks the signature punch of the authentic version. However, the process of making harissa is surprisingly forgiving once you understand the core chemistry at play. By mastering the art of rehydration, emulsification, and spice blooming, you unlock a level of culinary sophistication that store-bought versions simply cannot replicate. We aren't just making a sauce here; we are building a foundation of flavor that serves as the backbone for countless Mediterranean and Middle Eastern dishes, elevating your home cooking to restaurant-caliber status with just a few humble ingredients.
In the following guide, we will peel back the layers of this North African treasure, exploring the specific varieties of peppers, the importance of high-quality oil, and the essential techniques for achieving the perfect, velvety consistency. We will discuss why certain spices must be toasted and why others should remain raw, and how you can tailor the heat levels to suit the sensitivities of your friends and family. Prepare your spice cabinet, clear your workstation, and ready your food processor, because we are about to demystify one of the most exciting ingredients in the global pantry. By the time we reach the end of this journey, you will not only understand the soul of harissa, but you will also possess the confidence to iterate, experiment, and claim this vibrant paste as a permanent fixture in your culinary repertoire.
The Foundation of Flavor: Selecting Your Peppers
The character of your harissa is dictated almost entirely by the variety of peppers you choose to utilize. While the traditional Tunisian approach leans heavily on the Baklouti pepper, home cooks in the West often have to rely on a mix of dried chilies to replicate that iconic depth. The goal is to find a balance between sweetness, smokiness, and that creeping, pleasant heat that defines the authentic experience. We recommend sourcing high-quality Guajillo for their fruity, mellow base, Ancho for that dark, chocolatey undertone, and Arbol chilies if you want to dial up the intensity of the heat.
When you are selecting your chilies, always look for those that are still somewhat pliable. If a dried chili snaps immediately like a dry twig, it is likely old and has lost much of its essential oil content, which is where the real flavor resides. You want peppers that feel slightly leathery, indicating that they were dried under controlled conditions and still retain a bit of their integrity. Avoid anything that looks bleached by the sun or has visible dust, as these will contribute a bitter, metallic finish to your final paste that is impossible to mask even with the best olive oil.
The secret to a world-class harissa lies in the selection of the peppers. Do not settle for generic chili flakes; seek out heirloom varieties that offer a symphony of fruity, smoky, and earthy notes.
Professional chefs often treat their pepper selection as a blend, much like a winemaker treats their grapes. You might start with 50% mild peppers to provide the body and texture, 30% fruity peppers for the aromatic profile, and 20% high-heat varieties to provide the backbone. By playing with these ratios, you can create a signature house blend that is entirely unique to your kitchen. Keep a journal of your ratios, noting the specific brands or farms where you sourced your chilies, as this will help you iterate on your success in future batches.
Mastering the Rehydration and Prep
Once your peppers are selected, the next phase is the critical process of rehydration. Many beginners make the mistake of using boiling water, which can leach out too much flavor and create a watery, thin paste. Instead, utilize a gentle approach by soaking your stemmed, seeded, and torn peppers in hot water that is just off the boil—around 180 degrees Fahrenheit—for approximately 20 to 30 minutes. This preserves the oils while ensuring the skins soften enough to achieve a silky, smooth final texture that won’t catch in the back of your throat.
After soaking, the importance of thorough drainage cannot be overstated. Excess moisture is the enemy of a long-lasting, stable condiment. Place your rehydrated peppers on a wire rack or a clean kitchen towel and allow them to drain for at least 15 minutes. If you are aiming for a thicker, more concentrated paste, you can even pat them dry with paper towels to ensure that the water doesn't dilute the olive oil that will serve as the preservative and carrier for your spices.
The Garlic Factor
The garlic in harissa should be roasted or lightly sautéed to mellow its aggressive, sharp pungency, allowing it to provide a sweet, savory depth. We recommend peeling your garlic cloves and gently poaching them in a small amount of extra virgin olive oil until they are soft and golden. This not only enhances the flavor but also creates a fragrant infusion that will be incorporated directly into the paste, tying all the other elements together in a cohesive, aromatic package.
Stemming and Seeding
When handling dried chilies, always wear gloves. The oils are potent and can cause significant irritation if they come into contact with your skin or eyes. Use a sharp pair of kitchen shears to remove the stems and then shake out the majority of the seeds. While some recipes call for keeping the seeds for heat, the seeds can introduce a bitter, woody texture that distracts from the vibrant, fleshy character of the pepper skin. Aim for a clean, pure pepper flesh to ensure the best results.
The Spice Blend: Blooming and Grinding
The backbone of harissa is its spice profile, typically featuring caraway seeds, coriander seeds, and cumin. These spices provide the warm, earthy foundation that rounds out the sharp edges of the chilies. The secret to success here is the blooming process. You must toast these seeds in a dry pan over medium heat until they are just fragrant and have darkened slightly in color. This process releases the volatile essential oils, transforming flat, dusty spices into something vibrant and alive.
Once your spices are toasted, grind them into a fine powder using a mortar and pestle or a high-quality spice grinder. A mortar and pestle is preferred by traditionalists because it crushes the seeds, releasing the oils, rather than merely chopping them into smaller pieces. You want a consistent, fine dust that will integrate evenly throughout your chili paste. If you are using a grinder, pulse it in short bursts to prevent the friction from heating the spices too much, which can cause them to lose their delicate, floral notes.
When you toast your spices, you are waking up the flavors. The aroma that fills your kitchen should be your guide; when you can smell the warmth and the earthiness, your spices are ready for the mortar.
Don't be afraid to experiment with your spice proportions. While the classic trinity of cumin, coriander, and caraway is the standard, consider adding a pinch of smoked paprika for an extra layer of complexity, or even a dash of dried mint for a refreshing, cooling contrast. The beauty of the homemade route is the ability to deviate from tradition in ways that delight your specific palate. Just remember to maintain the balance; your spices should act as a supporting character to the peppers, not as the primary feature that drowns out the other ingredients.
Emulsification: Building the Body
The final step in bringing your harissa together is the emulsification. This is where the peppers, spices, garlic, and high-quality olive oil transform from a chunky mixture into a luxurious, spreadable condiment. Using a food processor, start by pulsing your rehydrated, dried peppers and the roasted garlic until they reach a coarse consistency. Slowly drizzle in your olive oil while the machine is running, allowing the mixture to emulsify into a rich, glossy, and vibrant paste.
The ratio of oil to paste is critical. You want enough oil to preserve the harissa and keep it supple, but not so much that it separates or feels greasy. A good starting point is approximately one-third cup of high-quality, extra virgin olive oil for every two cups of packed, hydrated peppers. As you process, scrape down the sides of the bowl frequently to ensure that no large chunks of pepper skin remain. You are aiming for a smooth, homogenous texture that clings to the back of a spoon.
Choosing Your Olive Oil
Since harissa is a raw-style paste, the quality of your olive oil will directly impact the final flavor profile. Use an oil that is fresh, fruity, and perhaps slightly peppery itself. Avoid oils that have gone rancid or have been sitting in the pantry for months, as the subtle off-notes will be amplified in the finished product. A good cold-pressed, extra virgin oil will add a silky mouthfeel and a bright, green note that perfectly complements the heat of the chilies.
Adjusting for Texture
If you find that your harissa is too thick or dense, add a teaspoon of fresh lemon juice or even a splash of sherry vinegar. The acid will not only help to loosen the texture but will also brighten the overall flavor, cutting through the richness of the oil and the intensity of the peppers. If you prefer a chunkier, more rustic texture, simply process it for less time or use a manual vegetable mill to achieve a more handmade, textured look that feels artisanal and authentic.
Storage and Longevity: Keeping Your Paste Pristine
Because homemade harissa does not contain the industrial preservatives found in store-bought jars, you must take care to store it correctly to ensure it stays fresh. Transfer your completed paste into clean, sterilized glass jars. Press the surface of the paste down slightly to remove any air pockets and then pour a thin layer of olive oil over the top. This "oil seal" prevents oxidation and keeps the harissa fresh in the refrigerator for up to three weeks.
If you find that you have made a large batch that you cannot finish within that timeframe, harissa freezes remarkably well. Simply portion the paste into an ice cube tray, freeze until solid, and then transfer the cubes to a freezer-safe bag. This allows you to pull out a single portion of heat whenever you need it, whether you are simmering a tagine, deglazing a pan for a quick pan-sauce, or adding a kick to your weekend shakshuka. It is the ultimate convenience hack for the organized home cook.
Safety First: Sterilization
To maximize the shelf life of your harissa, always use sterilized jars. You can easily achieve this by boiling your glass jars in water for 10 minutes and allowing them to air dry completely. Never put hot paste into a cold jar, or vice versa, as this can cause the glass to shatter. By taking these small, professional steps, you ensure that your hard work doesn't go to waste and that every batch of harissa remains as potent and delicious as the day you blended it.
Signs of Freshness
Your harissa should remain a bright, vibrant color and smell fresh and aromatic. If it turns a dull, brownish color or starts to develop an off or fermented aroma, it is time to discard it. While the high salt and oil content act as natural preservatives, they aren't infallible. Keep your jars in the coldest part of your refrigerator, away from the door, to maintain a consistent temperature that will keep your paste at its peak for as long as possible.
Culinary Applications: Beyond the Jar
Now that you have mastered the art of creating your own harissa, the question remains: how to use it? The most obvious application is as a marinade for proteins. Because of the oils and spices, harissa acts as a perfect vehicle for flavor penetration, especially when rubbed onto chicken thighs or white fish before roasting. The high heat of the oven or grill caramelizes the sugars in the peppers and the oils in the spices, creating a charred, flavorful crust that is impossible to replicate with dry rubs.
Another fantastic way to utilize your harissa is to incorporate it into your base sauces. Stir a tablespoon into a pot of simmering tomato sauce to give it a North African twist, or whisk it into a yogurt-based dip for a creamy, spicy combination that pairs perfectly with grilled lamb. You can even use it in your morning routine; a swirl of harissa into a poaching liquid for eggs creates a bold, breakfast dish that wakes up the palate and sets the tone for the day.
The true power of harissa lies in its versatility. It is a chameleon of a condiment, capable of adding fire to a stew, a complex top-note to a dressing, or a smoky depth to a marinade.
For the adventurous cook, consider using harissa as a secret ingredient in your baking or vegetable sides. A small amount stirred into roasted root vegetables—like carrots or parsnips—adds an earthy, spicy dimension that plays off the natural sweetness of the vegetables. It can even be used as an unconventional addition to a rich, dark chocolate cake batter, where the subtle heat of the chilies enhances the intensity of the cocoa, creating a sophisticated profile that leaves guests guessing.
Scaling Your Production for Success
As you get more comfortable with your ratios and your preferred heat profiles, consider scaling your production. Making a "double batch" doesn't take much more time than a single batch, and it allows you to have a steady supply on hand to share with friends and family. Homemade condiments make for an incredible, thoughtful gift. Package them in small, beautiful glass jars with custom labels, and you have a culinary offering that shows real effort and care, far surpassing the value of any mass-produced alternative.
When scaling up, pay close attention to the capacity of your equipment. Overloading a food processor can lead to an uneven, chunky texture as the ingredients at the top of the bowl don't get the same treatment as those at the bottom. If you are preparing a large quantity, work in batches, and then combine everything in a large mixing bowl at the end. This ensures that the ingredients are fully incorporated and that the seasoning is consistent throughout the entire batch.
Professional Batch Management
Professional kitchens rely on standardization. If you find a recipe ratio that you love, record it on an index card and keep it with your spice cabinet. Note the dry weight of the chilies, the volume of oil, and the precise measurements of your spices. Consistency is the hallmark of a great cook. By refining your process and documenting your results, you move from "guessing" to "executing," and that transition is exactly where you become a true expert in the kitchen.
Sourcing Quality Ingredients
If you find that your local grocery store doesn't carry the specific dried chilies you need, look to international markets or online retailers that specialize in Mexican or North African ingredients. The quality of your dried peppers is the single most important factor in your harissa. Fresh, high-quality ingredients lead to a final product that is complex, nuanced, and entirely addictive. Don't be afraid to hunt for the best—your palate will thank you.
Conclusion
Mastering the art of homemade harissa is a rite of passage for any cook who cares about the integrity of their ingredients. It represents a shift in mindset: moving away from reliance on processed pantry staples and toward the active, deliberate construction of flavor. By understanding the chemistry of the rehydration process, the importance of toasting spices, and the delicate balance of the emulsification, you have transformed humble, dried ingredients into a vibrant, complex condiment that carries the warmth and history of North Africa.
As you move forward and integrate your signature harissa into your everyday cooking, remember that the goal is not to achieve perfection in one go, but to foster a continuous relationship with your food. Taste often, adjust your spice blends as the seasons change, and don't be afraid to experiment with new pepper varieties as you discover them. Each jar you produce is a reflection of your evolving skills and your personal tastes, serving as a testament to the fact that the best flavors are almost always the ones you create with your own hands.
Whether you are hosting a dinner party or simply preparing a quick weeknight meal, you now have a secret weapon in your culinary arsenal. The heat of the chilies, the depth of the roasted garlic, and the earthy, aromatic blend of toasted seeds are now yours to command. You aren't just following a recipe; you are crafting a legacy of flavor. So, take pride in your work, enjoy the process of bringing these ingredients together, and never underestimate the impact that a single, homemade jar of harissa can have on the quality of your cooking and the satisfaction of your guests. Go forth, keep experimenting, and continue to elevate your kitchen, one batch at a time. The world of flavor is vast, but with a foundational mastery of such an essential element, you are well-equipped to explore it fully, confidently, and with the passion that every great home cook possesses. Enjoy the fire, enjoy the craft, and enjoy the result.


Get the Next Recipe
Weekly recipes, techniques, and gear picks — straight to your inbox.
