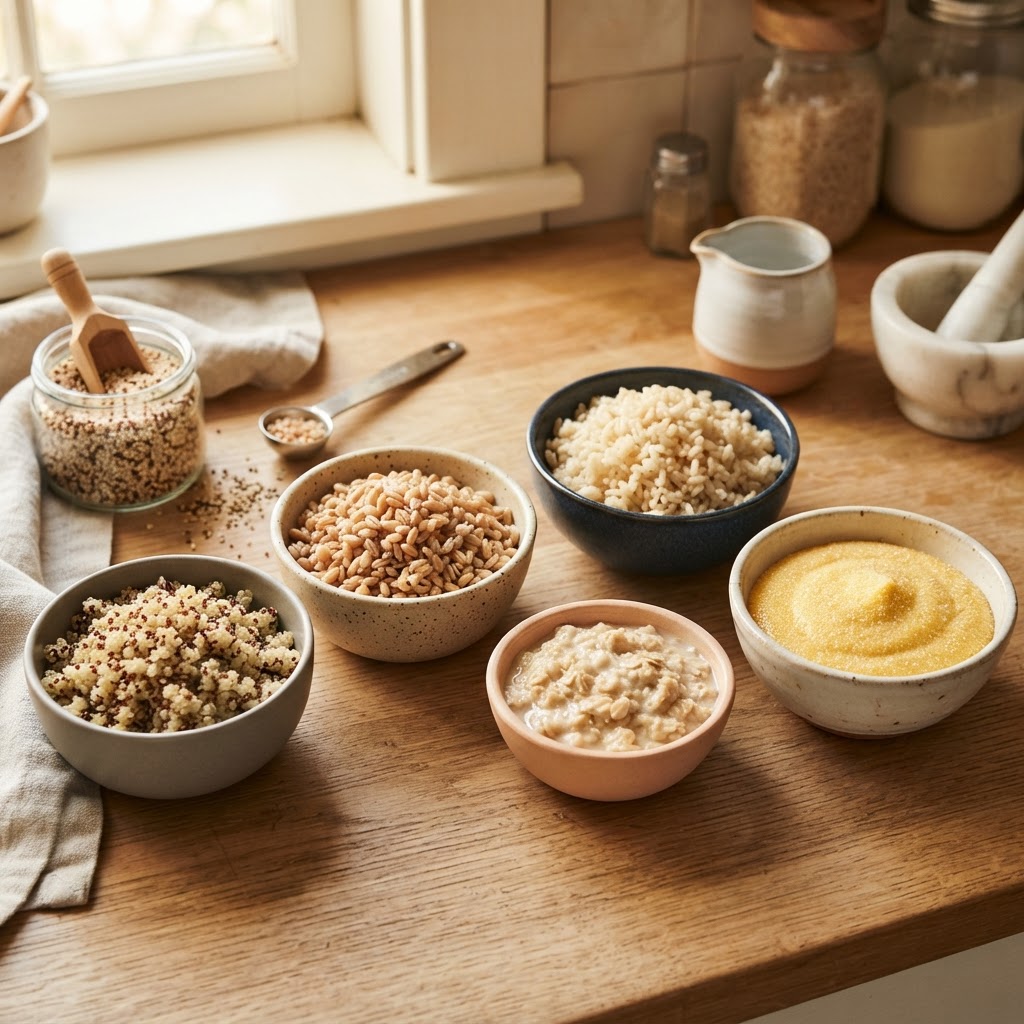
The Home Cook’s Guide to Hydration: Mastering Water Absorption Ratios for Perfectly Textural Grains and Pseudocereals
Cooking at home often feels like a balancing act between intuition and strict adherence to scientific principles. We have all experienced the heartbreak of a pot of rice turning into a starchy, gummy porridge or a batch of quinoa that emerges crunchy and unevenly cooked despite following the back-of-the-package instructions. The truth is that grains and pseudocereals are living, breathing ingredients that react differently to altitude, pot depth, heat intensity, and even the age of the grain itself. By mastering the fundamentals of water absorption, you transform yourself from a cook who follows a recipe to a chef who understands the molecular potential of every bag in the pantry.
Understanding the relationship between water and grain is the single most important skill for anyone aiming to improve their weeknight meals. It is not just about the ratio of liquid to starch; it is about the gelatinization of starches and the expansion of the grain's structure during the simmer. When we get the ratio right, we achieve a fluffy, distinct texture where each grain remains individual, held together by its own integrity rather than being trapped in a thick, gelatinous puddle. This guide is designed to strip away the guesswork and provide you with a concrete framework for achieving professional results every single time you step up to the stove.
As we dive into the science of hydration, keep in mind that the best tools you have are your eyes and your nose. Recipes provide a starting point, but the stovetop environment varies wildly between kitchens, and your own equipment—from your burner’s BTU output to the thickness of your saucepan—plays a vital role in the final output. We will explore the nuances of absorption, the importance of resting periods, and the specific quirks of grains ranging from long-grain white rice to the earthy, protein-packed profile of buckwheat. Prepare to rethink how you approach the humble grain, and get ready to elevate your cooking to a level where the blame for a bad meal will never fall on the chef again.
The Chemistry of Starch Gelatinization
At the heart of every perfectly cooked grain is a process known as starch gelatinization. When heat is applied to water, it permeates the endosperm of the grain, causing the starch granules—specifically amylose and amylopectin—to swell. As they absorb the moisture, the structure of the grain expands, transitioning from a raw, hard state to a soft, edible, and nutrient-accessible texture. This process requires a precise temperature range, usually between 140°F and 180°F, to ensure the starch molecules unravel and absorb the liquid evenly.
Why Your Ratio Often Fails
The common "two-to-one" water-to-rice rule is a convenient oversimplification that fails to account for evaporation rates. If you are cooking in a wide, shallow pan, you lose significantly more steam than you would in a tall, narrow pot with a tight-fitting lid. This means that a standard ratio often results in undercooked grains if the water evaporates before the center of the grain has fully hydrated. To solve this, always consider the surface area of your cookware and the efficiency of your lid seal as primary variables in your hydration equation.
Managing Evaporation
To gain control, you must treat your lid as a critical piece of hardware. A loose-fitting lid allows steam to escape, which necessitates a slight increase in your initial water volume or a reduction in heat intensity. Conversely, a pressurized seal, like that found in high-end heavy-duty pots, will keep almost all the moisture inside the vessel. When you achieve that perfect seal, you will find that you can often use less water than the "standard" recommendation, leading to a much more vibrant and flavorful grain because the starch hasn't been washed away by excess liquid.
"Cooking is essentially the art of managing energy transfer and hydration. Once you stop viewing water as a set measurement and start viewing it as a solvent that dictates the final texture of your dish, you move from following directions to mastering the craft."
Mastering White Rice: The Foundation of Texture
White rice, particularly long-grain varieties like Basmati or Jasmine, is the canvas upon which most home cooks paint their meals. Because these grains have been polished to remove the bran and germ, they are essentially pure starch. This makes them highly sensitive to moisture ratios. For long-grain white rice, a 1.5:1 ratio of water to grain is generally the gold standard, assuming your pot is properly covered and the heat is kept at the lowest possible simmer to prevent scorching.
The Rinsing Ritual
Before a single drop of heat is applied, rinsing your rice is non-negotiable. Excess surface starch is the enemy of a fluffy final product; it is exactly what causes grains to clump together into a heavy mass. Use a fine-mesh strainer and cold running water, agitating the grains with your fingers until the water runs clear. This step not only improves the final mouthfeel but also reduces the likelihood of the rice bubbling over, as there is less starch-heavy foam forming on the surface of the cooking liquid.
The Resting Phase
After your timer goes off and the water appears to be absorbed, do not lift the lid immediately. The resting period is where the moisture currently trapped in the outer layers of the rice migrates into the center of the grain, ensuring a uniform texture from edge to core. Let the pot sit, undisturbed and covered, for at least 10 to 15 minutes. This creates a gentle steam environment that sets the grain, making it easier to fluff with a fork later without breaking the individual kernels.
Pseudocereals: Quinoa, Amaranth, and Buckwheat
Pseudocereals, such as quinoa and buckwheat, are technically seeds, not grains, which gives them a vastly different structural integrity when cooked. Quinoa, for instance, contains a natural coating called saponin which can taste bitter if not removed. Much like white rice, thorough rinsing is essential. When cooking quinoa, use a 1.75:1 or 2:1 ratio of water, as these seeds possess a higher fiber content and require more hydration to fully soften their outer shells.
Understanding Saponin and Bitterness
Saponin is nature’s way of protecting the seed from birds and insects, but for the home cook, it is a flavor hazard. If you have ever felt a soapy aftertaste when eating quinoa, you have experienced the effects of improperly rinsed saponin. When preparing your pseudocereals, you might even consider a light dry-toast in a pan over medium heat before adding your liquid. This enhances the nutty profile of the seed and helps to bloom the volatile aromatics, providing a more robust flavor profile in the final dish.
The Texture of Buckwheat
Buckwheat, specifically when prepared as groats (kasha), requires a different approach. Because of its sturdy structure, it can handle a slightly more vigorous simmer than delicate white rice. Many chefs prefer to cook buckwheat in a slightly lower liquid ratio, around 1.5:1, often finishing it with a small knob of butter to create a silky, rich coating that contrasts with its naturally earthy, slightly tannic flavor. Never rush the cooking process with buckwheat; it needs time for the water to penetrate the dense cellular structure.
The Role of Salt and Seasoning
Many cooks make the mistake of adding salt only after the grain is cooked. This is a culinary missed opportunity. Salt should be added to the cooking water from the very beginning, as it helps to season the grain from the inside out during the expansion process. When the starch granules swell, they take in the salt along with the water, resulting in a grain that has a balanced, savory character rather than one that simply tastes like a bland vehicle for sauce.
Salting Guidelines
As a rule of thumb, use about one teaspoon of kosher salt per cup of dry grain. If you are using broth instead of water, be mindful of your salt levels, as most commercial broths are already heavily seasoned. Tasting your cooking liquid before adding the grain is a quick way to ensure you are not setting yourself up for an overly salty outcome. The liquid should taste appropriately seasoned—resembling a well-made soup—to impart the right level of flavor into the grain.
Beyond Water: Infusions and Aromatics
Water is the baseline, but the liquid you choose is a vital ingredient. Stock, dashi, or even tea can be used to hydrate your grains, significantly deepening the complexity of your final dish. Consider adding aromatics like bay leaves, garlic cloves, or a strip of lemon zest to the pot during the simmer. These infusion techniques work by releasing fat-soluble and water-soluble flavors into the grain as it rehydrates, ensuring that your side dish is just as flavorful as your main course.
"A grain is not just a base ingredient; it is a sponge waiting for flavor. When you use a well-seasoned stock instead of plain water, you are not just hydrating; you are infusing depth into every single bite."
Troubleshooting Common Culinary Disasters
Even with the best instructions, things can go wrong. If you open your lid and find the grains are still crunchy but the water is gone, do not despair. You can add a small splash of hot water (about 1/4 cup), replace the lid, and turn the heat to the absolute lowest setting. This provides enough steam to finish the job without burning the bottom of the pot. Avoid stirring at this stage, as mechanical agitation can break the grains and lead to a mushy texture.
The "Mushy" Problem
If your grains have turned into mush, it is usually a sign of one of three things: too much water, too high a heat, or over-stirring. Grains are delicate; once they are in the pot, they should be left completely alone. Stirring knocks the starch off the grains and into the water, creating a starchy slurry that coats the grains and turns them into a paste. If your grains are clumped together, you have likely over-agitated them or added too much moisture.
Dealing with Scorched Bottoms
We have all dealt with the dreaded burnt crust. If you smell something burning, remove the pot from the heat immediately. Do not scrape the bottom of the pot! Instead, lift the perfectly cooked grains from the top and transfer them to a clean bowl. By leaving the scorched layer stuck to the bottom of the pan, you prevent the burnt, acrid flavor from permeating the rest of your batch. It is a simple save that preserves the integrity of your hard work.
Equipment: Why Heavy Bottoms Matter
The thickness of your cookware is not just an aesthetic choice; it is a fundamental requirement for even cooking. A heavy-bottomed pot or Dutch oven provides thermal mass, which helps to distribute heat evenly across the base. This prevents hot spots that lead to uneven hydration, where some grains are soft and others remain hard. Cheap, thin-gauge pots are prone to rapid temperature spikes, which can boil off your water faster than the grain can absorb it.
The Importance of a Tight-Fitting Lid
Your lid is your most important tool in managing the hydration ratio. A heavy lid that sits snugly on the rim of the pot is essential. If your current lid is loose or has a steam vent, you are losing moisture, which is the primary cause of inconsistent results. You can easily fix a loose lid by covering the pot with a piece of parchment paper or a folded kitchen towel before placing the lid on top. This creates a makeshift gasket that traps the steam effectively.
Choosing the Right Size
Always use a pot that is appropriately sized for the volume of grain you are cooking. If you are cooking a single cup of rice in a giant stockpot, the large surface area will lead to excessive evaporation. Use the smallest pot that comfortably holds your grain and liquid while leaving about two inches of headspace. This creates an ideal environment for consistent, predictable steam circulation, which is the secret to a professional-grade final product.
Advancing Your Technique: The Absorption Method
The absorption method is not just a recipe; it is a philosophy. By ensuring that every grain is fully hydrated by the exact amount of liquid required, we eliminate the need for draining, which often strips away vitamins and delicate flavors. This method requires a level of patience that many home cooks are not used to, but the reward is a texture that is light, fluffy, and perfectly seasoned. It is the hallmark of a confident cook who knows exactly how their ingredients will behave.
The Sequence of Success
Embracing the Variable
As you grow more comfortable with these techniques, start to play with the variables. If you are cooking at high altitude, you will find that you need more water and longer cooking times because water boils at a lower temperature. If you are using very old grains, they might require a bit more hydration as they have dried out further over time. The "chef's instinct" is simply the ability to recognize these variables and adjust on the fly, ensuring that every grain of rice, quinoa, or buckwheat reaches its potential.
Final Thoughts
Mastering the art of grain hydration is a journey that shifts your perspective from seeing cooking as a chore to seeing it as a series of controlled experiments. When you understand the science of starches and the mechanics of your kitchen, you are no longer at the mercy of poorly written recipes or unreliable stovetops. You have become the architect of your own meals, capable of adjusting, improvising, and ultimately creating dishes that have a consistent, professional quality.
The next time you prepare a grain bowl or a side of rice, remember that you are in control of the hydration process. Trust your senses, maintain your equipment, and never underestimate the power of a long, quiet rest after the heat is turned off. These small, deliberate actions define the difference between a meal that is merely "fine" and a dish that is truly exceptional. Keep experimenting with different ratios, different liquids, and different grains; each one has a story to tell if you give it the right environment to flourish.
Most importantly, do not be discouraged by failure. Even the most seasoned professional chefs have had their share of scorched pots and gummy grains. The beauty of cooking at home is that you can learn from every mishap. Use these guidelines as your foundation, but do not be afraid to adapt them to the unique realities of your kitchen. By taking ownership of your process, you ensure that the blame—and the credit—rests solely where it belongs: with the chef. Happy cooking, and may your grains always be light, fluffy, and perfectly hydrated.

Get the Next Recipe
Weekly recipes, techniques, and gear picks — straight to your inbox.
