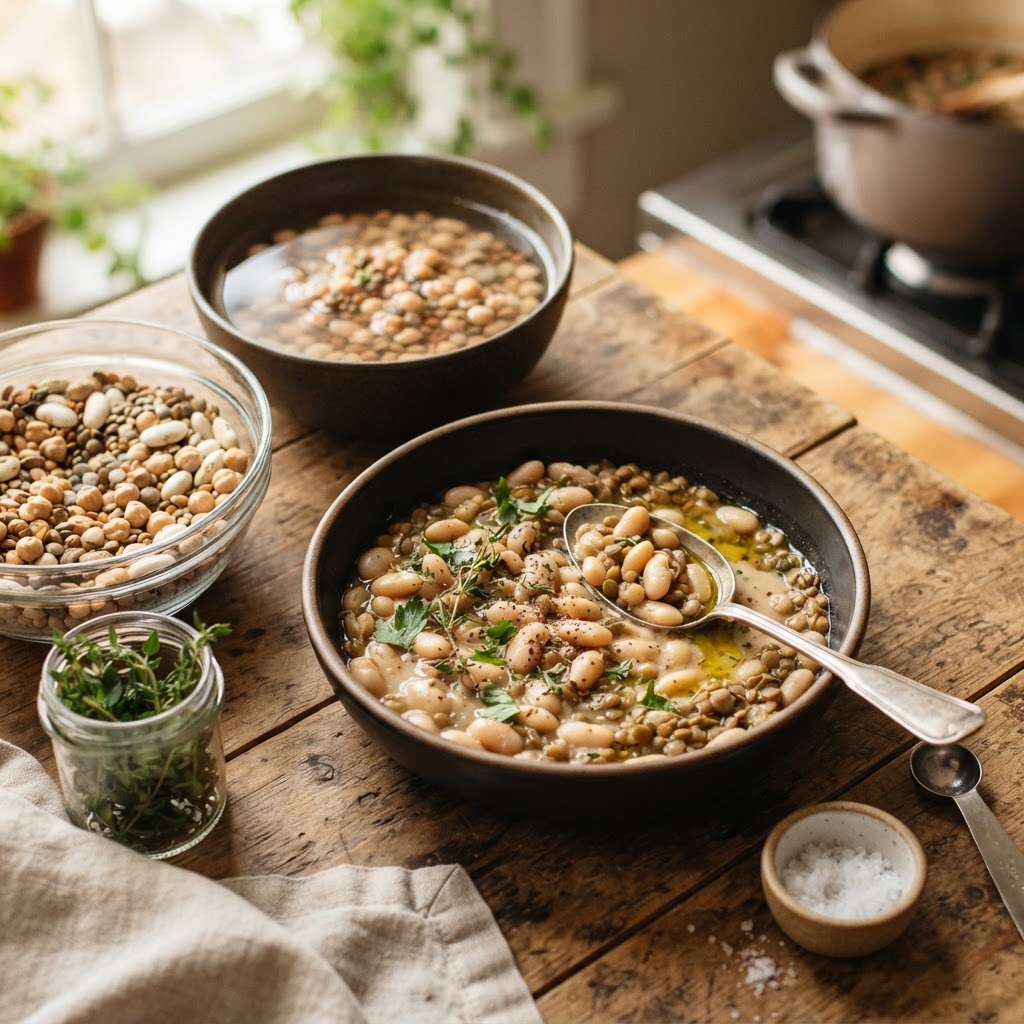
The Home Cook’s Guide to Hydration: Mastering Water-to-Legume Ratios for Perfectly Creamy Beans and Lentils
There is perhaps no greater humble hero in the professional kitchen than the dried legume. While novice cooks often reach for the convenience of canned goods, those of us who have spent years navigating the heat of a busy line know that the true magic happens in the soak and the simmer. When you take the time to hydrate a handful of dried chickpeas or lentils, you are participating in a culinary alchemy that transforms humble, shelf-stable seeds into vibrant, creamy, and deeply flavorful foundations for world-class dishes. Mastering this process is not merely about preventing a burnt pot or a mushy bean; it is about respecting the integrity of the ingredient and unlocking the textures that store-bought tins can simply never replicate.
Understanding the relationship between water, heat, and time is the secret language of the chef. Many home cooks approach legumes with a sense of trepidation, fearing that they will either end up with a bowl of rocks or a pot of broken, mealy starch. However, the science behind hydration is remarkably consistent, provided you adhere to a few core principles regarding ratios and tempering. Whether you are aiming for the structural snap of a French Lentil du Puy or the velvety, melt-in-your-mouth interior of a heirloom bean, the water you provide—and how you manage its movement—dictates the final performance of the dish. It is time to demystify the stovetop and reclaim these pantry staples as the star attractions they were always meant to be.
"Blame the Chef" is here to guide you through the process of shedding your reliance on pre-processed legumes. We believe that every home kitchen has the potential to produce professional-grade results, provided you are willing to learn the nuance of the pulse. In the following guide, we will break down the essential hydration ratios, the critical importance of mineral content, and the precise thermal management required to achieve that elusive, perfectly creamy finish. By the end of this journey, you will find that the time spent soaking and simmering is not a chore, but rather a meditative ritual that elevates your cooking from merely functional to truly transcendent.
The Chemistry of the Soak: Why Hydration is Paramount
The journey toward a perfect legume begins long before the pot touches the flame. When we talk about hydration, we are talking about the structural reintroduction of moisture to a dehydrated cellular matrix. Dried legumes are essentially in a state of suspended animation, and the way you wake them up determines the uniformity of the cooking process. If you skip the soak, you are forcing the outside of the legume to cook and soften while the interior remains dense and chalky. This results in a dish that feels uneven on the palate, which is the hallmark of a rushed or poorly executed home meal.
The Science of Pectin and Cell Walls
At the microscopic level, legumes are held together by a scaffold of pectin and various proteins. During the hydration phase, water molecules penetrate the outer seed coat, known as the testa, and begin to hydrate the starches within. A proper, slow soak allows for a gradual expansion of these tissues, which prevents the outer skin from bursting before the center has had a chance to reach a state of tenderness. If you use boiling water or salt too early in the hydration stage, you risk hardening that pectin scaffold, leading to what chefs call "tough skins," where the outer layer resists softening even after hours of boiling.
Temperature and Time Protocols
For most varieties, a long soak—ranging from eight to twelve hours—is the gold standard. I always recommend using room-temperature water rather than hot water for the initial soak. While hot water may speed up the process, it often leads to uneven hydration. We are looking for a consistent, slow uptake of moisture. If you are in a pinch, a quick-soak method is acceptable—bring the legumes to a boil, turn off the heat, and let them sit for one hour—but recognize that this is a compromise for texture. The ideal soak happens in a cool, dark place, ensuring the legume remains in a state of stasis until the cooking fire is lit.
"The soak is the silent period of cooking where the legume prepares itself for the heat. Treat it with the same patience you would give a long-braised brisket."
The Golden Ratios: Water-to-Legume Equilibrium
One of the most frequent questions I receive is about the exact amount of water needed for the pot. The answer is not a single number, but rather a spectrum based on the type of legume and the desired outcome. Generally, you want to maintain a 3:1 water-to-legume ratio for the actual cooking process, but this can fluctuate depending on whether you want a finished product that is dry, or one that is bathed in a flavorful, starchy cooking liquid. Remember, the legume will continue to absorb moisture even after the heat is turned off, so leave a margin for error.
Measuring for Success
Always measure your dried legumes before they hit the water. A cup of dried chickpeas will swell to nearly three times its volume, meaning you need a pot that allows for ample headspace. Using a pot that is too small can result in foam buildup that spills over, a common mess in the kitchen. If you are aiming for a creamy bean dip or a hummus base, you might consider increasing the water ratio to 4:1 to ensure that the beans remain fully submerged throughout the entire duration of the simmer, which usually lasts between 60 and 90 minutes for larger varieties.
Adjusting for Variety
Not all pulses behave the same way. Lentils are the outliers of the family; because of their small size and lack of a thick seed coat, they generally do not require a pre-soak. You can go straight from the pantry to the pot with lentils, provided you maintain a 2.5:1 ratio. Chickpeas (Garbanzo beans), however, are dense and require the full soaking protocol. Black beans and cannellini beans sit somewhere in the middle. Always keep a kettle of boiling water on standby so you can top off the liquid level in your pot if you see the water dipping below the surface of the beans before they have reached peak tenderness.
To Salt or Not to Salt: The Great Culinary Debate
For years, home cooks were told that salting beans at the beginning of the cooking process would result in leather-tough skins. As a chef, I am here to tell you that this is one of the most pervasive myths in the culinary world. Modern food science and empirical evidence have shown that salt actually helps to break down the skin of the legume, leading to a much creamier texture. By adding salt to the soaking water or the initial cooking liquid, you are effectively "brining" the beans from the inside out, ensuring seasoning permeates every bite.
The Role of Sodium in Starch Softening
Salt displaces the calcium and magnesium ions in the seed coat, which effectively softens the outer texture before the starches inside have a chance to gelatinize. When you wait until the end to salt, you are only flavoring the outer surface of the bean, leaving the interior bland. Add a generous tablespoon of kosher salt to your soaking water or the pot once it comes to a simmer. You will notice that the beans become more uniform in their texture, losing that distinct "skin vs. interior" separation that is so common in amateur pots.
Aromatics and Infusions
Beyond salt, this is the time to build flavor profiles. When you simmer your legumes, you are not just cooking them; you are creating a seasoned broth. My professional preference is to add:
* A whole head of garlic, split horizontally.
* Fresh bay leaves, never dried, for a subtle herbal note.
* A piece of kombu (dried kelp) to assist in digestibility and add umami.
* Whole peppercorns or aromatics like onion skins and carrot ends.
Thermal Management: The Art of the Gentle Simmer
The difference between a pot of delicious beans and a pot of mush is entirely dependent on your management of the flame. Legumes are delicate. If you subject them to a vigorous, rolling boil, the physical agitation will cause them to bash against each other, breaking their skins and turning your beautiful pot of legumes into a cloud of starch and broken hulls. This is the "refried" look, which is fine for dips but disastrous for salads or stews.
The Gentle Bubble
You are looking for a "lazy simmer," characterized by a few small bubbles breaking the surface every few seconds. This is the sweet spot where the heat is consistent enough to soften the starch, but gentle enough to keep the legume intact. If you have a ceramic-top stove, consider using a flame tamer or moving the pot to the smallest burner on its lowest setting. I often encourage chefs to cook their legumes in the oven at 300°F (150°C), as the ambient, surrounding heat is much more consistent than the directional heat of a burner.
The Importance of Consistency
If your beans reach a boil, you have effectively "shocked" them. This causes the starches to expand too rapidly, which ruptures the cell walls and leads to a gritty texture. Once you have reached a boil, immediately drop the temperature to the lowest possible setting. If you find the pot is cooling down too much, bring it back up to a gentle murmur, then lower it again. This level of attention is what separates a home cook from a master of the pulse.
"Heat is the brush you use to paint the flavor, but the gentle simmer is the delicate stroke. Never rush the process, or you will lose the elegance of the bean."
Troubleshooting Common Legume Failures
Even with the best techniques, things can go wrong. If you find your beans are still hard after two hours of simmering, do not panic. The most common culprit is old beans. Beans that have sat in the pantry for over a year lose their ability to absorb water, no matter how long you soak them. This is why it is essential to source your legumes from high-turnover providers—farmers' markets and specialty grocers are infinitely better than your local supermarket shelf.
The "Hard Water" Factor
If you live in an area with hard water, which is high in calcium and magnesium, you may find that your legumes struggle to soften. These minerals literally fight the hydration process, locking the cell walls tight. The fix is simple: add a half-teaspoon of baking soda to your soaking liquid. The alkaline nature of the baking soda will neutralize the minerals in the water, allowing the beans to soften beautifully. Be careful, however—too much baking soda will turn your beans a dark color and give them a slightly soapy flavor, so stick to the smallest amount necessary.
Recovering a Mushy Batch
If you have accidentally overcooked your beans and they are falling apart, do not throw them away. This is the perfect opportunity to create a velvety puree. Strain off most of the liquid, reserve it for a soup base, and toss the beans into a blender with a splash of high-quality olive oil, lemon juice, and sea salt. You have just transformed a failure into a high-end appetizer. Remember, in a professional kitchen, we rarely throw food away; we simply "re-purpose" it into a new dish.
Storage and Preservation: Keeping the Creaminess
Once you have mastered the art of the perfect legume, you must learn to store them properly. Legumes should always be cooled in their cooking liquid. This liquid is packed with flavor and acts as a protective blanket that prevents the surface of the beans from drying out. If you drain them immediately, the air will cause the skins to toughen as they sit in the refrigerator.
The Refrigerator Protocol
Keep the beans in their cooking liquid in an airtight container. They will stay fresh for up to five days. If you find that you have cooked a massive batch, freeze them in the liquid as well. When you are ready to use them, simply bring the entire block to a simmer on the stove. This slow reheating process is the best way to maintain the structural integrity of the beans, ensuring they remain as creamy on the third day as they were on the first.
The Liquid Gold
Never pour your cooking liquid down the drain. This is the aquafaba—the liquid gold of the vegetarian world. It is highly concentrated with protein and starch, making it an excellent thickener for soups, stews, or even a base for plant-based emulsions. In my kitchen, we use this liquid to mount sauces, giving them a glossy, professional finish without the need for excessive butter or cream. It is the ultimate testament to the "zero-waste" philosophy that should define every home cook.
Elevating Your Legumes: Pro-Chef Finishing Techniques
Once you have cooked your legumes to perfection, the final step is the finish. A bowl of chickpeas is delicious, but a bowl of chickpeas finished with a high-quality finishing oil, a squeeze of fresh citrus, and a handful of toasted aromatics is a meal. Finishing techniques are where you bring the dish to life. Think about acidity; a splash of sherry vinegar or lemon juice cuts through the earthiness of the beans, brightening the overall palate of the dish.
Texture and Crunch
Contrast is essential. Since your beans are perfectly creamy, introduce something crunchy to the plate. This could be toasted pine nuts, crispy fried sage leaves, or even simple toasted breadcrumbs seasoned with lemon zest. By layering textures, you move the dish away from the monotony of a single, soft consistency and toward a complex, restaurant-quality experience.
The Art of the Emulsion
Try this technique: remove a cup of your cooked beans and blend them with a little of the cooking liquid and some fresh herbs until smooth. Fold this back into the pot of whole beans. This creates a "creamy base" that coats the whole legumes, making them feel richer and more luxurious without adding a drop of heavy dairy. It is a subtle, high-impact technique that will have your dinner guests asking for your secrets.
Final Thoughts
Mastering the legume is an act of patience, but it is also an act of liberation. Once you understand the ratios and the subtle dance of heat, you are no longer tethered to the convenience of a can. You have the ability to take a dried, forgotten seed and elevate it into a centerpiece worthy of any dinner table. This is the heart of "Blame the Chef"—it is about empowering you with the knowledge that great food doesn't require complex gadgets or expensive ingredients; it requires respect for the process.
Take these principles into your kitchen this week. Start with a simple variety—perhaps a classic Cannellini or a earthy Green Lentil—and pay attention to how the water interacts with the seed. Note the time, adjust your heat, and observe the transformation. You will find that as your technical skills grow, so too will your confidence. Cooking is not a static set of rules; it is a conversation with your ingredients. If you treat your beans with care, they will reward you with a texture and depth of flavor that is unequivocally professional.
Don't be discouraged if your first batch isn't perfect. Even in the most decorated kitchens, we have days where the simmer gets too hot or the beans are older than we realized. The beauty of cooking is that the next meal is always just a few hours away. Keep a notebook, track your water-to-legume ratios, and most importantly, taste as you go. The path to perfection is paved with simple, well-executed steps. Now, grab a bag of dried pulses and get to work—the perfect bowl is waiting for you.
As you continue your culinary education, remember that the goal is not perfection in the sense of an idealized, flawless result, but rather the perfection of the experience. Cooking for yourself and others is about the connection, the nourishment, and the joy of creating something out of practically nothing. The humble legume is the perfect vessel for this philosophy. It teaches us about the environment, about the importance of agriculture, and about the deep satisfaction that comes from mastering a craft. Stay curious, keep your pans clean, and never be afraid to experiment with new varieties and techniques. The kitchen is yours to command.


Get the Next Recipe
Weekly recipes, techniques, and gear picks — straight to your inbox.
