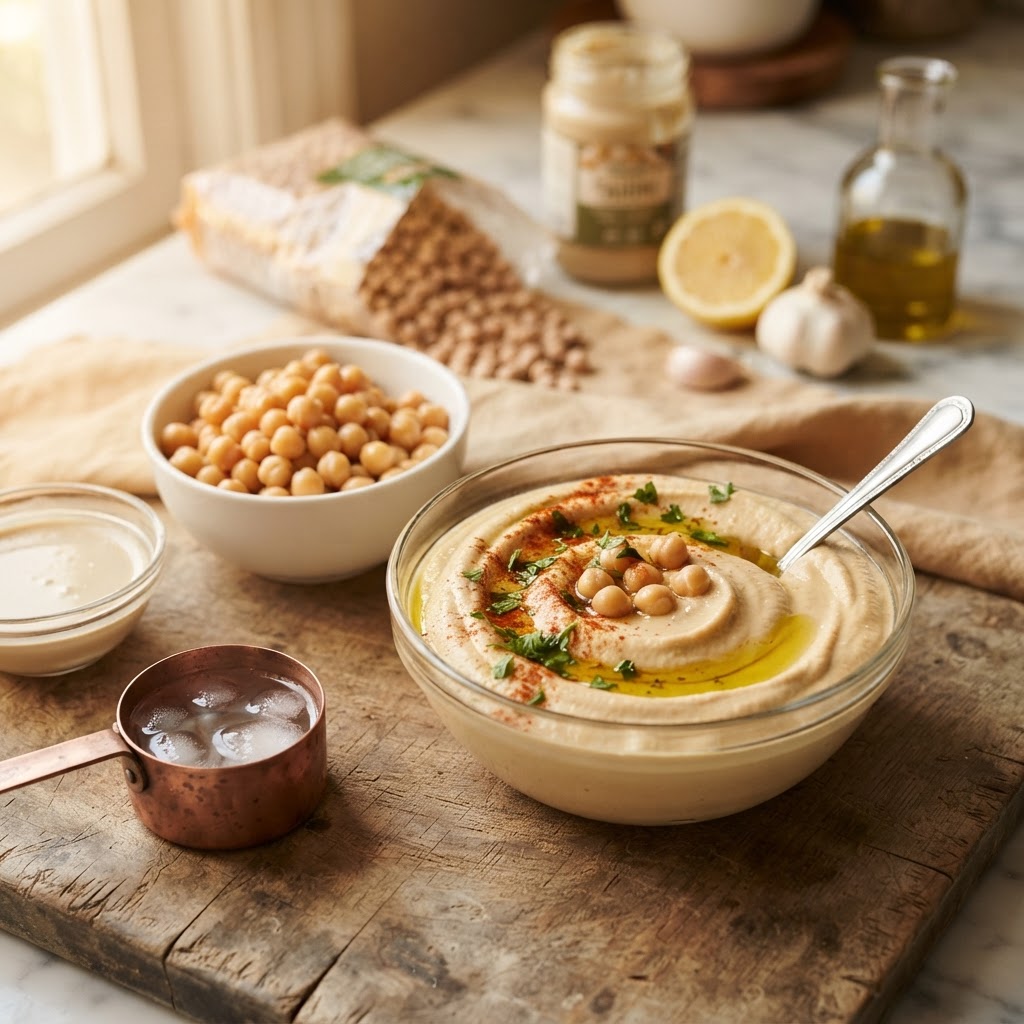
The Home Cook’s Guide to Hydration Ratios: Mastering Bean-to-Water Percentages for Perfectly Creamy, Smooth Hummus
If you have ever found yourself staring at a bowl of grainy, stiff, or overly dense hummus, wondering why your creation lacks that elusive, cloud-like silkiness found in the best Middle Eastern eateries, you are certainly not alone. The journey toward a truly professional-grade dip is paved with subtle missteps, but the most common culprit is almost always the mismanagement of hydration. Hummus is, at its core, an emulsion, and like any delicate emulsion, the precise balance between your solids—chickpeas and tahini—and your liquids—lemon juice, ice water, and aquafaba—is what separates a mediocre snack from a culinary masterpiece. We often focus so heavily on the quality of our chickpeas or the brand of our tahini that we treat the hydration as an afterthought, adding water blindly until the texture looks "close enough." This lack of rigorous measurement is precisely what we are going to fix today, as we dive into the science of bean-to-water percentages.
At "Blame The Chef," we believe that the kitchen should be a laboratory of joy rather than a place of guesswork, and mastering hydration is the ultimate way to level up your home cooking game. When you treat hydration as a variable that can be measured and adjusted, you remove the frustration of trial and error and replace it with a repeatable, reliable process. Achieving that coveted, light-as-air consistency requires a deep understanding of how starch, protein, and fat interact under the mechanical force of a high-speed processor. It is not just about adding water; it is about creating a stable network where the oils from the sesame seeds are fully integrated into the fiber of the chickpeas. Once you understand the specific ratios required for this transformation, you will find that you can achieve a superior texture every single time, regardless of the brand of canned beans you use or the humidity in your kitchen.
Let’s dispel the myth that hummus is a "throw it all in and pulse" kind of dish, because while it is quick to make, it requires a specific sequence of operations to reach its full potential. The hydration phase is the final act of this performance, where you go from a thick, gritty paste to a luxurious, emulsified spread. We are going to explore the exact temperatures, the impact of mineral content in your water, and the specific timing of liquid additions that will change your hummus game forever. By the end of this guide, you will no longer blame the recipe when things go wrong; instead, you will understand exactly how to adjust your hydration percentages to rescue a batch or perfect a new blend. Get ready to embrace the art of the perfect emulsification, because your hummus journey is about to get significantly smoother.
The Chemistry of the Emulsion: Why Hydration Matters
The texture of hummus is dictated by the colloidal suspension of chickpea solids within a matrix of tahini oil and citrus-infused water. When you process chickpeas, you are effectively breaking down their cell walls to release starches, which then act as a stabilizer for the fat found in the sesame paste. Without enough liquid, these solids remain clumped together, creating a grainy mouthfeel that sticks to the roof of your mouth rather than melting away. Conversely, too much hydration results in a soupy mess that separates as it sits, leaving you with a sad, oily puddle at the bottom of your storage container.
Achieving the perfect consistency requires a delicate balance of hydrophilic (water-loving) and lipophilic (fat-loving) components. The tahini provides the fat, while the lemon juice and cold water provide the hydration necessary to create a smooth, homogenous mixture. Many home cooks make the mistake of adding all the water at the start; however, the most professional approach involves a staged hydration technique. By adding liquid incrementally, you allow the emulsifiers—primarily the proteins in the chickpeas and the sesame—to fully incorporate the fat before adding more water. This ensures that the structure of the hummus remains stable and does not break or "split."
Understanding the Chickpea-to-Water Ratio
While every batch of chickpeas varies slightly due to harvest and processing conditions, a solid starting point for your hydration ratio is to aim for roughly 20% to 25% water-based liquids by total weight of the chickpeas. If you are using 500 grams of cooked chickpeas, you should be prepared to use between 100 and 125 grams of liquids (comprised of lemon juice, ice water, and aquafaba). It is helpful to treat your kitchen scale as your most important tool during this process. Do not rely on "splashes" or "glugs," as these are the enemies of precision.
"The difference between a grainy dip and a silky spread is not just in the cooking of the beans, but in the calculated introduction of hydration. Hummus is an exercise in restraint; add too little and it is leaden, add too much and it is a soup. Respect the emulsion, and it will reward you with a texture that defies gravity."
The Role of Temperature in Hydration Success
The temperature of your ingredients plays a massive role in how the fats in the tahini behave during the blending process. When tahini is cold, its viscosity is high, making it harder to emulsify smoothly into the chickpeas. When it is too warm, it can separate or become clumpy. For the most stable and creamy results, we recommend using ice-cold water as your primary hydration agent. The cold temperature helps keep the fats in the tahini from heating up due to the friction of the food processor blades, which prevents the emulsion from breaking and helps maintain a bright, pale color.
Why Ice Water is the Secret Ingredient
There is a specific phenomenon that occurs when you add ice-cold water to a thick base of chickpeas and tahini: the sudden temperature shock encourages the lecithin in the tahini to bind more effectively with the water. This is why you will often see chefs adding a single ice cube or a small amount of crushed ice directly into the processor bowl as they blend. This technique, sometimes called the "whip" phase, forces the hummus to turn white and fluffy, significantly increasing its volume and creating that air-whipped texture that feels light on the palate.
Managing Friction Heat
Even a powerful food processor will generate a significant amount of heat if it runs for more than a minute or two. This heat is the enemy of a perfect emulsion. By using ice water and ensuring your chickpeas are well-drained and perhaps slightly cool, you counteract the friction heat. If you find your processor is running particularly hot, you can pulse the mixture for 30 seconds, let it sit for a minute, and then resume. This intermittent blending keeps the internal temperature of the dip low, ensuring the emulsion stays tight and creamy.
Step-by-Step: The Professional Hydration Sequence
To master the art of the perfect ratio, you must follow a disciplined process. We do not simply toss everything into the bowl and hope for the best. Instead, we build the foundation first, then hydrate to the desired texture. Following this structured workflow will allow you to maintain control over the final product, regardless of how your chickpeas or tahini vary from batch to batch.
Troubleshooting the "Broken" Emulsion
If you accidentally add too much water and the hummus becomes runny, do not panic. The best way to fix an over-hydrated batch is to add more tahini and perhaps a small amount of extra chickpea fiber. If you have extra chickpeas on hand, toss in a handful and pulse again. If not, increase the tahini by a tablespoon at a time, blending thoroughly between additions. The extra fat will help re-absorb the excess water, effectively thickening the emulsion back to its proper state.
Ingredients That Influence Your Ratios
Your hydration ratio is not just about water. The type of tahini you choose—whether it is a pourable, Mediterranean-style tahini or a thick, roasted Middle Eastern variety—will dramatically change how much liquid you need. A thick, nutty tahini will require significantly more water to reach the same consistency as a smoother, pre-thinned tahini. Similarly, the acidity of your lemon juice acts as a thinning agent; high-acid lemons will make the mixture feel looser, while softer lemons may allow you to add more water without losing body.
The Aquafaba Variable
Aquafaba, the viscous liquid left over from cooked chickpeas, is a secret weapon for those seeking an ultra-smooth finish. Because it is rich in proteins and starches, it acts as a superior emulsifier compared to plain tap water. When using aquafaba, you can often achieve a lighter texture with less effort. If you are cooking your chickpeas from dried, save that liquid. It is packed with flavor and provides a natural boost to your hydration percentage that plain water cannot replicate.
"True craftsmanship in the kitchen is not about following a recipe to the letter, but understanding the behavior of the components within that recipe. Hydration is the heartbeat of hummus; learn the pulse of your ingredients, and you will never produce a dull batch again."
The Importance of Salt Concentration
Salt is more than a seasoning; it is a hydration regulator. Salt draws moisture out of the chickpeas and can affect how well the starches swell. We suggest adding salt to your chickpeas before adding the liquids. This ensures the salt is distributed evenly throughout the starch matrix, which in turn helps the emulsion hold more water without splitting. If you undersalt your hummus, the texture will often feel flatter and less "alive," making it harder to determine if you have reached the correct hydration level.
Equipment: Why the Processor Matters
While you can technically make hummus in a high-speed blender, a food processor is the superior tool for hydration management. Blenders are designed to liquefy, which often leads to a texture that is too smooth, almost like a puree or baby food. A food processor, with its wide bowl and flat blades, creates a more tactile environment. It allows you to introduce water in a controlled stream and observe the texture as it shifts from thick to creamy in real-time.
The S-Blade Nuance
Ensure your S-blade is sharp. A dull blade will mash the chickpeas rather than shearing them, which creates a grainy texture that no amount of extra water can fix. When the blade is sharp, it creates a cleaner emulsion by effectively cutting through the chickpea skins. If your skins are particularly tough, you may choose to peel them, though this is a tedious process that is often unnecessary if your hydration and blending techniques are on point.
Cleaning the Bowl
As you add liquids, hummus will often climb the sides of your food processor bowl. This creates a "dead zone" where the chickpeas are not being properly emulsified. Pause your processor every 30 seconds to scrape down the sides with a rubber spatula. This ensures that every bit of mixture is fully incorporated into the hydration process. By keeping the bowl clean, you ensure that the hydration ratio remains consistent throughout the entire batch.
Advanced Techniques: The "Velvet" Finish
Once you have mastered the basic hydration ratios, you can experiment with "velvet" techniques to push your hummus into the realm of fine dining. One such technique involves pre-soaking your chickpeas with baking soda. A small pinch of baking soda in your soaking water raises the pH level, which softens the skin of the chickpeas significantly more than salt alone. This softened skin breaks down into nothing during the blending process, creating an infinitely smoother base that accepts hydration much more readily.
Incorporating Fats for Texture
Beyond tahini, consider adding a tablespoon of high-quality extra virgin olive oil during the final stage of hydration. The oil acts as a lubricant, making the mixture feel even silkier on the tongue. By whisking a bit of oil into your ice-cold water before adding it to the processor, you create a pre-emulsified liquid that integrates into the hummus instantly. This gives you a glossy finish that is both beautiful to look at and delightful to eat.
Straining the Final Product
If you are aiming for true restaurant-quality hummus, a final step involves passing your finished product through a fine-mesh sieve. This removes any remaining fibrous skins that escaped the blades. If you do this, ensure your hummus is slightly on the looser side before straining, as the process will remove a small amount of volume and concentrate the flavor. This is a high-effort, high-reward technique that results in the smoothest dip you will ever encounter.
The Cultural Context of Texture
Hummus is an ancient dish, and while our focus here is on the technical precision of hydration, it is important to remember the cultural context of why we pursue this creaminess. In many parts of the Middle East, the specific consistency of hummus is a point of pride, with regional variations ranging from thick and chunky to light and aerated. Understanding the ratio is not just about science; it is about paying homage to the generations of cooks who perfected these textures long before the food processor was invented.
Regional Variations
The Joy of Sharing
Ultimately, the goal of perfecting these ratios is to bring people together. A perfectly hydrated hummus is a communal food—it is meant to be scooped, shared, and savored. When you invest the time to understand your hydration percentages, you are investing in the quality of the time you spend with your family and friends. A great bowl of hummus acts as an anchor for a meal, a conversation starter, and a testament to the fact that you care enough to master the details.
Final Thoughts
Mastering the home cook’s guide to hydration ratios is about more than just numbers; it is about developing a feel for the ingredients. As you work through these steps, remember that the "perfect" ratio is a moving target that shifts with the quality of your tahini, the size of your lemons, and the type of chickpeas you use. Do not be discouraged if your first batch requires a bit of improvisation; that is the hallmark of a true cook. Embrace the flexibility of the process, keep your ice water handy, and always trust your own palate.
The beauty of this method lies in its repeatability. Once you find that "sweet spot" for your preferred processor and your favorite brand of ingredients, you will be able to replicate it effortlessly. You will no longer need to rely on recipes that call for "a splash of this" or "a drizzle of that." Instead, you will have a scientific foundation that allows you to troubleshoot in real-time, adjusting for the specific variables in your kitchen. This is the difference between simply following instructions and truly mastering the craft.
As you move forward, keep experimenting. Try different ratios of lemon juice to ice water. Test the difference between store-bought chickpeas and ones you have boiled from scratch. Play with the temperature of your ingredients. Each batch will provide new insights into how water, fat, and starch interact, making you a more confident and capable cook. Thank you for choosing "Blame The Chef" to guide you through this culinary exploration. Now, go forth, fire up that food processor, and make the smoothest, creamiest hummus you have ever tasted—your kitchen, and your guests, will thank you.
Remember, the goal is always progress, not perfection. Even a "less than perfect" batch of homemade hummus is miles ahead of anything you can find on a supermarket shelf. By focusing on the mechanics of hydration, you have already taken a massive step toward excellence. Keep tasting, keep adjusting, and most importantly, keep enjoying the process of creation. Culinary mastery is a lifelong pursuit, and today, you have added a powerful new skill to your repertoire. Stay curious, stay hungry, and we look forward to seeing you in our next deep dive into the fascinating world of ingredients and techniques.

Get the Next Recipe
Weekly recipes, techniques, and gear picks — straight to your inbox.
