The Home Cook’s Guide to Leafy Green Blanching: Mastering Time-to-Ice-Bath Ratios for Vibrant Color and Texture Retention
There is a silent, almost aggressive transformation that occurs when a bundle of vibrant, raw kale meets a pot of roiling, salted water. For many home cooks, this process—blanching—is shrouded in a bit of mystery or relegated to a minor, afterthought step in a larger recipe. We often treat it as a chore, a necessary evil that results in limp, olive-drab piles of leaves that bear little resemblance to their crisp, garden-fresh selves. However, once you master the delicate, precise mechanics of heat exposure and rapid cooling, you unlock the ability to capture and preserve the absolute essence of your produce. Blanching is not merely about cooking; it is about pausing time, arresting enzymatic activity, and maintaining a level of structural integrity that keeps your greens singing on the plate.
When we speak of vibrant color retention, we are really talking about the chemistry of chlorophyll and the expulsion of trapped gasses. The moment raw greens hit boiling water, the air trapped between the cellular structures is forced out, and the surface of the leaf becomes translucent and brightened. If you leave them in a second too long, the heat forces the magnesium atom at the center of the chlorophyll molecule to be replaced by hydrogen, turning that brilliant emerald hue into a dull, army-green shade that no amount of seasoning can fix. By understanding the precise time-to-ice-bath ratio, you take control of this transition, ensuring that your spinach, swiss chard, or watercress arrives at the table with the same intensity of color it had when it was pulled from the earth.
Ultimately, the goal of this guide is to turn the intimidating process of blanching into a rhythmic, second-nature habit. It requires more than just a pot of water; it requires a mindset shift that values the shocking phase as much as the boiling one. Whether you are prepping for a freezer stash, a cold salad, or a refined sauté that requires a head start, the techniques outlined here will serve as your blueprint. We are going to strip away the guesswork, discard the "set it and forget it" mentality, and embrace a method that prioritizes texture, flavor, and visual appeal. Welcome to the culinary mastery of your own kitchen, where the chef is rarely to blame because the home cook has finally learned the secret to perfection.
The Science of Chlorophyll and Heat
At the heart of every successful blanching session is an understanding of how plant cells react to thermal shock. When you submerge leafy greens in boiling water, you are essentially performing a rapid sterilization and texture-softening process. The cell walls, composed of cellulose, begin to soften almost immediately, but the color retention depends on how quickly you can move past the initial thermal burst. Professional chefs refer to this as the "green window," a brief moment where the color is at its absolute peak before heat begins to degrade the pigments.
Why Salt is Your Best Friend
Many home cooks underestimate the importance of salting the water. It is not just about seasoning the leaves from the inside out, though that is a massive benefit. Salt raises the boiling point of the water, allowing for a faster, more even cook that penetrates the tough stalks and thick veins of hearty greens. Furthermore, salt helps to stabilize the chlorophyll molecules, acting as a buffer that prevents the rapid oxidation that leads to that unappetizing, murky color. You want your water to taste like the sea—aggressive, purposeful, and ready for work.
The Role of Enzymatic Inhibition
Beyond color, blanching serves a critical function in enzymatic inhibition. Raw vegetables contain enzymes that, if left alone, will continue to break down the plant tissues even after they are harvested, leading to spoilage and flavor loss. By submerging these greens in boiling water, you effectively "deactivate" these enzymes. If you intend to freeze your greens, this is the most vital step in the process. Without it, your frozen spinach will taste metallic and develop a muddy, freezer-burned texture after only a few weeks in the freezer.
Blanching is the culinary equivalent of taking a high-speed photograph; it freezes the biological clock of the vegetable at its most beautiful, nutritious, and vibrant peak, ensuring that when you finally serve it, it tastes like the height of the season.
Setting Up Your Blanching Station
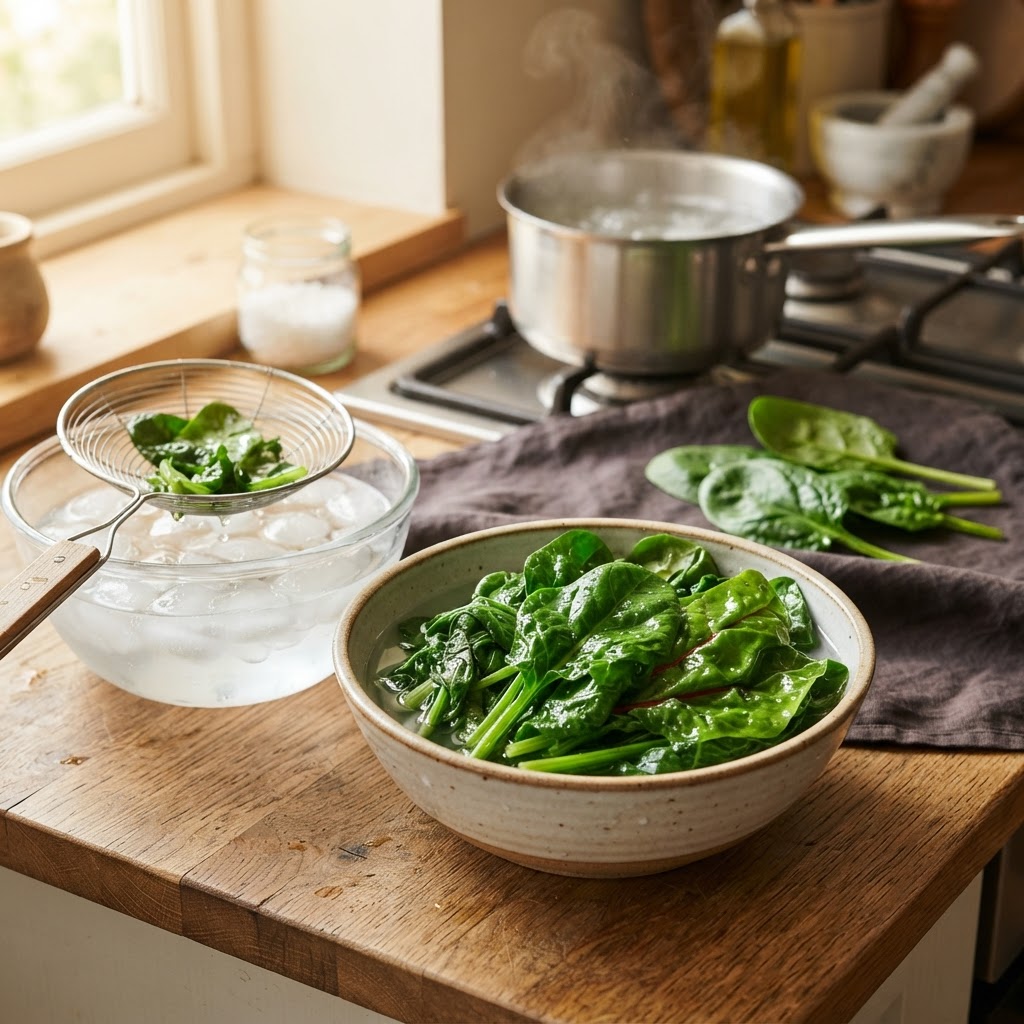
Precision is the hallmark of a great cook, and your setup is where that precision begins. You should never start boiling water until your ice bath is fully prepped and ready to receive the greens. This is a common failure point; cooks often find themselves scrambling to grab ice or fill a bowl while their greens are overcooking in the pot. By the time you get the ice, your Swiss chard has turned into mush. A well-organized mise en place is the difference between success and a compost pile.
The Ice Bath Protocol
Your ice bath should be a fifty-fifty split of ice cubes and cold water. It needs to be large enough that the temperature of the water does not rise significantly once you drop the hot greens into it. If your bowl is too small, the heat from the vegetables will warm the water too quickly, and the "shocking" effect will be lost. You want a thermal shock—a sudden, violent transition from near-boiling to near-freezing—to stop the cooking process instantly.
Equipment Check
Make sure you have a high-quality spider strainer or a long-handled slotted spoon. You need to be able to move large volumes of delicate leaves from the pot to the bowl in one swift motion. A metal spider is superior to plastic or mesh because it does not trap excess boiling water, which can continue to cook the greens as you transfer them. Keep a clean tea towel nearby to pat the greens dry after they have cooled; moisture is the enemy of texture, especially if you plan to finish these greens in a pan with butter or garlic.
The Time-to-Ice-Bath Ratios
The golden rule of blanching is that there is no universal "right" time; there is only the right time for the specific type of green you are handling. The thickness of the leaf, the density of the stalks, and the water content of the variety all dictate how long they should stay submerged. We categorize these into three tiers: delicate, medium, and hearty. Mastering these tiers is your ticket to consistent quality.
Tier 1: The Delicate Greens (15–30 Seconds)
Delicate greens include baby spinach, watercress, and arugula. These leaves are so thin that they barely need to touch the water before they wilt. For these, your boil time is a quick dip. Aim for 15 to 20 seconds. If you go beyond 30 seconds, you are essentially making soup. These greens hold onto heat longer than you expect, so ensure your ice bath is extra chilled and that you move them immediately.
Tier 2: The Medium Greens (45–60 Seconds)
This category covers mature spinach, baby kale, and beet greens. These leaves have slightly more structure and often come with stems that need a bit more heat to become palatable. You are looking for a window of 45 to 60 seconds. The goal here is to soften the leaf without losing the structural integrity of the stem. If the stems are thick, you can trim them beforehand, but blanching them whole with the leaves is often easier if you respect the timing.
Tier 3: The Hearty Greens (90–120 Seconds)
Hearty greens like mature kale, collard greens, and mustard greens require a much longer exposure to heat. These leaves are thick, waxy, and resistant. A two-minute blanch allows the water to break down the waxy cuticle on the leaf surface, which makes them much easier to digest and far more tender to chew. For collard greens, don't be afraid to push this to two full minutes; they are resilient plants that benefit from the extra time in the pot.
Never fear the blanching pot; it is the most misunderstood tool in the kitchen. When you learn to respect the timeline of the vegetable, you stop cooking the flavor away and start enhancing the very essence of the produce.
The Art of Post-Blanching Techniques
Once your greens are chilled, the work isn't done. The "shocking" phase is about stopping the cook, but what you do next determines the final flavor profile. Many home cooks make the mistake of leaving the greens in the water for too long or, conversely, not draining them enough. Both errors lead to a soggy, unappealing finished product that feels heavy and damp on the palate.
Proper Draining and Pressing
After the ice bath, remove the greens and place them on a clean kitchen towel. Do not just let them sit there; you need to remove the excess moisture. Use a light touch to pat them dry, or if you are preparing for a larger batch, gather them in a clean dish towel and give them a gentle squeeze. You want them to be moist, but not dripping. If you are going to sauté them later with olive oil and garlic, a dry leaf is essential for getting a proper sear.
The Finishing Sauté
One of the most professional ways to use blanched greens is to finish them in a pan. Once your greens are blanched, shocked, and dried, they are essentially "pre-cooked." A quick 30-second toss in a hot pan with infused oil, toasted nuts, or aromatics is all it takes to bring them back to life. Because the blanching has already done the heavy lifting of softening the fibers, you don't need to cook them until they lose their bright green color. This is the secret behind the vibrant, perfectly textured sides found in high-end steakhouses.
Storing for Future Use
If you are blanching in bulk—a highly recommended Sunday prep tactic—make sure to portion your greens before storing. Once they are dry, divide them into airtight containers or freezer bags. If you are freezing, try to remove as much air as possible. A vacuum sealer is ideal, but even a straw used to suck out excess air from a Ziploc bag will work wonders for keeping your greens fresh for up to three months. When you are ready to use them, they don't even need to be thawed; just drop them directly into your pan or soup.
Troubleshooting Common Blanching Mistakes
Even the best chefs have dealt with a batch of "sad greens." When things go wrong, it is usually due to one of three culprits: insufficient salt, inadequate water volume, or hesitation during the transfer process. Let's look at how to identify and solve these issues so you can achieve consistent results every time you step into the kitchen.
The "Grey-Green" Syndrome
If your greens come out looking like something from a cafeteria in the 1970s, you likely didn't use enough water or your water wasn't boiling hard enough. The greens need to be completely submerged in a massive volume of water to ensure the temperature doesn't drop when they hit the pot. If the pot is crowded, the temperature plummets, the leaves boil slowly, and the chlorophyll breaks down instantly. Always use a large stockpot, and only work in batches that occupy no more than a third of the pot’s capacity.
The Mushy Texture Disaster
If your vegetables feel slimy or disintegrate when you touch them, you have over-blanched. This usually happens because the ice bath was too warm or the transfer from the pot to the ice took too long. Always check your ice bath halfway through; if the ice has melted completely, add more before you start the next batch. The water in the bowl should feel bone-chillingly cold. If it doesn't, your greens are still cooking while they "cool."
The "Bitter Leaf" Problem
Some greens, like kale or dandelion greens, have a natural bitterness that can be quite intense. While blanching helps to mitigate this, it won't remove it entirely. If you find your greens are still too sharp, ensure you are blanching in heavily salted water, and consider a tiny pinch of baking soda in the pot. The alkaline environment helps to break down the bitter compounds, though be warned: use too much, and you will turn the greens into a mushy, neon-green mess. A tiny, literal pinch is all that is required for a large pot.
Essential Gear for the Home Chef
While you don't need a professional-grade kitchen to succeed, having the right tools makes the workflow infinitely smoother. Blanching is a fast-paced, high-heat process, and you don't want to be fumbling around for a colander or a bowl. Investing in a few specific pieces of equipment will turn this task from a source of stress into a meditative, satisfying part of your routine.
The Essential Tools List
Why Quality Matters
When you use a small pot, you are forced to cram your greens in. This overcrowding lowers the water temperature and results in uneven cooking. When you use a flimsy, plastic strainer, you run the risk of it melting or, worse, failing to support the weight of the water-logged greens. By investing in a large, heavy-bottomed pot and a sturdy metal spider, you are investing in the speed and efficiency of your culinary process. These aren't luxury items; they are the baseline requirements for a functional, successful home kitchen.
Consistency in the kitchen is not a product of luck; it is a byproduct of repetition and a deep, intuitive understanding of your equipment. When you master your gear, you stop fighting the process and start controlling the outcome.
The Flavor Profiles of Blanched Greens
Once you have mastered the technique, the real fun begins: pairing your perfectly blanched greens with the right flavor profiles. Blanched greens are essentially a blank canvas. They have been cleaned, softened, and brightened, making them the perfect vehicle for bold, aggressive seasonings. Whether you are aiming for a classic Mediterranean profile or something more Southeast Asian, the blanching process remains the same.
The Mediterranean Classic
For a classic approach, toss your blanched and dried greens in a hot pan with high-quality olive oil, thinly sliced garlic, and a hit of red pepper flakes. The bitterness of the greens balances the richness of the oil, while the garlic provides that deep, savory punch. Finish with a squeeze of fresh lemon juice just before serving. The acidity of the lemon will make the colors pop even further and cut through any lingering earthy notes in the leaves.
The Asian-Inspired Approach
If you are moving toward an Asian flavor profile, skip the butter and garlic. Instead, dress your blanched greens with a drizzle of toasted sesame oil, a splash of soy sauce, and a sprinkle of toasted sesame seeds. If you want a bit of sweetness, a half-teaspoon of mirin or honey works beautifully to harmonize the flavors. This is a common way to serve spinach (known as goma-ae) in Japan, and it highlights how well blanched greens take on the profile of a sophisticated dressing.
The Creamy Finish
For heartier greens like kale or Swiss chard, a creamy finish is a revelation. After blanching and sautéing, stir in a spoonful of mascarpone, crème fraîche, or even a bit of heavy cream and nutmeg. The fat coats the leaves and mellows out the robust, iron-rich flavor of the kale. This makes for an incredibly decadent side dish that feels much more sophisticated than a simple stir-fry. It is the perfect accompaniment to roasted proteins like pork chops or seared duck breast.
Final Thoughts
Blanching is one of those foundational skills that separates the casual cook from the confident home chef. It is a process that demands your full attention for just a few minutes, rewarding that focus with vegetables that are visually stunning, perfectly textured, and ready for whatever culinary direction you decide to take them. By respecting the temperature, the timing, and the importance of the ice bath, you remove the guesswork from your cooking and replace it with a reliable, repeatable technique.
Remember, the goal is not to "boil" the greens into submission, but to treat them with enough heat to unlock their potential. When you see that brilliant, neon-green hue emerge from the water, you know you have succeeded. It is a small victory, but it is one that elevates every single meal you prepare. The next time you find yourself with a pile of fresh market greens, don't look at them with hesitation. Look at them as an opportunity to practice your technique, refine your timing, and elevate your home cooking to a level that would make any professional chef proud.
As you continue to practice, you will develop an instinct for when the greens are done. You will stop looking at the clock and start looking at the leaf. You will recognize the exact moment the texture shifts from raw and fibrous to tender and succulent. That is the moment you stop being a person who follows a recipe and start being a chef in your own right. Keep your water salted, your ice bath cold, and your focus sharp, and you will never again have to blame the chef for a dish that falls short. Happy cooking, and may your greens always be vibrant, tender, and perfectly prepared.



Get the Next Recipe
Weekly recipes, techniques, and gear picks — straight to your inbox.
