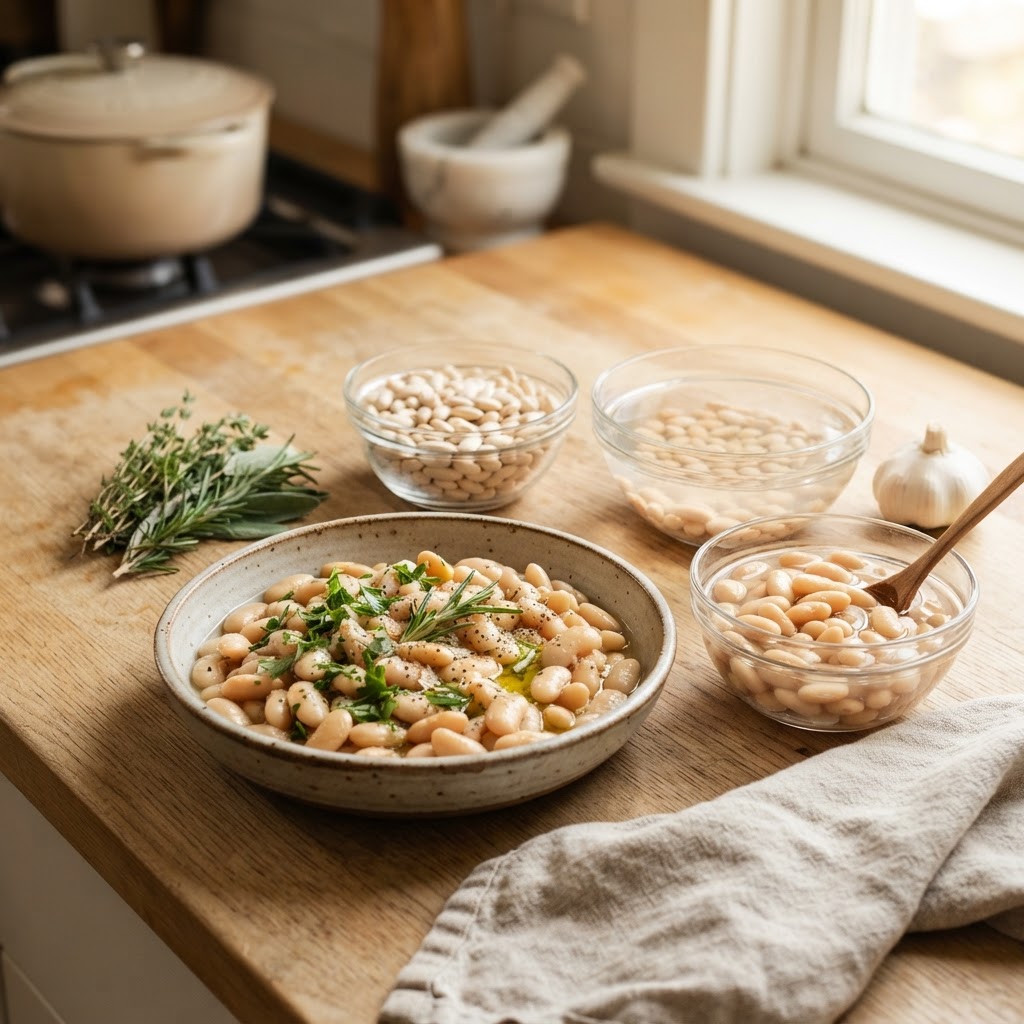
The Home Cook’s Guide to Legume Soaking: Mastering Digestibility and Texture for Perfectly Creamy Beans and Lentils
There is a pervasive myth in the culinary world that the humble dried bean is a difficult, temperamental ingredient that requires nothing short of a culinary degree to master. In reality, legumes are the backbone of human nutrition across nearly every civilization, offering an affordable, shelf-stable, and incredibly versatile foundation for countless dishes. When a home cook finds their beans turning into mushy, flavorless sediment or, conversely, remaining stubbornly rock-hard despite hours of boiling, the immediate instinct is often to blame the bean itself. However, as we explore the science behind these nutritional powerhouses, it becomes clear that the secret lies not in the bean, but in the preparation—specifically the art of soaking. Mastering this foundational step is the difference between an ordinary, gas-inducing meal and a velvety, deeply satisfying bowl of nourishment that sits comfortably in your stomach.
Properly treating your dried legumes is an act of culinary mindfulness that rewards the patient cook with superior texture and enhanced digestibility. While many modern recipes advocate for the convenience of the "quick soak" or even the "no-soak" method, there is an undeniable elegance to the traditional long-soak technique that influences the integrity of the legume's starch structure. By allowing the bean to slowly rehydrate in a controlled environment, we are essentially unlocking its potential, breaking down complex sugars, and ensuring that each individual bean hydrates evenly from the center out. This process does not merely soften the exterior; it conditions the internal pectin and proteins to ensure that when heat is finally applied, the result is a uniform, buttery consistency that canned alternatives simply cannot replicate.
At "Blame The Chef," we believe that your kitchen should be a laboratory of exploration, where you aren't just following instructions, but understanding the chemical reactions occurring in your Dutch oven. We are here to dismantle the intimidation factor surrounding dry goods and empower you to take total control over your pantry staples. From the mineral content of your water to the specific enzymes activated during a 24-hour brine, every variable plays a role in the final mouthfeel of your dish. Throughout this guide, we will delve into the nuances of soaking, the surprising science of hard water, and why the "blame" for a bad batch of chili usually starts and ends with your preparation technique. Get ready to transform your approach to legumes, turning simple ingredients into a gourmet, restaurant-quality experience that highlights the true essence of plant-based cooking.
The Chemistry of the Soak: Why We Do It
The primary objective of soaking legumes is twofold: to rehydrate the dried cellular structure and to neutralize anti-nutrients that can inhibit digestion. Legumes contain complex carbohydrates known as oligosaccharides, specifically raffinose and stachyose, which the human digestive tract struggles to break down. When these sugars reach the lower intestine, bacteria ferment them, leading to the unfortunate bloating and gas that many associate with bean consumption. By soaking, we allow the enzyme alpha-galactosidase to begin the process of breaking down these sugars before they ever hit the pot. Furthermore, soaking leaches out phytic acid, a compound that binds to essential minerals like iron, calcium, and zinc, effectively locking them away from your body's absorption process.
The Role of Osmosis
When you submerge a dried bean in water, you are initiating a process of osmotic hydration. As water molecules move through the thin, fibrous seed coat (the testa), they begin to penetrate the cotyledon, the fleshy, starch-rich part of the bean. This is not instantaneous; it requires time for the cell walls to soften and for the proteins to relax. If you try to jump-start this process by using boiling water, you risk causing the skin of the bean to rupture or "blow out" before the center is fully hydrated, resulting in a dish that is simultaneously mushy on the outside and gritty on the inside.
"A well-soaked bean is the canvas upon which flavor is painted. If the canvas is cracked or improperly prepared, no amount of aromatics or expensive stock will save the final composition from being mediocre."
Temperature and Time Variables
Most chefs agree that a long, cool soak—ideally between 8 and 12 hours—is the gold standard for most medium-to-large beans like Cannellini, Great Northern, or Kidney beans. Using room-temperature water is sufficient, but if you live in a particularly warm climate, keeping your soaking bowl in the refrigerator is a professional tip to prevent premature fermentation. If you are in a rush, a hot soak (bringing the water to a boil, then turning it off and letting it sit for one hour) is acceptable, but it rarely achieves the same uniform texture as the slow, overnight method.
The Salinity Debate: To Salt or Not to Salt?
For decades, the conventional wisdom suggested that adding salt to your soaking water would "toughen the skins" of your beans, preventing them from softening. This advice has been thoroughly debunked by food scientists like Harold McGee and J. Kenji López-Alt. In fact, adding salt to your soaking water—a technique known as brining—is one of the most effective ways to ensure perfectly cooked beans. The sodium ions in the salt displace the calcium and magnesium ions in the bean’s seed coat, which strengthens the skin. By exchanging these minerals, you essentially weaken the skin’s structure, allowing it to soften much more evenly and consistently.
The Science of Brining
When you soak in a saline solution, the salt penetrates the bean along with the water. This provides a baseline of seasoning that permeates the entire structure, rather than just flavoring the exterior liquid. A common mistake is to over-salt; a ratio of one tablespoon of kosher salt per gallon of water is the sweet spot. This light brine ensures that the pectin in the cell walls breaks down at a more controlled, steady pace, preventing the interior from turning to mush while the skin remains tough.
How Salt Impacts Texture
Beyond the skin, salt plays a crucial role in how the starches gelatinize during the boiling phase. Beans that are soaked in salted water are significantly less likely to burst open during the cooking process. You will notice that your finished beans hold their shape beautifully, maintaining a creamy, custard-like texture rather than the mealy, floury texture often found in unsoaked or improperly salted batches. This is essential for dishes like Pasta e Fagioli or Minestrone, where you want the individual bean to be a distinct, identifiable component of the texture profile.
Troubleshooting Water Quality and Legume Age
Your water quality is an often-overlooked variable in the kitchen. If you live in an area with "hard water"—water high in calcium and magnesium—you may find that your beans refuse to soften, even after an extensive soak. These minerals effectively "lock" the pectin in the beans, creating a tough, leathery exterior that no amount of boiling will resolve. If you find your beans are consistently stubborn, I highly recommend testing your water or, more simply, switching to distilled or filtered water for the soaking process. You will be shocked by the difference in texture.
Identifying Stale Beans
One of the most common reasons home cooks "blame the chef" for bad beans is actually the age of the beans themselves. Legumes that have been sitting in the back of your pantry for two years are not going to behave the same way as fresh-harvest beans. As beans age, they lose their ability to absorb moisture. They become effectively "senescent," meaning the internal structure has dried out to the point where even a 48-hour soak won't make them tender. Always check your pantry, rotate your stock, and aim to use dried legumes within 6-12 months of purchase.
Professional Tips for Older Beans
If you suspect your beans are older than a year, you can attempt to remedy the situation by adding a pinch of baking soda to your soaking water. This creates an alkaline environment, which helps break down the hardened pectin in older beans. However, be warned: do not overdo it. Too much baking soda will turn your beans into a mushy, metallic-tasting disaster. A mere quarter-teaspoon per pound of beans is more than enough to assist the hydration process without sacrificing flavor.
The Art of the Boil: Transitioning from Soak to Pot
Once your beans have completed their soak, the transition to the cooking pot is the next critical juncture. First and foremost, always discard the soaking water. While some claim this water contains vitamins, it also contains the very anti-nutrients and complex sugars that we worked so hard to leach out. Rinsing your beans thoroughly in a colander under cold running water is a non-negotiable step. This removes the surface residue and any lingering sediment, ensuring your cooking liquid stays clear and your final dish remains clean-tasting.
Choosing the Right Pot
A heavy-bottomed Dutch oven is the best vessel for cooking legumes. The cast iron or heavy enameled steel provides steady, even heat distribution, which is essential for maintaining a gentle simmer. Never boil beans violently. A rolling boil will cause the beans to bang against each other and the sides of the pot, causing the skins to break and the interior to turn into a starchy slurry. A gentle simmer, just enough to cause an occasional bubble to break the surface, is the ideal environment for a perfect, creamy cook.
"Cooking is an act of patience. If you rush the simmer, you are inviting structural failure. Treat your legumes with the same gentle care you would a slow-cooked ragu, and the result will be a dish that sings."
Essential Aromatics
When you add your beans to the pot for the final cook, this is where you build the foundation of flavor. A simple mirepoix—carrots, onions, and celery—is the classic starting point. However, do not be afraid to add a "sachet d'epices" containing bay leaves, black peppercorns, and a sprig of fresh thyme. Some professional chefs swear by adding a halved head of garlic or a piece of kombu (dried kelp) to the pot, as the glutamates in the seaweed can enhance the natural savoriness of the beans without needing extra animal fats.
Specific Techniques for Different Legume Varieties
Not all legumes are created equal. A tiny Lentil requires a vastly different approach than a meaty Gigante Bean. Understanding the characteristics of your specific bean will allow you to tailor your soaking and cooking times accordingly. For example, smaller legumes like Black Beluga Lentils or Split Peas do not require a soak at all because their surface area-to-volume ratio is high enough to allow them to cook through in 20-30 minutes. Conversely, large, dense beans like Chickpeas or Lima beans require aggressive soaking to ensure that the middle of the bean becomes tender.
The Case of the Chickpea
Chickpeas are notoriously dense and have a thick skin that resists moisture. To achieve that signature, hummus-smooth texture, a long soak is mandatory. I suggest a 12-hour soak with a slightly higher concentration of salt. When boiling, skimming the foam that rises to the surface is vital. This foam is primarily made of proteins and saponins, which can impart a bitter, soapy taste to the cooking liquid if left unchecked. Skim, simmer, and be patient; chickpeas are worth the extra effort.
The Delicate Lentil
Lentils are the workhorses of the quick-weeknight meal. Because they lack the thick seed coat of larger beans, they are prone to falling apart if cooked for too long. If you want to keep them whole for a salad, add a splash of acid, like red wine vinegar or lemon juice, to the pot during the last five minutes of cooking. The acid tightens the cell walls of the lentil and prevents them from disintegrating, which is a life-saving technique when you are aiming for a refined presentation.
Managing the Finished Product: Storage and Flavor Development
Once your beans are cooked to your desired level of doneness, the way you store them is just as important as how you cooked them. Always store the beans in their own cooking liquid, even if you plan to drain them later. This prevents the beans from drying out and maintains their creamy interior. If you let them sit in the fridge overnight in their cooking liquid, they will actually continue to absorb moisture and flavor, often tasting even better the next day—a phenomenon known as the "chili effect."
Freezing for Longevity
Legumes freeze exceptionally well. If you have prepared a massive batch, let them cool completely in their liquid, then portion them into airtight containers. They will hold their quality in the freezer for up to three months. To thaw, simply move them to the refrigerator overnight or run the container under warm water if you need them for a soup or stew immediately. Having a stash of pre-soaked, perfectly cooked beans in your freezer is the ultimate "culinary insurance policy" for busy weeknights.
Elevating the Final Dish
Never underestimate the power of finishing your beans with a splash of high-quality extra virgin olive oil and a squeeze of fresh citrus. These fats and acids cut through the density of the starches, lifting the flavor profile and creating a balanced, complex dish. Adding fresh herbs like parsley, cilantro, or basil right at the end of the cooking process preserves their color and vibrancy, providing a necessary contrast to the earthy, deep tones of the legumes.
Final Thoughts
Mastering the soak is not merely a task on your culinary to-do list; it is a gateway to a deeper appreciation for the ingredients that sustain us. By understanding the interaction between water, salt, time, and heat, you are graduating from a home cook who follows recipes to a kitchen strategist who understands the core mechanics of flavor. When you take the time to properly soak your beans, you are not just preparing a meal—you are honoring the history of the ingredient and ensuring that your finished dish is as digestible and nutritious as it is delicious.
The "blame" for an unsatisfactory legume dish often falls on a lack of preparation, but now that you are armed with the science of hydration, salinity, and water quality, that won't be a problem in your kitchen anymore. Take these principles, apply them to your favorite varieties of beans and lentils, and watch as your pantry staples transform from "necessary filler" into the highlight of your dinner table. Whether you are stewing a pot of smoky black beans, tossing a fresh bean salad with vinaigrette, or blending a batch of silken hummus, the difference will be palpable.
Remember that culinary confidence is built through repetition. Don't be afraid to experiment with different soaking times, varying salt levels, and unique aromatic combinations. Your kitchen is a place of endless possibility, and these humble legumes are the perfect medium to explore your creative potential. From the first rinse to the final garnish, take pride in the process. When you serve a bowl of perfectly cooked, creamy, and flavorful legumes, you aren't just serving dinner; you are serving a masterclass in the art of the home cook. Keep exploring, keep tasting, and above all, keep cooking.
As we conclude this deep dive into the world of legumes, I want to leave you with a final encouragement: simplicity often hides the most profound depth. A bowl of beans, cooked perfectly, is a testament to the idea that with the right technique, the simplest ingredients can be transformed into the most nourishing meals imaginable. Do not rush the process, respect the chemistry at play, and never settle for anything less than a tender, evenly cooked result. Your kitchen is the heart of your home, and your dedication to the craft of cooking is what makes it so special.
Next time you open a bag of dried beans, don't look at it as a chore. Look at it as a beginning. You have the tools, the knowledge, and the pantry staples to create something extraordinary. Whether you are feeding a family or simply preparing a nourishing meal for yourself, remember that every bean is a tiny powerhouse of potential just waiting for your guidance. Continue to push the boundaries of what you think you know about cooking, and always be willing to learn the nuance behind the method. The culinary journey is lifelong, and there is always something new to discover in the bottom of a Dutch oven.
If you ever find yourself struggling with a batch of beans that just won't cooperate, remember the variables we discussed: check the age of your stock, assess the mineral content of your water, and trust in the power of the brine. There is a solution to every culinary puzzle, and with patience, you will always find it. Share your successes with us, and don't hesitate to share your experiments. We love hearing how our readers interpret these techniques in their own kitchens, so keep the conversation going and stay hungry for knowledge.
Finally, keep in mind that the best meals are the ones shared. Once you have mastered your signature bean recipe, invite friends or family over to enjoy the results of your hard work. There is nothing quite like the satisfaction of serving a dish that you have carefully curated from start to finish. You have the knowledge now to make your legumes the star of the show. So, grab your apron, select your legumes, and get cooking—your culinary masterpiece is just one good soak away. The path to perfection is simple, consistent, and well within your grasp, one pot at a time. Enjoy the process and savor every bite of your perfectly prepared, home-cooked beans.
To ensure your success, keep this guide bookmarked for your next grocery haul. Whether you are sourcing heirloom beans from a local farm or sticking to the reliable staples from your local market, the rules of hydration and seasoning remain the same. With these skills, you are effectively immune to the frustration that plagues less-prepared cooks. You have transitioned from merely cooking to mastering the ingredients. Enjoy the journey, embrace the variables, and continue to refine your craft until every meal you serve is a testament to the time and effort you put into the process. The kitchen is yours to conquer.
As you look toward your next culinary project, consider how these techniques might apply to other areas of your cooking, such as grains, rice, or even tougher cuts of meat that benefit from a slow, steady brining process. The principles of moisture management and enzymatic breakdown are universal across the culinary arts. When you master the bean, you are essentially mastering the foundation of a significant portion of global cuisine. This is a powerful tool to have in your arsenal, and one that will serve you for many years of home cooking to come. Keep growing, keep learning, and keep blaming the chef—but only when the chef is truly the one responsible for the magic on the plate!
The final secret, if there is one, is simple love. Cooking is a performance of care. When you take the time to soak, rinse, and slow-simmer your legumes, you are putting your time and energy into the meal, and that always translates to a better experience for anyone who eats it. Food is fuel, but it is also connection, comfort, and culture. May your pots always be full of flavor, your beans always be tender, and your kitchen always be a place of joy and discovery. Thank you for trusting us to guide you through this process. Happy cooking to all our fellow culinary explorers.


Get the Next Recipe
Weekly recipes, techniques, and gear picks — straight to your inbox.
