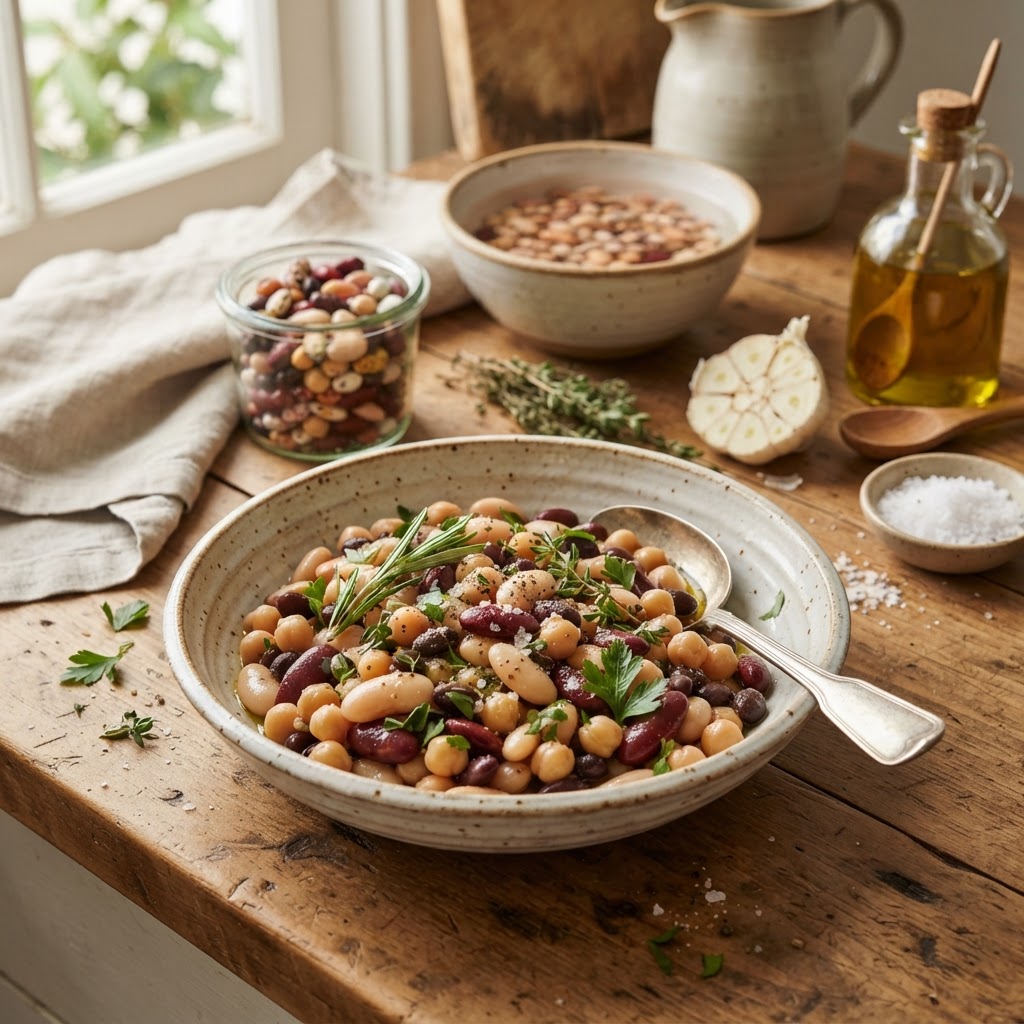
The Home Cook’s Guide to Legumes: How to Properly Soak, Season, and Transform Dried Beans into Culinary Gold
There is a quiet, rhythmic magic to a bag of dried beans that no canned variety can ever truly replicate. For many home cooks, the sheer effort of planning ahead—the soaking, the simmering, the patient waiting—feels like an unnecessary hurdle in our fast-paced culinary landscape. Yet, once you taste the difference between a mushy, metallic-tasting canned bean and one you have nurtured from a dormant seed into a creamy, flavorful powerhouse, there is no turning back. It is an act of culinary reclamation, a way to slow down and honor the humble ingredients that have sustained civilizations for millennia. When we commit to working with dried legumes, we are not just cooking; we are participating in a fundamental kitchen tradition that bridges the gap between raw potential and pure gastronomic satisfaction.
To begin this journey, you must first let go of the intimidation factor that often surrounds pulse preparation. Many beginners fear the potential for undercooked legumes, which are famously indigestible and unpalatable, or conversely, the tragedy of turning a beautiful pot of heirloom beans into a watery mush. These outcomes are not a result of bad luck, but rather a lack of fundamental knowledge regarding hydration and heat management. By understanding the science of the legume, you shift your role from someone following a vague recipe to a chef who understands the structural integrity of their ingredients. This guide is designed to empower you with the technical precision required to make dried beans a staple in your home kitchen, transforming them from a forgotten pantry item into the star of your plate.
Ultimately, "Blame The Chef" is about moving past the shortcuts and embracing the deep, soul-satisfying labor of love that characterizes the best meals. Beans are an incredibly cost-effective, nutrient-dense, and versatile canvas, yet they require an appreciation for the passage of time. When you master the art of the soak and the gentle simmer, you gain the ability to dictate the texture and flavor profile of your finished dish in ways that store-bought cans simply do not allow. We are going to explore the nuances of water chemistry, the alchemy of aromatic seasoning, and the secret techniques that turn even the most basic pinto or navy bean into a meal worthy of a dinner party. Welcome to the foundation of the home kitchen; let us start turning those dried seeds into culinary gold.
The Science of Hydration: Why We Soak
The process of soaking dried beans is not merely a convenience; it is a critical step in rehydrating the starch and softening the cellulose structure of the bean’s hull. When beans are dried, they enter a state of dormancy where their cellular water content drops to near zero. By submerging them in water, we initiate a chemical process that allows the bean to return to a life-like state, ensuring an even cook once they hit the heat. Without a proper soak, the outer skin of the bean cooks significantly faster than the starchy interior, leading to the infamous "split-skin" phenomenon that ruins the texture of your final dish.
The Over-Night Soak Method
For most legumes, a long, cold soak is the gold standard for achieving a uniform texture. You should aim for a ratio of three parts water to one part beans, ensuring the water level remains at least two inches above the beans at all times. Place your bowl in a cool area and allow them to rest for at least eight to twelve hours. If your kitchen is particularly warm, or if you are working with larger varieties like chickpeas or giant limas, you may choose to refrigerate them during this stage to prevent premature fermentation, which can lead to an unpleasant sour odor.
The Quick-Soak Technique
When life gets in the way of your planning, the quick-soak method is your best friend. Start by bringing your beans and a pot of water to a rolling boil for two to three minutes. Once the boil is established, remove the pot from the heat, cover it tightly, and let it sit for exactly one hour. While this is not as effective as an overnight soak for breaking down complex sugars—the very compounds that lead to digestive discomfort—it is a viable workaround for when you need a hearty meal in an afternoon. Always remember to discard the soaking water, as it contains the lectins and starches that leach out during this phase.
"A well-soaked bean is the difference between a dish that is merely fuel and a meal that is truly transcendent. Treat the hydration process with the same respect you would afford a fine cut of meat."
Salt: The Great Culinary Debate
For generations, grandmothers and home cooks were warned away from adding salt to their soaking or simmering liquid. The prevailing myth was that salt toughened the skins of the beans, rendering them leathery and uncookable. However, modern food science has soundly debunked this, proving that salt actually plays a pivotal role in strengthening the cell walls of the bean. When you season your water with salt—especially during the soaking phase—you are encouraging the skin to stay intact while allowing the internal starches to become creamy and tender.
The Chemistry of Seasoning
Salt acts as an ion exchange agent. When you add sodium to the soaking water, the sodium ions replace calcium and magnesium ions in the bean’s skin. Calcium and magnesium are what keep the pectin in the skin rigid; by removing them, you allow the skin to soften significantly during the cooking process. I recommend adding at least one tablespoon of kosher salt to your soaking water per pound of dried beans. This small act ensures that your beans are seasoned from the inside out, rather than just tasting salty on the surface.
When to Add Acidic Ingredients
While salt is your friend, acid is a double-edged sword. Ingredients like tomatoes, vinegar, lemon juice, or wine should only be added to your pot after the beans have reached your desired level of tenderness. Acidic environments inhibit the softening of the pectin in the bean skins, which can effectively "freeze" the texture in place, leaving you with beans that remain tough even after hours of simmering. Save your acidic finish for the final thirty minutes of cooking to brighten the profile without sabotaging your texture.
Mastering the Simmer: Heat Control and Timing
Once your beans have soaked, it is time to move them to the stovetop. This is where patience becomes your most valuable tool. You must avoid the urge to crank the heat to a high boil, as this creates a violent environment that bangs the beans against one another, causing them to disintegrate before they are cooked through. Instead, you are looking for a gentle, rolling simmer. The water should look like a slow-moving whirlpool, never a chaotic eruption of bubbles.
Managing the Water Level
Keep a kettle of boiling water nearby at all times during the cooking process. As the beans cook, they will absorb a massive amount of liquid, and the evaporation from the pot will further reduce your water level. You must keep the beans submerged by at least an inch throughout the duration of the cook. If the beans are exposed to air, the parts above the waterline will dry out and harden, resulting in an inconsistent dish. Adding cold water to a hot pot of beans will shock the starches and cause the skins to split, so always use boiling water for top-ups.
Identifying the Perfect Texture
How do you know when a bean is done? The answer lies in the pinch test. Remove a single bean from the pot and let it cool for a moment. If you can squeeze it between your thumb and forefinger and it offers no resistance, flattening out like a perfectly cooked potato, you have reached culinary gold. If the skin is still slightly chewy or the center feels grainy or firm, give it another ten to fifteen minutes. Remember that beans continue to cook and soften in their own residual heat, so aim for just a hair before "perfect" if you plan to serve them immediately.
"The true measure of a chef is not how they handle the expensive ingredients, but how they manage the humble ones. Beans, when treated with patience, yield a level of comfort that money cannot buy."
Aromatics: Building Layers of Flavor
A pot of beans cooked in plain water is a missed opportunity. Since beans are highly absorbent, they act like a sponge for whatever liquid they are swimming in. This is why you should always use aromatic bases to infuse the liquid. A simple "mirepoix" of onion, carrot, and celery is a classic starting point, but you can go much further by adding woody herbs, whole spices, or even smoked meats. The liquid left over after the beans are cooked—often called "bean liquor"—is liquid gold that should be saved for soups, stews, or even a base for braised greens.
Essential Aromatics to Keep on Hand
The "Sachet" Technique
If you want the benefits of aromatics without the hassle of picking out stems and onion bits later, use a cheesecloth sachet. Simply place your herbs and spices into a small piece of cheesecloth, tie it with kitchen twine, and drop it into the pot like a tea bag. This keeps your pot clean and professional, allowing for easy removal when the cooking is complete. This technique is especially useful if you are using whole peppercorns or dried cloves, which can be unpleasant to accidentally bite into.
Varieties and Their Unique Needs
Not all beans are created equal. The small white bean (like Navy or Cannellini) has a delicate, creamy texture that works perfectly in soups, while the kidney bean is robust and holds its shape exceptionally well, making it ideal for chili. When you are shopping, look for beans that are bright in color and uniform in size. Avoid bags that have a lot of dust or debris, and stay away from beans that look shriveled or discolored, as these are likely old and will never cook to a proper, creamy texture regardless of how long you soak or simmer them.
Troubleshooting Specific Varieties
Chickpeas (Garbanzo Beans)*: These are incredibly dense and require a longer soak and a longer cook time. They are the perfect candidate for a pinch of baking soda in the soaking water, which helps break down the tough skin.
Black Beans*: These are prone to coloring the entire pot of water, which is a great way to build a rich, dark broth. They pair exceptionally well with citrus and cumin.
Lentils and Split Peas*: Unlike their larger counterparts, these do not require soaking at all. Because they are smaller, they cook in roughly 30 to 45 minutes, making them a pantry lifesaver for last-minute meals.
Professional Tips for Large Batches
If you are going to put in the effort to soak and cook a large batch, cook the whole bag. Beans freeze beautifully. Once they have cooled to room temperature, store them in their own cooking liquid in airtight containers. They will last for up to three months in the freezer. Having a "stash" of ready-to-use, perfectly cooked beans in your freezer means you are only ten minutes away from a high-quality, plant-based dinner at any time.
Beyond the Pot: Transforming Your Beans
Once you have achieved the perfect tender bean, you have entered a world of culinary versatility. You can use your beans as a base for salads, a thickener for stews, or even a standalone side dish. A simple transformation involves pan-frying the cooked beans in a bit of olive oil with garlic and fresh herbs until the skins crisp up, creating a textural contrast that elevates the bean from a soft component to a star ingredient. Don't be afraid to experiment with pureeing them into a velvety dip, thinning them with a little bit of their own liquor and lemon juice.
Creating a Balanced Dish
To elevate your bean dishes to the next level, always think about the acid-fat-crunch balance. A bowl of creamy white beans is improved tenfold with a drizzle of high-quality extra virgin olive oil (fat), a splash of sherry vinegar or a squeeze of lemon (acid), and a handful of toasted breadcrumbs or fresh scallions (crunch). This simple formula of three elements turns a humble pot of legumes into a sophisticated, chef-driven meal that hits every sensory note.
The "Bean Liquor" Advantage
Never, ever pour the cooking liquid down the drain. This liquid is packed with the starches that leached out of the beans, making it a perfect natural thickener for sauces and soups. If you have a pot of chili that looks a bit thin, stir in a ladle or two of that reserved bean liquor. You will notice the body of the dish improve immediately, creating a luxurious mouthfeel that canned beans simply cannot replicate.
"Culinary mastery is found in the ability to find beauty in the mundane. A properly cooked bean is a testament to the fact that you do not need expensive ingredients to serve a meal that touches the soul."
Final Thoughts
The path to mastering legumes is one of the most rewarding journeys a home cook can take. It requires you to set aside the convenience of the grocery store aisle and embrace a process that is rooted in history, science, and sensory awareness. By understanding the importance of the soak, the role of salt in structural integrity, and the delicate nature of the simmer, you are gaining skills that extend far beyond a single pot of beans. You are learning to listen to your ingredients and to respect the time they require to reach their full potential.
As you move forward, I encourage you to experiment with different varieties of dried beans—heirloom varieties, different sizes, and unique colors. Each one brings its own flavor profile and texture to the table. Start keeping a small journal of your cooking times and your favorite aromatic combinations. You will soon find that the process becomes second nature, no longer feeling like a chore but rather a meditative rhythm in your kitchen.
Remember, the goal of "Blame The Chef" is to give you the confidence to own your kitchen space and to treat every ingredient with the respect it deserves. Cooking should be an act of joy, a creative outlet that nourishes both your physical body and your creative spirit. Beans are the bedrock of the home kitchen; they are affordable, healthy, and incredibly versatile. Once you master the techniques outlined here, you will find that you have a reliable, delicious, and deeply comforting resource at your fingertips whenever you need it. Now, go grab that bag of dried beans from the pantry, give them a good soak, and let the transformation begin. Your future meals will thank you for the extra effort, and your dinner guests will wonder how you managed to make something so simple taste so incredibly luxurious. Happy cooking, and remember—the secret is in the patience, not the recipe. Continue to push your boundaries, ask questions, and most importantly, enjoy the beautiful, slow process of creating gold from the humble, dried bean. The kitchen is yours to conquer, and with this guide in hand, you have everything you need to turn every bean you cook into a culinary triumph. Whether it is a slow-cooked ragu, a vibrant salad, or a simple side seasoned with herbs, you now possess the knowledge to elevate your legumes to their highest form. May your pots always simmer, your beans always tenderize, and your meals always bring people together around the table in celebration of truly great food.



Get the Next Recipe
Weekly recipes, techniques, and gear picks — straight to your inbox.
