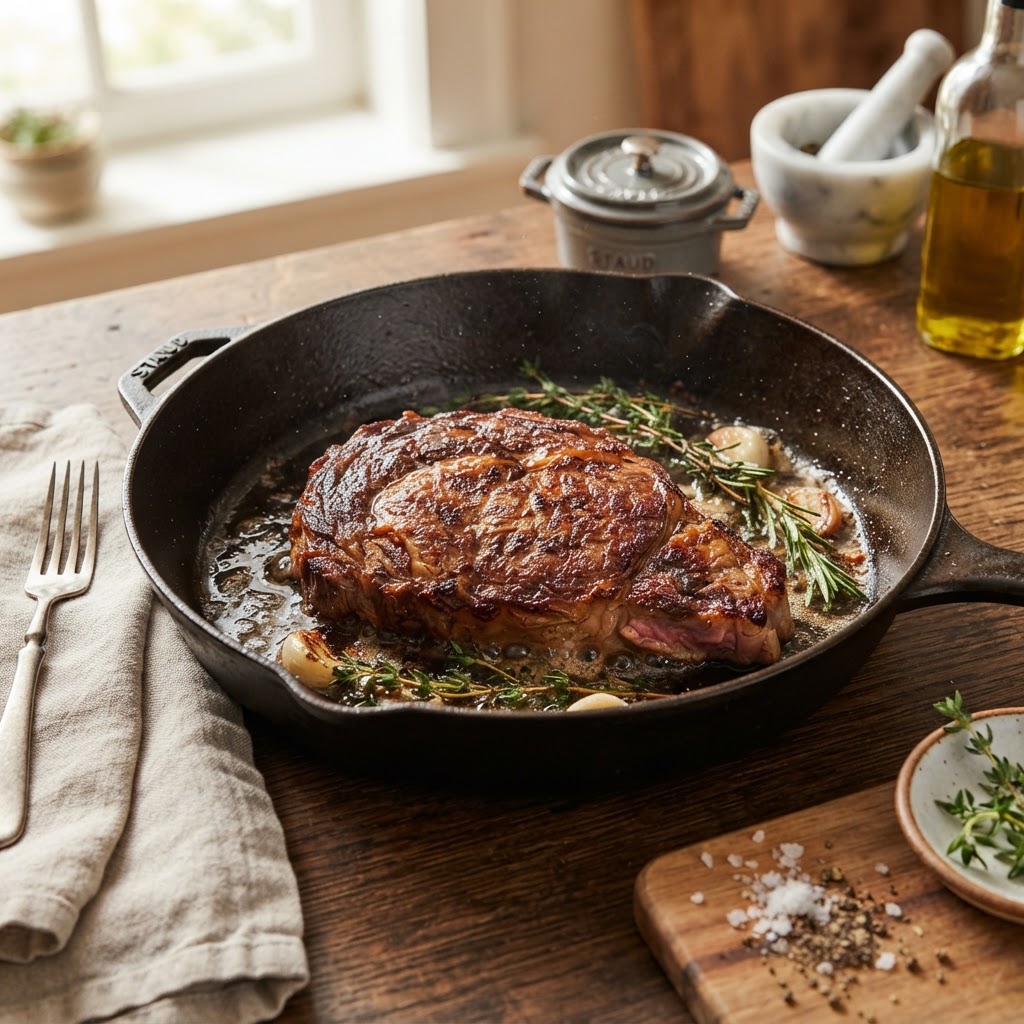
The Home Cook’s Guide to Maillard Browning: Mastering Crust, Color, and Complexity in Your Everyday Sauté
Have you ever wondered why that steak you seared at home looks gray and sad, while the one at your favorite bistro boasts a deep, mahogany crust that crackles under the knife? The difference isn't a secret ingredient or a high-end commercial range; it is the fundamental chemical phenomenon known as the Maillard reaction. Named after the French chemist Louis-Camille Maillard, this complex sequence of reactions occurs when amino acids and reducing sugars rearrange themselves under heat, creating hundreds of different flavor compounds. For the home cook, understanding this process is the singular most effective way to elevate your everyday cooking from functional to professional. It is the bridge between steaming a piece of protein and truly transforming it into something spectacular.
Many home cooks approach the stove with a sense of trepidation, fearing either a fire alarm or a scorched dinner. We often crowd our pans, use cold ingredients, or flip our proteins too frequently, inadvertently cooling the surface of the meat and preventing the necessary heat threshold from being met. Mastering the Maillard reaction requires a shift in perspective, moving away from simply "heating food" toward managing energy transfer and moisture content. It is about patience, preparation, and the willingness to let your pan do the heavy lifting. Once you understand the physics at play, you gain a sense of culinary intuition that no recipe book can fully replicate.
In this guide, we will break down the science of browning into actionable, repeatable techniques that you can use in your own kitchen tonight. We are going to explore why moisture is the enemy of crust, how to choose the right cookware for the job, and how to control your heat sources to achieve that perfect, savory crunch. This is not just about making things look pretty; it is about building layers of depth, nuttiness, and complexity that define great cooking. Put on your apron, grab your heaviest skillet, and let us dive into the rewarding, delicious world of high-heat alchemy.
The Chemistry of Flavor: What Actually Happens in the Pan
At its core, the Maillard reaction is a dance between proteins and sugars. It begins in earnest around 285°F to 330°F (140°C to 165°C). Below this range, moisture evaporates, and the food simply boils or steams in its own juices. Above 350°F, you enter the territory of pyrolysis, or burning, which produces bitter, carbonized char. Your goal as a home cook is to live exclusively within that narrow, flavorful window where the magic happens. It is a balancing act of temperature control and timing that separates a novice from a skilled chef.
"The Maillard reaction is the primary reason why a seared ribeye tastes exponentially better than a boiled one. It is the flavor of transformation, turning raw, bland ingredients into a complex, savory masterpiece."
When you drop a piece of protein into a hot pan, the heat breaks down the complex chains of amino acids. These fragments interact with the natural sugars in the meat, producing melanoidins—the compounds responsible for that rich, brown color—and a volatile array of aromatic molecules. These molecules hit your olfactory sensors, which is why your kitchen smells incredible when you are searing a steak or roasting onions. This is not just a visual cue; it is the sound and smell of flavor being created in real time.
Why Moisture is Your Biggest Obstacle
Moisture is the natural enemy of a perfect sear. Water has a high latent heat of vaporization, meaning it absorbs a massive amount of energy just to turn from liquid to gas. If there is surface moisture on your ingredient, the pan’s energy is consumed by evaporating that water before it can ever reach the temperature required for the Maillard reaction. This is why wet meat will always come out gray, flaccid, and lacking in flavor, regardless of how hot your stove is set.
To mitigate this, you must treat your ingredients with a strict drying regimen. Before your protein or vegetable hits the pan, use high-quality paper towels to pat the surface until it is bone-dry. For steaks, some professionals even recommend seasoning them with salt and letting them sit uncovered in the refrigerator for several hours or overnight. This technique, known as dry brining, pulls moisture out, evaporates it, and creates a tacky, dry surface that is primed for an aggressive sear.
Selecting the Right Tools for the Sear
Not all pans are created equal, and your choice of cookware will dictate your success. To achieve a proper sear, you need a pan with high thermal mass—the ability to hold and distribute heat evenly. If a pan is too thin, the moment you drop a cold piece of meat into it, the pan’s temperature will plummet. This causes the meat to stick and steam rather than brown. You want a pan that retains its heat, ensuring the surface temperature stays well above that critical 300°F threshold.
Cast Iron and Stainless Steel: The Gold Standards
For the home cook, cast iron skillets are perhaps the best tools for the job. They are relatively inexpensive, virtually indestructible, and possess excellent heat retention. Once a cast-iron pan is hot, it stays hot, providing the intense, sustained energy required for deep, even browning. If you are cooking a steak, a pork chop, or even pan-searing salmon, cast iron is your most reliable ally. It requires a bit of maintenance, but the results are unparalleled.
Stainless steel pans are the second-best option, particularly those with an aluminum or copper core (cladding). These pans respond to temperature changes more quickly than cast iron, making them ideal for pan-searing delicate items like scallops or breasts of chicken where you might want to adjust the heat slightly during the cooking process. Avoid non-stick pans for high-heat searing; the coatings are typically not designed to handle the temperatures necessary for effective Maillard reactions, and the non-stick surface actually prevents the formation of the fond, those brown, flavorful bits that stick to the bottom of the pan.
The Art of Temperature Management
Managing your stove is not just about turning a dial to "high." It is about understanding how your pan communicates with your heat source. Most home gas stoves produce concentrated, intense heat, while electric or induction stoves can have "hot spots." You must be the conductor of this energy, moving the pan if necessary and adjusting your flame to ensure an even crust without burning the exterior before the center is cooked through.
When you preheat your pan, do not rush the process. A pan may feel hot to the touch after two minutes, but it may not have uniform thermal saturation. Let your skillet heat over medium-high heat for at least five to seven minutes. You will know it is ready when a drop of water sizzles and dances across the surface—the Leidenfrost effect. Add your oil only after the pan is hot, and wait another thirty seconds for the oil to shimmer. If you add the oil too early, it will oxidize and potentially turn bitter before the food even hits the surface.
"Professional cooking is the art of thermal control. The pan is not just a container; it is a heating element that must be managed with focus, intention, and a watchful eye."
The "Crowding" Rule
One of the most common mistakes in the home kitchen is overcrowding the pan. When you put too many items in the pan at once, two things happen: first, you lower the temperature of the pan significantly; second, you trap steam in the pan. Both of these factors effectively prevent the Maillard reaction. If you are searing a batch of mushrooms or multiple chicken thighs, do them in shifts. Leave at least an inch of space between each piece of food. This allows moisture to escape efficiently and keeps the temperature high enough to brown rather than boil.
Fats, Oils, and Smoke Points
Choosing the right fat is just as important as choosing the right pan. You want an oil with a high smoke point, which is the temperature at which an oil begins to break down, smoke, and impart an acrid, burnt flavor to your food. Extra virgin olive oil, while delicious for salads, is generally a poor choice for high-heat searing because its smoke point is relatively low. Stick to oils that can handle the heat.
Common high-heat oils include:
Grapeseed Oil*: Neutral flavor and a very high smoke point.
Avocado Oil*: Extremely stable at high temperatures, excellent for searing.
Refined Coconut Oil*: Can work, though it may impart a faint tropical flavor.
Clarified Butter (Ghee)*: Unlike regular butter, the milk solids have been removed, giving it a much higher smoke point while retaining a rich, nutty flavor.
If you love the flavor of butter, add it at the very end. Once your protein has achieved a beautiful sear, drop a knob of butter into the pan with some aromatics like garlic, thyme, or rosemary. The butter will foam, and you can spoon that liquid gold over your food, a technique known as basting or arroser. This adds a final layer of richness and flavor without running the risk of the milk solids burning during the initial sear.
The Role of Salt and Surface Treatment
Seasoning is not just about flavor; it is about chemistry. Salt plays a crucial role in the Maillard reaction by drawing moisture to the surface. While this seems counterintuitive to our goal of a dry surface, it actually helps create a more uniform crust if managed correctly. When you salt meat well in advance, the salt dissolves into the juices, creating a brine that penetrates the muscle fibers. The surface then dries out, leaving behind a concentrated layer of protein and sugar that browns beautifully.
The Importance of the Crust
The "crust" is not merely an aesthetic preference; it is a textural contrast that makes food exciting to eat. This is why we crave textures that range from crisp to tender. If you achieve a perfect sear, you are creating a seal that helps the meat retain its internal juices while providing a deep, savory foundation for the rest of your meal. This is the difference between a steak that is "just okay" and a steak that you will remember for months.
When you place your protein into the pan, do not touch it. This is perhaps the hardest rule to follow. We have an instinct to move food around the pan, but movement is the enemy of browning. If you poke, prod, or lift the meat to "check on it," you are disrupting the heat transfer. Wait until the protein releases naturally from the pan—this is the sign that the Maillard reaction has successfully created a crust. If it feels stuck, it is usually because it is not yet finished browning.
Troubleshooting Common Searing Issues
Every cook encounters problems, and the key is knowing how to fix them. If your food is burning on the outside but raw on the inside, your heat is too high. Dial it back slightly and consider using a two-stage cooking method: sear the protein hard on both sides in the pan, then finish it in a 350°F oven until it reaches your desired internal temperature. This is the standard procedure for thick-cut steaks, pork chops, and poultry.
If your food is gray and pale, your heat is likely too low, or you are overcrowding the pan. Remember to use high-quality, heavy-duty pans and always ensure the surface of your ingredient is completely dry. If you are dealing with vegetables, remember that they contain a high percentage of water. It takes time for them to brown, so be patient, use a bit more oil than you think you need, and don't stir them too often. Let them settle, brown, and then flip.
Building a Pan Sauce
One of the greatest rewards of mastering the sear is the ability to make a professional-grade pan sauce. Once your protein is finished, you will see bits of brown, crusty goodness stuck to the bottom of the pan. These are called fond. Whatever you do, do not wash that pan yet! Those bits are concentrated flavor waiting to be released.
Final Thoughts
Mastering the Maillard reaction is a lifelong journey, but the rewards are immediate. By controlling moisture, managing heat, and selecting the right equipment, you can bring the quality of a high-end restaurant into your own kitchen. Remember that cooking is an iterative process; you will get better at sensing the heat, listening to the sear, and timing your flips with every meal you prepare. Do not be discouraged by a few burnt crusts or a piece of meat that did not brown quite as deeply as you wanted. Each attempt teaches you more about the physics of your specific stove and the temperament of your cookware.
The goal here is not perfection; it is understanding. When you understand the "why" behind the "how," you move from being a recipe-follower to being a chef. You begin to see the potential in a simple piece of chicken or a humble cauliflower head. You realize that a deep, golden-brown crust is the foundation upon which the best dishes are built, providing the backbone of flavor that makes a dish memorable.
Keep your pans clean but seasoned, your paper towels handy, and your heat high. Experiment with different proteins and different fats, and pay attention to how your food changes as it reacts to the heat. You are the architect of your dinner, and with the techniques discussed here, you are well on your way to creating meals that are as complex and satisfying as anything you would find in a professional kitchen. Happy cooking, and remember: if the kitchen smells like heaven, you are on the right track. Continue to challenge yourself, keep your focus on the pan, and enjoy the delicious results of your hard work. There is truly nothing quite as satisfying as the sound of that first, perfect sear in a well-loved skillet. You have all the tools, the knowledge, and the potential to turn your kitchen into a center of flavor. Now, go create that crust!


Get the Next Recipe
Weekly recipes, techniques, and gear picks — straight to your inbox.
