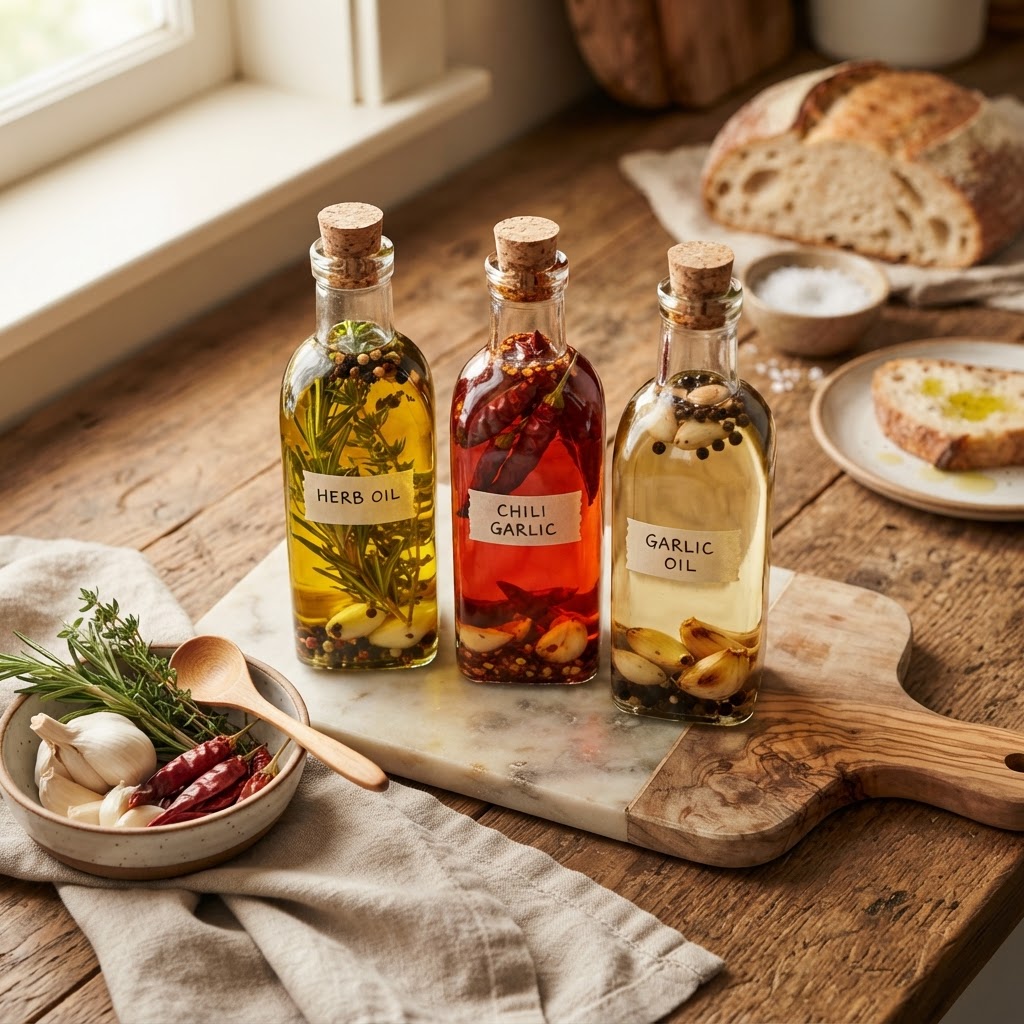
The Home Cook’s Guide to Oil Infusions: How to Create Herb, Chili, and Garlic Oils to Elevate Your Finishing Touches
The pursuit of professional-grade flavor at home often feels like a riddle wrapped in an enigma, leaving many of us to wonder why our dishes lack that final, lingering sparkle found in restaurant dining. We meticulously source our produce, spend hours reducing stocks, and obsess over the Maillard reaction on a searing steak, yet the difference between "good" and "unforgettable" often hides in the simplest of finishing touches. Oil infusions are perhaps the most underrated weapon in a home cook’s arsenal, acting as a delivery system for aromatic compounds that can transform a mundane bowl of pasta or a rustic roasted vegetable platter into a sensory masterpiece. By understanding how to properly marry fat with flavor, you gain the ability to add layers of nuance that permeate every bite without changing the fundamental texture of your dish.
When we talk about infusions, we are talking about the science of fat-solubility. Many of the most pungent and pleasant aromatic compounds—the essential oils found in basil, the capsaicin in dried chilies, and the sulfurous punch of raw garlic—are not water-soluble; they require a medium like high-quality olive oil, grapeseed oil, or even neutral sunflower oil to fully express their character. When you steep these ingredients in a warm environment, you are essentially extracting those aromatic volatile oils and preserving them for later use. This process doesn't just create a flavorful liquid; it creates a shelf-stable (when handled correctly) seasoning that you can reach for at a moment’s notice. It is the culinary equivalent of having a secret flavor vault, ready to be deployed at the exact moment your plate hits the table.
In this comprehensive guide, we will peel back the curtain on how to craft these infusions safely and effectively. Many home cooks approach infused oils with a mixture of intimidation and confusion, wondering about the longevity of the product and the risk of botulism, which is a valid concern that we will address with academic precision. By following professional-grade protocols for blanching, temperature control, and storage, you can safely curate an entire library of oils that cater to your specific palate. We are going to explore the delicate nature of soft herbs, the fiery potential of dried chilies, and the pungent, savory depth of garlic, ensuring that your kitchen is always equipped with the finishing oils necessary to make your food truly sing.
The Chemistry of Flavor Extraction
The fundamental secret to a high-quality infusion is recognizing that flavor extraction is a delicate dance between time and temperature. If the oil becomes too hot, you risk degrading the volatile aromatic compounds, effectively cooking the ingredients until they become bitter or scorched. If the oil is too cold, the extraction process takes far too long, increasing the risk of enzymatic spoilage or oxidation. Achieving that perfect balance requires an understanding of how these aromatics move from the solid cellular structure of the plant into the lipid structure of the oil.
Understanding Fat-Soluble Aromatics
Most herbs and spices contain essential oils that are lipophilic, meaning they bond readily with fats. When you submerge fresh herbs like parsley, basil, or chives into a high-quality fat, the fat acts as a protective blanket, preventing the oxidation that would typically occur if the herbs were left exposed to air. However, because fresh herbs contain water, you are faced with a challenge: moisture is the enemy of shelf life. This is why professional techniques prioritize the removal of excess surface moisture before extraction begins.
Temperature Control and Maintenance
For most delicate herb infusions, you are aiming for a temperature range between 140°F and 160°F (60°C to 70°C). At this range, you are gently "steeping" the herbs rather than frying them. Using a digital probe thermometer is not just a suggestion; it is a necessity for consistency. If you allow the temperature to climb toward 200°F or higher, you change the nature of the infusion from a fresh, bright extract to a roasted, deep-toned oil. Both have their place, but knowing the difference is what separates an amateur from a seasoned cook.
"True flavor is not just about the intensity of the ingredients you start with, but the scientific precision with which you extract and preserve them. An infusion is an act of patience, not speed."
Masterclass: The Vibrant Herb Oil
When we look at vibrant green oils in restaurants—those striking drizzles that turn a simple soup into a work of art—we are looking at a technique called blanch-and-shock. This is essential if you want your herb oil to stay neon-green for weeks rather than turning a murky, brownish olive color. The chlorophyll in herbs is sensitive to heat; when it breaks down due to prolonged exposure to light or heat, it turns grey. By blanching, you "set" the green color before incorporating it into the fat.
The Blanch-and-Shock Technique
Start by bringing a pot of salted water to a rolling boil and prepare a bowl of ice water nearby. Drop your herbs—parsley, cilantro, or basil—into the boiling water for exactly 15 to 30 seconds. Immediately remove them with a spider strainer and plunge them into the ice bath to stop the cooking process. Once cooled, pat them bone-dry using a kitchen towel or paper towels. Any residual water left on the herbs will cloud your oil and significantly reduce its shelf life by introducing a breeding ground for bacteria.
Blending and Straining
Place your dried herbs into a high-speed blender and cover them with a neutral oil, such as grapeseed or a mild olive oil. Blend on the highest setting for about two minutes. You want the friction of the blender to warm the oil slightly, which helps with the final extraction of the chlorophyll into the fat. After blending, strain the mixture through a fine-mesh chinois or a cheesecloth-lined sieve. Do not press down too hard on the solids, as this can introduce fine particles that make your final oil look cloudy rather than crystal clear.
The Art of the Chili Oil
Chili oil is perhaps the most versatile condiment in the global kitchen, bridging the gap between Asian-inspired stir-fries and simple Italian pasta aglio e olio. Unlike herb oils, which benefit from the gentleness of cold-steeping or low-heat extraction, chili oils thrive on a brief, high-heat flash. This process toasts the capsaicin and the sugars within the dried chiles, resulting in an oil that is not just spicy, but deeply nutty and complex.
Selecting Your Chilies
You should aim for a blend of chiles to get both heat and depth. Use dried arbol chiles for a sharp, clean heat, and Guajillo or Kashmiri chiles for a vibrant red color and a fruity, mild undertone. If you want to experiment, add a star anise pod, a cinnamon stick, or a tablespoon of toasted Sichuan peppercorns into the mix. These secondary aromatics provide a numbing sensation and a lingering floral finish that keeps the heat from feeling one-dimensional.
The Flash-Infusion Method
Place your dried, coarsely crushed chiles in a heat-proof stainless steel or glass bowl. Heat your chosen oil in a small saucepan until it reaches 325°F (162°C). Carefully pour the hot oil over the chiles. You will hear a violent sizzle—this is exactly what you want. This flash of heat toasts the chiles instantly, releasing their essential oils into the fat without burning them. Let the mixture cool completely, stir in a pinch of toasted sesame seeds if desired, and bottle it.
"A well-made chili oil should tell a story: it begins with a bright, fruity aroma, travels through a deep, smoky complexity, and concludes with a gentle, warming heat that makes you crave the next bite."
The Science and Safety of Garlic Infusions
Garlic-infused oil is the "danger zone" of the infusion world. Because garlic is a low-acid vegetable that grows in the soil, it is naturally host to Clostridium botulinum spores. These spores are heat-resistant and thrive in anaerobic (oxygen-free) environments—exactly what a bottle of oil provides. If you simply toss raw garlic into a bottle of olive oil and leave it on your counter, you are creating the perfect environment for a toxin to develop. For home cooks, safety is the absolute priority.
The Professional Safety Protocol
If you want to infuse oil with garlic, you must treat it as a perishable product. There are two safe ways to do this:
Infusing with Roasted Garlic
Alternatively, you can roast your garlic until it is deep golden brown and soft before adding it to the oil. The heat of the oven helps to destroy some bacteria, but it still does not make the oil shelf-stable at room temperature. Always label your bottles with the date they were made. If you ever notice the oil getting cloudy, or if it develops a strange odor, discard it immediately. Never take risks with garlic infusions; when in doubt, throw it out.
Storage, Longevity, and Shelf Life
Once you have crafted your oils, your final responsibility is proper storage. Light, heat, and oxygen are the three primary enemies of shelf life. Even the most carefully prepared oil will eventually go rancid if left in a sunny window or stored in a warm pantry near the stove. The kitchen cupboard is often too hot; the back of the pantry or the refrigerator is much better for long-term flavor retention.
Choosing the Right Vessel
Always use amber or opaque glass bottles if possible, as these block ultraviolet light, which accelerates the oxidation of the fats. If you use clear glass, store the bottles inside a dark cabinet. Ensure your lids are airtight. Remember that oils act like sponges for other odors in your kitchen; if you leave an open bottle near a pungent onion or cleaning supply, the oil will absorb those aromas.
Maintaining Quality
Follow these general shelf-life rules:
Herb oils:* Keep refrigerated for up to 10 days. The chlorophyll will begin to oxidize after this point.
Chili oils:* If made with high-heat flash, they can last up to 3-4 weeks in the pantry, provided no fresh ingredients were added.
Garlic oils:* Strictly 3 days in the refrigerator. Never exceed this limit under any circumstances.
Practical Applications: Elevating the Everyday
Now that your shelves are stocked with your custom oils, the goal is to integrate them into your daily cooking repertoire. Herb oil is magnificent when drizzled over a simple roasted tomato soup or a piece of flaky, pan-seared white fish. The herbaceous notes provide a brightness that cuts through the richness of the fish or the creaminess of a soup. A high-quality herb oil is a "finishing" ingredient—do not use it for high-heat cooking, or you will waste the delicate flavors you worked so hard to extract.
The Finishing Touch
For your chili oil, look toward dishes that need a punch of savory depth. It is transformative on a plain fried egg, perfect for drizzling over steamed dumplings, and incredible when folded into a bit of mayonnaise for a spicy dipping sauce for roasted potatoes. Don't be afraid to experiment with your infusions; mix them together! A dash of garlic oil paired with a drop of chili oil can turn a simple bowl of plain white rice into a satisfying meal.
Hosting with Infusions
When you have guests over, these oils are the ultimate conversation piece. Serving a small bowl of high-quality bread alongside a selection of your house-made oils allows your guests to customize their own experience. It shows a level of care and craft that generic store-bought dressings simply cannot match. You aren't just serving dinner; you are serving an experience that you built from the ground up, one molecule at a time.
Final Thoughts
The process of creating your own oil infusions is one of the most rewarding endeavors a home cook can undertake. It forces you to slow down, to respect the chemical properties of your ingredients, and to think about your dishes in terms of layers—the base, the body, and the finish. By mastering the temperatures, the extraction techniques, and the critical safety protocols, you move beyond following a recipe and start truly understanding the mechanics of flavor.
Do not be discouraged if your first batch of herb oil doesn't turn out as vibrant as a professional chef's, or if your chili oil needs a bit more tweaking to find the right balance of heat. Cooking is an iterative process. Every batch is an opportunity to adjust your ratios and refine your technique. As you build your collection of infusions, you will find that you no longer need complex sauces or heavy reductions to make your food taste "finished."
Ultimately, the goal of these infusions is to empower your intuition. When you stand in front of a plate of food and feel like it is missing "something," you will now have a toolkit ready to address that void. Whether it is the grassy punch of basil, the smoky bite of toasted arbol, or the savory depth of garlic, these oils are the bridge between the kitchen and the table. Keep experimenting, keep labeling your jars, and above all, keep blaming the chef—because with these infusions, the responsibility for how incredible your food tastes now rests entirely on your shoulders. Enjoy the journey of discovery, and may your kitchen always smell of fresh herbs and toasted aromatics.
Get the Next Recipe
Weekly recipes, techniques, and gear picks — straight to your inbox.
