The Home Cook’s Guide to Pan-Roasting: How to Sear and Finish for Perfectly Juicy Proteins
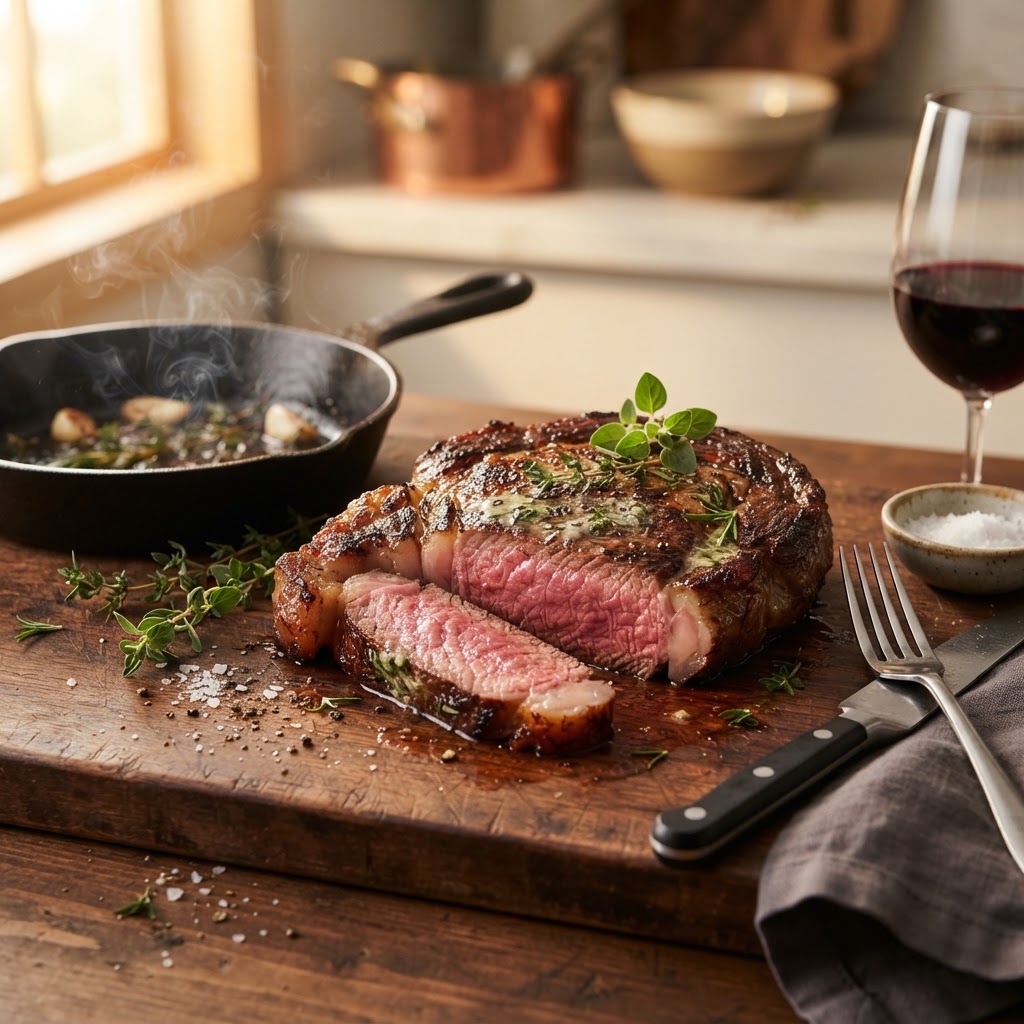
There is an enduring myth in the world of home cooking that the most succulent, restaurant-quality proteins are the result of expensive equipment or a lifetime of professional training. The truth, however, is significantly more grounded in fundamental physics and a bit of patience. When we talk about pan-roasting, we are describing the ultimate bridge between stovetop intuition and oven precision. It is the gold standard for achieving that coveted, mahogany-colored crust on the outside while maintaining a tender, butter-soft interior that practically melts on the tongue. By mastering this two-stage process, you effectively take control of the thermodynamic environment surrounding your food, ensuring consistent results regardless of the cut of meat.
Most home cooks struggle with protein preparation because they rely too heavily on either the pan or the oven, rarely utilizing both to their full potential. If you cook a thick-cut pork chop or a substantial chicken breast solely in a skillet, you often end up with a burnt exterior and a raw, chewy middle. Conversely, tossing a cold piece of protein into a cold oven leads to gray, uninspired meat that lacks the deep, complex flavors produced by the Maillard reaction. Pan-roasting solves these dilemmas by using the pan to initiate the flavor-building browning process and the oven’s ambient heat to bring the core temperature to perfection. It is a foolproof method once you understand the rhythm of the process.
At "Blame The Chef," we believe that the kitchen should be a laboratory of creativity, not a place of anxiety. Whether you are working with a humble piece of poultry, a decadent cut of beef, or a sustainably sourced fillet of fish, the principles of pan-roasting remain largely universal. This guide will walk you through the essential science behind the sear, the importance of temperature management, and the final, crucial step of resting. As you internalize these techniques, you will find that you no longer need to rely on complex recipes; instead, you will have a versatile culinary toolkit that allows you to cook almost anything with absolute confidence. Let us peel back the curtain on this professional technique and turn your home kitchen into a high-end bistro.
The Science of the Sear: Why Heat Matters
The primary objective of a sear is not to "lock in juices," as the old culinary wives' tale suggests, but rather to create a concentrated layer of flavor on the surface of your protein. This is known as the Maillard reaction, a chemical reaction between amino acids and reducing sugars that gives browned food its distinctive, savory taste. To achieve this, you need a high-temperature environment. If your pan is not hot enough, the protein will steam in its own moisture, resulting in a pale, flabby exterior that lacks the depth of flavor you are looking for. Achieving that perfect sear requires a combination of high heat, a dry surface, and the right fat.
The Importance of Moisture Control
Before your protein ever touches the pan, it must be dry. Even a light coating of surface moisture can hinder the browning process, as the energy from your pan will be spent evaporating that water rather than browning the surface. Always pat your meat dry with paper towels until it is completely matte. If you are dealing with a larger cut of meat, seasoning it well in advance and letting it sit in the refrigerator uncovered—a process known as dry-brining—can help dehydrate the surface layer while allowing salt to penetrate deep into the fibers. This leads to a superior crust and a more flavorful end result.
Fat Selection and Smoke Points
Choosing the right fat is just as critical as the temperature of your pan. You need a fat that can withstand high temperatures without burning, which is why we avoid using butter for the initial sear. Butter contains milk solids that will scorch and turn bitter at the temperatures required for a proper sear. Instead, opt for oils with a high smoke point, such as avocado oil, grapeseed oil, or clarified butter (ghee). These fats remain stable at high heat, allowing you to get the pan hot enough to create that beautiful crust without introducing an acrid, burnt flavor to the finished dish.
"A well-executed sear is not merely about aesthetics; it is a fundamental chemical transformation that elevates the protein from a simple ingredient to a culinary centerpiece."
Mastering the Stovetop-to-Oven Transition
Once you have achieved that gorgeous, golden-brown crust on your protein, the stovetop has done its job. However, leaving the meat on the burner to finish cooking often leads to an uneven gradient, where the edges are overcooked and dry while the center remains underdone. This is where the oven comes into play. By transferring your pan to a preheated oven, you surround the protein with consistent, radiant heat. This allows the heat to penetrate the center of the meat gently, ensuring that the internal temperature rises uniformly without scorching the outside further.
The Role of Pan Material
For pan-roasting, your choice of pan matters immensely. You need a pan that is oven-safe and has good thermal mass, meaning it holds onto heat well. A heavy-bottomed stainless steel pan or a well-seasoned cast iron skillet is ideal for this technique. Stainless steel provides excellent conductivity and creates a beautiful fond (the browned bits left in the pan) which can be turned into a pan sauce later. Cast iron is superior for retaining high heat, making it the perfect vessel for searing and transitioning directly into a hot oven. Avoid non-stick pans for this method, as most are not designed to withstand the high temperatures required for searing, and the coatings can degrade under direct heat.
Preheat Management
To ensure a smooth transition, your oven should be preheated to a temperature that complements the thickness of the protein. For most applications, a temperature range of 350°F to 400°F is ideal. If you are searing a very thick steak, a lower oven temperature will allow for a more controlled, even cook. If you are working with a thin chicken breast, you can move faster with a slightly higher oven temperature. Always keep your oven-safe gloves or a heavy-duty towel nearby; it is easy to forget that the handle of your pan is screaming hot once it comes out of the oven.
The Art of Basting: The Chef's Secret
If you have ever wondered why restaurant proteins have that glistening, herb-infused finish, the answer is butter-basting (or arroser in French). Once your protein has finished its time in the oven and is nearly at your target internal temperature, you return the pan to the stove on medium-high heat. You then add a generous knob of high-quality butter, along with aromatics such as crushed garlic cloves, fresh sprigs of thyme, or rosemary. As the butter foams, tilt the pan slightly and use a large spoon to continuously bathe the meat in the flavored, hot fat.
Flavor Infusion
Basting is not just for appearance; it is a highly effective way to infuse flavor into the protein. As the aromatics hit the hot butter, their essential oils are released, creating a fragrant infusion that penetrates the surface of the meat. This also serves to finish the cooking process gently, filling in the gaps of any uneven heat. The milk solids in the butter will begin to brown, creating a nutty, rich flavor known as beurre noisette, which acts as a final seasoning layer. It turns a standard piece of meat into a decadent experience.
Timing the Basting Process
The timing of your basting is critical. You want to start this process in the final two to three minutes of cooking. If you start too early, you run the risk of burning the milk solids in the butter, which will impart a bitter, charcoal-like taste to the dish. Watch the color of the butter carefully—it should transition from a pale yellow to a deep, golden brown. If the butter looks like it is turning black, take the pan off the heat immediately. The residual heat will be sufficient to finish the job without the risk of overcooking the protein.
"Basting is the culinary equivalent of an artist’s final brushstroke; it adds the glossy, aromatic finish that defines professional cooking."
Internal Temperatures and The Resting Ritual
There is no room for guesswork in professional cooking. Even with years of experience, the only way to guarantee perfectly juicy proteins is through the use of an instant-read thermometer. Trying to guess the doneness by touch is a recipe for inconsistency. You should pull your protein from the oven or the pan when it reaches approximately five degrees below your target final temperature. This allows for carryover cooking, where the latent heat inside the meat continues to raise the core temperature once it is off the heat source.
Target Temperatures for Success
Knowing your target temperatures is the hallmark of a skilled cook. For beef, a medium-rare finish is generally achieved at 130°F, meaning you should pull it from the heat at 125°F. Poultry, which is much less forgiving, should reach a safe internal temperature of 165°F. For fish, the threshold is lower, usually around 130°F to 135°F for a moist, flaky texture. These numbers are your best friends in the kitchen, removing the anxiety of "is it done yet?" and replacing it with the scientific certainty that your food is safe and cooked to your preference.
The Importance of Resting
Once your protein reaches the target temperature, you must pull it from the pan and place it on a cutting board or a warm plate. Do not skip the resting period. When meat is cooked, the internal proteins are tense and contracted, pushing the juices toward the center. If you slice into it immediately, those juices will run out onto the cutting board, leaving you with dry, tough meat. By letting the meat rest for five to ten minutes—depending on its size—the proteins relax and reabsorb the juices, ensuring that every bite is succulent and tender.
Troubleshooting Common Pan-Roasting Pitfalls
Even with the best instructions, things can go wrong in the kitchen. The most common mistake home cooks make is overcrowding the pan. When you put too many pieces of meat in the pan at once, the temperature drops precipitously and moisture becomes trapped between the pieces, preventing that hard, golden sear. Always cook in batches if your pan is not large enough to hold the protein with at least an inch of space between each piece. It is better to have one perfectly seared batch than a pan full of gray, steamed protein.
Dealing with Stuck Proteins
If your protein seems stuck to the pan, do not panic and do not try to rip it off. A common rule in professional kitchens is that the food will naturally "release" from the pan once a proper sear has been achieved. If you try to flip a piece of chicken or steak and it feels resistant, it is simply telling you it needs more time to develop that crust. Be patient; wait another thirty seconds to a minute, and you will find that the protein releases easily with a simple nudge of your tongs.
Smoke Management
Pan-roasting at high temperatures can be a smoky affair. Ensure your kitchen is well-ventilated by turning on the range hood to its highest setting or opening a window. If your smoke alarm goes off, it is a sign that your pan is likely too hot or that your oil choice is inappropriate for the heat. Remember, you want a gentle shimmer and a light wispy smoke, not a cloud of black, acrid grease. If the oil begins to smoke heavily, it is time to turn the heat down and perhaps introduce a little bit of butter or a lower-heat oil to stabilize the pan.
Advanced Techniques: Beyond the Basics
Once you have mastered the fundamental pan-roast, you can start experimenting with more complex flavor profiles. One way to do this is through the use of pan sauces. After you have removed your protein to rest, don't wash that pan! The browned bits stuck to the bottom, known as the fond, are packed with flavor. You can deglaze the pan with a splash of wine, stock, or even balsamic vinegar, scraping the bits up with a wooden spoon as the liquid reduces. Mount this reduction with a cold knob of butter to create a silky, restaurant-quality sauce that ties the entire dish together.
The Role of Aromatics
Do not be afraid to be generous with your aromatics. Crushed garlic cloves (skin on is fine) and whole sprigs of herbs like rosemary, thyme, or even woody sage add an incredible depth of flavor that a simple salt-and-pepper seasoning cannot replicate. You can even experiment with adding citrus peels or smashed peppercorns to your basting butter. These subtle additions build layer upon layer of complexity, making your pan-roasted dish taste like it came out of a top-tier kitchen.
Incorporating Vegetable Sides
You can even use the pan-roasting method to cook your vegetables alongside your protein. If you are roasting a chicken, place halved Brussels sprouts or chunks of root vegetables directly into the pan around the protein during the oven stage. The rendered fat from the meat will coat the vegetables, infusing them with rich flavor while they roast. This is a brilliant way to create a one-pan meal that minimizes cleanup and maximizes flavor integration. Just be mindful of the timing—vegetables may need to be added slightly later than the protein to ensure they don't overcook.
Elevating the Final Presentation
Presentation is the final step in the culinary process. When you are ready to serve, think about how the meat sits on the plate. Slicing your protein against the grain—cutting across the muscle fibers rather than parallel to them—is a crucial technique for tenderness, especially with tougher cuts like flank or skirt steak. By shortening the muscle fibers, you make the meat significantly easier to chew. Combine this with a beautiful plating style: perhaps a bed of puréed potatoes or a colorful medley of roasted vegetables, topped with the protein, and drizzled with a small amount of your pan sauce.
The Importance of Salt
We often discuss seasoning as a general concept, but the timing and type of salt are key to a professional finish. Using a coarse kosher salt for your initial sear allows for better grip and coverage. For the final touch, consider a light sprinkle of flaky sea salt just before serving. The difference in texture is subtle but noticeable, adding a tiny crunch that contrasts beautifully with the tender meat. Remember, salt is not just a flavor enhancer; it is the fundamental tool that unlocks the natural profile of your ingredients.
Confidence in the Kitchen
The difference between a "home cook" and a "chef" is not a set of expensive knives or a commercial-grade range. It is the understanding of the processes at play and the willingness to learn from each mistake. Every time you pan-roast, you are refining your internal clock, learning to recognize the scent of perfectly browned butter, and understanding the subtle tactile cues that tell you when the meat is just right. Keep your notebook handy, jot down your timings, and don't be afraid to tweak the variables to suit your personal palate.
Final Thoughts
Pan-roasting is the cornerstone technique that every home cook should master. It is efficient, it is flavor-driven, and it provides a level of quality that is rarely achievable through simpler methods like poaching or boiling. By harnessing the power of the Maillard reaction, understanding the crucial transition between stovetop and oven, and respecting the essential process of resting your proteins, you are well on your way to elevating your home kitchen to a professional standard. Remember that cooking is an iterative process; the more you practice these steps, the more intuitive they will become.
Do not be discouraged if your first attempt doesn't result in the perfect crust or the ideal internal temperature. The beauty of pan-roasting lies in its reliability once the basics are second nature. Focus on the moisture of your protein, the heat of your pan, and the precision of your thermometer. When you combine these elements with quality ingredients and a bit of patience, you will find that the best meals are often those you prepared entirely yourself in your own kitchen. At "Blame The Chef," we provide the roadmap, but you are the driver. Take these skills, experiment with your favorite proteins and herbs, and discover the joy of creating restaurant-quality dishes without the pretense.
Your journey into the world of professional techniques is only beginning. As you become more comfortable with these foundational skills, you will find yourself improvising more, exploring new cuts of meat, and finding creative ways to incorporate different flavor profiles into your cooking. Whether you are hosting a formal dinner party or simply preparing a weeknight meal for your family, the lessons of pan-roasting will serve you well. So, grab your skillet, turn on the range, and get ready to impress. The kitchen is yours to command, and with these techniques in your repertoire, there is no protein you cannot conquer. Happy cooking, and remember: if it comes out perfectly, you deserve the credit—but if it doesn't, you can always just blame the chef.


Get the Next Recipe
Weekly recipes, techniques, and gear picks — straight to your inbox.
