The Home Cook’s Guide to Pan-Searing: Mastering Surface-to-Heat Ratios for Perfectly Crusty Proteins Every Time
The kitchen can often feel like a battlefield, especially when you are staring down a thick-cut ribeye or a delicate fillet of wild-caught salmon. We have all been there: the pan is screaming, the smoke is starting to curl toward the ceiling, and your heart is pounding as you wonder if you are creating a masterpiece or a charcoal briquette. Pan-searing is the bridge between a home cook who just follows instructions and a home cook who truly understands the science of flavor. It is not just about browning meat; it is about the Maillard reaction, a complex chemical dance between amino acids and reducing sugars that yields the savory, umami-rich crust we crave. When you master the pan-sear, you stop worrying about recipes and start relying on your senses.
The secret that professional chefs often keep to themselves is that great searing is less about the heat intensity and more about the management of surface-to-heat ratios. If your pan is overcrowded, you lose the kinetic energy required to evaporate surface moisture, turning your gorgeous steak into a grey, steamed tragedy. Temperature regulation is the invisible hand guiding the entire process, requiring patience, the right choice of cookware, and an intimate understanding of how your protein interacts with fat. By controlling the environment, you ensure that the exterior develops a glass-like crunch while the interior remains a buttery, succulent medium-rare. It is a technique rooted in physics, but it yields results that are purely artistic.
Welcome to the fold of those who refuse to settle for mediocre weeknight dinners. Here at "Blame The Chef," we believe that every home kitchen has the potential to produce restaurant-quality proteins if you are willing to learn the rules before you break them. We are going to dismantle the intimidation factor surrounding cast iron and stainless steel, providing you with the exact protocols for heat retention, moisture control, and the delicate art of the flip. Prepare to turn your kitchen into a sanctuary of sizzling butter, fragrant herbs, and perfectly caramelized crusts. Let us get to work on transforming your proteins into the main event they were always meant to be.
Understanding the Physics of the Sear
The Maillard Reaction Explained
At its most fundamental level, the Maillard reaction is a chemical reaction between amino acids and reducing sugars that gives browned food its distinctive flavor. This is not to be confused with caramelization, which refers specifically to the pyrolysis of sugars. For the home cook, the Maillard reaction is your best friend. It begins to occur rapidly at temperatures above 300°F (150°C). When you sear a protein, you are essentially accelerating this reaction across the entire surface area. If the protein is too wet, the energy from the pan is consumed by the evaporation of water, preventing the surface temperature from reaching that critical threshold. This is why drying your protein with paper towels is the single most important step in the entire process.
Surface-to-Heat Ratios
Managing the surface-to-heat ratio is a skill that separates the amateur from the pro. Every pan has a heat-holding capacity, often referred to as thermal mass. When you add a cold protein to a hot pan, the temperature of the cooking surface drops instantaneously. If your pan is too small or thin-walled, it cannot recover quickly enough, and the meat will begin to boil in its own juices. To combat this, always select a pan with high thermal mass, such as cast iron or tri-ply stainless steel. Furthermore, never crowd the pan. Leaving at least an inch of space between individual pieces of meat ensures that moisture can escape as steam rather than pooling around the protein and cooling the surface.
The secret to a restaurant-quality crust is dry meat and a pan that doesn't quit. If you crowd your protein, you are steaming, not searing.
The Equipment: Why Pan Choice Matters
Cast Iron vs. Stainless Steel
Choosing the right pan is half the battle. Cast iron is the gold standard for searing because of its incredible ability to hold onto heat. Once a cast iron skillet reaches its target temperature, it stays there, even when a thick steak is dropped in. It is virtually indestructible and naturally non-stick if seasoned properly. However, stainless steel offers its own advantages. It is excellent for pan-searing because it allows for the formation of a beautiful fond—the browned bits stuck to the bottom of the pan—which can be deglazed with wine, stock, or butter to create a complex pan sauce. If you want a crust, go with cast iron; if you want a sauce, reach for the stainless steel.
Thermal Conductivity and Heat Distribution
Understanding how heat moves through your cookware is essential. Aluminum is a great conductor but a poor heat holder; copper is an exceptional conductor but expensive and high maintenance. This is why modern professional pans are often clad, featuring a core of aluminum or copper sandwiched between layers of stainless steel. This construction gives you the rapid response of aluminum with the non-reactive, durable nature of stainless steel. When searing, ensure your pan is fully preheated over medium-high heat before adding your fat. If you are using oil, wait until it shimmers or just barely begins to smoke, signaling that the oil is ready to transfer that heat efficiently to your protein.
The Art of Preparation: Moisture is the Enemy
The Importance of the Pat-Down
Before a protein ever touches the pan, it must be dry. Even a microscopic layer of moisture acts as an insulator, preventing the heat from making direct contact with the muscle fibers. Take a clean paper towel and blot the surface of your steak, chicken breast, or scallop until it is bone-dry. Many professional chefs even advocate for air-drying in the refrigerator. By placing your seasoned protein on a wire rack in the fridge, uncovered, for an hour or two, you allow the surface to dehydrate slightly, creating an ideal environment for an instantaneous, deep-brown crust.
Seasoning Protocols
Seasoning is not just about flavor; it is a structural component of the sear. Kosher salt is the preferred choice for most professionals because its coarse grains are easy to control and provide better coverage than fine table salt. Apply your seasoning liberally about 15 to 20 minutes before cooking. If you salt too early, the salt will draw moisture out of the meat, creating a brine on the surface that you will then have to pat dry again. If you salt right before hitting the pan, the salt sits on the surface, which is exactly what you want for a savory, crusty finish. Do not be afraid of salt—most of it will stay in the pan anyway.
Mastering the Sear: Execution and Technique
Oil Selection and Smoke Points
Not all fats are created equal. When searing, you need an oil with a high smoke point—the temperature at which the oil begins to break down and smoke. Extra-virgin olive oil is wonderful for drizzling or dressing, but it will burn and turn acrid if used for a hard sear. Opt for avocado oil, grapeseed oil, or refined coconut oil. These fats can handle the heat required for a deep sear without imparting burnt flavors to your dinner. Remember: use just enough oil to coat the bottom of the pan. Too much oil will deep-fry the protein, while too little will cause the meat to stick and tear.
The First Flip
The biggest mistake home cooks make is fidgeting. We have a tendency to want to move the protein around or check the progress by flipping it every thirty seconds. Resist this urge! When the meat first hits the pan, it will naturally stick. This is normal. It will release itself from the surface of the pan once the proteins have properly browned and the crust has formed. If you feel resistance when you try to slide a spatula under your steak, walk away. Give it another thirty seconds and try again. The protein will tell you when it is ready to be turned.
A steak is a living thing while it cooks. It will signal to you when the crust is complete by releasing from the pan of its own accord. Patience is the secret ingredient.
The Butter Baste (Arrosé)
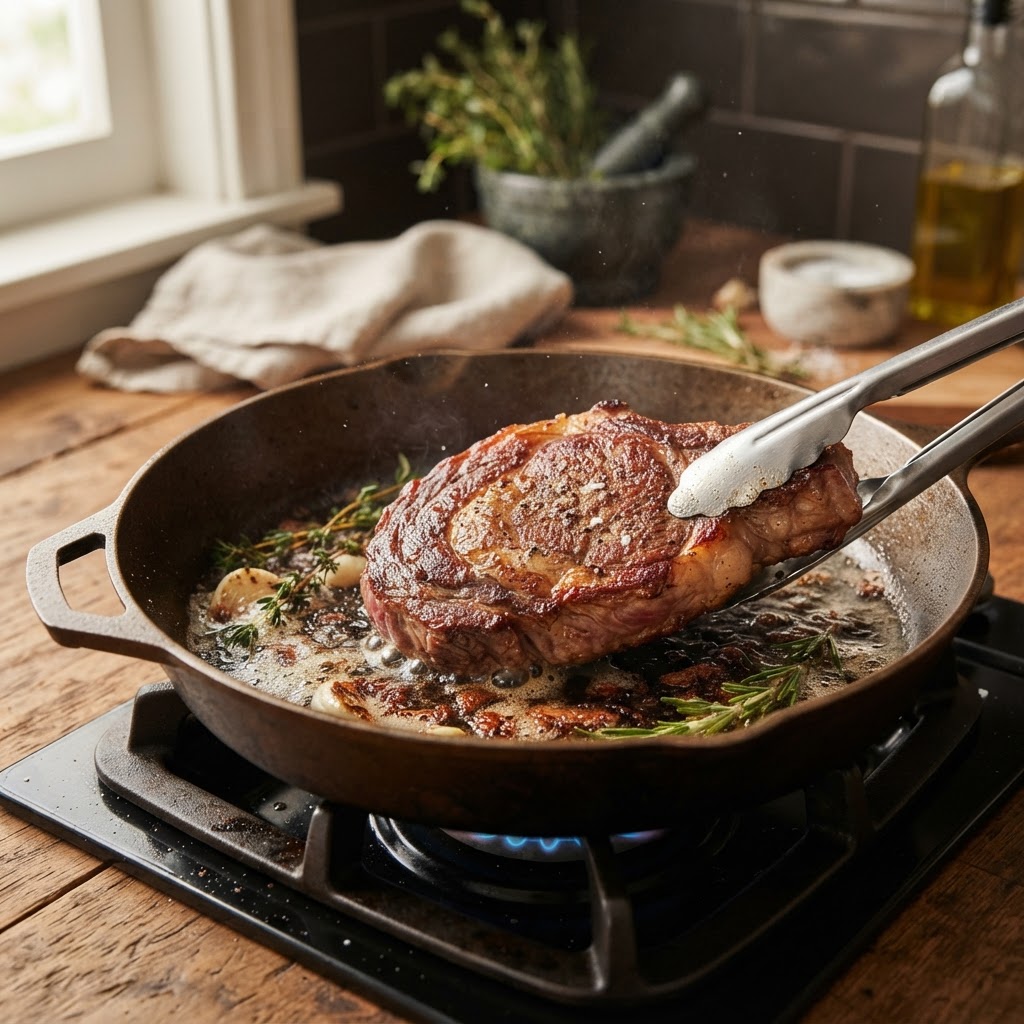
Once you have achieved a beautiful crust on one side, it is time to introduce the butter baste. This is a classic French technique often called arrosé. Lower the heat slightly, drop in two tablespoons of high-quality unsalted butter, a few cloves of smashed garlic, and sprigs of fresh thyme or rosemary. As the butter foams, tilt the pan slightly and use a large spoon to continuously bathe the protein in the aromatic, nut-brown butter. This adds a depth of flavor that is simply impossible to replicate with oil alone. The milk solids in the butter will toast, adding a nutty richness that clings to the crust you have so carefully cultivated.
Troubleshooting Common Searing Issues
The Grey Steak Problem
If your steak comes out of the pan looking grey and sad rather than brown and crusty, you have failed the moisture test or the heat test. It is common for beginners to be afraid of the heat. Turn the knob up. A proper sear requires an aggressive temperature. If you are worried about burning, use a thermometer. An instant-read digital thermometer is the most important tool in your arsenal. Pull your steak when it hits 125°F (52°C) for medium-rare, and let it carry-over cook while resting. Do not judge a steak by the clock; judge it by the internal temperature.
Sticking and Tearing
If your protein is sticking, it is either too wet, the pan wasn't hot enough, or you are trying to flip it too soon. If you find your protein is sticking regardless of your technique, check your pan's condition. If using cast iron, it may need to be re-seasoned. If using stainless steel, ensure you are using enough fat. In the event of minor sticking, increase the heat for a few seconds to finish the sear; the crust will usually detach once it is fully formed. If it is still stuck, don't force it—let it rest in the pan for a few more seconds to see if the crust releases.
Preventing Smoke Damage
Yes, searing can get smoky. It is the nature of the beast. To minimize the fire alarm going off, ensure you have proper ventilation. Turn your range hood on to the highest setting before you even turn on the burner. If you don't have a good hood, keep a window cracked and a fan running. If the oil begins to smoke excessively before the meat hits the pan, your heat is too high. Dial it back by 10%. The goal is to reach that Maillard threshold, not to fill your kitchen with a thick, acrid haze.
The Importance of the Rest
Why Resting Matters
The resting phase is the most overlooked step in the entire culinary process. During cooking, the proteins inside the meat contract, squeezing the juices toward the center of the cut. If you cut into a steak immediately after pulling it from the pan, those juices will run out onto the board, resulting in a dry, lackluster piece of meat. By allowing the protein to rest on a warm plate or wire rack for at least 5 to 10 minutes, you allow the internal temperature to stabilize and the juices to redistribute throughout the muscle fibers.
Maintaining Texture
Resting also preserves the crust you worked so hard to build. If you cut into a hot steak, the steam escaping from the center can soften the crust you created in the skillet. By giving it that grace period, you ensure that the crunch stays firm and the interior remains uniform in color and moisture. Use this time to prepare your pan sauce, clean your station, or plate your sides. Treat the rest not as a delay, but as a deliberate part of the cooking cycle. Your patience will be rewarded with a steak that is tender, juicy, and perfectly browned from edge to edge.
Final Thoughts
Mastering the pan-sear is a rite of passage for the serious home cook. It is a technique that demands your full attention, a bit of bravery, and a commitment to understanding the physics of the kitchen. You are learning to communicate with the heat, the fat, and the protein, listening for the sizzle and watching for the color. It is not about perfection every single time; it is about the incremental growth that happens when you pay attention to the details—the moisture, the temperature, the seasoning, and the rest.
Do not be discouraged if your first attempt results in a kitchen filled with smoke or a crust that is less than ideal. Every professional chef has ruined more steaks than they care to admit. The goal of "Blame The Chef" is to give you the tools to analyze your results. Did the pan cool down too much? Was the meat too wet? Did you rush the flip? By answering these questions, you transition from being a cook who follows a recipe to a cook who understands the foundation of flavor.
So, head back into the kitchen with confidence. Pick up that heavy skillet, dry your protein until it is parched, and push the heat to where it needs to be. You have the knowledge now to build that perfect crust, to master the butter baste, and to deliver a meal that would make a professional proud. Keep experimenting, keep tasting, and above all, keep searing. Your dinner guests—and your own palate—will thank you for the extra effort, and you will find that the best meals are often the simplest, executed with the greatest attention to detail. Happy cooking!



Get the Next Recipe
Weekly recipes, techniques, and gear picks — straight to your inbox.
