
The Home Cook’s Guide to Par-Cooking: Mastering Blanching and Par-Boiling for Efficient, High-Quality Meal Prep
The journey from a home cook to a culinary artist is often defined not by complex sauces or elaborate plating, but by the mastery of the fundamental techniques that happen behind the scenes. Many home cooks struggle with the consistency of their vegetables, the texture of their potatoes, or the timing of a multi-course dinner, often finding themselves frantic as guests arrive. The secret, practiced by professional chefs in high-pressure commercial kitchens for decades, is the strategic use of par-cooking. By partially cooking ingredients before the final service, you gain an immense amount of control over both the timing and the quality of your finished dish, ensuring that everything is cooked to perfection simultaneously.
Par-cooking is essentially a "pause button" for your ingredients, allowing you to manipulate the texture and cook time of produce or proteins before they hit the final heat source. Whether you are blanching vibrant green beans to retain their snap or par-boiling potatoes for the crispiest roast imaginable, this technique is the ultimate insurance policy against overcooked, mushy, or uneven meals. Once you understand the chemistry of heat and water, you will stop viewing prep as a chore and start viewing it as a sophisticated management system. It is time to reclaim your kitchen and stop blaming yourself for timing errors; the solution lies in the methodical application of heat, cooling, and timing.
In this comprehensive guide, we will break down the science of blanching, the precision of par-boiling, and the logistics of implementing these techniques into your weekly routine. You will learn how to handle delicate herbs, sturdy root vegetables, and complex proteins with a professional touch that elevates your home cooking to restaurant standards. By the end of this deep dive, you will have the confidence to prepare elaborate meals without the stress of managing four different pots at the exact same second. Let us begin by demystifying the most common culinary confusion: the difference between blanching and par-boiling.
The Foundation: Understanding Blanching and Par-Boiling
At its core, blanching is the practice of immersing food, usually vegetables, into boiling water for a very short duration, followed immediately by a rapid cooling process known as an ice bath. The primary goal is to stop the cooking process dead in its tracks, preserving the vibrant color, crisp texture, and nutritional profile of the produce. Chefs utilize this technique to brighten the chlorophyll in green vegetables, making them appear brilliant and appetizing, while also setting the enzymes that would otherwise lead to color loss or textural degradation.
Par-boiling, on the other hand, is a more aggressive cousin to blanching. It involves cooking the ingredient in boiling water for a longer period, often until it is partially cooked through but still maintains a firm center. Unlike blanching, where the goal is often to keep the ingredient crisp or raw-adjacent, par-boiling aims to bridge the gap between a raw state and a finished state. This is particularly useful for items that take a long time to cook, like starchy potatoes or hardy root vegetables, which might burn on the outside before the center is cooked through if finished only by roasting or frying.
"The difference between an amateur and a professional is the awareness of internal heat carry-over. Par-cooking gives you the power to dictate exactly when that carry-over happens, turning the kitchen into a place of precision rather than guesswork."
The Crucial Step: The Ice Bath
The success of your blanching endeavors rests almost entirely on your ice bath. Without a proper cooling vessel ready, your vegetables will continue to cook from residual internal heat—a phenomenon known as carry-over cooking. To set up an effective ice bath, fill a large bowl with half cold water and half ice. The ratio is vital; you need enough ice to ensure the water temperature does not rise as you drop hot vegetables into it. If the water warms up, you have defeated the purpose of the blanch.
Equipment Essentials
You do not need a professional kitchen to execute these techniques, but having the right tools makes the workflow significantly easier. A large stockpot is essential to ensure that when you add your ingredients, the water temperature does not drop drastically. A high-quality spider skimmer or a fine-mesh strainer is also non-negotiable for transferring delicate items from the boiling water to the ice bath. Keeping your workspace organized—what the French call mise en place—means having your strainer, your boiling pot, and your ice bowl in a line before you turn on the burner.
Masterclass: The Art of the Perfect Blanch
Blanching is an essential skill for anyone who wants their salads, stir-fries, and side dishes to look like they came from a magazine. The key is in the salt. You should salt your water until it tastes like the sea; this is the only chance you have to season the interior of the vegetable. As the vegetable enters the boiling water, the salt helps draw out impurities and maintains the structural integrity of the cell walls.
When blanching, timing is everything. For items like asparagus, snap peas, or broccoli florets, you are typically looking at a window of 60 seconds to three minutes. If you are blanching tough greens like kale or Swiss chard, the time might be slightly longer, but the principle remains the same. The goal is to brighten the color and remove the "raw" edge while keeping the item firm to the bite. Once the time is up, the ingredients must be submerged in the ice bath for at least as long as they were in the boiling water.
Blanching Timing Chart
Green Beans (Haricots Verts):* 2 to 3 minutes
Asparagus:* 1 to 2 minutes
Broccoli Florets:* 2 to 3 minutes
Spinach or Kale:* 30 to 45 seconds
Peas:* 1 minute
Why Salt Matters
Many home cooks worry about over-salting their blanching water, but the reality is that very little of that salt is actually absorbed by the vegetable. The salinity, however, is a catalyst for the thermal process. It raises the boiling point of the water slightly, ensuring a more vigorous boil that keeps the vegetables moving and promotes even cooking. Always wait for a "rolling boil"—the kind that continues to bubble even when you stir it—before adding your produce.
Par-Boiling for Structural Integrity
Par-boiling is your secret weapon when it comes to starch management. Consider the humble potato; if you throw raw, diced potatoes directly into a hot frying pan or a high-heat oven, the outside will char and turn bitter before the starch in the center has had a chance to gelatinize properly. By par-boiling your potatoes in salted, slightly acidic water—perhaps with a splash of vinegar—you break down the pectin on the surface, which creates the perfect environment for a crunchy, golden-brown exterior.
The goal with par-boiling is to achieve a texture that is "tender but resistant." You want the potato, or whatever starch you are using, to be soft enough to be pierced by a paring knife without meeting much resistance, but not so soft that it begins to fall apart. Once the timer rings, drain the vegetables and spread them out on a sheet pan to steam dry. Moisture is the enemy of crispiness; by allowing the steam to escape from the surface of the par-boiled vegetable, you ensure that when you finally do roast or fry them, they crisp up instantly.
"A par-boiled potato is a canvas for texture. By roughing up the surface after the boil and before the roast, you create a million little edges that catch heat and fat, turning into the crunchiest, most addictive crust you've ever tasted."
The Acid Trick
When par-boiling potatoes, adding a tablespoon of white vinegar or lemon juice to the water is a professional secret. The acid slows down the breakdown of pectin, which keeps the potato from turning into mashed potato sludge. It keeps the exterior intact while the starch inside softens. This allows you to roast your potatoes for a long time without them disintegrating, providing a structural integrity that is impossible to achieve with a raw-to-roast approach.
Prepping Proteins: The Blanch-Sear Technique
While we often associate par-cooking with produce, it is equally effective for certain proteins, particularly those that are dense or difficult to cook evenly. Some chefs use a technique called "poaching" or "blanching" for thick cuts of meat or even certain seafood to ensure that the final sear is just a final touch. For example, large shrimp or even thick-cut pork belly can benefit from a brief bath in boiling water to initiate the protein denaturation process before hitting the cast-iron skillet.
This technique is especially useful for items that carry a high amount of fat. By briefly boiling pork belly, for instance, you render out some of the excess surface fat and tighten the skin. When you move the protein to the pan for the final sear, you are not starting from a cold, raw state; you are finishing a pre-warmed product, which drastically reduces the time it spends in the pan, thereby preventing the drying out of the delicate muscle fibers.
Safety First
When applying par-cooking to proteins, food safety is paramount. You are not "cooking" the meat to a finished temperature; you are merely moving the process along. Always use a digital meat thermometer to track the progress and ensure that your final cooking stage hits the necessary temperatures to kill any surface bacteria. Never attempt to "par-cook" poultry or ground meats in advance and hold them at room temperature; this is a massive food safety violation. If you par-cook protein, it must be cooled rapidly and refrigerated if it is not going straight to the final sear.
Efficiency and Meal Prep Logistics
Integrating par-cooking into your weekly meal prep is the single most effective way to save time on busy weeknights. Imagine coming home after an eight-hour shift and having a container of pre-blanched broccoli and pre-par-boiled potatoes in the fridge. Instead of spending 40 minutes prepping, boiling, and waiting, you are five minutes away from a high-quality, hot dinner. The par-cooked ingredients are ready for a quick sauté with garlic and oil, or a rapid toss in a hot oven with herbs.
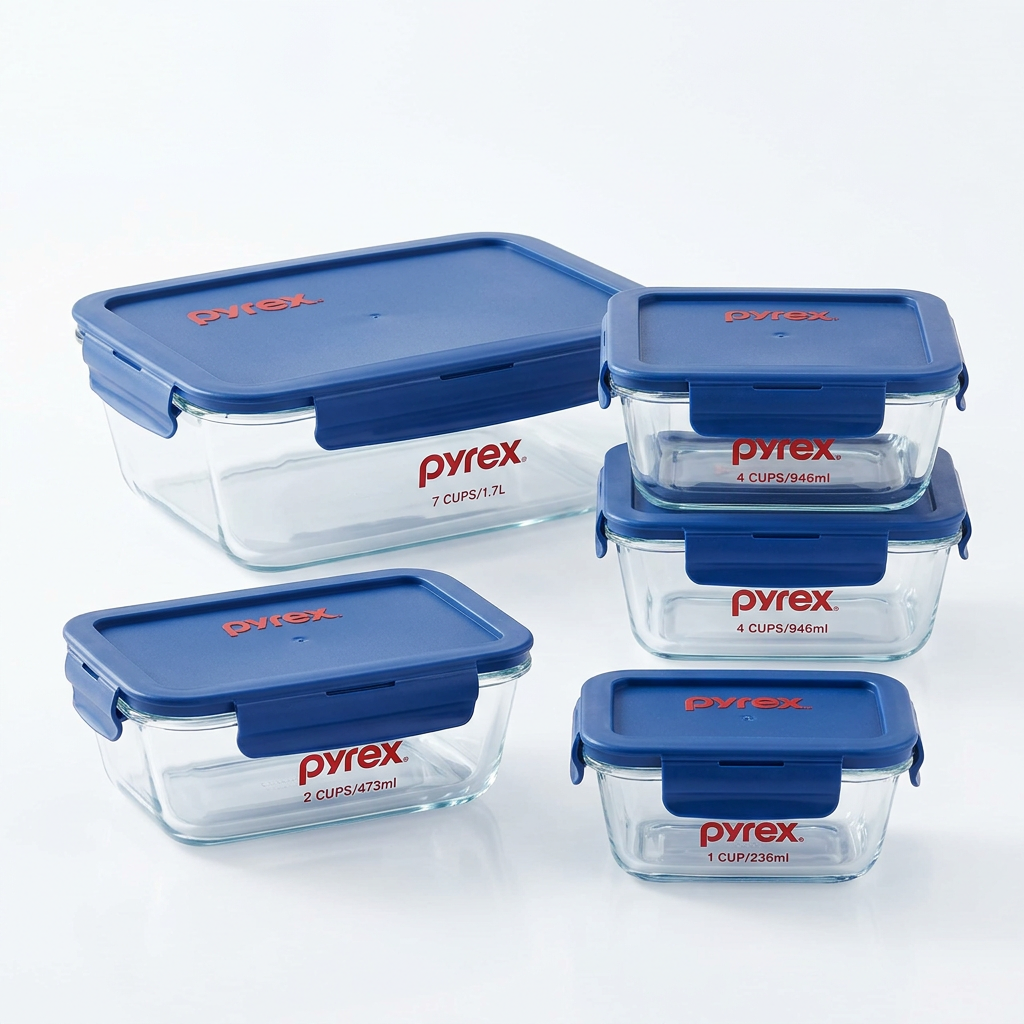
To execute this, treat your Sunday prep session like a restaurant shift. Set up your blanching station, prepare an ice bath, and work through your produce systematically. Blanch your hardy vegetables first, then your delicate greens. Par-boil your potatoes or carrots, then drain and dry them thoroughly. Once cooled completely, store them in airtight containers lined with paper towels to absorb excess moisture. This moisture management is the key to preventing them from becoming slimy in the fridge.
Organization Checklist
Common Mistakes to Avoid
The most frequent error home cooks make is "over-processing." If you blanch your beans until they are olive green and limp, you have gone too far. The goal is to maintain the bright, chlorophyll-rich, vibrant green color. If the water turns cloudy or the vegetable begins to lose its shape, you have already moved past the "blanching" stage and into the "boiling" stage. Listen to your ingredients; they will tell you when they are ready.
Another mistake is crowding the pot. If you throw too many vegetables into the water at once, the temperature drops below the boiling point, and the vegetables will sit in warm water, slowly turning into mush rather than being flash-cooked. Always work in smaller batches. It takes a few extra minutes, but the quality difference between a batch of vibrant, crisp beans and a pile of greyish-green, overcooked pods is worth the effort.
"Cooking is not a race to the finish line; it is a series of controlled heat interventions. If you treat every stage of your prep with the same respect as the final plating, the results will speak for themselves."
The "Soggy Bottom" Syndrome
One common issue with home-cooked meals is excess water pooling at the bottom of the serving dish. This almost always happens because the vegetables were not adequately drained or dried after the blanching or par-boiling process. Even a tiny amount of residual water on the surface of your broccoli will steam the vegetable rather than frying or roasting it. Invest in a good salad spinner; it is the most underutilized tool in the home kitchen for ensuring that your par-cooked ingredients are crisp, not soggy.
Scaling Up: Professional Techniques at Home
When you reach the stage where you are comfortable with these techniques, you can start applying them to large-scale events or family gatherings. Par-cooking is the only way to feed a crowd without losing your mind. For example, if you are roasting root vegetables for a holiday meal, you can par-boil them the day before, let them cool, and toss them in olive oil and seasonings. On the day of the event, you simply spread them on a baking sheet and slide them into the oven for 20 minutes while you finish the rest of the meal.
This method also allows you to focus on the flavor profile of the dish rather than the technical execution. Because you know the texture of the vegetable is already exactly where it needs to be, you can focus on the glaze, the seasoning, or the reduction of your sauce. You are no longer managing the chemistry of the food; you are curating the experience. This transition from "making dinner" to "chef-ing a meal" is the hallmark of the home cook who has truly internalized the techniques of the professional kitchen.
Advanced Tips for Professional Results
Aromatic Water:* Add garlic cloves, bay leaves, or whole peppercorns to your boiling water to infuse the vegetables with subtle flavor.
The Shocking Method:* If you are blanching very delicate greens, use an ice bath with a little bit of salt. It helps pull the heat out faster.
Texture Control:* If you want a softer result, extend your par-boiling time by 30-second increments, but always perform a taste test after the ice bath to ensure you hit that specific point of resistance.
Batching for Flavor:* If you are planning a stir-fry, blanch all your vegetables separately. This ensures the broccoli doesn't turn the carrots green, and each vegetable is cooked to its optimal degree of doneness.
Final Thoughts
The journey to culinary excellence is rarely about buying expensive equipment or following complicated recipes; it is about the mastery of time and heat. By incorporating blanching and par-boiling into your routine, you are taking command of your kitchen, reducing your stress levels, and drastically improving the quality of the food you serve. You no longer have to apologize for soggy vegetables or unevenly cooked roasts—you now have the techniques to prevent those issues before they even begin.
Remember that every time you enter the kitchen, you are building your own intuition. Pay attention to how the ingredients change color, how they feel under your tongs, and how they respond to the ice bath. Do not be afraid to fail, and do not be afraid to adjust your timings based on your own preferences. The beauty of these techniques is that they are infinitely customizable. Whether you prefer your vegetables "al dente" or slightly softer, the process remains the same—it is simply a matter of tuning your timing to your personal taste.
At "Blame The Chef," we believe that the only thing you should be blaming the chef for is the delicious, consistent, and perfectly executed meal that you are now capable of producing every single night of the week. So, sharpen your knives, get your water boiling, and start experimenting with these foundational techniques. Your kitchen, your family, and your dinner guests will thank you. Happy cooking, and remember: the secret to great food was always in your hands, waiting to be unleashed through the precision of par-cooking. Keep pushing the boundaries of your craft, keep testing your timings, and most importantly, keep enjoying the process of creation that makes cooking one of the most rewarding endeavors in life. You have the tools, you have the knowledge—now go make something truly remarkable.

Get the Next Recipe
Weekly recipes, techniques, and gear picks — straight to your inbox.
