The Home Cook’s Guide to Peeling and Prep: Mastering Efficient Techniques for Tricky Produce and Vegetables
There is a distinct, rhythmic beauty to the preparation phase of cooking that often gets overlooked in favor of the final sear or the plating flourish. Many home cooks view prep work as a grueling, unavoidable chore, a toll to be paid before the fun of heat and flavor can truly begin. However, when you approach the cutting board with the mindset of a professional, you transform this time into a meditative process that sets the stage for success. Mastering the art of peeling and chopping is not merely about aesthetic uniformity; it is about ensuring that every ingredient reaches its peak potential during the cooking process. When your knife skills are sharp and your techniques are refined, you stop fighting your produce and start collaborating with it.
The psychological hurdle of "prep time" often stems from a lack of confidence in how to handle ingredients that seem stubborn, slippery, or oddly shaped. We have all experienced the frustration of wrestling with a butternut squash that refuses to yield or the annoyance of mangling a delicate tomato while trying to remove its skin. These moments of kitchen friction are exactly what keep many home cooks from experimenting with fresh, seasonal vegetables. By learning the industry-standard methods for peeling, coring, and segmenting, you eliminate the guesswork and drastically reduce your total time in the kitchen. Efficiency is not about rushing; it is about intentionality and knowing the path of least resistance for every piece of produce you encounter.
Ultimately, your goal is to create a seamless workflow that allows you to transition from the raw ingredient to the pan with grace and precision. This guide is designed to dismantle the intimidation factor associated with complex vegetables and fruits, providing you with the exact techniques used in high-volume restaurant kitchens. We will explore the nuances of peeling, the safety protocols of advanced knife work, and the specific ergonomic adjustments that prevent fatigue during long prep sessions. When you master these fundamentals, you will find that your recipes come together more reliably, your seasoning becomes more accurate, and your overall confidence as a chef blossoms. Welcome to the foundation of better cooking; let us sharpen our tools and sharpen our skills.
The Foundation: Selecting and Maintaining Your Peeling Arsenal
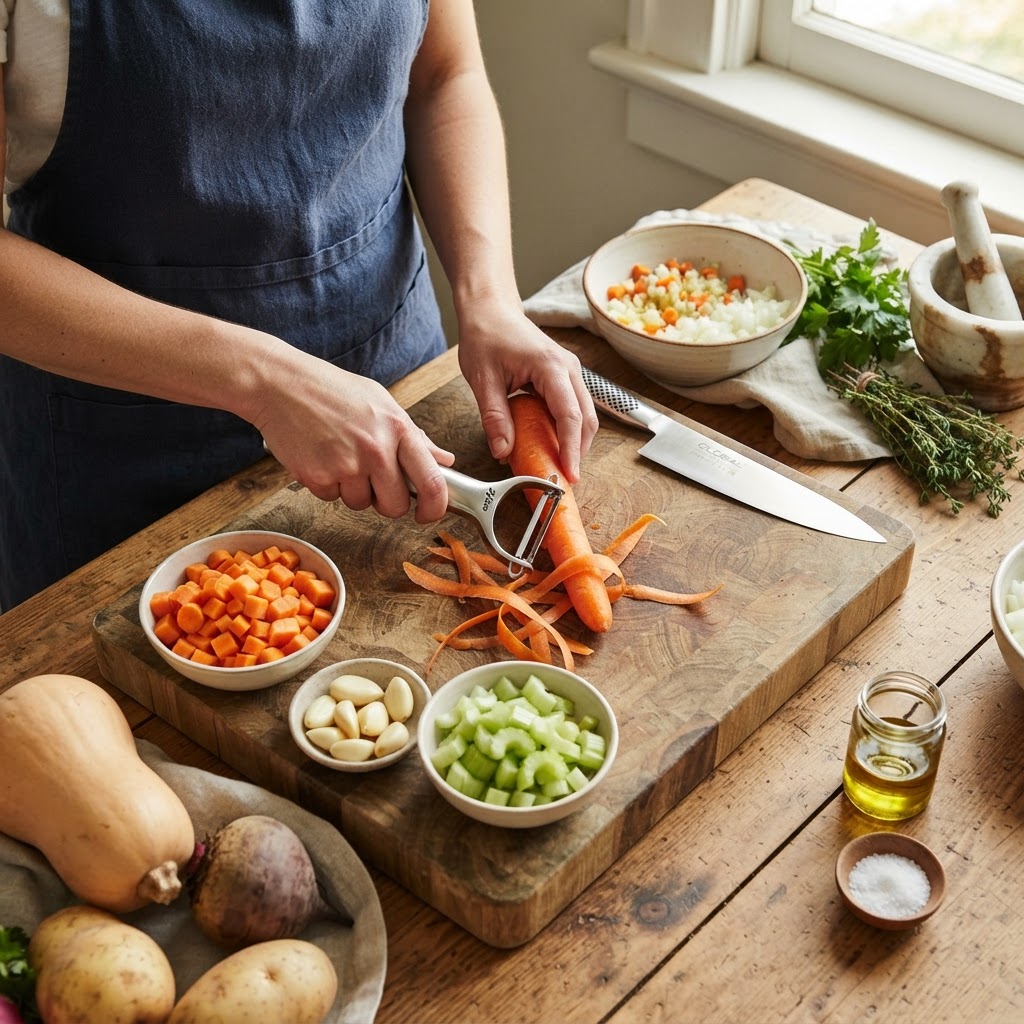
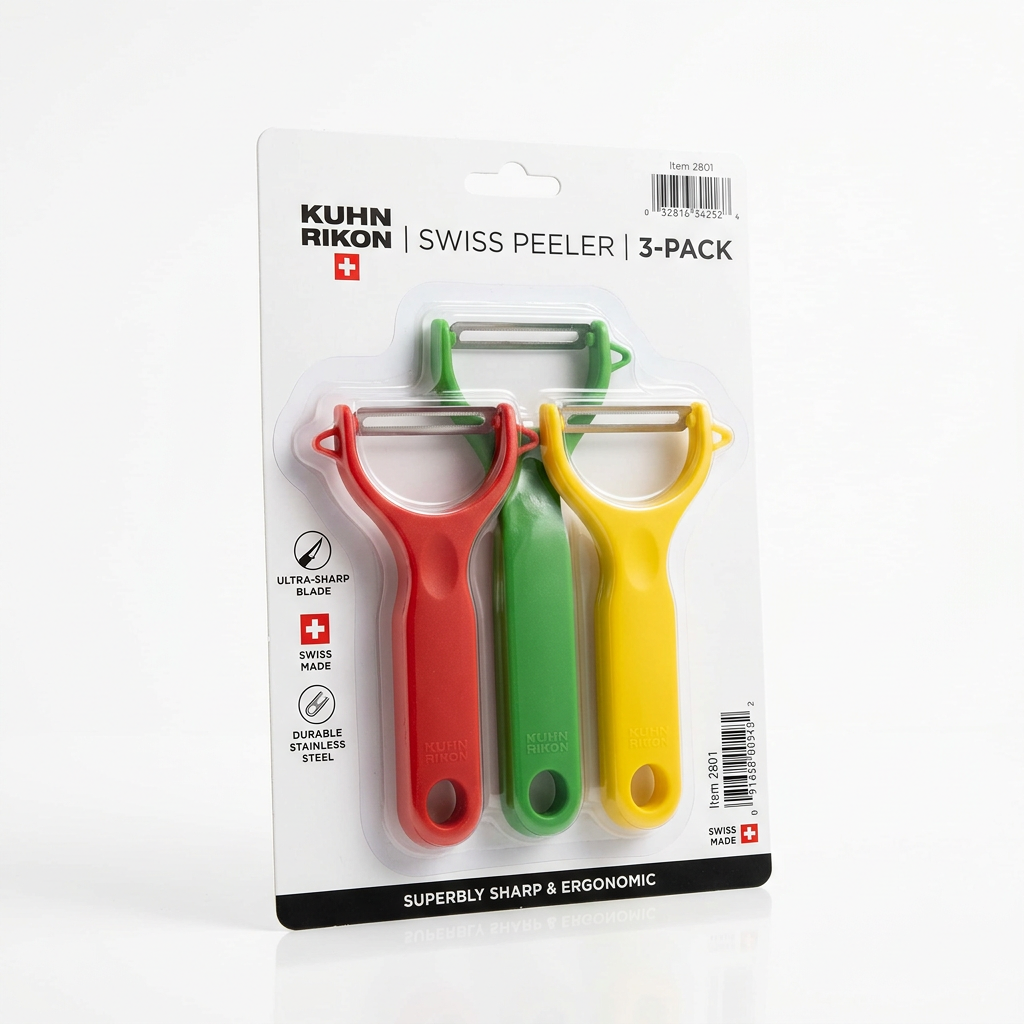
The difference between a frustrating kitchen experience and a seamless one often begins with the tool in your hand. Many home cooks make the mistake of using a dull, multipurpose peeler that has been sitting in a drawer for a decade, unaware that the metal has lost its edge. A high-quality Y-peeler is the industry standard for a reason; its ergonomic design allows for a natural wrist motion that mimics the way a chef maneuvers a paring knife. When you invest in a sharp, carbon-steel or high-grade stainless steel blade, you minimize the amount of flesh lost during the peeling process, preserving the nutrient-dense layers closest to the skin. Maintenance is equally crucial, as a blade caked with dried vegetable starch will inevitably slip, posing a safety risk.
Ergonomics and Grip
The secret to efficient peeling lies in the "pivot" technique. Rather than trying to pull a straight, long stroke across an entire vegetable, use short, controlled strokes that rotate the item in your non-dominant hand. Keep your fingers tucked back, using the vegetable itself as a guide for the blade. If you feel yourself straining your thumb, you are likely gripping the peeler too tightly. Relax your palm, allow the blade to do the work, and let the weight of the tool glide over the surface. This light-pressure technique is the hallmark of a professional, ensuring you don't dig into the vegetable and waste precious ingredients.
Choosing the Right Blade Type
Not all peelers are created equal. You should keep two distinct types of peelers in your station: a straight-blade peeler for firm items like carrots and parsnips, and a serrated peeler for delicate or waxy skins. A serrated peeler is a game-changer for items like tomatoes, kiwis, or peaches, as it catches the skin without bruising the soft pulp beneath. By understanding the surface texture of your produce, you can choose the right tool immediately, saving you from the frustration of skinning a tomato only to have it collapse into a puree.
"Efficiency in the kitchen is not defined by how fast you move your hands, but by how little resistance you face when working with your tools. If you are struggling against your produce, you are using the wrong equipment or the wrong angle."
Mastering the Starchy Giants: Squash and Root Vegetables
Winter squash and root vegetables are the heavyweights of the culinary world, providing substance, earthiness, and deep sweetness to soups, roasts, and stews. Yet, their density often makes them intimidating to prep. The primary challenge with items like butternut squash or celery root is their irregular shape and thick, waxy skin. The professional method for tackling these involves stability and leverage. Never attempt to peel a large, round squash while it is standing upright on the cutting board; this is a recipe for a slip and a potential injury.
The Microwave Shortcut
When dealing with exceptionally dense vegetables like acorn or kabocha squash, a quick par-cooking technique can make peeling significantly safer. Pierce the skin of the vegetable in three or four spots using a fork, then place it in the microwave on high for 90 to 120 seconds. This gently softens the outermost layer of the skin without cooking the interior flesh. Once cool enough to touch, you will find that a standard peeler slides through the skin like butter. This method is a lifesaver when you are prepping for a large dinner party and have several squash to process.
Stability and Blocking
Before you even reach for the peeler, create a flat surface. Use a heavy-duty chef’s knife to remove the top and bottom of the vegetable. Once you have a stable base, stand the vegetable upright and use a downward motion to "block" the sides. By creating flat, vertical panels, you transform a round, rolling vegetable into a manageable rectangular block. This significantly reduces the risk of the vegetable shifting under your knife and makes the subsequent dicing or julienne process much more predictable and uniform in size.
The Art of the Allium: Efficient Onion and Garlic Prep
Onions are the aromatic backbone of almost every great dish, yet they are often prepared poorly. The common mistake is removing too much of the root end early, which causes the layers to slide apart and makes dicing a chaotic affair. To maintain control, leave the root end intact until the very final step of your dice. This acts as a handle, keeping the onion together while you execute your horizontal and vertical cuts. A professional chef moves through an onion in seconds not because of speed, but because of the structural integrity they maintain by preserving that root connection until the last possible second.
The Paper-Skin Trick
We have all dealt with the clingy, papery skin of a shallot or garlic clove that seems designed to stick to your fingers. To combat this, osmotic release is your best friend. For garlic, give the clove a firm crush with the flat of your knife blade; this shatters the integrity of the peel and allows it to slide right off. For shallots or red onions, soaking them in a bowl of cold, salted water for five minutes can make the skin lose its static cling. You will notice the difference immediately as the skins lift away without any tugging or tearing.
Consistency is Flavor
When chopping aromatics, consistency is the key to even cooking. If your dice is uneven, your small pieces will burn while your large pieces remain raw. Aim for a uniform dice, usually between 1/4 inch and 1/2 inch for mirepoix. To achieve this, use your non-dominant hand as a "claw," tucking your fingertips inward so that the side of your knife blade rests against your knuckles. This prevents accidental nicks and allows you to move your hand backward in precise, millimeter-length increments as you chop, ensuring every piece of onion hits the pan with the same surface area.
"A uniform dice isn't just about making your dish look pretty. It is about chemistry. When every piece of onion is the same size, it caramelizes at the same rate, releasing its sugars evenly into your dish rather than creating a mixture of burnt and raw textures."
Delicate Produce: Handling Herbs and Soft Vegetables
Working with delicate herbs like cilantro, parsley, and basil requires a completely different touch than working with roots. The goal here is to preserve the essential oils trapped in the leaves. If you use a dull knife or chop the same pile of herbs repeatedly, you will bruise the leaves, resulting in a dark, oxidized mess that loses its vibrant flavor. The golden rule for herbs is: one clean cut. Use a sharp chef’s knife and aim to cut the herbs only once, gathering them into a tight mound and slicing through them with a swift, confident motion.
The Wet Paper Towel Method
When prepping soft vegetables like cucumbers or bell peppers, moisture management is essential. If your cutting board is wet, your vegetables will slide around, increasing the likelihood of an accident. Always wipe your cutting board dry before starting. If you are working with large quantities of delicate produce, keep a damp (not dripping) paper towel under your board to prevent it from sliding on the countertop. This small adjustment creates a much more secure and stable workspace, allowing you to focus on your blade angle.
Coring and Seeding
Bell peppers are often a source of kitchen waste due to inefficient coring. Rather than trying to cut around the stem, slice the four sides of the pepper away from the core, leaving the stem and seeds behind in one piece. Then, trim the white membranes from the inside of each slab. This method not only keeps your cutting board clean and free of runaway seeds, but it also provides you with flat, easy-to-cut rectangular pieces of pepper. This technique turns the potentially messy task of deseeding into a clean, geometric operation.
* Always sharpen your knife before processing delicate herbs.
* Stack leaves flat to ensure even slicing.
* Avoid "rocking" the knife back and forth repeatedly; this bruises the leaves.
* Use a gentle, slicing motion rather than a forceful chop.
Precision Knife Skills: The Anatomy of a Perfect Dice
There is a world of difference between a "rough chop" and a "professional dice." Understanding the terminology is essential for following recipes correctly. A brunoise is a very fine dice (1/8 inch), a small dice is 1/4 inch, and a medium dice is 1/2 inch. The key to achieving these sizes consistently is the "planking" method. First, cut your vegetable into rectangular slabs of the desired thickness. Then, stack those slabs and cut them into strips (batons). Finally, align the batons and cut across them to form perfect, uniform cubes.
Proper Knife Handling
Your knife should feel like an extension of your arm. The pinch grip is the most important skill to master. Instead of wrapping your entire hand around the handle, place your thumb and index finger on the blade itself, just in front of the handle, while your other three fingers wrap around the grip. This gives you superior control and balance. When you hold the knife this way, you are far less likely to lose control of the blade, and you will find that you can steer the knife with much higher accuracy.
The Maintenance of the Board
Your cutting board is your primary piece of kitchen equipment. If it is warped, cracked, or excessively scarred, it will impede your knife work. Wood or high-density plastic boards are preferred because they are gentle on your knife’s edge. Once a week, apply a food-grade mineral oil to your wood boards to keep them from drying out and cracking. A well-maintained board provides a slight "give" that cushions the blade, extending the life of your knife and making your prep work feel smoother and quieter.
The Science of Storage: Keeping Prepped Ingredients Fresh
Prepping ahead of time is a brilliant strategy, but it is useless if your ingredients lose their quality before they reach the pan. Oxidation is the enemy of prepped produce. Many vegetables, such as potatoes, artichokes, and apples, will turn brown shortly after they are cut due to exposure to oxygen. To prevent this, keep these items submerged in acidulated water—water mixed with a squeeze of lemon juice or a tablespoon of white vinegar. The acid inhibits the enzymes responsible for browning, keeping your ingredients vibrant and fresh for hours.
The Breathability Factor
For aromatics like onions, garlic, and shallots, air circulation is vital. Do not store these in airtight containers or plastic bags, as they will trap moisture and cause the vegetables to soften and develop an unpleasant odor. Instead, store them in a paper bag or a container covered with a clean, dry kitchen towel. This allows the produce to "breathe" while keeping light out, which prevents sprouting and maintains the crisp texture of the onion layers.
Managing Moisture in Leafy Greens
When prepping greens like kale, chard, or spinach, the most common mistake is washing them too early and leaving them damp. Excess water will cause the leaves to wilt and rot in the refrigerator. Use a salad spinner to remove as much moisture as possible after washing. Once they are dry, line a storage container with a dry paper towel, place your greens inside, and top them with another paper towel. This absorbs any lingering moisture and keeps the leaves crisp and bright for up to a week.
"The true test of a home cook is not how they handle the ingredients when everything is going perfectly, but how they manage the logistics of the kitchen. Proper storage is the final step of prep, ensuring that your hard work today pays off in the quality of your meal tomorrow."
Seasonal Prep: Adapting to Summer vs. Winter Produce
As the seasons change, your prep techniques should evolve. Summer produce—tomatoes, cucumbers, stone fruits—is generally softer, higher in water content, and more fragile. These items require a lighter touch and often benefit from being prepped at the last possible second. Winter produce, conversely, is often dense, fibrous, and hearty, which allows it to hold up better to advanced preparation. By understanding the water content of your produce, you can plan your prep schedule accordingly.
Dealing with High-Moisture Summer Vegetables
Tomatoes are perhaps the most misunderstood vegetable when it comes to prep. Never store your pre-cut tomatoes in the refrigerator, as the cold temperatures break down the cell walls and destroy their texture. If you must prep them in advance, keep them at room temperature and cover them tightly with plastic wrap to prevent them from drying out. If you are making a salsa or a salad, add your salt at the very last moment; salt draws water out of vegetables via osmosis, and salting too early will result in a soggy, unappealing dish.
The Hardiness of Winter Roots
Winter root vegetables, including carrots, parsnips, and beets, thrive on the preparation-ahead model. In fact, cutting these vegetables into uniform shapes and storing them in an airtight container can actually help them maintain their crunch. Because they have lower water content and a more robust cell structure, they do not suffer from the same wilting issues as summer greens. Use this to your advantage by designating one "prep day" a week to tackle your roots, leaving your afternoons free for the more delicate, last-minute work.
* Winter = Harder, sturdier, better for long-term storage.
* Summer = Softer, moisture-rich, best for immediate use.
* Always salt your soft vegetables immediately before serving.
* Hard vegetables can be blanched briefly to set color before storage.
Final Thoughts
Mastering the mechanics of peeling and prep is a journey that pays dividends in every single meal you prepare. By focusing on the quality of your tools, the ergonomics of your stance, and the structural integrity of your produce, you move from being a cook who works against their ingredients to a chef who works in harmony with them. The kitchen is a place of endless refinement; don't be discouraged if your first attempt at a perfect brunoise takes longer than expected or if your peeling technique feels clumsy at first.
Every professional chef began exactly where you are, likely struggling with a stubborn onion or a rolling squash. The key is to keep showing up to the cutting board with the intention of improvement. Treat your prep time not as a tax on your day, but as a deliberate practice of your craft. When you find that flow state—where the knife feels like an extension of your hand and your ingredients are prepped with precision and ease—you will find that the actual cooking process becomes infinitely more enjoyable and significantly more successful.
Remember that flavor begins at the cutting board. If you respect your ingredients by cutting them properly, peeling them efficiently, and storing them with care, they will reward you with superior flavor, better texture, and a finished plate that looks and tastes like it came from a professional kitchen. Keep your knives sharp, your surfaces clean, and your focus sharp. With these foundations firmly in place, there is no recipe you cannot master and no meal you cannot elevate. Happy cooking, and remember: if the dish is perfect, you can take the credit, but if it needs a little help, you can always blame the chef.
Get the Next Recipe
Weekly recipes, techniques, and gear picks — straight to your inbox.
