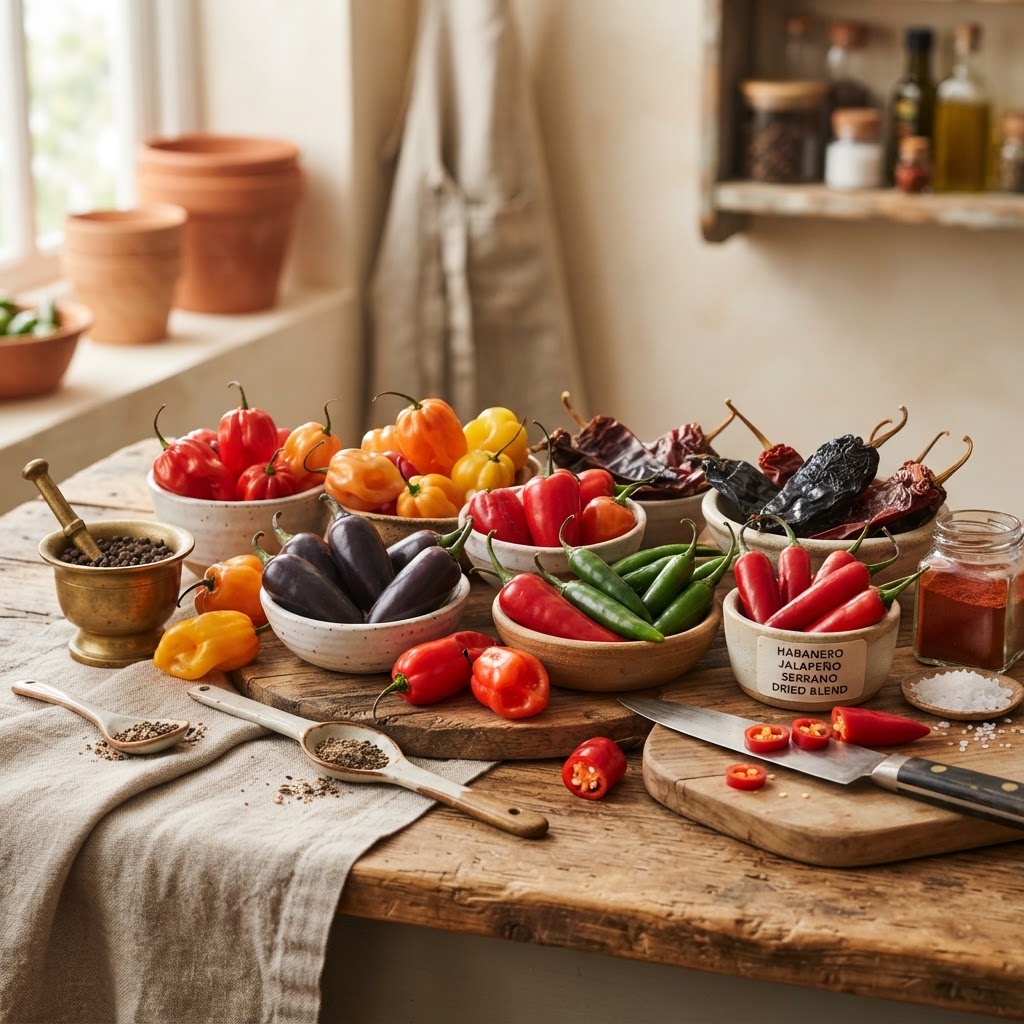
The Home Cook’s Guide to Pepper Varieties: Balancing Heat, Aroma, and Terroir in Every Dish
The culinary world is often divided by those who fear the bite of a chili and those who treat every meal as a race to the finish line of Scoville heat. As a home cook, however, your goal shouldn’t be to prove your bravery, but to achieve a sophisticated harmony between flavor, texture, and intensity. Peppers are far more than just a delivery system for capsaicin; they are complex botanical ingredients that bring earthiness, fruitiness, acidity, and deep smokiness to the table. Understanding the vast spectrum of pepper varieties is the difference between a one-note sauce that sets your mouth on fire and a layered, nuanced dish that lingers in the memory of your guests long after the plates are cleared.
Every pepper tells a story of its terroir, the specific combination of soil, sun, and climate that dictates its final profile. A jalapeño grown in the rich, volcanic soil of Mexico possesses a distinct vegetal brightness that differs drastically from its greenhouse-grown counterpart found in a suburban grocery store. By learning to identify the subtle undertones—be it the citrus notes of a Habanero or the deep, dark chocolate richness of a dried Ancho—you gain control over your kitchen. This guide is designed to move you beyond the "green" or "red" pepper aisle and into a world where you choose your heat with the same precision a sommelier chooses a vintage wine.
To master the pepper is to master the architecture of flavor, allowing you to elevate humble ingredients into restaurant-quality masterpieces. We will explore the chemistry of heat, the art of rehydrating dried chilies, and the essential techniques for roasting, blistering, and fermenting your way to culinary excellence. It is time to stop viewing the pepper as an intimidating afterthought and start embracing it as the foundational building block of your pantry. Prepare to overhaul your spice rack, sharpen your knife skills, and learn how to balance the fire so you can finally stop blaming the chef and start becoming the master of your own stove.
The Chemistry of Capsaicin and Scoville Scaling
The sensation of heat that we associate with peppers is triggered by capsaicinoids, a group of chemical compounds that bind to the vanilloid receptors in our mouths. These receptors are designed to detect physical heat, which is why your brain erroneously interprets the spicy sting of a chili as a literal burn. It is important to realize that capsaicin is oil-soluble, not water-soluble. This explains why drinking a glass of water after a particularly spicy bite only serves to spread the oils around your tongue, while dairy—which contains the protein casein—acts as a detergent to scrub those compounds away and provide immediate relief.
The Scoville Scale, established by Wilbur Scoville in 1912, is the industry standard for measuring the pungency of peppers. While it began as a subjective organoleptic test—where a panel of tasters diluted pepper extract with sugar water until they could no longer detect the heat—we now use High-Performance Liquid Chromatography (HPLC) to measure the exact concentration of capsaicinoids. For the home cook, the scale is a useful guide, but it shouldn't be your only metric. A pepper with a lower Scoville rating can sometimes feel "hotter" or more aggressive depending on its acidity, skin thickness, and the presence of other aromatic compounds.
When working with high-heat peppers, your most vital tool is a pair of nitrile gloves. The oils that cause the "burn" on your tongue will linger on your fingers for hours, and any inadvertent contact with your eyes or nose will lead to an incredibly unpleasant experience. If you are handling large quantities, always ensure your kitchen is well-ventilated, as the aerosolized oils can irritate your lungs. Understanding this chemistry allows you to work with confidence, knowing exactly when to utilize the intensity of a Ghost pepper and when to rely on the subtle warmth of a Piquillo.
The Anatomy of the Pepper
The heat is not evenly distributed throughout the pepper. The placenta, the white, pithy membrane that runs down the interior of the pepper and holds the seeds, is where the vast majority of the capsaicin is concentrated. The seeds themselves are technically not hot, but because they are in constant contact with the placenta, they often end up coated in the potent oils. If you want a milder flavor without sacrificing the pepper’s unique profile, simply remove the placenta and the seeds before chopping.
"True culinary mastery is not found in the raw power of the chili, but in the intelligent application of heat to enhance the base ingredients, not mask them."
The Fresh Spectrum: From Bell to Habanero
The world of fresh peppers is defined by texture and moisture content. Fresh peppers, or capsicum annuum, are succulent, crunchy, and packed with water. When selecting fresh peppers, look for skins that are tight and shiny with no signs of wrinkling or soft spots. The stem should be bright green and pliable; a dried-out, woody stem is often an indication that the pepper has been sitting for too long and will have lost much of its characteristic crunch and volatile oils.
The Workhorses: Jalapeños and Serranos
The Jalapeño is arguably the most versatile pepper in the home kitchen. Harvested while still green, it has a grassy, vegetal quality that balances perfectly with acidic dishes like ceviche or fresh salsas. If allowed to ripen to a deep, dark red, the Jalapeño develops a sweetness that makes it an excellent candidate for pickling or smoking. Serrano peppers, while smaller and thinner-skinned, pack significantly more punch. They have a sharper, brighter bite and are my preferred choice for raw applications where you want a cleaner flavor profile that doesn't linger as heavily as the Jalapeño.
The Exotics: Habanero and Scotch Bonnet
If you are looking to introduce fruity, tropical notes, look no further than the Habanero and its cousin, the Scotch Bonnet. These peppers are in a different league of heat, usually ranging from 100,000 to 350,000 Scoville units. However, behind that fire is a complex flavor profile reminiscent of apricot, citrus, and floral undertones. When using these, mincing is essential. Do not simply chop them; work the knife to create a fine paste, which helps to distribute the flavor evenly throughout your dish, preventing the dreaded "hot pocket" of flavor in your sauces.
The Art of Rehydration and Dried Chilies
Dried chilies are not merely a way to preserve a harvest; they are a separate culinary entity altogether. The drying process concentrates the sugars and changes the flavor profile entirely, replacing the raw, green "fresh" taste with notes of raisins, coffee, dark chocolate, and tobacco. To properly use a dried chili like an Ancho, Guajillo, or Pasilla, you must first treat it with respect. A dry, brittle chili, if tossed directly into a pan, will burn instantly, releasing an acrid, bitter smoke that will ruin your entire dish.
The Toasting Technique
The first step in working with dried chilies is to toast them. Place a heavy-bottomed cast iron skillet over medium-high heat and add the whole, stemmed, and seeded chilies. Toast them for 30 to 60 seconds per side until they become fragrant and pliable. You are looking for a slight color change, but if they begin to smoke, you have gone too far. This process releases the essential oils trapped within the dried skin and provides a foundation of smokiness that can never be achieved by simply boiling the peppers later.
The Rehydration Process
Once toasted, place your chilies in a bowl and cover them with boiling water or hot stock. Allow them to soak for 15 to 20 minutes until they are soft and completely rehydrated. The liquid left behind—the chili liquor—is packed with flavor and should not be discarded. Use this liquid as your blending medium when turning your rehydrated chilies into pastes or sauces. This technique is the secret behind the depth of authentic mole and adobo sauces, providing a body and complexity that canned or powdered alternatives simply cannot replicate.
"A dried chili is a time capsule of flavor; toast it carefully, hydrate it slowly, and you unlock a dimension of intensity that defines the soul of traditional cuisines."
Roasting and Blistering: Texture and Depth
Blistering or roasting peppers is perhaps the most effective way to modify their texture. When you expose a pepper to high heat—whether via a broiler, an open flame, or a scorching hot skillet—you cause the skin to char and the flesh to steam in its own juices. This process softens the pepper, making it easier to incorporate into emulsions, purees, or as a condiment. For recipes like Chiles Rellenos, this step is non-negotiable, as it removes the tough, waxy outer layer of the pepper and reveals the succulent, sweet flesh underneath.
Charring Methods
If you have a gas range, place the pepper directly over the open flame. Rotate it frequently with tongs until the skin is uniformly blackened and charred. This imparts a distinct, smoky flavor that is difficult to recreate with an oven. If you are using an electric range, place the peppers on a baking sheet under the broiler set to high. Position the rack about 4 inches from the heat source and monitor closely, turning every 2–3 minutes until the skin is blistered and the pepper has collapsed slightly.
The Steam Phase
After charring, immediately place the hot peppers into a glass bowl and cover it tightly with plastic wrap or a lid. This allows the residual heat to steam the pepper, effectively loosening the skin from the meat. Let them sit for 10 minutes. Once they are cool enough to handle, use a paper towel to gently rub away the charred skin. Don’t worry about removing every single black flake—those charred bits add a wonderful depth of flavor—but removing the bulk of the skin ensures a silky, luxurious texture for your sauces.
Fermentation: The Final Frontier of Flavor
Fermentation is the process of using beneficial bacteria to transform the flavor profile of your peppers. By creating a lacto-fermented mash (usually a 3-5% salt-to-weight ratio), you can turn simple peppers into a sophisticated hot sauce with a tangy, probiotic-rich complexity. The salt suppresses the growth of spoilage bacteria while allowing Lactobacillus to thrive, consuming the natural sugars in the peppers and converting them into lactic acid. This process takes time—typically two to four weeks—but the result is a sauce with a shelf-stable acidity and a vibrant, lively flavor.
Building Your Mash
To begin, weigh your cleaned, stemmed peppers. Calculate 3% of that weight in sea salt. Process the peppers in a food processor until they form a coarse mash, then mix in the salt. Transfer the mash to a sterilized glass jar, pressing it down firmly to remove any air pockets. It is critical that the mash remains submerged below the surface of the liquid. If the peppers are exposed to oxygen, mold will form. Place a weight, like a glass fermentation stone or a small ceramic dish, on top to keep everything submerged.
Monitoring and Bottling
Store the jar in a cool, dark place, and "burp" the jar daily to release the carbon dioxide that builds up during the fermentation process. You will notice the color transition from bright to slightly muted, and a distinct, vinegar-like aroma will develop. Once the fermentation reaches your desired level of tanginess, blend the mash with a little vinegar or water to reach your preferred consistency. Passing the mixture through a fine-mesh sieve will yield a smooth, commercial-style hot sauce, while leaving it chunky provides a more rustic, condiment-heavy result perfect for tacos or grilled meats.
Advanced Techniques: Infusions and Compound Butters
If you want to experiment with pepper flavors without committing to a full hot sauce, pepper-infused oils and butters are the way to go. These techniques allow you to use the aromatic compounds of the pepper while maintaining a more controlled heat. Infusions work particularly well with milder, fruitier peppers like the Piquillo or the Anaheim, as the oil acts as a carrier for the delicate volatile compounds that are often lost during high-heat cooking.
Crafting Infused Oils
To create a high-quality pepper-infused oil, you must avoid the "danger zone" of botulism by keeping the peppers completely dry and using the oil relatively quickly. Slice your dried or dehydrated peppers into thin ribbons and gently heat them in neutral oil (like grapeseed or sunflower) over very low heat—never exceeding 180°F—for about 20 minutes. Remove from the heat and let the peppers steep as the oil cools completely. Strain the oil through a cheesecloth and store it in the refrigerator. This oil is a game changer when drizzled over roasted root vegetables or finished pasta dishes.
Compound Butters
Compound butter is the home cook’s secret weapon. Take softened, unsalted butter and fold in finely minced, roasted Serrano or Jalapeño, a squeeze of fresh lime juice, and a pinch of sea salt. Roll the butter into a log using parchment paper, refrigerate until firm, and slice into discs. Placing a round of this butter on a hot, seared steak or a piece of grilled fish creates an instant pan sauce that melts, coating the protein in a layer of creamy, spicy, and bright flavor that is truly restaurant-caliber.
Scaling Heat and Balancing Profiles
One of the most frequent mistakes in the kitchen is trying to balance heat by adding more salt or sugar. While these can help, they often lead to a dish that is over-seasoned rather than balanced. Instead, think about the four pillars of balance: fat, acid, sweetness, and time. If a dish is too spicy, add a dollop of sour cream or heavy cream to coat the palate, or finish with a squeeze of citrus to brighten the dish and distract the taste buds. Sweetness, such as a touch of honey or maple syrup, works to counteract the harsh edges of extreme heat by providing a contrasting flavor that our brains enjoy.
If you are cooking for a crowd with varying heat tolerances, always cook to the "lowest common denominator" of spice, and provide a hot sauce on the side for those who want more. This allows every guest to customize their experience without the meal being ruined by an excessive heat level. It is also important to remember that heat levels can fluctuate wildly between individual peppers of the same species. Always taste a small sliver of the placenta before you begin chopping the entire batch to gauge the intensity of that specific harvest.
Finally, remember that patience is an ingredient. In many slow-cooked dishes like chili or stew, the heat of the peppers will mellow and integrate into the base over time. A dish that tastes aggressively hot when you first combine the ingredients will often be perfectly tempered after an hour of simmering. Give your flavors time to marry, taste repeatedly as you go, and never be afraid to pivot if the balance feels off. Culinary intuition is built on the foundation of these trials and errors, so treat every meal as a chance to refine your palate.
Final Thoughts
The journey of the pepper is one of the most rewarding paths a home cook can walk. We have covered the chemistry, the varieties, the preparation methods, and the secret techniques that separate the amateur from the skilled artisan. It is my sincere hope that you no longer look at a display of peppers as a wall of intimidation, but as an invitation to experiment, to innovate, and to build complexity into every meal you prepare. You have the tools, the knowledge, and the palate to turn simple, earthy vegetables into the stars of your culinary repertoire.
Do not be discouraged if your first attempt at a fermented hot sauce takes a few tries to perfect, or if you find that your sensitivity to heat changes over time. Culinary skill is a fluid practice, and your preferences should evolve alongside your expertise. Keep your knives sharp, your pantry stocked with diverse dried chilies, and your hands protected with gloves when the heat levels get high. You are the architect of your kitchen, and you now possess the blueprint to balance heat, aroma, and terroir in a way that will impress even the most discerning diners.
So, head back to your stove with renewed confidence. The next time a dish doesn't hit the mark, don't look for someone to blame; look to your ingredients, adjust your ratios, and trust your instincts. The balance you seek is not a destination, but a continuous process of refinement. Whether you are tempering the heat of a Serrano or building the dark, complex layers of a traditional mole, remember that the goal is always the same: to create a bite that brings joy, warmth, and flavor to those you love. Happy cooking, and may your kitchen always be filled with the delicious, aromatic scent of a well-balanced masterpiece.

Get the Next Recipe
Weekly recipes, techniques, and gear picks — straight to your inbox.
