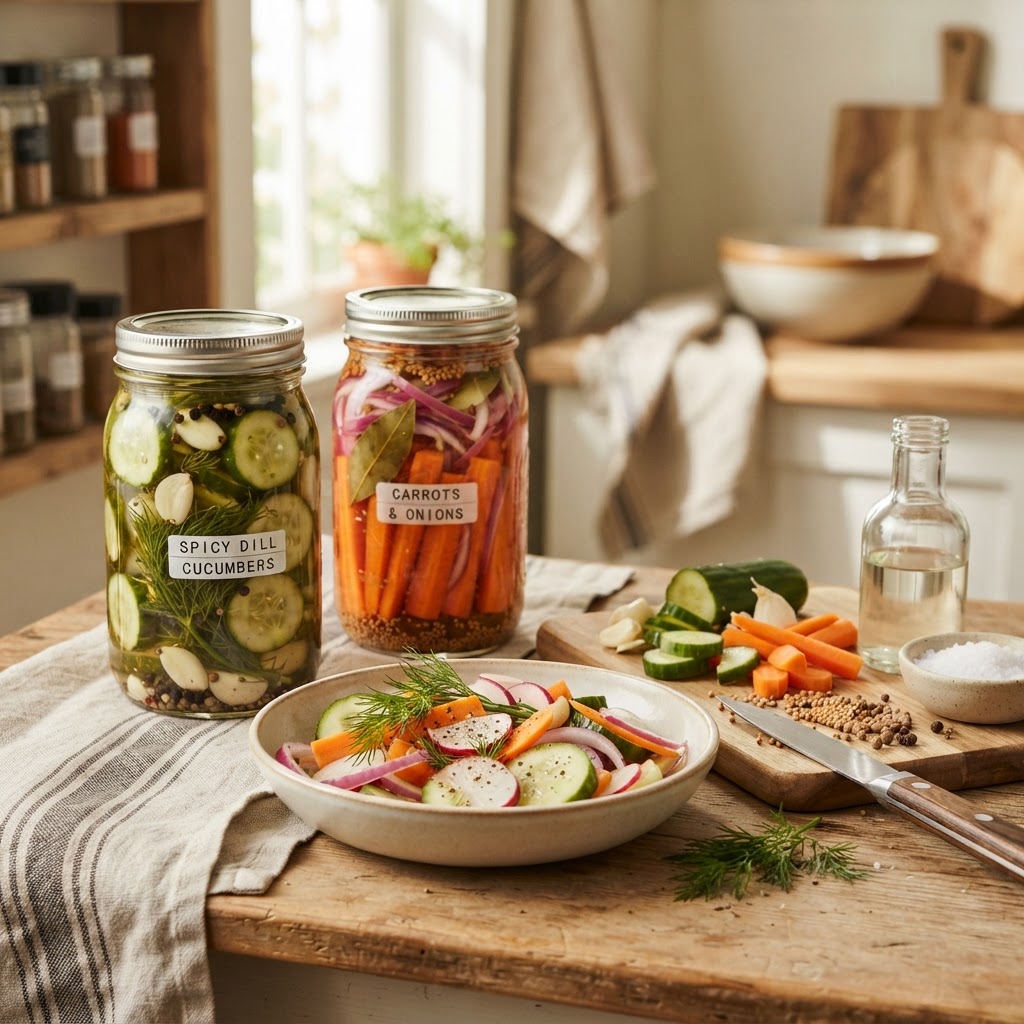
The Home Cook’s Guide to Pickling: Mastering Quick-Brine Ratios for Crunchy, Vibrant Vegetables
There is something undeniably satisfying about the crisp, resounding snap of a perfectly pickled vegetable. Whether you are adding a bright, acidic punch to a fatty brisket sandwich or simply reaching into the back of the refrigerator for a mid-afternoon snack, the art of the quick-pickle has transformed from a preservation necessity into a staple of modern culinary flair. As home cooks, we often look at the neatly lined jars in gourmet markets with a sense of intimidation, assuming that the alchemy of brine requires a chemistry degree and hours of patient water-bath processing. I am here to tell you that the secret to those vibrant, crunchy, and tangy vegetables is surprisingly simple, relying less on complex equipment and more on understanding the foundational ratios of salt, sugar, and acid.
When we talk about "quick-brining" or "refrigerator pickling," we are bypassing the long-term fermentation process that requires weeks of monitoring and specific environmental controls. Instead, we are utilizing heat to accelerate the infusion of flavor, creating a product that is ready to enjoy within a few hours, yet holds its integrity for weeks in your cold storage. Mastering this technique allows you to take command of your seasonal produce, turning surplus summer cucumbers, autumn carrots, or even leftover radishes into something that elevates your entire kitchen repertoire. It is a process that rewards experimentation, encourages sustainability, and provides an immediate payoff for a relatively small amount of hands-on labor.
In the world of "Blame The Chef," we believe that every home kitchen should be a laboratory of flavor, and pickling is the perfect place to start your experimentation. Over the next few thousand words, we are going to break down the science of the brine, explore the best vegetables for the job, and troubleshoot the common pitfalls that lead to soggy or bland results. By the time you reach the end of this guide, you will be looking at your grocery store's produce section with a completely new perspective. Get ready to clear some shelf space in your refrigerator, because once you realize how effortless it is to create your own signature pickles, you will never want to go back to the store-bought varieties again.
The Chemistry of the Perfect Brine
At its core, a pickle is essentially a vegetable that has been transformed through the introduction of an acidic solution. In professional kitchens, we rely on the 1:1:1 ratio as a starting point for a balanced brine, though we often tweak these proportions based on the desired final flavor profile. This ratio refers to the balance between water, vinegar, and sugar, with salt added as a crucial seasoning and texture preserver. Understanding that salt draws out excess moisture while vinegar kills off spoilage-causing bacteria—thereby "cooking" the vegetable through acidity—is the fundamental knowledge you need to start riffing on your own unique recipes.
Choosing Your Vinegar
Not all vinegars are created equal, and your choice will dramatically influence the complexity of your final product. Distilled white vinegar is the standard workhorse; it is neutral, sharp, and cheap, making it perfect for classic dill spears where you want the herbs and spices to shine. Apple cider vinegar offers a fruity, mellow undertone that pairs beautifully with root vegetables like beets or onions, while rice vinegar is the go-to for quick-pickled cucumbers or ginger, providing a delicate, clean profile that won't overwhelm subtle aromatics.
"A great brine is a balancing act of acidity, salinity, and sweetness. Think of your vinegar as the canvas, your salt as the highlighter, and your sugar as the mediator that rounds out the sharp edges of the acid."
The Role of Salt and Sugar
While sugar is optional in a standard dill pickle, it is almost always necessary when balancing high-acid vinegars to prevent the final product from tasting harsh or metallic. I recommend using Kosher salt exclusively; table salt contains anti-caking agents and iodine that can turn your brine cloudy and impact the flavor. When dissolving your brine, ensure your water is brought to a gentle simmer to fully integrate the salt and sugar crystals before pouring the liquid over your prepared vegetables. A cloudy, grainy brine is a sign of poorly dissolved solutes, which can lead to inconsistent flavor distribution throughout the jar.
Selecting and Prepping Your Produce
You can pickle almost anything, but the best pickles start with the best produce. The primary goal in quick-pickling is to maintain structural integrity (crunch) while allowing for flavor infusion. Soft or overripe vegetables will turn to mush the moment they hit hot liquid, so always select produce that is firm, unblemished, and ideally, just barely ripe. If you are using cucumbers, seek out pickling varieties like Kirby or Persian, which have thinner skins and fewer seeds, reducing the amount of water released into the jar and keeping your pickles snappy.
The Importance of Surface Area
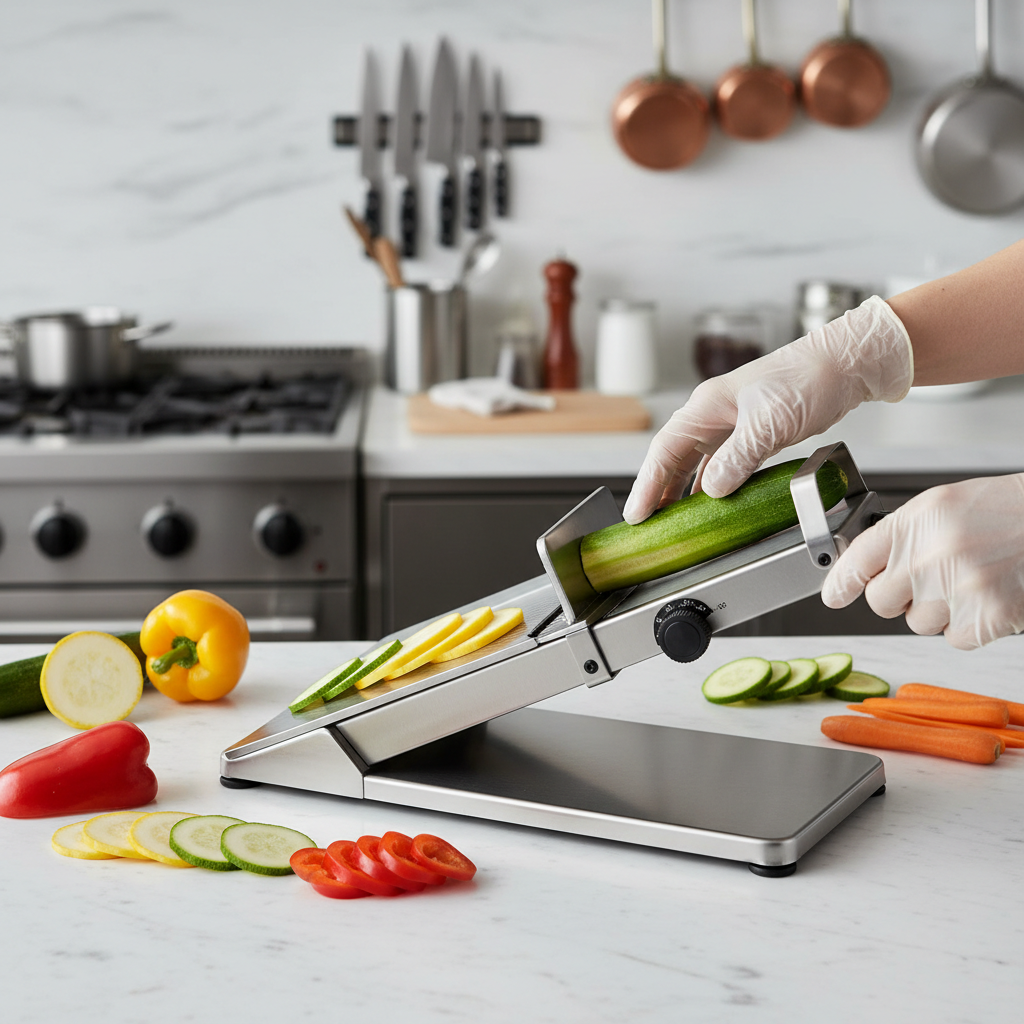
How you cut your vegetables dictates how fast they will be ready to eat. A whole carrot might take three days to fully permeate with brine, while thin-sliced "ribbons" or small rounds will be ready in under an hour. For the classic "spear" cut, aim for uniform thickness to ensure even pickling. If you are dealing with hardy vegetables like cauliflower, broccoli, or carrots, I recommend a quick blanch in boiling water for 30 to 60 seconds followed immediately by an ice bath. This technique, known as shocking, sets the color and helps the vegetable absorb the brine more effectively without cooking it all the way through.
Managing Moisture
The greatest enemy of a crunchy pickle is internal water content. Vegetables are mostly water, and when they are submerged in a brine, that water wants to migrate out into your jar, diluting your flavor. To combat this, salting your vegetables for 30 minutes before brining is a professional chef’s trick. By placing your cut vegetables in a colander and sprinkling them with a light coating of salt, you encourage the excess water to weep out before they ever touch the vinegar. Rinse them thoroughly, pat them dry, and you will notice a significant improvement in the final "snap."
Aromatics, Spices, and Flavor Infusions
This is where the home cook moves from following a recipe to creating a signature style. Aromatics are the soul of the pickle, and adding them is not just about flavor; it is about building layers. Classic additions include mustard seeds, coriander seeds, whole peppercorns, and fennel seeds. These spices act as a foundational baseline. For more creative profiles, consider adding fresh ginger, slices of serrano or jalapeño for heat, or even a splash of soy sauce for an umami-forward pickle that defies traditional expectations.
Fresh Herbs vs. Dried
When it comes to herbs, fresh is almost always superior, provided you use them correctly. Fresh dill is the gold standard for cucumbers, while fresh thyme or oregano works wonders with pickled mushrooms or peppers. If you are using fresh herbs, ensure they are thoroughly washed and patted dry to avoid introducing bacteria that could shorten the lifespan of your pickles. If you only have dried spices, toast them in a dry pan for 30 seconds until fragrant before adding them to your jar; this "wakes up" the essential oils and mimics the impact of fresh aromatics.
The Heat Threshold
If you want a spicy pickle, the location of your heat source matters. Adding a slice of chili pepper directly to the jar will provide a slow, gradual heat infusion. However, if you want the brine itself to carry the spice, add your dried chili flakes or fresh hot peppers to the pot while the brine is simmering. This extracts the capsaicin into the liquid, ensuring that every bite carries a consistent kick. Be mindful: the longer your pickles sit in the fridge, the spicier they will become as the vinegar continues to draw out those potent oils.
"Don't be afraid to break the rules. Pickling is a conversation between the vinegar and the ingredient. If you love the smell of star anise or the earthiness of cumin, throw it in the jar. The best recipes are often the result of happy accidents."
The Technique: From Brine to Jar
Now that your produce is prepped and your brine is flavored, the actual assembly is where things get interesting. Start by packing your clean, sterilized jars tightly with your vegetables. The more you pack them, the less brine you need, and the more vibrant the pickles will taste. I recommend using wide-mouth glass jars; they make it much easier to wedge in long spears or larger vegetable chunks without damaging them. Once packed, tuck your herbs and aromatics into the gaps between the vegetables to ensure even flavor distribution.
The Pouring Process
Pour your hot brine over the vegetables until they are completely submerged. You want to leave about a half-inch of headspace at the top of the jar. If the vegetables are floating, use a small piece of parchment paper or a clean, weighted glass disc to hold them down beneath the surface of the liquid. If the vegetables are exposed to air, they will oxidize and lose their crunch, turning brown and unappetizing. Once the jar is filled, let it sit on the counter until it reaches room temperature before securing the lid and transferring it to the refrigerator.
The "Cool Down" Rule
Patience is the final ingredient. While you can technically eat a quick-pickle within an hour, the flavors really begin to harmonize after 24 hours. The acidity needs time to penetrate the cell walls of the vegetables, and the sugars need to mellow out the sharpness of the vinegar. For the absolute best results, label your jars with the date of preparation. Quick-pickles will last in the refrigerator for up to three weeks, though they are usually at their peak texture within the first 10 days. After that, the continuous acid exposure will start to soften the vegetables, which is fine for salads but not ideal for snacking.
Troubleshooting Common Pickle Problems
Even experienced chefs encounter "pickle failures" from time to time. The most common issue is the "soggy pickle," which is almost always caused by using vegetables that were not fresh to begin with or failing to adequately dry them after washing. Another frequent complaint is "cloudy brine." While this can sometimes indicate bacterial growth, it is more often caused by the use of table salt or an excess of ground spices. If the brine becomes slimy or develops a film on top, discard the batch immediately; food safety is paramount, and it is never worth the risk to save a jar of questionable produce.
Adjusting the Ratios
If you find your pickles are too sour, you have two choices for your next batch: increase the sugar or increase the water-to-vinegar ratio. A 3:2:1 ratio (3 parts water, 2 parts vinegar, 1 part sugar) is significantly milder and more approachable for those who find the punch of pure vinegar overwhelming. On the flip side, if your pickles taste "thin," it means they aren't salty enough. Salt is the primary flavor enhancer; if the pickles taste flat, it’s a clear sign you need to bump up your salt measurement by a quarter-teaspoon.
Storage and Shelf Life
Remember that because these are refrigerator pickles, they have not been processed via heat canning, meaning they are not shelf-stable. They must stay in the refrigerator at all times. If you are taking them on a picnic, pack them in an insulated bag with plenty of ice. If you notice the jar lid is bulging or the liquid has turned a strange, murky color that wasn't there before, those are tell-tale signs that the pickle has passed its prime. Trust your nose—vinegar-based preserves should smell bright and acidic; any off-putting, fermented, or "funky" odors indicate that the jar should be tossed.
Elevating Your Pickles for the Table
Once you have mastered the basics, think about how these pickles fit into your dining experience. A quick-pickle should never just be a garnish hidden on the side of a plate. Use them to provide texture and contrast. A thinly sliced pickled radish on top of a rich bowl of ramen, or some pickled red onions on top of a savory avocado toast, adds a level of sophistication that makes a home-cooked meal feel like a restaurant creation. By balancing the fat content of a dish with the sharp acid of a pickle, you cleanse the palate and make each bite taste as vibrant as the first.
Creative Pairings
Consider these combinations to get you started:
The Art of Presentation
Since we eat with our eyes first, don’t neglect the aesthetics. If you are serving these as part of a charcuterie board or a snack platter, slice them into interesting shapes. Use a crinkle cutter to give your carrots a classic "chipped" edge, or carve your cucumbers into rounds rather than spears. The way a pickle looks affects our perception of its flavor, and a well-presented jar of bright, colorful vegetables is a beautiful addition to any kitchen counter or gift basket. If you are gifting your pickles, be sure to add a label with the ingredients and the date—home-pickled goods are one of the most thoughtful, budget-friendly gifts you can share with friends and family.
Final Thoughts
The beauty of pickling lies in its accessibility and its infinite potential for variation. You don't need a pantry full of expensive equipment or a degree in food science to master this craft; you simply need a few jars, some quality vinegar, a bit of salt, and a sense of curiosity. By controlling your own brine ratios, you are moving away from the mass-produced, overly processed pickles found in the grocery aisle and reclaiming the integrity of your ingredients. You are learning to taste the nuances of the seasons and understanding how acidity can transform a humble root vegetable into a culinary masterpiece.
Remember that every batch you make is a lesson. If the first one is too sour, write it down and adjust your ratio next time. If you decide the spice level wasn't high enough, experiment with different varieties of chilies in your next jar. The goal here is to develop an intuitive feel for the process—a "chef's instinct" that allows you to walk into your kitchen, see a lonely cucumber in the crisper drawer, and instinctively know exactly what brine it needs to become something delicious. That is the essence of "Blame The Chef"—taking responsibility for the flavor in your kitchen and finding joy in the simple, artisanal act of creating.
As you continue your journey, keep a small notebook specifically for your brining experiments. Note the ratio you used, the vegetables you chose, and how long you let them sit before tasting. This log will become your most valuable kitchen asset, eventually turning into a bespoke collection of recipes that you can pass down or share with friends. There is a deep, historical satisfaction in preserving food, a connection to the generations before us who used these same methods to survive. Today, we do it for the crunch, for the zing, and for the simple pleasure of turning a fresh harvest into a pantry staple. So, go forth, grab your vinegar, and get pickling—you have a lot of jars to fill.
One of the most important takeaways from this entire process is the realization that pickling is not about perfection; it is about progress. It is about understanding that a small jar of pickled vegetables can change the entire personality of a meal. It adds color, it adds snap, and it brings a necessary brightness that balances out the richness of everyday cooking. Whether you are a novice who has never pickled anything before or a seasoned home cook looking to refine your technique, I hope this guide has given you the confidence to start experimenting. The world of brines is vast, and you have only just scratched the surface of what is possible in your own kitchen.
As you become more comfortable with these fundamental ratios, you will find yourself reaching for the pickling jars more often than not. You’ll find yourself pickling things you never imagined, like green tomatoes, asparagus, or even grapes for a sweet and sour salad topper. The possibilities are truly endless when you have the foundational knowledge to manipulate the brine to your liking. So, don't wait for a special occasion or a surplus harvest. Start today. Grab whatever vegetables you have on hand, whip up a quick batch of brine, and discover the thrill of creating something crunchy, vibrant, and entirely your own. Your refrigerator—and your dinner guests—will thank you for it.
Finally, remember the "Blame The Chef" philosophy: it’s okay if a batch isn't perfect. We learn as much from a batch that’s too salty as we do from one that’s absolutely divine. Each jar is an opportunity to learn, to adjust, and to grow as a cook. If you make a mistake, don't be discouraged. Taste it, analyze why it didn't work, and pivot for the next round. Culinary mastery is a marathon, not a sprint, and there is no better way to build your skills than through the trial and error of the pickling jar. Happy pickling, and may every batch be as crisp and satisfying as the one that came before it!
Get the Next Recipe
Weekly recipes, techniques, and gear picks — straight to your inbox.
