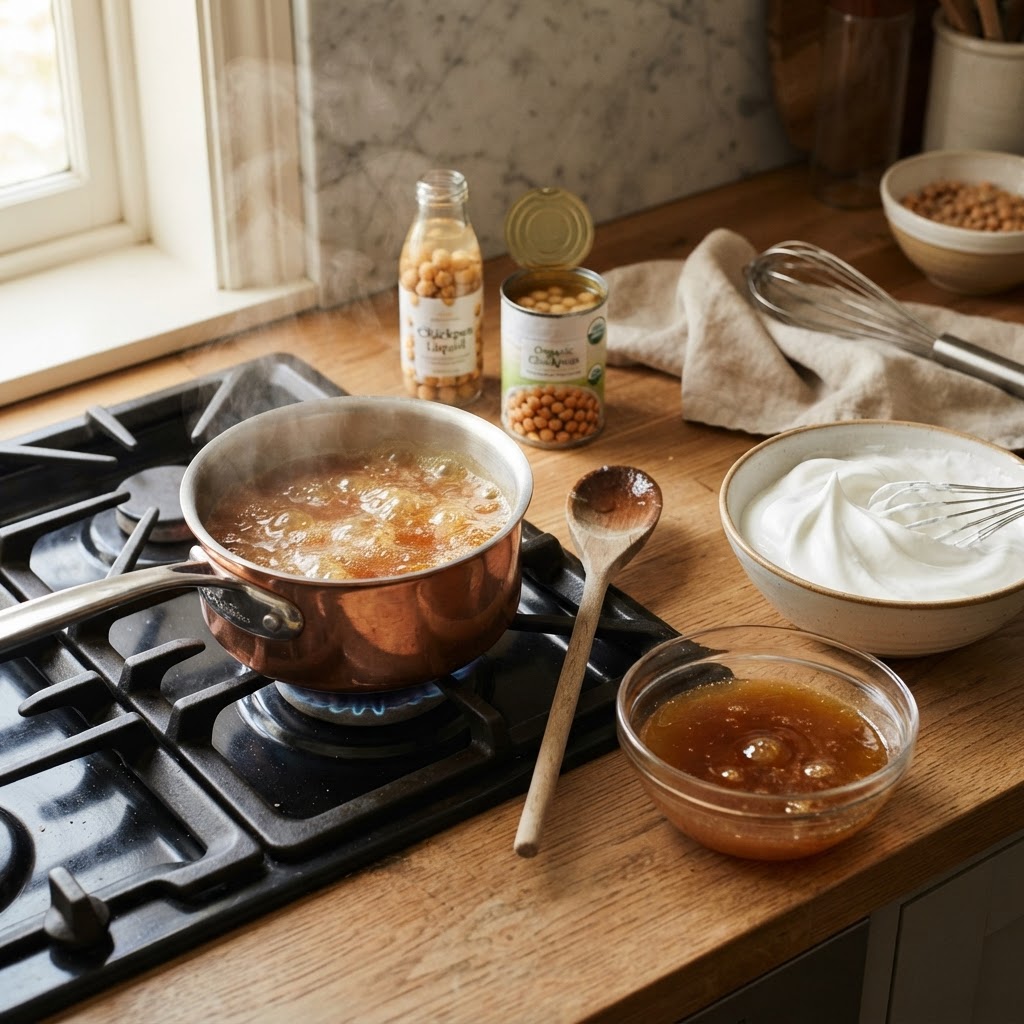
The Home Cook’s Guide to Reducing Aquafaba: Mastering Plant-Based Binders and Foams for Vegan Baking
If you have spent any time wandering the aisles of a high-end grocer or scrolling through the latest vegan recipe blogs, you have likely encountered the peculiar, viscous liquid hiding inside a can of chickpeas. For years, this cloudy, unassuming brine—known as aquafaba—was routinely discarded down the kitchen sink as a byproduct of hummus preparation. However, in the realm of plant-based culinary arts, this starchy liquid has undergone a total renaissance, emerging as the undisputed king of vegan binders and aeration agents. Understanding how to harness its unique chemical composition can completely transform your baking, allowing you to replicate the delicate structure of egg whites and the binding power of whole eggs with nothing more than a bit of patience and a whisk.
Mastering aquafaba requires moving beyond the simple "dump and whisk" mentality that many beginner vegan bakers adopt. While it is true that you can whip straight-from-the-can liquid into a stiff meringue, the consistency is often inconsistent, leading to weeping foams or weak structural foundations in cakes and cookies. By learning how to properly reduce this ingredient, you are essentially concentrating the protein and starch structures that give it its surfactant properties. When you boil away the excess water, you are left with a potent, gold-standard liquid that behaves with a predictability that would impress even the most skeptical pastry chef.
At "Blame The Chef," we believe that the best vegan food isn't just about imitation; it is about chemical mastery. We want you to stop relying on expensive, processed egg replacers that often leave a lingering metallic aftertaste or a gummy texture in your finished goods. When you take control of your aquafaba reduction, you aren't just following a recipe; you are engaging in a culinary science experiment that elevates your home kitchen to a professional standard. In this comprehensive guide, we will break down the exact ratios, the critical temperatures for reduction, and the storage secrets that will ensure your vegan macarons, mousses, and meringues are indistinguishable from their animal-based counterparts.
The Chemistry of Aquafaba and Why Reduction Matters
To understand why we reduce aquafaba, we must first look at what it actually is. It is a colloidal suspension of proteins, carbohydrates, and other plant solids that have leached into the cooking water during the heating process of legumes. This mixture is remarkably similar to egg whites because it contains proteins that can unfold and form a film around air bubbles when agitated. However, the concentration of these proteins varies wildly from can to can depending on the brand, the variety of the chickpea, and the amount of sodium used in the processing.
By reducing the aquafaba, you are performing a controlled concentration process. Most canned aquafaba contains between 90% and 95% water. When you simmer this down, you increase the concentration of the functional proteins—globulins and albumins—which are responsible for the stabilization of foams. A high-quality reduced aquafaba should be the consistency of a thin syrup or, at the very least, a heavy-bodied liquid that coats the back of a spoon. Without this step, your foam lacks the "staying power" required for complex bakes like pavlovas or souffle.
When you fail to reduce your brine, you are fighting against excess moisture. This excess water acts as a diluent, preventing the protein network from becoming tight and elastic. This is why many beginners report that their vegan meringues collapse in the oven or melt into a puddle shortly after being piped. Reduction is your insurance policy. It allows you to create a stable foam that holds its shape, accepts sugar gracefully, and provides the structural integrity necessary for your baked creations to rise and hold their crumb.
Understanding the Ideal Protein-to-Water Ratio
While there is no singular universal ratio for every recipe, professional chefs typically aim for a reduction that yields a liquid with a specific gravity slightly higher than that of raw egg whites. For standard meringues, you want a reduction that is approximately 1.5 to 2 times the protein concentration of the original brine. You can measure this by weight: start with 200ml of brine and reduce it over low heat until you are left with roughly 100ml to 120ml of concentrated liquid.
"Aquafaba is not just a substitute; it is a miracle of plant-based physics. When you master the reduction process, you unlock the ability to create textures that were previously thought impossible in a vegan kitchen."
Equipment and Setup for the Perfect Reduction
You do not need a commercial kitchen to produce high-quality reduced aquafaba, but you do need the right tools to ensure consistency. The most common pitfall is scorching the brine. Because of the high starch and sugar content in chickpea water, it can caramelize quickly if the heat is too high. You need a heavy-bottomed stainless steel saucepan, which provides even heat distribution. Avoid non-stick pans that have seen better days, as they can sometimes interfere with the delicate aeration process later on.
Precision is key. A digital kitchen scale is non-negotiable here. Unlike traditional baking where you might measure by volume, you need to measure by weight to track how much water has evaporated during the reduction process. If you start with 250 grams of brine, you want to know exactly when you have hit your target weight of 150 grams or 125 grams. Using a thermometer is also helpful; you want to maintain a gentle, rolling simmer—never a violent boil. A temperature range between 190°F and 205°F (88°C to 96°C) is ideal for effective evaporation without causing excessive denaturation of the proteins before you even start your recipe.
Finally, consider the vessel you use to store your reduced liquid. Glass mason jars are superior to plastic containers, as they do not retain odors from previous ingredients and allow you to see the clarity and viscosity of the reduced liquid. Once reduced, the aquafaba should be allowed to cool completely at room temperature before being moved to the refrigerator. Chilled aquafaba whips significantly better than room-temperature liquid, as the fat-free protein structure is more rigid when cold.
Essential Tools Checklist
Heavy-bottomed stainless steel saucepan* (to prevent hot spots).
Silicone spatula* (for gentle agitation during the simmer).
Digital scale* (the most important tool for accuracy).
Fine-mesh sieve* (to remove any stray chickpea skins or debris).
Glass storage containers* (for optimal freshness).
The Step-by-Step Reduction Process
The actual reduction process is a test of patience, but it is one of the most rewarding techniques in the vegan repertoire. Start by opening your cans of chickpeas—organic, low-sodium varieties are preferred—and drain the liquid into a measuring cup through a fine-mesh sieve. This step is crucial, as even small bits of chickpea skin can interfere with the formation of uniform, small air bubbles when you begin to whip. Transfer the liquid into your saucepan and place it over medium-low heat.
As the liquid begins to simmer, you will notice a white, frothy foam forming on the surface. You may be tempted to skim this off, but resist the urge! This foam contains some of the proteins you are trying to concentrate. Instead, let the heat do the work. If the edges begin to brown or darken too quickly, lower the heat immediately. You are looking for a gentle, rhythmic bubble rather than an aggressive boil. If you boil too aggressively, you risk breaking down the protein chains, which will lead to a watery result that refuses to whip into peaks.
Monitoring the weight is the most scientific way to determine when you are finished. Check the weight every 10 to 15 minutes. Once you have reached your desired concentration—usually a reduction of 40% to 50% of the starting volume—remove the pan from the heat immediately. Pour the liquid into a clean bowl, cover it, and let it come down to room temperature. Once it is cool, transfer it to the refrigerator. You will notice that it thickens significantly as it cools; this is the natural thickening agent doing its job.
Troubleshooting the Reduction Phase
Too thin:* You did not reduce the liquid enough. Return it to the heat and simmer for another 10 minutes.
Too dark or burnt smell:* The heat was too high. Unfortunately, once aquafaba is burnt, it will impart a bitter taste to your pastries. Start again.
Clumpy or separated:* This indicates the proteins have denatured too rapidly. Ensure your heat is kept low and consistent.
Whipping and Stabilization Techniques
Now that you have your perfectly reduced aquafaba, it is time to turn it into a stable foam. Whether you are using a stand mixer or a high-quality hand mixer, the process is similar to whipping egg whites. Start on low speed to break the surface tension of the liquid, then gradually increase to medium-high. You want to incorporate air slowly; if you blast the liquid on the highest setting immediately, you will create large, unstable air bubbles that will pop as soon as they hit the heat of your oven.
To stabilize your foam, you will need an acidic component. Cream of tartar is the standard, as it provides the necessary acidity to help the proteins maintain their shape and prevent the foam from "weeping." For every 100ml of reduced aquafaba, use 1/4 to 1/2 teaspoon of cream of tartar. You can also use lemon juice or apple cider vinegar, though these can slightly alter the flavor profile of your finished bake. Adding the acid once the foam becomes frothy (the "soft peak" stage) is the most professional approach.
The addition of sugar is the final step in the stabilization process. For meringues or mousses, wait until you have reached stiff peaks before gradually adding superfine (caster) sugar. The sugar acts as a structural scaffold, reinforcing the bubble walls and creating that characteristic glossy, firm texture. If you add the sugar too early, you risk weighing down the foam before the structure is fully established. Keep whipping until the mixture is thick, glossy, and holds its shape even when you turn the bowl upside down.
"A well-whipped aquafaba meringue should look like a thick, glossy cloud. If you can draw a figure-eight in the foam and it holds its shape for more than a few seconds, you are ready to fold in your dry ingredients."
Achieving Stiff Peaks
Culinary Applications: From Macarons to Mousse
The versatility of aquafaba is truly staggering once you have mastered the reduction. Because it acts as both a binder and a leavening agent, it can be used in a variety of applications that were once deemed "impossible" in the vegan kitchen. In macarons, the reduced aquafaba provides the structural integrity needed to survive the folding process, resulting in those delicate, crisp shells with a soft, chewy center. The key here is to whip the aquafaba slightly past the point of stiff peaks to account for the weight of the almond flour.
For lighter applications like chocolate mousse, the reduced liquid can be folded into melted chocolate with ease. Because aquafaba is essentially flavorless once baked or combined with cocoa, you don't have to worry about the "chickpea" taste coming through. It is also an exceptional binder in vegan brownies and blondies. Instead of using a flax egg or a commercial replacer, use 3 tablespoons of reduced aquafaba per egg. The result is a fudgier, more cohesive crumb that doesn't suffer from the gummy density often associated with other vegan substitutes.
When using aquafaba in cakes, the leavening aspect becomes the star. By whipping the aquafaba to medium peaks before folding it into the batter, you introduce tiny, microscopic air bubbles that expand in the oven. This creates a lighter, fluffier crumb that mimics the action of traditional whipped eggs. Remember that you are working with a delicate structure; always fold your ingredients gently with a silicone spatula rather than beating them, or you will deflate the air you worked so hard to incorporate.
Recommended Usage Chart
Meringues:* 100% replacement for egg whites, use 1:1 ratio by volume.
Macarons:* Requires 1.5x reduction; 1:1 ratio.
Brownies/Cakes:* Use 3 tbsp per large egg, no reduction necessary unless you want extra stability.
Mousse:* Use 1:1 ratio, whipped to stiff peaks.
Storage and Shelf Life: The Home Cook’s Secret
One of the greatest advantages of aquafaba is its shelf life. Because it is high in protein and carbohydrates, it is an excellent medium for bacteria, so proper storage is non-negotiable. If you aren't going to use your reduced liquid immediately, it can be stored in an airtight container in the refrigerator for up to one week. If you need to store it for longer, freezing is the best option.
We recommend freezing your reduced aquafaba in ice cube trays. Each standard ice cube tray slot usually holds about 1 to 2 tablespoons of liquid. Once frozen solid, transfer the cubes into a freezer-safe bag. When you decide to bake, simply pull out the number of cubes you need, let them thaw in the refrigerator, and bring them to room temperature before whipping. This is a game-changer for spontaneous baking, ensuring you always have a high-quality binder ready to go.
Always label your containers with the date of reduction. While aquafaba is hardy, it will lose some of its structural integrity over months in the freezer. Try to use frozen batches within three months for the best results. If you notice any sour smell or unusual discoloration upon thawing, discard it immediately. Trust your senses—good aquafaba should smell neutral and have a consistency similar to egg white.
Storage Pro-Tips
Portioning:* Freezing in 1-tablespoon increments makes scaling recipes effortless.
Thawing:* Always thaw in the fridge; sudden heat can cause separation.
The Sniff Test:* Fresh aquafaba should smell earthy but clean. If it smells like fermentation, do not use it for meringues.
Final Thoughts
Mastering the art of aquafaba reduction is a rite of passage for any home cook looking to take their plant-based baking to the next level. By moving past the convenience of the canned product and applying the culinary principles of concentration and stabilization, you are no longer limited by the constraints of traditional vegan substitutes. You have moved into the world of professional pastry science, where ingredients are understood, manipulated, and perfected to create beautiful, delicious results.
Remember that baking is an iterative process. Your first attempt at an aquafaba meringue might not be perfect, and that is entirely expected. Pay attention to how your specific brand of chickpeas behaves under heat, how your mixer handles the aeration, and how the humidity in your kitchen affects the drying time of your meringues. Every variable is a learning opportunity. Once you understand the behavior of the proteins, you can adjust your ratios and techniques to achieve a level of consistency that will have your friends and family questioning how on earth you made such a light, delicate dessert without eggs.
At "Blame The Chef," our goal is to empower you to stop blaming your tools and start blaming your technique—and then fixing it. With the guide above, you now have the tools to treat aquafaba not just as a byproduct, but as a premier ingredient in your pantry. So, the next time you open a can of chickpeas for your hummus, set that liquid aside. A world of meringues, macaroons, and velvety mousses is waiting for you in that bowl. Happy whisking, and may your peaks always be stiff and your meringues always be crisp!




Get the Next Recipe
Weekly recipes, techniques, and gear picks — straight to your inbox.
