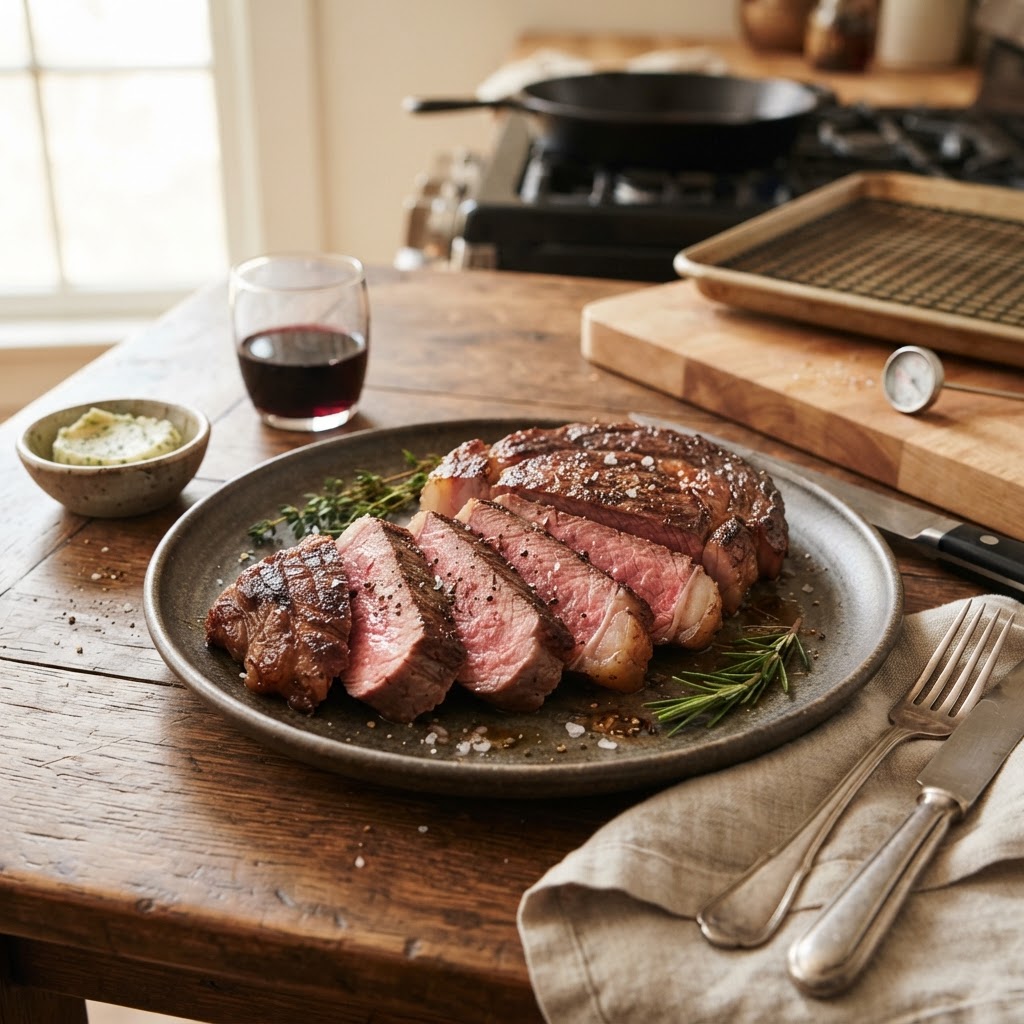
The Home Cook’s Guide to "Reverse-Searing": Mastering Thickness-to-Temperature Ratios for Evenly Cooked, Edge-to-Edge Proteins
For decades, the standard advice for cooking a steak—or indeed, any thick protein—was to crank the heat as high as possible, sear it until it formed a crust, and hope that the interior reached the desired level of doneness without turning into a grey, leathery mess. If you have ever stood over a sizzling cast-iron skillet, checking your meat thermometer every thirty seconds while praying the center wasn't raw, you know the frustration of the "bullseye" effect. This happens when the outer layer of the meat is scorched and overcooked while the center remains cool and underdone, creating a disappointing gradient of texture that undermines the quality of the protein. The home cook is often left wondering why their efforts never quite mirror the consistency achieved by high-end steakhouses, where every bite is a uniform, succulent masterpiece of color and tenderness.
The secret, as it turns out, is not in the intensity of the heat, but in the patience of the application. The reverse-sear method has revolutionized the way we approach thick cuts of meat, effectively flipping the traditional script by cooking the protein low and slow before applying a final, high-heat crust. By leveraging ambient oven heat to bring the protein to its target internal temperature gently, we allow the muscle fibers to relax and the fat to render without the frantic rush of traditional pan-searing. This technique provides the home cook with an incredible level of precision, ensuring that the meat remains edge-to-edge pink or perfectly cooked from the center to the crust. It is a foolproof method that mitigates the risk of overcooking, making it an essential tool for any kitchen repertoire.
Mastering the reverse-sear requires moving away from timing-based recipes and instead embracing temperature-based ones, treating your kitchen more like a lab than a chaotic workspace. This guide will walk you through the physics of the technique, the essential equipment you need, and the nuanced adjustments required for different thicknesses and types of proteins. Whether you are preparing a thick-cut ribeye, a massive pork chop, or even a whole tenderloin, the fundamental principles remain the same. Once you understand the relationship between thickness, heat, and time, you will find that the stress of hosting a dinner party dissipates, replaced by the quiet confidence of knowing exactly how your masterpiece will look when the knife hits the cutting board.
The Science of the Reverse-Sear
At its heart, the reverse-sear is a lesson in thermodynamics. When you cook a piece of meat over high heat, the exterior reaches the desired temperature long before the center has had a chance to absorb enough heat to break down connective tissues. This is what leads to that uneven texture we all strive to avoid. By contrast, the reverse-sear uses the oven—an environment of consistent, low-temperature air—to warm the protein gradually. As the ambient temperature rises slowly, the heat penetrates the center at a much more controlled rate, minimizing the temperature differential between the exterior and the interior.
Why Thickness Matters
The physics of heat penetration dictates that the thicker the protein, the more advantageous the reverse-sear becomes. For a thin, half-inch steak, the reverse-sear is largely unnecessary, as the heat will penetrate the center almost immediately upon touching a hot pan. However, for anything over one and a half inches thick, the traditional sear-first approach is almost guaranteed to produce a thick band of grey, overcooked meat surrounding the center. The thicker the cut, the more time it needs in the low-temperature oven stage to ensure the internal temperature is reached before the exterior has even begun to brown.
"The true magic of the reverse-sear lies in its ability to dry the surface of the meat during the oven phase, creating the perfect canvas for an aggressive, flavor-packed crust that can only happen on a bone-dry surface."
When you subject a protein to the oven, you are also accomplishing a secondary, vital step: surface dehydration. Moisture is the enemy of a great sear. By exposing the exterior of the steak to circulating air in the oven, you are effectively evaporating the surface moisture, which means that when you finally place the meat into a hot skillet, the energy of the pan is spent browning the protein rather than steaming it. This is why reverse-seared steaks often have a deeper, mahogany-colored crust that is far superior to those cooked solely in a pan.
Essential Tools for Precision
You don't need a professional kitchen to execute a perfect reverse-sear, but you do need a few pieces of specialized equipment that prioritize accuracy over gimmicks. First and foremost is the instant-read digital thermometer. You cannot achieve consistent results by "feel" or by following a timer, as every oven and every cut of meat behaves slightly differently based on its fat content and weight. A high-quality probe thermometer that can stay in the meat while it cooks, or a rapid-response handheld unit, is the single most important investment you can make.
Wire Racks and Sheet Pans
Beyond the thermometer, you will need a heavy-duty rimmed baking sheet and a wire rack. The wire rack is crucial because it allows the heat to circulate completely around the protein. If you place the steak directly on a sheet pan, the bottom will cook faster than the top, and you will lose the benefit of the gentle, ambient heat. By elevating the meat, you ensure that the air flow is uniform, which leads to the most consistent internal temperature possible.
Selecting and Preparing Your Protein
Not all proteins are created equal when it comes to the reverse-sear. This technique is designed for thick, high-quality cuts that have enough intermuscular fat to withstand the prolonged cooking time. A lean cut, such as a filet mignon, can certainly be reverse-seared, but you must be incredibly vigilant about the internal temperature, as there is less fat to render and protect the meat from drying out. For beginners, a thick-cut ribeye or New York strip with good marbling is the ideal candidate, as the fat will keep the meat succulent and flavorful throughout the process.
The Importance of Salting
Preparation begins at least an hour before the oven comes on. Dry brining—or salting the meat and letting it sit uncovered in the refrigerator—is a massive advantage. Salt draws out moisture through osmosis, then dissolves into a brine and is reabsorbed into the muscle, seasoning it throughout rather than just on the surface. This also aids in the dehydration of the surface, which, as we have already established, is the precursor to a world-class crust. If you have the time, salt your meat 24 hours in advance and leave it uncovered in the fridge for the best possible results.
"If you are not salting your meat at least an hour before cooking, you are missing out on the easiest way to improve the flavor and texture of your steak."
Make sure to bring your meat out of the refrigerator about 30 to 45 minutes before putting it in the oven. While the reverse-sear is forgiving of temperature differentials, starting with a room-temperature (or near-room temperature) protein ensures the internal temperature rises steadily and avoids any potential issues with the exterior searing stage later. Pat the surface dry with a paper towel right before you put it in the oven; even if you have dry-brined, there may be some residual moisture on the surface that you want to eliminate.
The Oven Stage: Patience is a Virtue
Set your oven to a low temperature—anywhere between 200°F and 250°F (95°C to 120°C). While some chefs argue for lower temperatures for even greater control, 225°F is generally considered the "sweet spot" for most home cooks. It is slow enough to ensure that you don't overshoot your target temperature, but fast enough that you aren't waiting for four hours to eat. Place your protein on the wire rack over the baking sheet and slide it into the center of the oven.
Monitoring Internal Temperatures
You are aiming for an internal temperature that is approximately 10 to 15 degrees below your final desired doneness. For a medium-rare finish, you want the meat to reach about 115°F to 120°F in the oven. Because the final sear will raise the internal temperature slightly, pulling the meat at this lower point is critical. If you aim for 130°F in the oven, you will likely end up with a medium or medium-well steak after the pan-sear.
Rare:* Pull from the oven at 110°F.
Medium-Rare:* Pull from the oven at 115°F - 120°F.
Medium:* Pull from the oven at 125°F - 130°F.
Once your thermometer hits that target, remove the meat from the oven immediately. You don't necessarily need to "rest" the meat in the traditional sense here because the heat distribution is already so even, but it is wise to let it sit on the counter for 5 to 10 minutes while you get your pan smoking hot. This brief pause allows the surface of the meat to cool down slightly, which prevents the center from overcooking during that final, aggressive sear.
The Final Sear: Crafting the Crust
The final sear is where you build flavor and texture. Because your steak is already cooked to the perfect internal temperature, this step is purely about the Maillard reaction. You need your pan to be very hot—almost to the point of smoking. Place your heavy cast iron skillet over high heat and add a tablespoon of high smoke point oil. Once the oil begins to shimmer or show light wisps of smoke, gently lay the steak into the pan.
Achieving the Perfect Crust
Do not move the steak for the first 45 to 60 seconds. You need to give the protein time to make full contact with the metal and initiate the browning process. Once a crust has formed, flip it and repeat on the other side. Don't forget to sear the edges—use a pair of tongs to hold the steak upright to render any fat cap that might be present. This is the moment to baste the meat if you wish. Toss in a knob of unsalted butter, a few cloves of smashed garlic, and some sprigs of fresh rosemary or thyme.
As the butter foams, spoon it over the steak repeatedly. This process, known as arroser, adds a luxurious, nutty richness to the exterior of the protein and helps distribute the heat evenly during the sear. Keep this step brief—no more than one minute per side. You are looking for a deep, dark brown, crispy crust. If you have done the oven phase correctly, the interior will remain the exact shade of pink you set in the oven, now protected by a delicious, caramelized shell.
Adjusting for Different Proteins
While we often think of the reverse-sear in the context of beef, it is a versatile technique that applies to many different proteins. A thick, double-cut pork chop is arguably the best candidate for this method, as pork is famously easy to overcook and turn dry. By reverse-searing a pork chop to 140°F, you maintain a juicy, tender center that is a world apart from the chalky white meat most people associate with pork. The same principles apply: low-heat oven until the target, followed by a quick, intense sear.
Lamb and Beyond
Lamb chops, particularly thick-cut rack or loin chops, respond beautifully to the reverse-sear as well. Because lamb has a distinct fat flavor that benefits from rendering, the slow oven stage allows that fat to soften and flavor the meat from within. When applying this to proteins like venison or other lean game meats, be extra cautious with your temperatures. Game meat is exceptionally lean and can go from perfect to overcooked in a matter of seconds, so use your probe thermometer to monitor the internal temperature closely throughout the entire process.
Final Thoughts
The reverse-sear is more than just a technique; it is a shift in philosophy for the home cook. It moves us away from the anxiety of "will it be done?" and toward the certainty of consistent excellence. By mastering the relationship between thickness and temperature, you take control of the chemistry of your food rather than letting the pan dictate the outcome. It requires preparation, yes, and it requires a bit of patience, but the result—a perfect, edge-to-edge cooked protein with a crust that crackles under the knife—is worth every second of effort.
At "Blame The Chef," we believe that the best meals are those where the chef is as relaxed as the guests. The reverse-sear is the perfect dinner party ally because it creates a window of time where the meat can sit comfortably before the final sear, allowing you to mingle with your company without worrying that the steak is burning. So, the next time you bring home a thick, beautiful piece of protein, trust the process. Turn your oven to 225°F, insert your probe, and let the science do the heavy lifting. You will find that once you go reverse-sear, you will never go back to the old, stressful way of cooking. It is time to reclaim the kitchen, one degree at a time. Happy cooking, and may your crust always be perfectly browned.




Get the Next Recipe
Weekly recipes, techniques, and gear picks — straight to your inbox.
