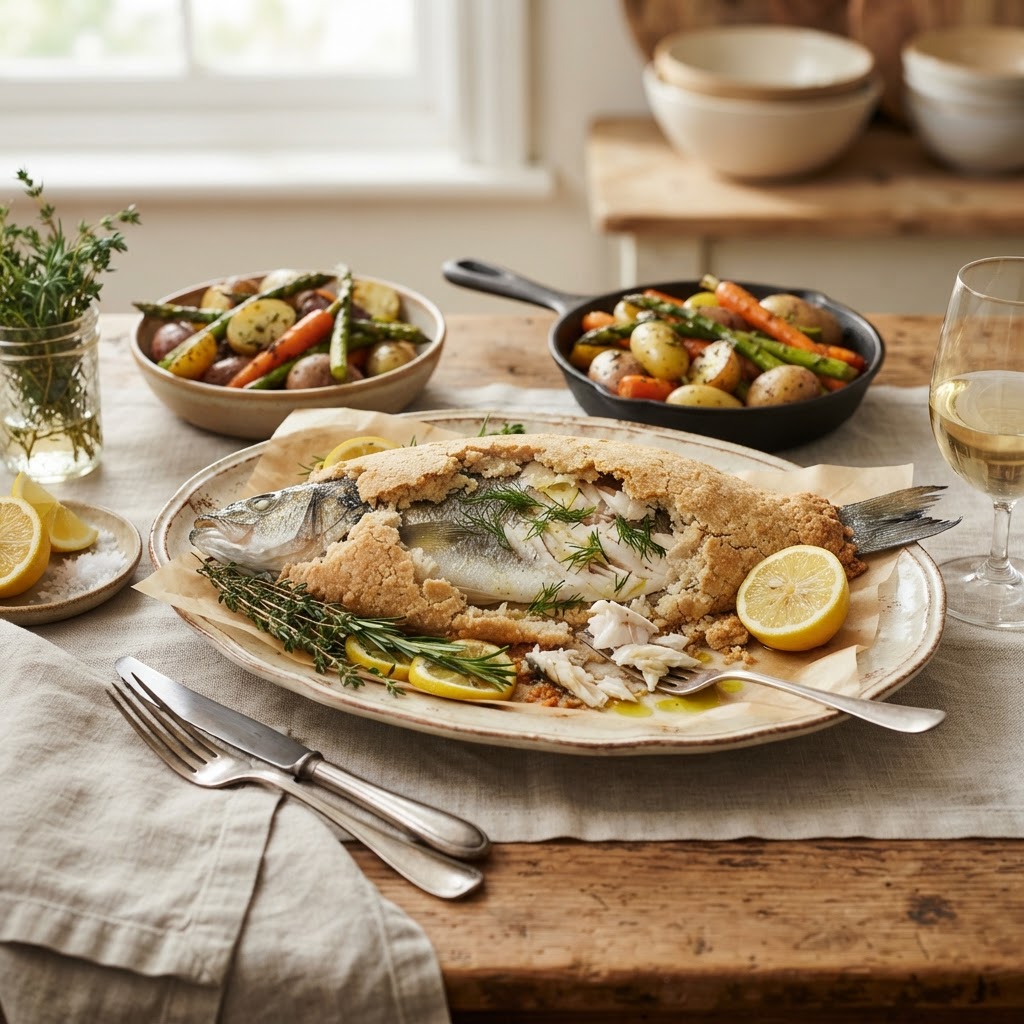
The Home Cook’s Guide to Salt Crust Baking: A Foolproof Technique for Succulent Proteins and Vegetables
There is a persistent myth in the culinary world that the most sophisticated techniques are reserved exclusively for the stainless-steel sanctuaries of professional kitchens. Home cooks often shy away from methods that appear overly technical or dramatic, fearing a disastrous outcome that might ruin an expensive cut of meat or a perfectly good piece of fish. Salt crust baking, while visually arresting and undeniably theatrical, is perhaps the most misunderstood "advanced" technique in the modern repertoire. In reality, it is a forgiving, foolproof, and profoundly effective way to ensure that your proteins remain incredibly moist while your vegetables develop a concentrated, earthy sweetness. By encasing your ingredients in a literal cocoon of salt and aromatics, you are essentially creating a pressurized steam oven that locks in flavor and protects the delicate fibers of your food from the harsh, direct heat of the oven.
When you think about the physics of cooking, you are essentially managing the transition of moisture and heat through cellular structures. Most home cooks struggle because they lose control over the evaporation process, leading to proteins that are dry or vegetables that turn to mush before they are properly seasoned. When you utilize the salt crust method, the salt acts as an insulating layer, absorbing the excess moisture that would otherwise dissipate into the dry air of your oven. This creates a high-humidity environment within the crust, allowing the ingredient to essentially poach in its own juices while the exterior develops a subtle, savory brine that penetrates deep into the core. It is the ultimate insurance policy for anyone who has ever accidentally overcooked a sea bass or a whole chicken, providing a window of time where the food stays perfectly succulent even if it lingers in the oven a few minutes too long.
The beauty of "Blame The Chef" is that we believe in pulling back the curtain on these professional secrets to empower your home cooking. We aren't just talking about dumping salt on a tray; we are talking about creating a flavor-dense micro-climate that transforms humble ingredients into something reminiscent of a high-end bistro experience. Throughout this guide, we will explore the precise ratios of salt to egg white, the best ingredients to pair with this method, and the essential troubleshooting tips that will make you look like a seasoned professional at your next dinner party. It is time to stop fearing the salt crust and start embracing it as your new go-to technique for elevating your weekend roasts and vegetable sides to a level of excellence that will have your guests asking for the recipe.
The Chemistry of the Crust: Why It Works
The magic of salt crust baking lies in the synergy between insulation and seasoning. Unlike a traditional dry roast where the surface of the food is subjected to the abrasive heat of circulating air, a salt crust serves as a thermal buffer. The thick layer of salt, usually bonded with egg whites or a bit of water, prevents the surface of the protein from ever reaching the temperature that would cause browning or drying. Instead, the heat is conducted slowly and evenly through the salt, allowing the center of the protein to reach its target internal temperature without the exterior becoming stringy or leathery.
The Science of Moisture Retention
At the microscopic level, the crust creates a sealed vessel. Because the steam generated by the food cannot escape through the dense, salted barrier, it is forced back into the ingredients. This hydrothermal environment is why a whole fish baked in a salt crust remains remarkably tender, as the juices are trapped in the cells rather than evaporating into the oven. The crust acts as a regulator, ensuring that the cooking process is gentle, consistent, and remarkably forgiving.
Choosing Your Salt
You do not need to use the most expensive fleur de sel for your crust, but you should avoid ultra-fine table salt if possible. A coarse Kosher salt or a high-quality sea salt is ideal because the larger crystals provide better structural integrity for the crust. The structural weight of the salt allows it to hold its shape as it hardens, forming a solid, brick-like shell that can be cracked open with a mallet or a sturdy spoon. If you use salt that is too fine, the crust may become too dense and difficult to crack, or it may melt away before it has a chance to set properly.
"A salt crust is not merely a seasoning agent; it is an architectural marvel of culinary science that protects the integrity of the ingredient from the harsh reality of oven temperatures."
Mastering the Ratio: Building Your Salt Base
Getting the consistency of your salt base right is the most critical step in this entire process. If the mixture is too wet, it will take forever to dry out and harden, potentially causing your protein to overcook in the process. If it is too dry, it will crumble and fail to provide that essential steam-locking seal. A reliable starting point for a standard roast is a ratio of approximately four parts salt to one part egg white, though some chefs prefer using water for a more delicate crust.
The Egg White Advantage
Using egg whites is the preferred method for many professionals because the proteins in the egg act as a binder, effectively creating a cement-like structure once the oven heat hits it. When you whisk your egg whites until they are just starting to froth—not quite to stiff peaks—and fold them into your salt, you create a pliable, damp sand-like texture. This mixture should feel like wet beach sand; it should clump together when squeezed in your fist but not be dripping with liquid.
Enhancing the Crust with Aromatics
This is your opportunity to infuse flavor into the crust, which will gently permeate the food as it cooks. You can fold in dried herbs like thyme, rosemary, or bay leaves directly into the salt mixture. You can also zest citrus fruits and mix the zest into the salt, allowing the essential oils to steam into the fish or meat throughout the cooking time. The goal is to build a aromatic wall that flavors the food from the outside in, creating a complexity that you simply cannot achieve with standard seasoning.
Preparing the Protein for the Crust
Not every protein is a candidate for salt crust baking, but the ones that are truly shine. Fatty, skin-on fish like sea bass, snapper, or trout are the gold standard for this technique. Because the fish is protected by the salt, the skin—which is often the most flavorful part—is preserved and tenderized, rather than scorched or dried out. The salt draws out just enough moisture to concentrate the flavor of the flesh without making it salty, provided you keep the skin intact.
Handling Whole Fish
When preparing a whole fish, it is essential to leave the scales on if possible. The scales provide an additional physical barrier that prevents the salt from directly touching the flesh, which is your ultimate insurance against an overly seasoned final product. Simply gut the fish, rinse it under cold water, and pat it dry with paper towels. Stuff the cavity with lemon slices, garlic, and fresh herbs to ensure the flavor is coming from both the inside and the outside.
Poultry and Vegetables
While fish is the classic application, a whole chicken or even root vegetables like beets and potatoes can be prepared this way. For a chicken, you will need a significantly larger amount of salt, and you must ensure that the cavity is completely dry before placement. Vegetables, on the other hand, become intensely sweet under a salt crust. Baking a whole beet in a salt crust concentrates its natural sugars to an incredible degree, creating a texture that is silky and dense, perfect for salads or elegant side dishes.
"When you serve a salt-crusted dish, you aren't just serving food; you are hosting an event. The crack of the hammer against the salt crust is the culinary equivalent of an opening curtain."
The Technique: Assembling and Baking
Once your base is ready and your ingredient is prepared, the assembly is straightforward. You want to create a bed of salt on your baking sheet or in a roasting pan before laying your ingredient on top. The bed of salt ensures that the heat is evenly distributed from the bottom up, preventing the food from sticking to the metal pan and scorching.
Creating the Seal
After placing the protein on the bed, pack the remaining salt mixture over the top and sides, pressing down firmly to ensure there are no gaps. The goal is a uniform layer of about 1/2 to 3/4 inch thickness. If there are holes or thin spots, steam will escape, and you will lose the benefits of the pressurized environment. Be deliberate and thorough; take your time to sculpt the salt so it covers every surface of the ingredient completely.
Temperature and Timing
Oven temperature is critical. For most salt-crusted items, you want to operate in the 400°F to 425°F (200°C to 220°C) range. This high heat is necessary to set the crust quickly before the food begins to cook through. A whole fish typically takes about 30 to 45 minutes, depending on the size, while a chicken can take anywhere from 60 to 90 minutes. Always use an instant-read thermometer to check the internal temperature, as the salt crust will insulate the food and slightly alter the timing compared to a standard roast.
Whole Fish:* 35-45 minutes at 400°F.
Whole Chicken:* 75-90 minutes at 425°F.
Beets/Root Vegetables:* 60 minutes at 400°F.
Troubleshooting and Pro Tips
Even with a foolproof method, things can go wrong if you are not paying attention to the details. One of the most common issues is the crust sticking to the food, which usually happens because the skin of the fish was damaged or the salt was packed too tightly against delicate flesh. Always remember to check for any exposed meat; if you see any, patch it with a little extra salt mixture before putting it in the oven.
The "Salty" Fear
A common concern among beginners is that the dish will turn out tasting like a block of salt. If you have kept the skin on your fish or the peel on your vegetables, this should not be an issue. The skin acts as a protective membrane. If you are baking a protein that doesn't have a natural protective layer, you can lay down a sheet of parchment paper over the protein before packing the salt on top. This is a "cheat" method that works exceptionally well and yields the same moisture-retention benefits without any risk of over-salting.
The Reveal
The presentation is the final, most satisfying step. Bring the tray to the table with a small mallet, the back of a large spoon, or even a clean kitchen hammer. Let your guests watch as you break the crust, the sound of the crackling salt adding to the anticipation. Once broken, carefully remove the pieces of the crust and discard them; they have done their job and are not intended for consumption. Carefully lift the meat from the bed of salt, ensuring no loose granules fall onto the serving plate.
Incorporating Salt Crust Into Your Routine
Now that you have the basic mechanics down, you might be wondering how often you should use this technique. Salt crust baking is not for every weeknight meal, but it is the perfect tool for weekend entertaining or when you want to make a simple, high-quality ingredient feel like a centerpiece. It reduces the stress of monitoring your oven and produces a professional-grade result that is visually impressive and undeniably delicious.
Pairing and Serving
Serve your salt-crusted proteins with simple, vibrant sides that cut through the richness. A sharp vinaigrette, a bright salsa verde, or a refreshing cucumber salad are perfect accompaniments. Since the meat itself is seasoned so perfectly through the crust, you don't need heavy sauces. The integrity of the ingredient should be the star, and the salt crust has simply provided the perfect environment for that star to shine.
Expanding the Repertoire
Once you master the fish, start experimenting with different types of crusts. You can mix in dried spices like fennel seeds, coriander, or even chili flakes into the salt to infuse a subtle warmth into the meat. You can also replace part of the salt with flour to make a "salt dough," which is an even more sturdy and professional way to encase larger items. The more you work with the salt, the more you will understand how it interacts with heat and steam, allowing you to manipulate the environment of your oven to produce consistent, succulent results every single time.
Final Thoughts
Salt crust baking is a testament to the fact that the best culinary outcomes often come from the simplest principles. By working with the natural properties of salt as an insulator and a regulator, you move from being a home cook who worries about overcooking to a home cook who understands how to manage the environment of the oven. It is an empowering, efficient, and deeply rewarding way to cook that honors the ingredients you purchase and the time you spend in the kitchen.
As you reflect on the process, remember that "Blame The Chef" is about encouraging you to take these risks. Do not be intimidated by the mess of the salt or the drama of the mallet. The crust is meant to be broken, and the mistakes you make along the way are simply the tuition you pay for mastery. Start with a whole sea bass or a few large beets this weekend. Embrace the crack of the salt, the steam that escapes when the crust breaks, and the realization that you have just produced one of the most succulent meals of your life using nothing more than salt, heat, and a little bit of patience. Your kitchen is now a professional lab, and you are the lead scientist—now get to baking.




Get the Next Recipe
Weekly recipes, techniques, and gear picks — straight to your inbox.
