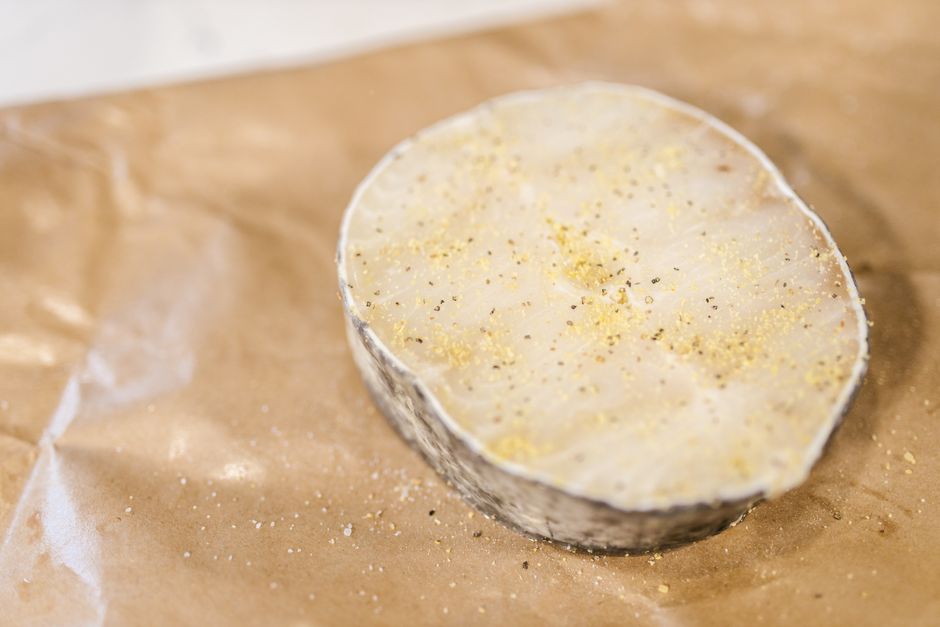
The Home Cook's Guide to Salt Crust Baking: Mastering Mineral Encrustment for Perfectly Steamed Fish and Root Vegetables
There is a particular kind of magic that occurs when you encase a delicate ingredient in a thick, rocky shell of salt and slide it into a hot oven. It feels, at first glance, like an act of culinary madness—a recipe for a dish that will emerge as an inedible, briny disaster. Yet, those who have mastered the art of salt crust baking know that this ancient technique is perhaps the most gentle, transformative way to cook proteins and vegetables alike. By creating an airtight, mineral-based seal, you are effectively turning your oven into a high-heat steam room, trapping every drop of natural moisture inside the ingredient while infusing it with a subtle, seasoned elegance that no other cooking method can replicate.
Many home cooks shy away from this technique because they fear over-salting, or perhaps they are intimidated by the physical labor of cracking open a hardened shell once the timer dings. However, once you understand that the salt is not a seasoning agent but rather an insulating vehicle, the fear dissolves. The salt crust acts as a heat diffuser, ensuring that the ambient temperature around your fish or vegetable remains incredibly steady and moist. It is the ultimate insurance policy against the dreaded "dry dinner," providing a foolproof environment that produces tender, succulent results every single time you attempt it in your own kitchen.
In this deep dive into the world of mineral encrustment, we will look at the science behind the crust, the best ingredients to pair with the method, and the step-by-step process for achieving professional-grade results. Whether you are aiming to impress guests with a whole sea bass or hoping to coax the deepest, earthiest flavors out of humble root vegetables, this guide will provide the foundation you need. Put down your fear of salt, prepare your mixing bowls, and get ready to break through the surface of what you thought was possible in your home kitchen. It is time to blame the chef—or perhaps, thank them—for introducing you to the most reliable technique in the gastronomic repertoire.
The Science of the Shell
The brilliance of salt crust baking lies in the physics of thermodynamics and hydration. When you mix coarse salt with a binding agent—most commonly egg whites or a precise amount of water—you create a slurry that, when baked, dehydrates and hardens into a solid, stony barrier. This shell does not allow heat to spike abruptly. Instead, it slowly conducts energy, radiating an even, consistent warmth into the interior of your food. This prevents the proteins from tightening up too quickly, which is usually why chicken or fish dries out in a standard roasting pan.
The Role of Moisture Retention
Because the salt crust creates a hermetically sealed environment, the water molecules released from the fish or vegetables during the cooking process have nowhere to go. They are trapped within the salt shell, effectively poaching the ingredient in its own juices. This creates a flavor profile that is remarkably pure. You aren't boiling it away in liquid, and you aren't searing away the texture with high-exposure heat; you are gently nudging the ingredient toward perfection using the environment the crust provides.
"The salt crust is not merely a casing; it is a thermal stabilizer that creates a private, humid sanctuary for your ingredients to reach their peak potential without the threat of dehydration."
Why the Salt Doesn't Over-Season
One of the most common questions from students is whether the food will end up tasting like a salt lick. The answer is a resounding no, provided you leave the skin or peels intact. The salt crust functions as a barrier that prevents the sodium from penetrating the thick, fatty surface of fish skin or the protective layers of vegetable skins. The result is a finished product that is perfectly seasoned from within—as the moisture travels through the meat, it picks up just enough salinity to brighten the flavors, resulting in a balanced, nuanced bite rather than an aggressive hit of salt.
Preparing the Salt Medium
To create the perfect crust, you must be particular about your starting materials. Using fine table salt will result in a dense, cement-like block that is difficult to break and can lead to uneven cooking. You want to aim for coarse sea salt or kosher salt, as these provide the structure necessary for a sturdy shell. While you can certainly buy expensive artisanal salts, the bulk coarse salt found at any grocery store will suffice perfectly for this application.
The Binding Agent Ratio
The secret to a crust that holds together while being easy to remove later lies in the binder. For every two cups of coarse salt, you generally want to use one to two egg whites. The proteins in the egg white act as a glue, bonding the salt crystals together as the heat hits them. If you prefer to avoid eggs, a light misting of water can work, but you must be careful—too much water will result in a soggy crust that slumps, while too little will cause it to crumble before it ever hits the oven rack.
Adding Aromatics
This is your opportunity to infuse the crust with layers of flavor. While the interior of the dish remains largely insulated, you can mix herbs, spices, or aromatics directly into the salt mixture before applying it. Consider stirring in dried bay leaves, fennel seeds, crushed peppercorns, or lemon zest. As the salt heats up, these essential oils will be released into the microscopic pores of the crust, subtly perfuming the air and the exterior of the ingredient as it bakes. It turns the cooking process into an olfactory experience that begins long before the oven door is opened.
Mastering Salt-Crusted Fish
Whole fish is perhaps the most iconic application of this technique. A whole branzino, snapper, or trout is ideal because it is naturally protected by scales and a thick layer of skin, making it the perfect candidate for this gentle, steam-focused method. The crust ensures that the delicate white flesh remains buttery and translucent, never reaching that chalky, overcooked state that often happens when grilling or pan-searing.
Prepping the Protein
Before burying your fish, you must ensure the cavity is clean and properly seasoned. Stuff the belly with fresh herbs like parsley, dill, or thyme, along with thin slices of citrus. Do not remove the scales; they serve as a secondary shield that prevents the salt from touching the flesh directly. Pat the outside of the fish dry with paper towels to ensure the salt mixture adheres properly to the skin without sliding off.
Execution Steps
"A fish baked in salt is the ultimate expression of simplicity; once you crack open that crust and reveal the pristine, steam-infused meat, you will never want to cook seafood any other way again."
The Art of Root Vegetables
While fish is the classic choice, root vegetables like celery root, beets, and potatoes are arguably the most improved by this technique. Baking these in a salt crust intensifies their sugars, creating a flavor profile that is sweet, earthy, and exceptionally concentrated. You are essentially roasting them in a dry-steam environment that prevents the exterior from shriveling or burning, resulting in a texture that is akin to velvet.
Selection and Preparation
Choose dense, hardy vegetables. Beets benefit immensely from this, as the moisture retention keeps them juicy, while celeriac becomes almost creamy. Wash the vegetables thoroughly, but do not peel them. The skin acts as the primary defense against the salt. Leave the stem ends long, or trim them cleanly if you are roasting them for a platter. If the vegetables are irregular in size, cut them into uniform segments so they cook at a consistent rate.
Flavor Infusion Tips
Since vegetables are more absorbent than fish, they are the perfect vessels for herbal infusions. Try adding rosemary sprigs, star anise, or cardamom pods into the salt mixture when working with root vegetables. The heat will force the volatile oils from these spices into the crust, and while the salt won't make the vegetables taste like spices, it will create an aromatic halo that makes the dish smell incredible upon service.
Cracking and Service
The final stage of the process is the most dramatic. Serving a salt-crusted dish should be an event. Bring the tray directly to the table before cracking the crust. You will need a heavy-duty spoon or a small kitchen hammer. Gently tap along the edges of the shell until it begins to fissure, then lift away the hardened slabs to reveal the steaming, aromatic ingredient inside. It is a moment of theater that highlights the home cook’s dedication to the craft.
Removal and Cleaning
Be very careful as you peel back the crust. You do not want any loose salt grains to fall onto the tender meat or vegetables you have worked so hard to prepare. Use a pastry brush to sweep away any lingering salt crystals that might be stuck to the surface. If you are serving fish, the skin should come away easily in one piece as you lift the fillets off the bones.
The Aftermath
Do not attempt to save the crust for a second use. Once it has been baked and hardened, it is effectively a vehicle for residual fats and juices and is no longer stable or sanitary for further cooking. Dispose of it in your compost or trash. What remains is a perfectly cooked protein or vegetable that requires very little extra work—perhaps just a drizzle of high-quality extra virgin olive oil or a squeeze of fresh lemon juice is all that is needed to finish the plate.
Troubleshooting Common Errors
Even the most experienced chefs run into hiccups when experimenting with salt crusting. One of the most frequent issues is the "soggy crust" syndrome. If your crust feels wet or slimy when you take it out of the oven, it usually means your egg-to-salt ratio was off or your fish was too wet when you began. To avoid this, always pat your ingredients thoroughly dry and ensure your oven is fully preheated before the tray goes inside.
Dealing with Cracked Shells
If you notice that your crust is cracking during the cooking process, do not panic. While a sealed crust is ideal, small fissures are usually not enough to ruin the dish. If you see a large gap, you can quickly patch it with a bit of the excess salt mixture, though be mindful of the heat. In the future, ensure your salt crust is at least 3/4 of an inch thick all the way around, as a thinner crust is more prone to thermal expansion cracks.
Temperature Management
Precision is key. If you are roasting, 400 degrees Fahrenheit is the sweet spot. Anything lower, and you run the risk of the salt not hardening enough to trap the moisture. Anything higher, and you might cause the salt to scorch, which can impart a bitter, metallic flavor to the crust that you certainly do not want near your delicate ingredients. Always check the internal temperature of your fish with a probe thermometer; you are looking for 135 to 140 degrees Fahrenheit for a perfectly moist, flaky finish.
Culinary Elevation
Once you have mastered the basic technique, you can start to innovate. Think about creating a "salt dough" crust by incorporating a bit of flour into your egg and salt mixture. This creates a bread-like shell that is much easier to remove in one large piece, effectively acting as a savory bread bowl for your food. This takes more effort but yields a presentation that looks like it came straight out of a fine-dining establishment.
Infusing the Salt
Another way to elevate the dish is by using flavored salts. Instead of standard sea salt, try using smoked salt for an earthy, backyard-BBQ profile. You can also mix in pulverized dried citrus peels or toasted peppercorns to give the crust a colorful, speckled appearance. The visual aspect of the crust is just as important as the function, and it is a wonderful way to showcase your attention to detail.
Pairing with Sides
Since the ingredient cooked in the salt crust will be inherently clean and pure in flavor, you want your side dishes to complement that. A light, acidic salad with a bright vinaigrette is perfect to contrast the richness of a salt-baked fish. For root vegetables, a creamy yogurt-based sauce or a herbaceous chimichurri works beautifully. Because the main component is cooked with such restraint, you have the liberty to add more complex flavors to the rest of the plate.
"The beauty of this method lies in the restraint; by stripping away the noise of heavy sauces or aggressive searing, you allow the ingredient to speak for itself, supported by the quiet, grounding influence of the salt."
Final Thoughts
Mastering salt crust baking is a rite of passage for the home cook who values precision and technique over complexity. It is a method that demands patience and a respect for the ingredients, teaching you that the best results often come from creating the right environment rather than force-feeding flavor into food. When you take that first bite of fish that has been steamed to perfection within its mineral fortress, or taste the concentrated sweetness of a salt-baked beet, you will understand why this technique has survived for centuries.
Do not be discouraged if your first attempt requires a bit of cleanup or if your crust is a little difficult to break. It is a learning curve, and the rewards—tender, juicy, and impeccably seasoned food—are worth every bit of the effort. You are now armed with the knowledge of ratios, temperature, and technique. All that remains is for you to select your ingredient, prepare your salt, and trust the process. You have the tools to turn your kitchen into a professional laboratory of flavor; all you have to do is take the first step.
As you move forward, keep in mind that the crust is your ally, not your enemy. It is a silent partner in your culinary success, working quietly behind the scenes to ensure that your dinner is the talk of the evening. Whether you are cooking for a large dinner party or just treating yourself to a quiet meal at home, the salt crust is an elegant, sophisticated way to elevate your cooking. Blame the chef, blame the technique, or just enjoy the success—either way, your culinary repertoire is now significantly more robust.
The journey into mineral encrustment doesn't end here, though. Continue to experiment with different types of herbs, various proteins like whole chickens or even thick cuts of beef, and unique spice blends to see how they impact the final result. Keep a journal of your temperatures and timings. Notice how the humidity in your kitchen or the thickness of your crust affects the outcome. Over time, you will find that you no longer need this guide, as the method will become second nature to you.
Finally, remember that cooking is an act of creation and, occasionally, of controlled chaos. Don't let the salt crust intimidate you. If it breaks too soon, call it rustic. If it is hard to remove, call it a challenge. The most important thing is that you are learning, growing, and enjoying the process of making something truly special from scratch. Your home kitchen is a place of endless possibility, and with the salt crust technique in your pocket, you are well on your way to becoming a master of your own culinary domain. Happy baking, and may your crusts be firm and your fish be forever moist.
The versatility of this technique really knows no bounds once you get comfortable with the basics. Some chefs even go so far as to create "salt-crust parties," where multiple fish or large batches of vegetables are baked and cracked open simultaneously for a crowd. The communal aspect of breaking into the shells is a fantastic way to break the ice and bring a sense of celebration to any meal. Think about the potential for holiday dinners, special anniversaries, or even just a fun weekend project with friends. It turns dinner into an interactive experience, which is perhaps the highest praise any chef can receive.
When you look at your kitchen, don't just see a place to assemble meals; see a space for experimentation. The salt crust is just one of many techniques that can transform the ordinary into the extraordinary. By focusing on how heat, moisture, and environment interact, you are essentially adopting the mindset of a professional. You are looking past the recipe and into the mechanics of food. That is what separates the casual cook from the truly skilled, and it is exactly the kind of curiosity that will keep you evolving for years to come.
As you continue to refine your skills, always stay humble but remain ambitious. Try the most challenging ingredients you can find. Test the limits of your oven's capacity. Share what you learn with others, because culinary knowledge is meant to be passed down and shared. When someone asks you how you got the fish so tender or the vegetables so flavorful, you can simply smile and say that it’s all in the mineral encrustment. After all, the best secrets are the ones that yield such delicious, undeniable evidence.
To wrap up, remember these three core pillars of salt crust baking: the moisture-retaining seal, the insulating mineral barrier, and the aromatic infusion. If you keep these in mind, you have the core of the technique mastered. Everything else is just detail and practice. So, the next time you are at the market and see a beautiful, fresh whole fish or a stunning array of heirloom root vegetables, don't hesitate. Pick them up, buy an extra bag of coarse salt, and get to work. Your dinner—and your diners—will thank you for it.
There is always something more to learn in the culinary arts, and that is what makes this craft so rewarding. You might try the salt crust today, and tomorrow you might be perfecting a souffle or a sourdough loaf. But for now, take pride in this specific accomplishment. Salt crust baking is a classic for a reason, and you have officially joined the ranks of those who know how to wield this ancient tool with modern confidence. Keep cooking, keep experimenting, and most importantly, keep enjoying every single bite of the food you create in your own home.



Get the Next Recipe
Weekly recipes, techniques, and gear picks — straight to your inbox.
